


How to make an Incubation Chamber with automated temperature control for mushroom growing
Usually, you can colonize agar plates, liquid culture, spawn jars and spawn bags at room temperature and no incubator needed, but everything change for growers during winter season in continental climate zones. We recommend to use this set up, if you have bunch of spawn jars, spawn bags, your room temperature about 70ºF or +20ºC and lower and if you want to speed up colonization process.
Incubation chamber allows you to grow mushrooms at home any time. This design will allow you to maintain a constant stable temperature automatically.
Such modification can be built directly into the cabinet or placed on the shelf in a cabinet or might be as a mobile box.
Incubation Chamber Advantages
Incubation Chamber is more expensive compared to Tub in Tub (TiT) with aquarium heater, where you need one inexpensive device.
Tub in Tub (TiT) — refers to an incubator modification consisting of 2 plastic tubs and an aquarium heater
Incubation chamber has significant advantages:
✅ No water tank needed
✅ Safe to use
✅ Stable temperature all the time. The temperature controller has several settings and allows you to set a temperature range. This makes it easy to keep the temperature within 1-2°
✅ Heating element goes along the wall(s) of the box. This gives more uniform heating
In my case it is 0.3m per 1m of total perimeter, it covers 30%
✅ The sensor of the thermostat is remote. You control the air temperature in the box, not the temperature of the water in the tub or battle with aquarium heater
✅ The Heating Film or Heat Mat is flat. It doesn't take too much space in the incubation chamber. You have a lot of space for spawn jars/bags and other stuff
✅ You can use Incubator for different mushroom species, for spawn colonization, spawn run, agar plates colonization, liquid culture
Let's figure out how to make Incubator for mushroom growing with temperature control!
Components for Automated Incubator and easy set up
List of required stuff and Amazon links to each item for easy set up. Just connect all this stuff
1. Heating Pad Mat

Recommended stuff on Amazon:
Heating Pad Mat, manual temperature regulator, 25W, 220x420mm $10.99
Heating Pad, manual temperature regulator, 25W, 220x420mm $13.99
Advanced Infrared Heat Mat, w/o temperature regulator, 22W, 274x410mm $31.57
Professional Heated Film Technology, w/o temperature regulator, 280x1524mm $49.95
2. Temperature Controller aka Thermostat
This device helps you to control air temperature in the incubator within temperature range you set. For example 25-27°C or 77-80F. Thermostat turn ON the Heat Mat, when temperature drop down to 77°F or 25°C and turn OFF, when temperature is 27°C or 80°F. So that you always have stable temperature within 77-80°F or 25-27°C.

Recommended stuff on Amazon:
BN-LINK Digital Heat Mat Thermostat Heat Controller $18.99 - Heating controller only
BN-LINK Digital Thermostat for any DIY projects $34.99 - Heating & Cooling Thermostat
Inkbird ITC-308 Digital Thermostat for any DIY projects $35.00 - Heating & Cooling Thermostat
3. Polystyrene styrofoam panel
This helps to retain heat inside the box

Recommended stuff on Amazon:
Polystyrene Sheets 11x17x0.5 inch - 14 Pack $26.99
STYROFOAM Polystyrene 2' x 2' Project Panels | 1" Thick - 6 Pack - $35.99
4. Clear thick PE Film or PET Flexible Plastic Sheets

Recommended stuff on Amazon:
PET Flexible Plastic Glass Sheets, Clear, 24x36 x 0.03 inch - 2 Pack $28.99
5. Quiet PC Fan 90-120мм

Recommended stuff on Amazon:
Quiet Fan 120mm with power plug cord $19.99
Cheaper components for Automated Incubator I use
You can save your money if you already have some components are listed below, so you can use them for incubator. If you are going to buy all these items, then better to take components from the previous paragraph.
Be ready to be a Tech Guru and connect a few wires to make your incubator work!
1. Temperature controller board 12V or Thermostat

Recommended stuff on Amazon (choose one from the listed below):
AEDIKO Digital Temperature Controller Board W1209 DC 12V $6.99 - my simple cheap option
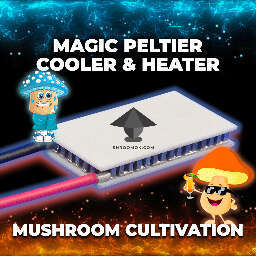
I'd like to suggest thermostat with Heating and Cooling Controller. I also use it for cooling box (for fruiting chamber) during hot summer season.
STC-1000 AC 110V Temperature Heating/Cooling Controller $19.56 - for those who can connect 2 wires together, it seems the best option
MH1210W Digital Temperature Thermostat Regulator Controller 90-250V 10A 220V $11.53 - great cheap option for incubator
Inkbird ITC-308 Digital Thermostat for any DIY projects $35.00 - more expensive, with plug
2. Power Adapter 12V, 10A

AC 110V/220V to DC 12V 10A 120W Power Supply Transformer Switch $16.99 - my adapter
60W Power Adapter, 12V 5A, 120V AC to 12V DC Transformer $9.59 - cheap option
AC 100-240V to DC 12V 10A Power Supply Adapter $18.99
3. Infrared Heated Film or Infrared Heating Mat

I used Infrared Heated Film 12V, 50-66W per 1m. Can't find the exact one on Amazon, but these options from previous paragraph are also great:
Heating Pad Mat, manual temperature regulator, 25W, 220x420mm $10.99
Heating Pad, manual temperature regulator, 25W, 220x420mm $13.99
Advanced Infrared Heat Mat, w/o temperature regulator, 22W, 274x410mm $31.57
Professional Heated Film Technology, w/o temperature regulator, 280x1524mm $49.95 - this one close to my film I use
4. Quiet PC Fan. Any simple cheap quiet fan 90-120 mm is okay!

Silent Fan 120mm $6.69 - my fan
Quiet Fan 120 mm, with power plug cord- $19.99 - more expensive, with plug
5. Wire Cable (1.5 sqmm = 16 awg = 30/0.25). You need wires to connect all gadgets

Stranded Copper Wire 16 AWG 10 ft $7.98
6. Cable Ties - optional, for convenience
Zip Cable Ties $2.99
Important notes to this set up
🔴 The W1209 temperature controller has 20A. In fact you can give up to 5-7A, otherwise dangerous heating
🔴 Check out the power and voltage of the Infrared Film Heating. It comes in 12, 24, 220V and can vary in wattage per meter
🔴 Just with a thermal controller the power of the film should not exceed 70W. If you need more, you can do it, but you will need to put an additional relay with more power (the controller will turn on the relay with more power, and it will turn on the film)
🔴 The power adapter should be with some reserve. If you have 60-70 watt film it is better to find a power adapter for 100W and more
How to assemble Incubator for mushroom cultivation
First of all you need to make a box for incubator (or use a cabinet, or cardboard box, or wooden box) and cover it with Polystyrene Styrofoam panels inside, this material help to retain heat inside the box.
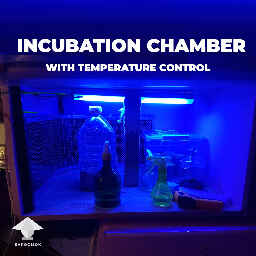
Here you can see my 2 incubators

✅ Styrofoam is a good insulator and quite strong material! 🔥 Keep in mind it is flammable, be careful!
1. My top incubator stands on the table as a shelf. 3 walls of my incubator are made with Styrofoam panels. I had big panels 125x60x2 cm or 48x24x1 inch. So one sheet of styrofoam was enough for my incubator
The final size of the box for incubator is 60*70*40 cm or 24*28*16 inch

You can use any sizes according to your needs, use pieces of styrofoam, cut the sheet, make a separate box of any size or buy ready styrofoam box

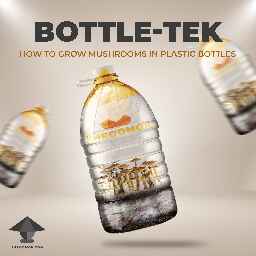
Light inside isn't necessary for colonization period, I add it just for my convenience. Sometimes I place fruiting chambers inside this box (Bottle-tek, Growbox) for spawn run
2. Heated element placed on the left wall and goes to the back wall. I use Infrared Heated Film (12V, 50-66W per 1m). You can use Heat Pad Mat or Heated Film as well. Use adhesive tape to stick it to the wall of the incubator

❌ Don't use heat mat on the floor of the incubator! Your jars/bags with substrate shouldn't contact with heating element directly, because you can overheat mycelium or trigger bacteria contamination
❌ Don't use heat mat on the ceiling of the incubator! This will make heating almost useless
3. My Thermostat for automated temperature control placed outside of the incubation chamber and connected with Heating Film. Power goes down, the wires for the heater and the temperature controller are put inside

You can use low power heating pad without a thermocontroller, with a simple analog regulator, but it is highly NOT recommended. You can easily overheat your environment if you set it wrong or if external conditions change
🔴 Temperature can be adjusted manually. Just set the needed temperature and thermostat will turn on/off when it is necessary to maintain required temperature. I usually set about +25-27°C or 77-80°F for spawn colonization period. Thermostat turn ON the Heat Mat, when temperature drop down to 77°F or +25°C and turn OFF, when temperature is 27°C or 80°F. So that you always have stable temperature within 77-80°F or +25-27°C
4. I also connected a PC fan. It turns on/off with the heating element

🔴 Why I use fan? With fan we have uniform temperature everywhere in the box. It helps to spread warm air from heat mat evenly in the box. Without fan temperature always will be higher near heat mat and lower on the opposite side. This influences the colonization process greatly!
🔴 On other side Fan can be a bad thing if you catch contamination. It helps to spread mold spores in the air
5. The front wall or door of my incubator made with Clear PET Plastic Sheets (or thick PET film). You can use styrofoam panels here as well

🔴 Film-door fixed on top with double-sided adhesive tape
6. Incubation Chamber for mushroom cultivation is ready and loaded with spawn jars and bags. There are grow bags with shiitake and spawn jars with actives

Incubator modifications for mushroom growing
🔵 The most simple incubator: any cardboard box, bubble wrap inside to retain heat, Shoe Heater and Thermometer. Thermostat can be added

🔵 Styrofoam incubator, Heat Mat on the side

Thermostat outside the box
🔴 Details about all these cheap modifications: Simple Incubator for mushrooms and Colonization period
Enjoy your home mycology and have a happy growing!
This guide made with love by mrzimm - Tech Guru of Shroomok Growers Community in Discord
Promoted by ©Shroomok
Comments
Awesome !!
Add comment