


Step 8. Day 15-18. How to make mushroom cake, Spawn to Bulk and Casing
On this step spawn colonization is completed. Now you've already have grain spawn for making mushroom cake/block.
Cake — aka mushroom cake or mushroom block, refers to a fully colonized bulk substrate in the fruiting phase of cultivation
What is bulk? What is casing? Why some growers use bulk & casing and some don't? Why some growers even skip spawn to bulk?
Eventually, how to prepare mushroom cake?
How to make mushroom cake for Monotub or Shoebox or Bottle-tek?
Let's figure out!
Can I grow mushrooms without spawn to bulk and casing
Yes. In fact you can grow P. Cubensis mushrooms without Spawn to Bulk and Casing by using PF-tek. Pf tek is a great start and much easier for beginners. The main disadvantage of PF tek is lower yield.

If you decide to choose PF-tek, then you just need to get the jars out of the incubator. Open the jars. Remove PF-cakes. Roll them in wet vermiculite. Put mushroom cakes in Growbox with a layer of wet perlite at the bottom.
So you can skip the guide below and move on STEP 9. DIY Growbox. Fruiting conditions
However by mastering Spawn to Bulk & Casing techniques you'll be able to increase your yield significantly and improve your skills for cultivation wide variety of mushroom species including gourmet mushrooms and other species of magic mushrooms.
Why growers skip Spawn to Bulk and Casing
Sometimes beginners are afraid of spawn to bulk and casing process for several reasons:
🔺 Spawn to bulk and Casing involves extra steps are not necessary to get fruit bodies (for P. Cubensis).
🔺 Spawn to bulk gives opportunities for contaminants. However pH adjusted bulk substrate and casing layer is a great protection against some molds.
🔺 Spawn to bulk and Casing involves "putting all the eggs in one basket" because the covered mushroom cakes/blocks contain the amount of spawn equivalent to 2-6 PF-cakes. If one container contaminated, all the amount of mushrooms that could have been given from each mushroom cake separately will be lost.
🔺 Spawn to bulk and Casing process requires extra steps and time.
🔺 Casing substrate preparation requires pH adjusting.
🔺 Newbies think spawn to bulk and casing are difficult techniques. In fact, it's easy!
If you want to skip all preparation steps for bulk substrate you can buy ready to use sterilized bulk substrate and Casing substrate with proper field capacity and just use them for making mushroom cakes.
Shroomok's Choice on Amazon:
Sterile Coco Coir/Vermiculite Substrate - 5 Pounds - 1 Bag - $29.95
Although it's easy to prepare bulk substrate by your own and save money!
How to make small mushroom cake
For newbies I recommend to start with small mushroom cakes (1-2 quarts) or bottle-tek. Why?
It's something between 2 teks: old school PF-tek - that produce too little harvest; and MonoTub - 'putting all the eggs in one basket', which means if your shoebox/monotub contaminated you should toss the entire monotub cake at once. Then all the amount of mushrooms that could have been harvested from each small mushroom cake separately will be lost.
If any small cake contaminated you'll lost just a small cake instead of the whole monotub block.
Small mushroom cakes can significantly increase your chances for harvest.
This method for those who are not ready for monotub, but want to get more efficient yield than with PF-tek.
Fruiting and final result may be awesome, not worse than other teks.
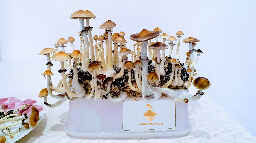
Let me show you a few examples of small mushroom cakes fruiting


List of required stuff for making small mushroom cakes
1. Grower outfit: medical gloves, mask, cap, raincoat or gown.

10 Gloves and 1 Mask Bundle - $6.99
2. Colonized Spawn jars or Spawn bags

3. Coconut peat soil or coconut fiber brick

Shroomok's Choice on Amazon:
Nature's Premium Coco Coir 1-Pound Brick - $8.99
Coco Bliss - Premium Coconut Coir, 5/10/20 Bricks $21.99
4. Optional! Calcium carbonate (CaCO3) for pH adjusting: limestone flour, limestone grit, chalk, marl, limestone dolomite flour, oyster shell

Shroomok's Choice on Amazon Calcium carbonate (CaCO3):
Calcium Carbonate from Ground Limestone 1/5/10 lb (97+%) - $14.04
Organics Garden Lime Soil Amendment, 6 lb - $15.64
Organic Garden Lime Calcium Carbonate, 5lb - $16.90
5. Optional! Gypsum (CaSO4) for substrate aeration
Food Grade Calcium Sulfate (Gypsum) 1.5/3/4 Pounds - $9.68
Organic Garden Gypsum Calcium Sulfate, 5 lb - $17.59
6. Optional! Vermiculite or Vermiculite/Perlite 1:1.

Shroomok's Choice on Amazon:
Organic Vermiculite 4 qt. - $13.99
Vermiculite 8 qt. - $14.59
Premium Perlite 8 qt. - $13.95
Organic Perlite 8 qt. - $15.89
6. Jars with modified lids or heat resistant bags for substrate sterilization. Jars are exactly the same as for grain sterilization

7. Flat Plastic Food Containers (volume about 1-2 Qt or 1-2 L) for making mushroom cakes in it

Shroomok's Choice on Amazon:
Black Container with Lid, 34 oz, 30 Pack $21.99
Square Clear Containers with Lids, 32 oz, 20 Pack $30.59
8. Alcohol 70% in a spray bottle

Isopropyl Alcohol 70% - $22.99
9. Tablespoons - 2 pcs.
10. Boiled chilled water (about 1 liter).
1.1. Cotton disks.
1.2. Aluminium foil.
1.3. Pressure cooker /autoclave /multicooker /instant pot /oven /microwave for substrate sterilization


Shroomok's Choice on Amazon:
Pressure Cooker & Canner, 3 PSI Settings - 22 Qt - $109.99
Pressure Canner and Cooker - 23 Qt - $147.99
Professional All-American Non-Electric Sterilizer - 25 Qt - $449.95
How to prepare substrate for mushroom cake
1. Mix ingredients
🔸 130g of coco coir (1/5 coco brick)
🔸 1.6 cups vermiculite - optional
🔸 1 table spoon of gypsum - optional
🔸 1 table spoon of limestone flour - optional
🔸 3-3.6 cups of water (0.9 qts)
This amount of substrate enough for 2-3 Qts of grain spawn and for making 2-4 mushroom cakes 1-2 Qt each
2. Fill the jars/bags with prepared substrate.
3. Close the jars with modified lid or seal the bag. Wrap the lid with foil. Jars and lids are the same as for grain substrate sterilization. Heat-resistant autoclavable bags also great to use.
🔴 To remind the process: DIY Spawn Jars and Spawn Bags
4. Place all jars/bags to pressure cooker/multi cooker or just in pot with lid at 100-120°C (212-250°F). Sterilize for 45-60 mins. The process is the same as for grain substrate sterilization step, but not so long and high pressure is not critical for coco substrate. You can proceed sterilization in the oven at 180°C (~350°F) for 1 hour. Or place the substrate in heat-resistant bag and heat in the microwave at maximum power for 5 minutes, then shake/flip the substrate and heat for another 5 minutes.
🔴 To remind the process: Substrate sterilization
5. Let the substrate cool down to room temperature inside the PC/pot/multicooker/oven.
You can also buy ready to use sterilized substrate and skip all steps are listed above.
Shroomok's Choice on Amazon:
Ready Sterile Coco Coir/Vermiculite Substrate - 5 Pounds - 1 Bag - $34.95
Preparation step before making mushroom cake
1. Wipe the table, plastic boxes, tablespoons, jars with casing substrate and vermiculite with alcohol.
2. Take the spawn jars or spawn bags out of the incubator.

3. Without opening the jars check each one for the presence of contaminants.
Make sure there are no contamination in them. If you notice blue-green, green, olive, gray, red, pink, purple or black spots, the whole jar should be tossed without opening!
Even if there is healthy white mycelium of Psilocybe Cubensis in that jar with the contamination, don't spare and throw the entire jar away, because it is already contaminated. Contamination can affect neighboring healthy mushroom cakes in the future. Taking away the healthy mycelium and throwing away contaminated parts won't work! Mold spores spread easily and imperceptibly over the substrate.
If you see any signs of mold, bacterial contamination or doubtful areas - throw such jar away!
Make small mushroom cake step by step
Video demo: How to make small mushroom cake
1. Optional step! Cover the bottom of plastic container with moist vermiculite

2. Open the spawn jar

3. Check each jar for the signs of contamination. Choose good healthy spawn only

4. Move the grain spawn into a flat plastic container. You can do it with sterile spoon. Don't afraid to crush the substrate. It's okay to mix 2-3 jars of the same strain in one container. Don't mix different strains!


5. Remove substrate parts that are not covered with mushroom mycelium or too wet, or have slime, or fermentation smell (sweet, sour, cider, alcohol etc.). Use only healthy spawn!
If you find signs of mold (any bright color with powdered texture - green, blue, pink, yellow, red) toss this jar/bag immediately.
❗️Don't use uncolonized grain. It's high risk of bacteria and mold contamination
❗️Small mushrooms that have already formed in spawn jar/bag should be removed. If we leave them, they can start to rot and provoke contamination
6. Spread the spawn evenly, but don't press it! Fill the container with substrate and leave 2-3 cm to the top of the container, because we need to add 1-1.5 cm of sterile coco substrate on to

🟠 The optimal height for small mushroom cake about 2-3 inch (5-8 cm), up to 4 inch (10 cm). There is no reason to make a tower
7. Put the layer of soil on the top. About 1-1.5 cm, no more! The soil should be wet. Pressing it down should release a water drop. If there is too much of water and it flows from the soil, you need to squeeze the soil. If there is not enough liquid, add cooled boiled water.


❗️You can also mix your grain spawn and coco coir substrate 1:1
8. Wrap the containers with foil (all sides). This is to give the mushrooms an upward direction of growth. Non-transparent containers also suitable, the only disadvantage you won't be able to see possible contamination that might show up inside

9. Spray the mushroom cake several times with boiled chilled water. Ultra fine mist spray bottle is the best to use
Ultra Fine Spray Bottle, 10 oz, 300ml, Different Colors $7.99
10. Cover gently each cake with foil to keep out the light. You can cover them with a plastic lid from a container. But don't close tightly, you need to leave minimal air access. Foil or plastic lid should NOT contact or press top substrate!

1.1. Optional! On the top of foil (or on the lid) make a few small holes with a needle. Usually I just cover the cake with plastic lid, but don't close tightly

Move your mushroom cakes to incubator or any clean box. Wait for colonization new substrate.
Colonization period for mushroom cake
It takes about 3-5-7-10 days for colonization coco substrate.
Incubation conditions are the same as for grain colonization: temperature range is 70-81°F or +21°..+27°C, no light at all, no fresh air exchange and no misting for this step!How to identify when we need to move cakes to the grow box?
At this stage colonization process is faster and you can observe changes every day.
✳️ 2 days after:

✳️ 2 days after:

✳️ 4 days after:

✳️ 4 days after:

When mushroom cakes are ready for fruiting conditions
When 70-100% of the top substrate is colonized by mycelium it's time to prepare the fruiting chamber and provide fruiting conditions.
On the photo below you can see mushroom cakes 4 days after casing. They are ready to move in the growbox

🔴 Don't keep mushroom cakes for colonization too long! Overgrown mycelium can be a cause of overlay. Then fruit bodies can't form and you won't get mushrooms at all!
Before moving mushroom cakes to Fruiting Conditions I'd like to mention one of the most debated topic. Check it out: Cold Shock in mushroom cultivation: pros and cons
Now it's time for: Step 9. DIY Grow Box. Fruiting conditions

Spawn to Bulk
This method and recipes are recommended for all modifications of MonoTub, Shoebox, Bottle-tek, Grow Tent growing.
What is Spawn to Bulk
Spawn to Bulk (S2B) — transfer grain spawn to secondary fruiting substrate (bulk) for further bulk colonisation and mushroom fruiting in fruiting chamber (growbox, shoebox, monotub, grow tent etc.)
Tek for Shoebox, Monotub: DIY Monotub for mushrooms. Monotub configurations

Tek for growing shrooms in bottle: Bottle-tek or how to grow mushrooms in plastic bottles

Remember, there is no right or wrong way to fruit mushrooms. Any tek works, has pros and cons. Start with the easiest and cheap tek. Skip any automatization for the first attempts
Why coco coir for bulk substrate
Fruiting substrate content depends on the mushroom species we grow. Some edible mushrooms prefer wood products (sawdust, wood chips, paper etc), straw or manure.
Cubes enjoy coco coir and hay substrates. Manure substrate is also good for Cubes, but not necessary.
Manure substrate for Panaeolus aka Copelandia is recommended!
The most popular ingredient of bulk substrate for Cubensis mushrooms is coco coir. It's cheap, easy to buy, easy to prepare. It is lightweight, supports aeration. When soaked in water increases in volume by 8-10 times, it makes coco coir excellent moisture retainer for longer. At the same time coco coir relatively resistant to molds, bacteria, pests.
The best option of coco coir are pressed coco bricks.
On the packages with ready-made coconut-peat soil and coco bricks manufacturers always indicate the pH level, that can vary from 5.5 to 7.5.
❗️Don't use coconut peat soil mix for plants! Usually brands add Trichoderma to coco coir for plants, it’s a part of their mycorrhiza. Trichoderma is useful for plants, but not for shrooms!
Salted coco coir
One important point about coco coir! As we know it's made from coconuts. Palm trees usually grow near the sea, that's why coco coir sometimes salted (usually from no-name sellers).
❗️Salt inhibits mushroom metabolism, as a result inhibits mushroom pinning and fruit bodies development!
Sometimes salt level in coco coir +/- normal, sometimes extremely high. Moreover can vary from brick to brick!
'Washing' the coco coir in water helps to remove salt and check the salinity level. Sometimes we need repeat such washing few times to have normal salt level.
How to check salt level? If you have pool at home or aquarium you know about it for sure. Use salinity tester or test strips, they show the salt level in water after washing the coco coir.
Saltwater Test Strips $9.99
Digital salinity tester $39.99
Drinking water < 0.5 ppt
Normal saline = up to 9 ppt
Sea water = 30-35 ppt
Simple coco coir recipe for bulk substrate
Simple recipe without any additives: 650g coco coir (1 coco brick), 14 cups of water (3.5 qts)
Coco Bliss - Premium Coconut Coir, 5/10/20 Bricks $21.99
CVG recipe for bulk substrate
CVG substrate = Coco coir + Vermiculite + Gypsum
For 5qt spawn jars (for Monotub Tek): 650g coco coir (1 coco brick 1,4lbs = 650g), 8 cups of vermiculite (2 qts), 1 cup of gypsum, 18 cups of water (4.5 qts)
For 2.5qt spawn jars (for Monotub Tek): 325g coco coir (1/2 coco brick), 4 cups vermiculite, 1/2 cup gypsum, 2.25 qts of water (9 cups)
For 2 qts spawn jars (shoebox tek, small mushroom cakes, bottle-tek): 260g coco coir, 3.2 cups vermiculite, 2/5 cups gypsum, 7.2 cups of water (1.8 qts)
For 1 qt spawn jar (shoebox tek, small mushroom cakes, bottle-tek): 130g coco coir (1/5 coco brick), 1.6 cups vermiculite, 1/5 cups gypsum, 3.6 cups of water (0.9 qts)
🔴 Gypsum provides looseness (particle separation) to reduce soil compaction and increase drainage, aeration in soils. Provides mineral salts, especially sulfur and calcium, essential elements for mushroom metabolism.
🔴 Gypsum is not a buffering agent! It has a neutral pH 7.0. It can be added as an additional ingredient to the basic buffering agent and change pH level up to 7.0. You can use gypsum with any other buffer agent 50/50 (i.g. if I need 1 cup of gypsum I add 1/2 cup of gypsum and 1/2 cup of Limestone flour)
Shroomok's Choice on Amazon:
Coco Bliss - Premium Coconut Coir, 5/10/20 Bricks $22.99
Professional Grade Vermiculite 8Qt, 1/2/5 Pack $14.50
Gypsum (Calcium Sulfate), 2lb $12.99
Organic Lime Soil Amendment, 6 lb - $15.61
Bulk substrate Pausterization or Sterilization
We need this step to kill possible mold spores in bulk substrate and prevent mold contamination. In fact it is enough to keep bulk substrate at 140F and higher (60C) for at least 30+ minutes.
At this step we don't work with bacteria as we do this with grain substrate. Coco coir doesn't have so much carbs as in grain, that's why it is not so attractive for bacteria pathogens.
For pausterization put all dry ingredients (coco coir + vermiculite + gypsum) in a PC/pot/bucket.

Pour steep boiled water right on dry ingredients.
Close the PC/pot/bucket with lid. Cover it with towel or blanket to retain heat for longer.
Let it sit and cool down to room temperature (about 4-8 hours depending the volume of substrate).
For sterilization prepare bulk substrate (here you can use cold water) and fill the spawn jars/bags. Sterilize/pausterize in pressure cooker or pot for 45-60 mins at 10-15 psi. Let it cool down to room temperature.
Usually mushroom farmers and home growers use pasteurization to save time and beneficial bacteria in substrate, that support mushroom growth. However Sterilization and Pasteurization have advantages and disadvantages that were discussed on Shroomok Growers Community on Discord
🟠 Check out discussion: Sterilization vs Pasteurization for bulk substrate
You can also use 'sterilization' in microwave. Put jar/bag in microwave for 8-10 mins (use the highest power). Mix it around 4-5 min then finish the rest 4-5 mins of cooking. Let it cool down to room temperature.
Sterilization in oven. Turn on your oven and set 250F (120C). Wait for this temperature. Put jars/bags in oven. Wait for 1 hour. Turn off the oven and let it cool down to room temperature in the oven.
Bulk substrate field capacity
Before mixing mushroom spawn with bulk substrate you should check field capacity, literally it is right water content in substrate. It's extremely important for mushrooms!
Field capacity — perfect substrate moisture conditions
A good way to test for this is to grab a handful of the substrate mixture and squeeze it in your hand.
⛔️ If you are unable to squeeze out any water, it is too dry.
⛔️ If a light squeeze causes a stream of water to come out, it’s too wet.
✅ You want to be able to squeeze the mixture as hard as you can, and only have a few steady drops come out to have a field capacity moisture level. This is perfect!
Recommended ratio of grain spawn to bulk substrate
The recommended ratio of Grain Spawn to ready for use Bulk substrate is from 1:1 to 1:4.
Typically growers do 1:2 or 1:3
1:2 = means 1 part of Grain Spawn to 2 parts of Bulk
For the very first attempt try to work with 1:1 or 1:2 ratio.
Check out discussion about S2B ratio from Shroomok Discord: What is the best ratio of spawn to bulk for mushroom growing
Spawn to Bulk process
Wash your boxes/tubs/bottles with any disinfectant before making mushroom cakes/blocks in them.
Wipe boxes/tubs/bottles with iso alcohol.
Check the spawn jar for signs of contamination on all sides and at the bottom. Grain should be covered completely with white mycelium.

Open the jar and check the mycelium on top. It should be perfectly white.

Don't use bald areas (uncolonised grains without mycelium) as they are prone to further contamination. Throw away uncolonized grain and pick good grain from the jar for the next step. Check the smell as well. It should have a nice mushroomy smell. Sweet-sour, cider, rotted smell is a sign of contamination.
Remove grain spawn from the jar and transfer it to a plastic box (shoebox, monotub, bottle). To make it easier, use a tablespoon. Don't be afraid to break grain spawn apart.

Add pausterized or sterilized bulk substrate in the box. Spawn to Bulk ratio from 1:1 to 1:4.

You can create layers of spawn and bulk one by one.

Or simply mix spawn with bulk. I prefer to break up grain and MIX with bulk substrate without layering. In this way we create more points of growth. Therefore, the speed of bulk substrate colonization is faster.

Cover the cake with 1/2-1/3 inch (~1cm) of bulk substrate on top of your cake after mixing to cover all grains.
Tamp the whole cake a little.
Close the lid of your box and all air vents (if you have them). Wait for bulk substrate colonization. Usually it takes 3-10 days, up to 14 days. For this period, mycelium don't need any air exchange or light!
Question: Shroomok, what is the ideal height for mushroom cake?
Answer: Your cake should take up no more than 1/3 of the total volume of the fruiting chamber (shoebox, bottle, monotub). For instance, if your plastic box = 24 cm in height, then your mushroom cake should be up to 8 cm (24/3=8). The height of mushroom cake (grain spawn + bulk + thin top layer) should be around 5-10 cm (2-4 inches). +/- 1 cm is not critical. You don't need a tower, at the same time cake should be thick enough.
Bulk substrate colonization
Wait till 80-100% of bulk substrate colonization.
Then you have 2 options for your choice:
1) making casing layer and providing fruiting conditions right after casing
2) skip casing layer and providing fruiting conditions
Check out: Pinhead initiation. Fruiting parameters
I do recommend to use casing layer! Let's figure out why and how to make it.
Casing
What is casing
Extremely beneficial, but optional step for some mushroom species (for Cubensis particularly). This step applied after Spawn to Bulk and bulk substrate colonization.
Casing — a layer of water-retentive materials applied to a substrate to encourage and enhance fruitbody production. It is not supposed to provide nutrients for fungi development
Usually casing content including peat moss, vermiculite and water. Additives include hydrated lime or limestone flour. Casing should not have any nutrients, it's non-nutrient substrate! If the casing layer is nutritious, mycelium won't form mushrooms and continue vegetative growth until it had taken over the entire nutrient medium.
Casing layer benefits
This practice was developed by Agaricus mushroom cultivators. They discovered experimentally that mushroom pinhead formation is stimulated by covering the compost with such a layer. The cover layer promotes fruiting and increases the yield potential for many (but not for all) cultivated mushrooms.
Casing layer has the following reasons:
✅ To protect the colonized substrate from drying out. Casing layers hold moisture in substrate, promote and hold humidity level x2 better than coco coir and vermiculite
✅ Additional contamination protection. When pH adjusted between 8.0 - 9.0 casing creates a hostile environment for certain contaminations like Trichoderma mold to live
✅ To provide a moist microclimate for pinhead initiation and further growth.
✅ To provide an additional water supply for fungi growing on active stage.
✅ To support the growth of beneficial microorganisms that improve fruiting.
✅ Mushroom cake produce more flushes, increase yield in terms of size and weight for each flush and in terms of overall harvested weight. Have even fruiting all over the cake, not only near the borders of your tub
✅ Beneficial for growing such strains like APE (Albino P Envy). Casing layer helps to prevent or decrease 'Dino Eggs' mutation during pinning period
✅ Casing layer helps to prevent overlay and works great for overlay treatment.
✅ Highly recommended for Psilocybe Natalensis, casing initiate pins formation and reduce aggressive mycelium groth.
In a substrate with high acidity:
🔴 nutrients are poorly assimilated
🔴 mushroom growth is inhibited
🔴 increases the activity of competitive microorganisms. It leads to decomposition of organic matter and substrate contamination.
🔴 In addition, the substrate is gradually acidified by mushroom waste products, which makes it even more vulnerable for molds like green mold Trichoderma. For example, if we applied a casing layer with a pH 7.5, it gradually drops to a pH 5.0-6.5 after the 1st flush. That's why green mold contamination often appear on the 2nd, 3rd or 4th flush of fruiting when mushroom cake is depleted and acidified.
Check out: Green mold contamination aka Trichoderma
Casing by species
For most mushroom species it is optional step or not necessary at all. However, there are some mushroom species for which casing is a mandatory part of their life cycle. The table below shows some examples:

As you can see, casing is optional for Psilocybe Cubensis and Panaeolus subbalteatus strains. You can skip it and continue growing using the PF-tek or Monotub tek without casing at all. For Psilocybe Cubensis casing is not required for getting mushrooms.
pH level for casing layer
The acidity level of the casing substrate for different fungi species range from 6.5 to 8.0.
The optimum pH for Psilocybe Cubensis growing is 7.0-7.5 - neutral or slightly alkaline soil (bulk substrate).
For casing substrate which we apply on top only (just 1-1,5 cm or no more than 1/2 inch) we adjust pH about 8.0-8.5 (up to 9.0)

❗️ pH 9.0 and higher provoke mushroom metabolites. Check out: Mycelium metabolites or mushroom pee
How to prepare casing substrate
The base for Casing layer is peat moss aka sphagnum, vermiculite and water. Additives include hydrated lime or limestone flour. Sphagnum pH vary from 3.5 to 4.5, that's why you need more or less lime
Here is the list of formulas for the casing substrate. They can be used for Psilocybe Cubensis, Psilocybe Natalensis, Panaeolus and other species for which casing is a required cultivation step.
The recipe below always works perfect!
The best casing substrate recipe for shrooms
- peat moss (aka sphagnum) - 2 cups (Amazon)
- vermiculite - 1 cup (Amazon)
- hydrated lime (aka calcium hydroxide) - 1 tablespoon (Amazon)
- water - 1 cup
Prepare as much as you need, just follow the ratio. Peat based casing don't require sterilization and rarely require pasteurization. However I recommend pausterization for casing. Fill the canning jar with casing mix, close the lid. Put it in an instant pot, saucepan with lid or pressure cooker. Add water in a pot and bring it to a boil. For casing layer we don't need high pressure and you can use just pot with lid.
Pausterize the casing substrate for ~60 mins. Let it cool down to room temperature.
I also found casing formulas in the book 'The Mushroom Cultivator: A Practical Guide to Growing Mushrooms at Home' by by Jeff S. Chilton and Paul Stamets. Although they use CaCO3 - limestone flour, limestone grit, chalk or marl as a buffering agents and recommend these formulas for Agaricus culture and most species require a casing. However limestone (aka garden lime) is less effective for pH adjusting than hydrated lime (aka slaked lime). Hydrated lime works faster.
Formula 1
- Coarse peat (sphagnum) - 4 parts
- Limestone flour - 1 part
- Limestone grit - 1/2 part
- Vermiculite - 1/2 to 1 part
- Water - about 2-2¼ parts
Limestone saturates the substrate with oxygen, promotes mushroom metabolism and reproduction of beneficial microorganisms, reduces the growth of pathogenic microorganisms and thereby increases the yield of mushrooms and the duration of the fruiting period (the number of fruiting flushes).
Formula 2
- Coarse peat (sphagnum) - 2 parts
- Chalk or marl - 1 part
- Vermiculite - 1/2 to 1 part
- Water - about 1-1¼ parts
Casing recipe with pH adjusted water
Take 1 gallon of water (distilled, clean drinking or tap) and add 1/8 teaspoon of hydrated lime in water. Shake it and leave for 1 hour.
In 1 hour check the pH level of water with pH test strips for water or pH meter. If pH less than 8.5-9.0 add a pinch of hydrated lime, shake it well. Check the pH again after 1 hour. Leave it for 12-24 hours before using.
Mix 5 cups of dry sphagnum and 5 cups of vermiculite.
Add pH adjusted water 4 cups. Mix it.
Use the same field capacity test as for bulk substrate. Add more water if needed. If too much water add more sphagnum and/or vermiculite.
Why vermiculite is bad casing layer
Some growers and growkit producers use moist vermiculite only as a casing layer for mushroom cakes. I don't recommend such casing layer, because in 99% you have issues with moisture balance during the fruiting period. Works bad and doesn't guarantee mold protection!


How to check soil pH level
1. Easy cheap way to check soil pH level (for casing and bulk) is pH Test Strip

Use distilled water and mix water with soil in a 1:1 ratio. Use litmus paper to determine the pH level of the soil based on the color.
Shroomok's Choice on Amazon:
Soil pH Test Strips Kit (3.5-9 Range) 100 Tests - $12.98
2. Another option is Digital Soil pH Meter

You just insert the tip of the tester into the soil and in a few minutes you can see the result.
Shroomok's Choice on Amazon:
Digital Soil Ph Meter - $17.95
What to do next
After successful Bulk Substrate colonization add casing layer. It should be about 1/3-1/2 inch (or ~1 cm).
Provide fruiting conditions right after casing.
If you don't use casing layer, then provide fruiting conditions when top layer (bulk substrate) is colonized for 80-100%.
Now it's time to move on — Step 10. Fruiting period. Pinhead initiation, mushroom pinning and mushrooms growth parameters
Join Shroomok Community on Discord and Reddit for questions and sharing experience.
If you find this guide helpful, please support me with subscription or cup of coffee on ☕️ buymeacoffee
Peace, Shroomok ❤️
Comments
Hi guys, I have done a really bad job with a casing layer and put it on too think and a bit lump. Consequently, the colonised bit underneath isn't really grinning through other than a couple of isolated spots - any ideas? Thanks.
Hey @Flatty!
How thick is your casing layer?
Usually you just need to wait more time for full smooth colonization and further fruiting.
Just patience for now and work on mistakes for the next attempts :)
You can share a photo on Shroomok Discord or Reddit, so I can check the issue ;)
I guess an inch. Photo & thread on Discord - thank you!
Hey Shroomok, what a great site you got here! 🔥
I couldn't find any hydrated lime for the casing layer so I got calcium carbonate instead. My question is, how much of it should I use going by your recipe? Should I use the same quantity as with hydrated lime or should I double?
Namaste 🙏🏻
Делаю Spawn to Bulk в монотуб. В период колонизации (когда все отверстия закрыты и нет воздуха) нужно монотуб држать в темноте? И какую температуру держать и влажность в этот момент?
@Леонид Yes, during bulk colonization period (when air vents are closed) keep the tub in a dark place. The temperature range is around 70-80F or 21-27С. You don't need neither fresh air exchange nor misting/humidifier for this period, just forget about it. Keep the tub closed and wait for 80-100% of top layer colonization. After that you can open air vents (make sure to protect them with polyfill or micropore tape). Good luck 🤞
Please, tell me which exact lamps need to be used and at which stages?
In my opinion, this CVG recipe was still too wet:
For 1 qt spawn jar (shoebox tek, small mushroom cakes, bottle-tek): 130g coco coir (1/5 coco brick), 1.6 cups vermiculite, 1/5 cups gypsum, 3.6 cups of water (0.9 qts).
So I had to squeeze some water out. Excited about the results. 🤞 Fingers crossed
I'd also recommend adding all quantities in weight (g) and not in volume. That way u don't have to be eyeballing if the level of the liquid or solid stuff like vermiculite matches the stripe on the measuring cup.
Using a weight scale and raring for every added ingredient is so much easier. My two cents;)
@Bademeister Ratios by volume is a standard practice in mushroom cultivation (brought from edible mushroom growing).
For instance, for making a bunch of blocks you can find recipes with main ingredients in ratio like 5:3:1:1 by volume. You can use cups, jars, buckets or… wheel barrow. Up to you, just follow the ratio and prepare as much as you need. A little more or less of some ingredient is not critical. It doesn't need to be precise to the gram.
For actives, like Cubensis, we usually use the whole coco brick for substrate and it's easy to follow the ratio by volume. But yeah, for small amount the recipe looks weird due to non-integers for measuring the volume of each ingredient.
Special for you I've tested the recipe to get perfect field capacity :)
By WEIGHT I've got the following:
130g - coco coir
46g - vermiculite
15g - gypsum
850g - water
Regarding excessive water in your bulk substrate…
It may vary. Could be perfect match with the recipe, or too much, or not enough water. It all depends on how dry main ingredients are. Coco bricks could have 10-20% of moisture from the start. Coco and verm left open for a while could absorb additional moisture from the air.
You’re right! In your case you can squeeze out some water. Or just add more vermiculite to the substrate to ensure a proper field capacity. If there is not enough water, you can add more chilled boiling water and mix the substrate well.
You need to check it every time you make a substrate 🙃
Wish you a great cultivation journey🤞
Looking forward to good news and updates from you 😉
@kupjv, you DON'T need powerful full spectrum lamps for plants.
Moreover, additional light for Cubensis is optional.
There are several options for you to choose from:
- natural light in your room (but NOT direct sun light)
- LED lamps white-blue spectrum (~435-480 nm)
- fluorescent cold white light 6000-6500k lux power
At which stages to use? Fruiting period!
I've seen JIffyMix seed starting soil recommended as a casing layer.
It appears to be a very clean mix of peat moss/ coir/ vermiculite that does not contain a fungicide.
My question is - could this kind of mix be used for spawn to bulk substrate?
Or maybe with something added?
I enjoy the convenience of a pre-mixed product and would (of course) pasteurize before using.
Thanks!
And BIG Thank You for this site and the accurate and abundant helpful info you share with the shroom community!
@kb YES, pre-mixed seed starter mixes based on peat moss/ coir/ vermiculite can totally work. I've even used tomato potting soil for P. Cubensis (as a bulk and pseudo-casing) and cacti soil for a casing layer to fruit Panaeolus and P. Tampanensis.
You can use the substrate as-is, or you can bump it up with gypsum and/or hydrated lime to adjust and stabilize pH. Just check the soil pH on the package first. You don’t need acidic soil! Typically you'll find pH 6.8–7.5, it's good for your purposes. 7.5–8.5 is even better.
As you pointed out, substrate should be fungicide-free 👍 And also without added Trichoderma, which is a common natural root system supporter for cannabis plants, but it’s a real killer for mushrooms. Even though, pasteurization neutralizes Trichoderma it’s safer not to have it in your substrate at all.
Thank you for your warm word and wishing you a magnificent harvests!
Add comment