


Hopefully, you've already bought an equipment and prepared everything according to the previous article: lists of stuff for growing process.
Now let's get to the actual mushroom cultivation, and the first step here will be the preparation of a spore syringe, which is necessary for inoculating the grain substrate.
If you already have a ready-to-use syringe with spores or liquid culture, move on to STEP 2. Substrates for magic mushrooms
However, I still encourage you to read this article to fill the gaps in knowledge and avoid possible confusions in the future
What is a spore syringe
Liquid spore syringe or spore solution or multi spore syringe (MSS) is a syringe filled with sterile water and mushroom spores floating in it. With such syringe you can easily transfer spores to a sterile substrate (i.e. inoculate a jar or bag).
The difference between Spore syringe and Liquid culture
Multi spore syringe (MSS) or simply spore syringe in everyday use is often mistaken with liquid culture syringe (LC).
Spore syringe is simply spores in sterile water. Many genetic variations may develop from it, that's why it is called multi spore syringe.
Liquid culture is the result of mycelium development in liquid nutrient broth (liquid media) based on honey, corn syrup, light malt extract etc. In ideal world, true LC should be made of isolated culture on agar, not from spore syringe. This takes a long time and some experience with agar.
What if I inoculate liquid media with spore syringe? Will I get liquid culture?
Yes, you'll get LC and liquid mycelium made from spore syringe. BUT! In this way it won't be isolated genetics, it will be multi spore LC, not a true isolated LC.
Liquid culture (LC) is preferred over a spore syringe to inoculate grain spawn, because mycelium spread faster and genetics will show better growth and better yield overall.
Tip: if you're choosing between Spore syringe and LC syringe when buying genetics — choose LC!
Anyway, you need to begin with spore syringe first, to start your growing process. Later you will use this skill for advanced level mushroom cultivation — agar work and LC preparation.
LC is additional step, more complicated process in comparison with spore syringe and requires more time. Leave it for later.
Check out: Liquid Culture Guide
Syringe is where spores are waking up
The key to success in home mushroom cultivation is an imitation of the conditions typical for them in nature.
Imagine a mature mushroom in a tropical forest at the end of the rainy season. The mushroom opens its cap. The spores spread around, they are fresh and ready to germinate. Why? They contain enough moisture – the crucial feature of spores at the moment. Very soon they'll dehydrate and cell walls of each spore will curl inwards. Thus the spores enter a state of dormancy (rest, hibernation) to safely wait for the next rain.
To awaken and prepare the spores for vegetation, we will simulate a rainy-wet-humid environment by placing them in sterile water in a sterile syringe.
This is the easiest way to inoculate substrate, very friendly for newbie growers.
Components required to prepare a Spore Syringe
Gather necessary materials to prepare a liquid spore syringe by your own:
Spore print in a zip bag
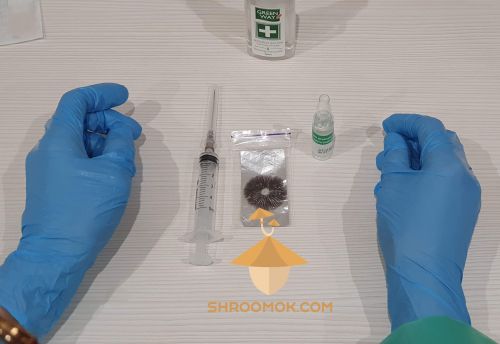
Psilocybe cubensis liquid spore syringe preparation Sterile disposable syringe. One syringe per one spore print.
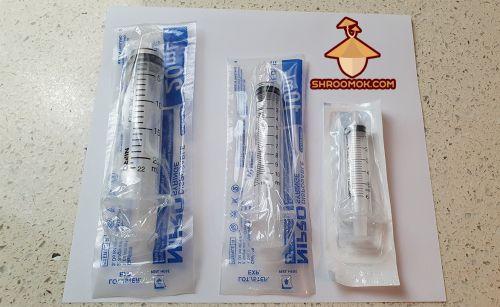
Disposable sterile syringe with needle Tip: The syringe volume should be at least 5 cc/ml. Better to use syringe of medium and large volume 10-20-50 cc/ml, so that you can get more genetic material for inoculation, because each spore print has billions of active spores!
Sterile injection water in vial (minimum 5 cc/ml) and ampoule cutter (or kitchen knife) to open the ampoule.
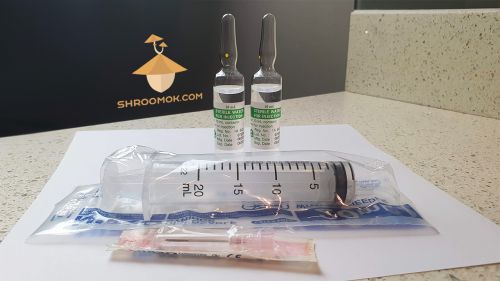
Sterile injection water in vial and sterile syringe for liquid spore If you use big syringe or gonna dilute the spore solution you need additional injection water. Another 5-15-45 ml for 10-20-50 ml syringes, respectively.
Tip: If you don't have sterile injection water just boil clean drinking water for 15-20 mins in pot. After that fill the syringe with hot boiling water and wait till it cool down to room temperature before using it. Fill the syringe while water is still slightly boiling and you can see small bubbles.
You can also use sterile distilled water!
Ethyl or Isopropyl alcohol 70% in a bottle or spray bottle.
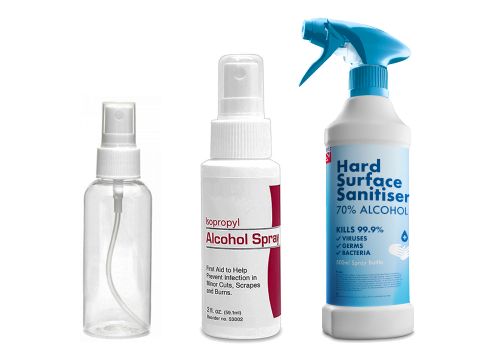
Ethyl alcohol (70%) in spray bottle Tip: 70% alcohol is more effective for disinfection than 91/96/99%. Why? At high concentrations, alcohol evaporates too quickly and does not have time to act on contaminants. With a 70% water content, alcohol evaporates slower and it has time to penetrate the cell membranes of bacteria, molds, and viruses.
Shroomok's Choice on Amazon: Isopropyl Alcohol 70% + Spray bottle - 21.99
Cotton pads — 2-3 pcs.
Personal protective equipment: gloves, face mask, lab coat (PE raincoat), cap.
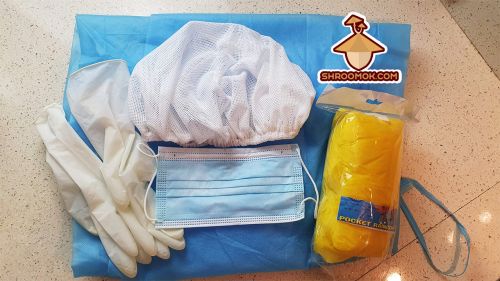
Grower's outfit: gloves, face mask, cap, medical gown (PE raincoat) Shroomok's Choice on Amazon: 10 Gloves and 1 Mask Bundle - $7.99


Preparation and sanitation before making Spore Syringe
Wash your hands and face.
Put on personal protective equipment: face mask, medical cap, gloves, lab coat (or PE raincoat). This helps prevent contamination from your own body (hands, hair, breath) and clothing.
Wipe the table with ethyl/iso alcohol 70%. Soak cotton pad in alcohol and wipe the table; or spray the alcohol with spray bottle and wipe the surface.
Spray the alcohol on your gloves. Wipe your hands thoroughly over the entire surface of the gloves and between your fingers.
Spray the alcohol on your hands up to the elbows.
Wipe with the alcohol all needed materials on the table: the vial with injection water, zip bag with the spore print, the ampoule cutter (or kitchen knife), the syringe package and even the bottle with alcohol.
Don't skimp on alcohol for sanitation!
How to make a Spore Syringe
Method 1. Making spore syringe in zip bag
The following method of preparing the liquid spore syringe is the easiest and very simple. It doesn't require perfect sterile conditions, no need to use a glove box, still air box or laminar flow hood. However, it is rather wasteful, because you need to use the whole print at once.
The process of spore syringe preparation you can watch in the video on Reddit
Don't skip detailed guide below, because video shows only the main principles!
Open the ampoule with sterile water for injections.
Open the syringe pack. Put the needle on. Fill the syringe with sterile water from the ampoule.
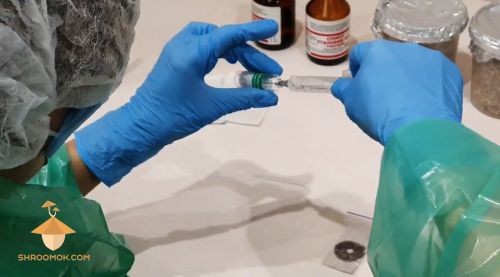
Steps 1-2. Open the vial (ampoule) and fill in the syringe with sterile water for injections Don't lean over the table with the whole your body during the process. Try to keep only your wrists and palms over the table
Don't open zip bag with spore print! Wipe zip bag with alcohol again.
Pierce the zip bag closer to the zip valve. Put the needle inside. Squeeze all water from the syringe into the zip bag.
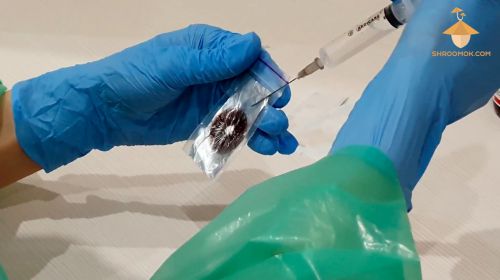
Steps 3-4. Don't open a zip bag! Squeeze all water from the syringe into the zip bag with spore print. Don't pull the needle out of the zip bag. Just clamp the puncture point with one hand and rub the spore print through the zip bag with the other hand. So that, spores separate and mix with water.
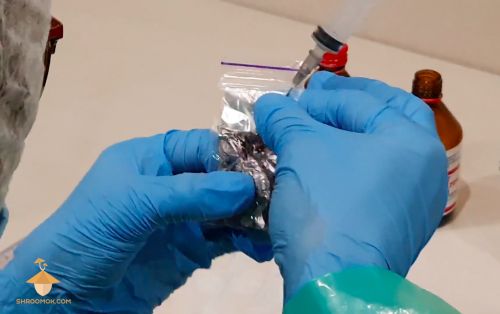
Step 5. Rub spore print to separate spores and mix them with water Draw water with spores from zip bag back into the syringe.
Remove the needle from the zip bag. Wipe the syringe needle with alcohol (wipe by cotton pad soaked with alcohol or just spray it with alcohol). Put the protective cap over the syringe needle. Make sure opened syringe needle doesn't touch anything. Do not put the syringe on the table without the protective cap on the needle!
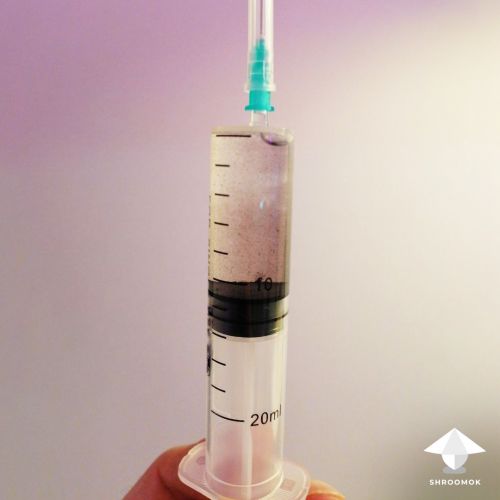
Shake the syringe to mix spores in water water. Put the syringe in dark place or wrap it in foil/paper to ensure dark conditions.
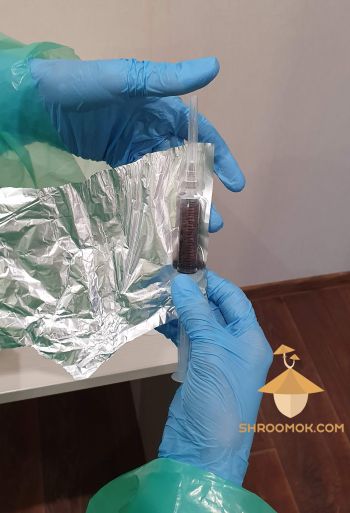
Wrap liquid spore syringe in foil. You can see that water became black with mushroom spores Sign the strain on a syringe or zip bag. Leave prepared spore solution at room temperature (68-77°F or +20°..+25°С) or put it in a fridge till inoculation step.

Leave spore syringe for 24 hours for rehydration before substrate inoculation


How to get a larger volume of spore syringe and how to dilute it
You can dilute the prepared liquid spore, thus increasing the volume of material for inoculation by several times. This way, you can inoculate more jars of substrate.
Did you know? Each spore print contains billions of spores (about 3-5% are capable of continuing life)
To make the dilution as sterile as possible and to avoid contact of the spore solution with contaminants take a medium or large syringe to prepare more spore solution from the very beginning. For example, 20-50 ml.
Make all manipulations for liquid spore syringe preparation in zip bag.
Then just add another 15-40 ml of water to fill in the whole volume of the syringe. So that you'll get 20-50 ml of spore syringe for inoculation.
Of course you can dilute it in a sterile disposable lab test tubes/containers in still air box or with using Fan Filter Unit or Laminar Flow Hood.
You can dilute the spore solution till it slightly colored with spores or almost transparent (share 1 spore print per 100-200 ml of water or even 500 ml).
Did you know? More spores in syringe doesn't mean more mushrooms or better yield! It doesn't work for fungi. Less is better in this case. Why? Roughly speaking, the fewer spores there are, the less competition there will be for nutrients
Method 2. Making spore syringe in still air box
In this way you can use half or 1/4 of spore print and save genetic material for the next attempts. The rest of spore print you can use any time you need. However, this method requires SAB (still air box) or Fan Filter Unit or Laminar flow hood.
Prepare Spore Print in zip bag and SAB (still air box)
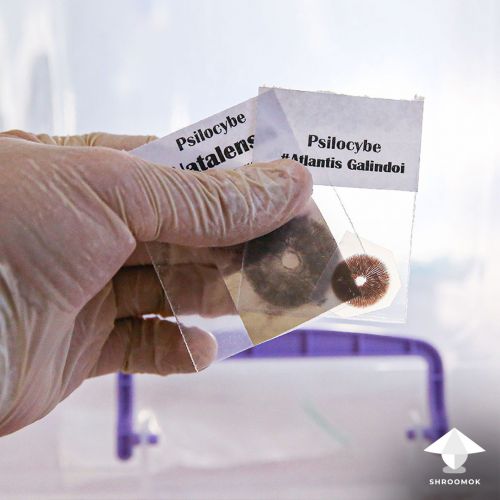
Mushroom spore prints for spore syringe Put spore print, syringes with needles, sterile water, iso alcohol, scissors, scalpel and sterile plastic container for lab tests. Wipe all instruments and SAB with iso alcohol.
Open zip bag with spore print. Scrap some spores from a spore print with scalpel to sterile plastic container for lab tests or sterile shot glass.
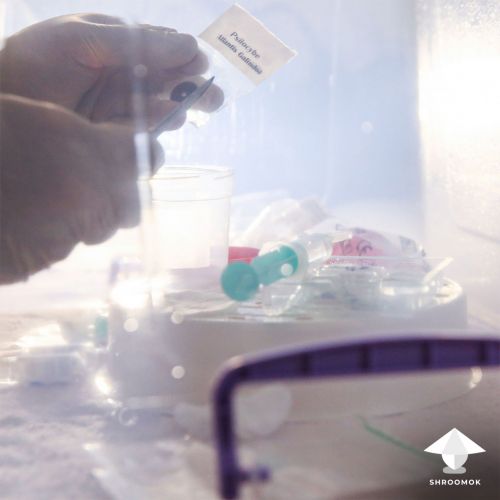
Open spore print and scrap spores to sterile container Add sterile injection water to spores in the container (you can use chilled boiled water, boil for 20 minutes and let it cool down before using). Fill the syringe (or few syringes) with spore solution.
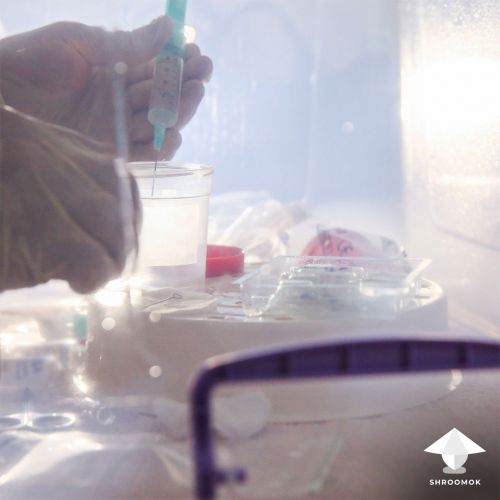
Fill the syringe with spore solution Ready! Add more sterile water in syringe to have a full syringe.
Ready spore syringe


How long liquid spore syringe can be stored
You can leave spore solution for one month at room temperature 68-77°F or +20°..+25°С in a dark place and use it when you are ready for inoculation.
Longer storage is not a problem as well. Ready-made liquid spore syringe can be stored in the refrigerator at 35-46°F or +2°..+8°C up to 1 year and spores stay viable.
Note: there are many cases when spores propagated and growers had great harvests after 3-5 years of storage!
Shake the spore syringe from time to time (once in 2-4 weeks) and don't forget to shake it well right before inoculation, because spores stick together over time.
Now move on —> STEP 2. Day 1. Choose and prepare substrate for magic mushrooms
If you find this guide helpful support me with a cup of coffee on buymeacoffee
Feel free to ask your questions and post photos on Forum, Discord, Reddit or in comments to this post ⬇️
Have a happy growing journey!
Comments
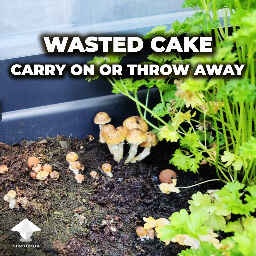
I’ve recently tried to grow shrooms but only 2 emerged, what do I do now?
@Cat O’Rourke you have just 2 shrooms on your mushroom cake?
I need more details about your growing process, cultivation tek, what strain?
To get quick feedback/consultation join Discord/Reddit/BuyMeACoffee, links below (in the footer)
Method 1 video is missing or not loading.
You did NOT screw up, I consider that 24 hour idea debunked mythology. Anyone who has ever done any spore work with a microscope knows the dry spores fully hydrate in minutes if not seconds, they do NOT need 24 hours, haha. I've made plenty of spore syringes where I did not wait at all between creating the syringe and injecting it to grain jars, and they worked perfectly. In fact I would actually RECOMMEND using them as fast as possible, why give any potential contam a chance to grow, just get it on grain as soon as possible and get it into an incubator.
Hello. Why do some spore prints stick to the side of the beaker when added to sterile water and during the syringe filling process. Ive had nice dark prints wasted due to no spores being sucked up and all were stuck to the glass beaker! I was told to add a bit of "jet dry" or similar water wetter and that did seem to help but I dont want to have to add anything such as that. Some prints mix great and fill up nicely but some dont. Thank you
Add comment