

Day-to-day Reishi growing diary
Hello, mushroom lovers!
I just want to share my journey of growing amazing medicinal mushrooms — Ganoderma — aka Reishi in Japan, aka Lingzhi in China. Actually, my species is Ganoderma multipileum, also called Antler Reishi because it produces beautiful, deer antler-like mushrooms.
The very first steps for almost ALL mushroom species are the same. We need initial genetics (spores, liquid culture, or mycelium on agar) and sterile grain jars or bags.
You can follow this grow report and use some tips and tricks for growing magic mushrooms; and for other wood loving species like Lion's Mane, Shiitake etc.
Let's get started!
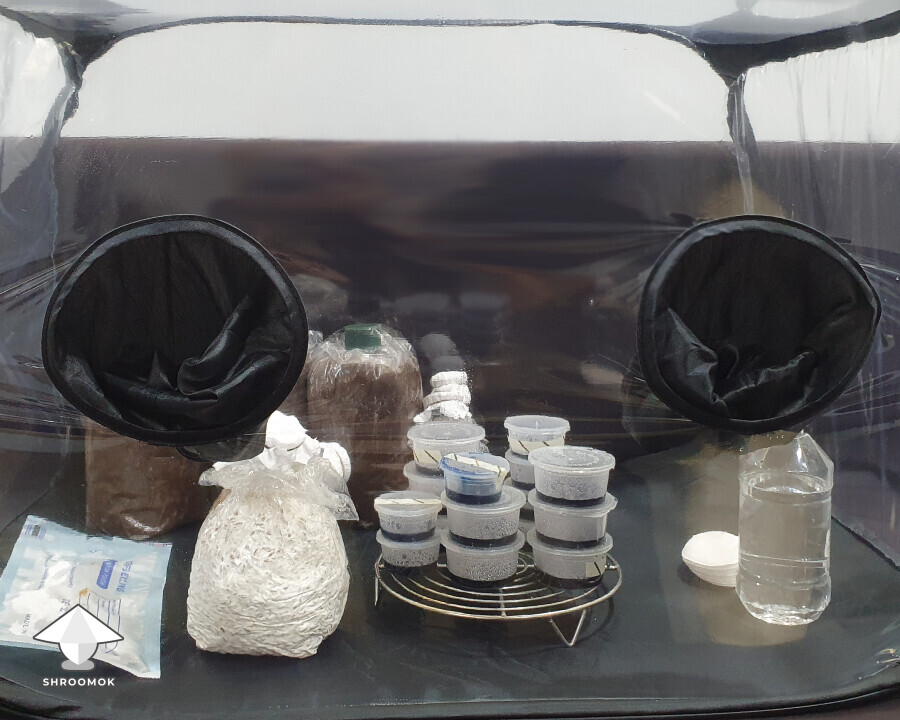
Starting materials and equipment:
Agar culture (Ganoderma Multipileum)
Whole unpeeled rice
Grain bags, polyfill (or cotton), filters, rubber bands
Hardwood sawdust
Rice bran (or wheat bran)
Bulk bags, filters and rubber bands
Pressure Cooker
Still Air Box
Gloves, Face mask, 70% alcohol
Attachments
Shroomok's choice on Amazon
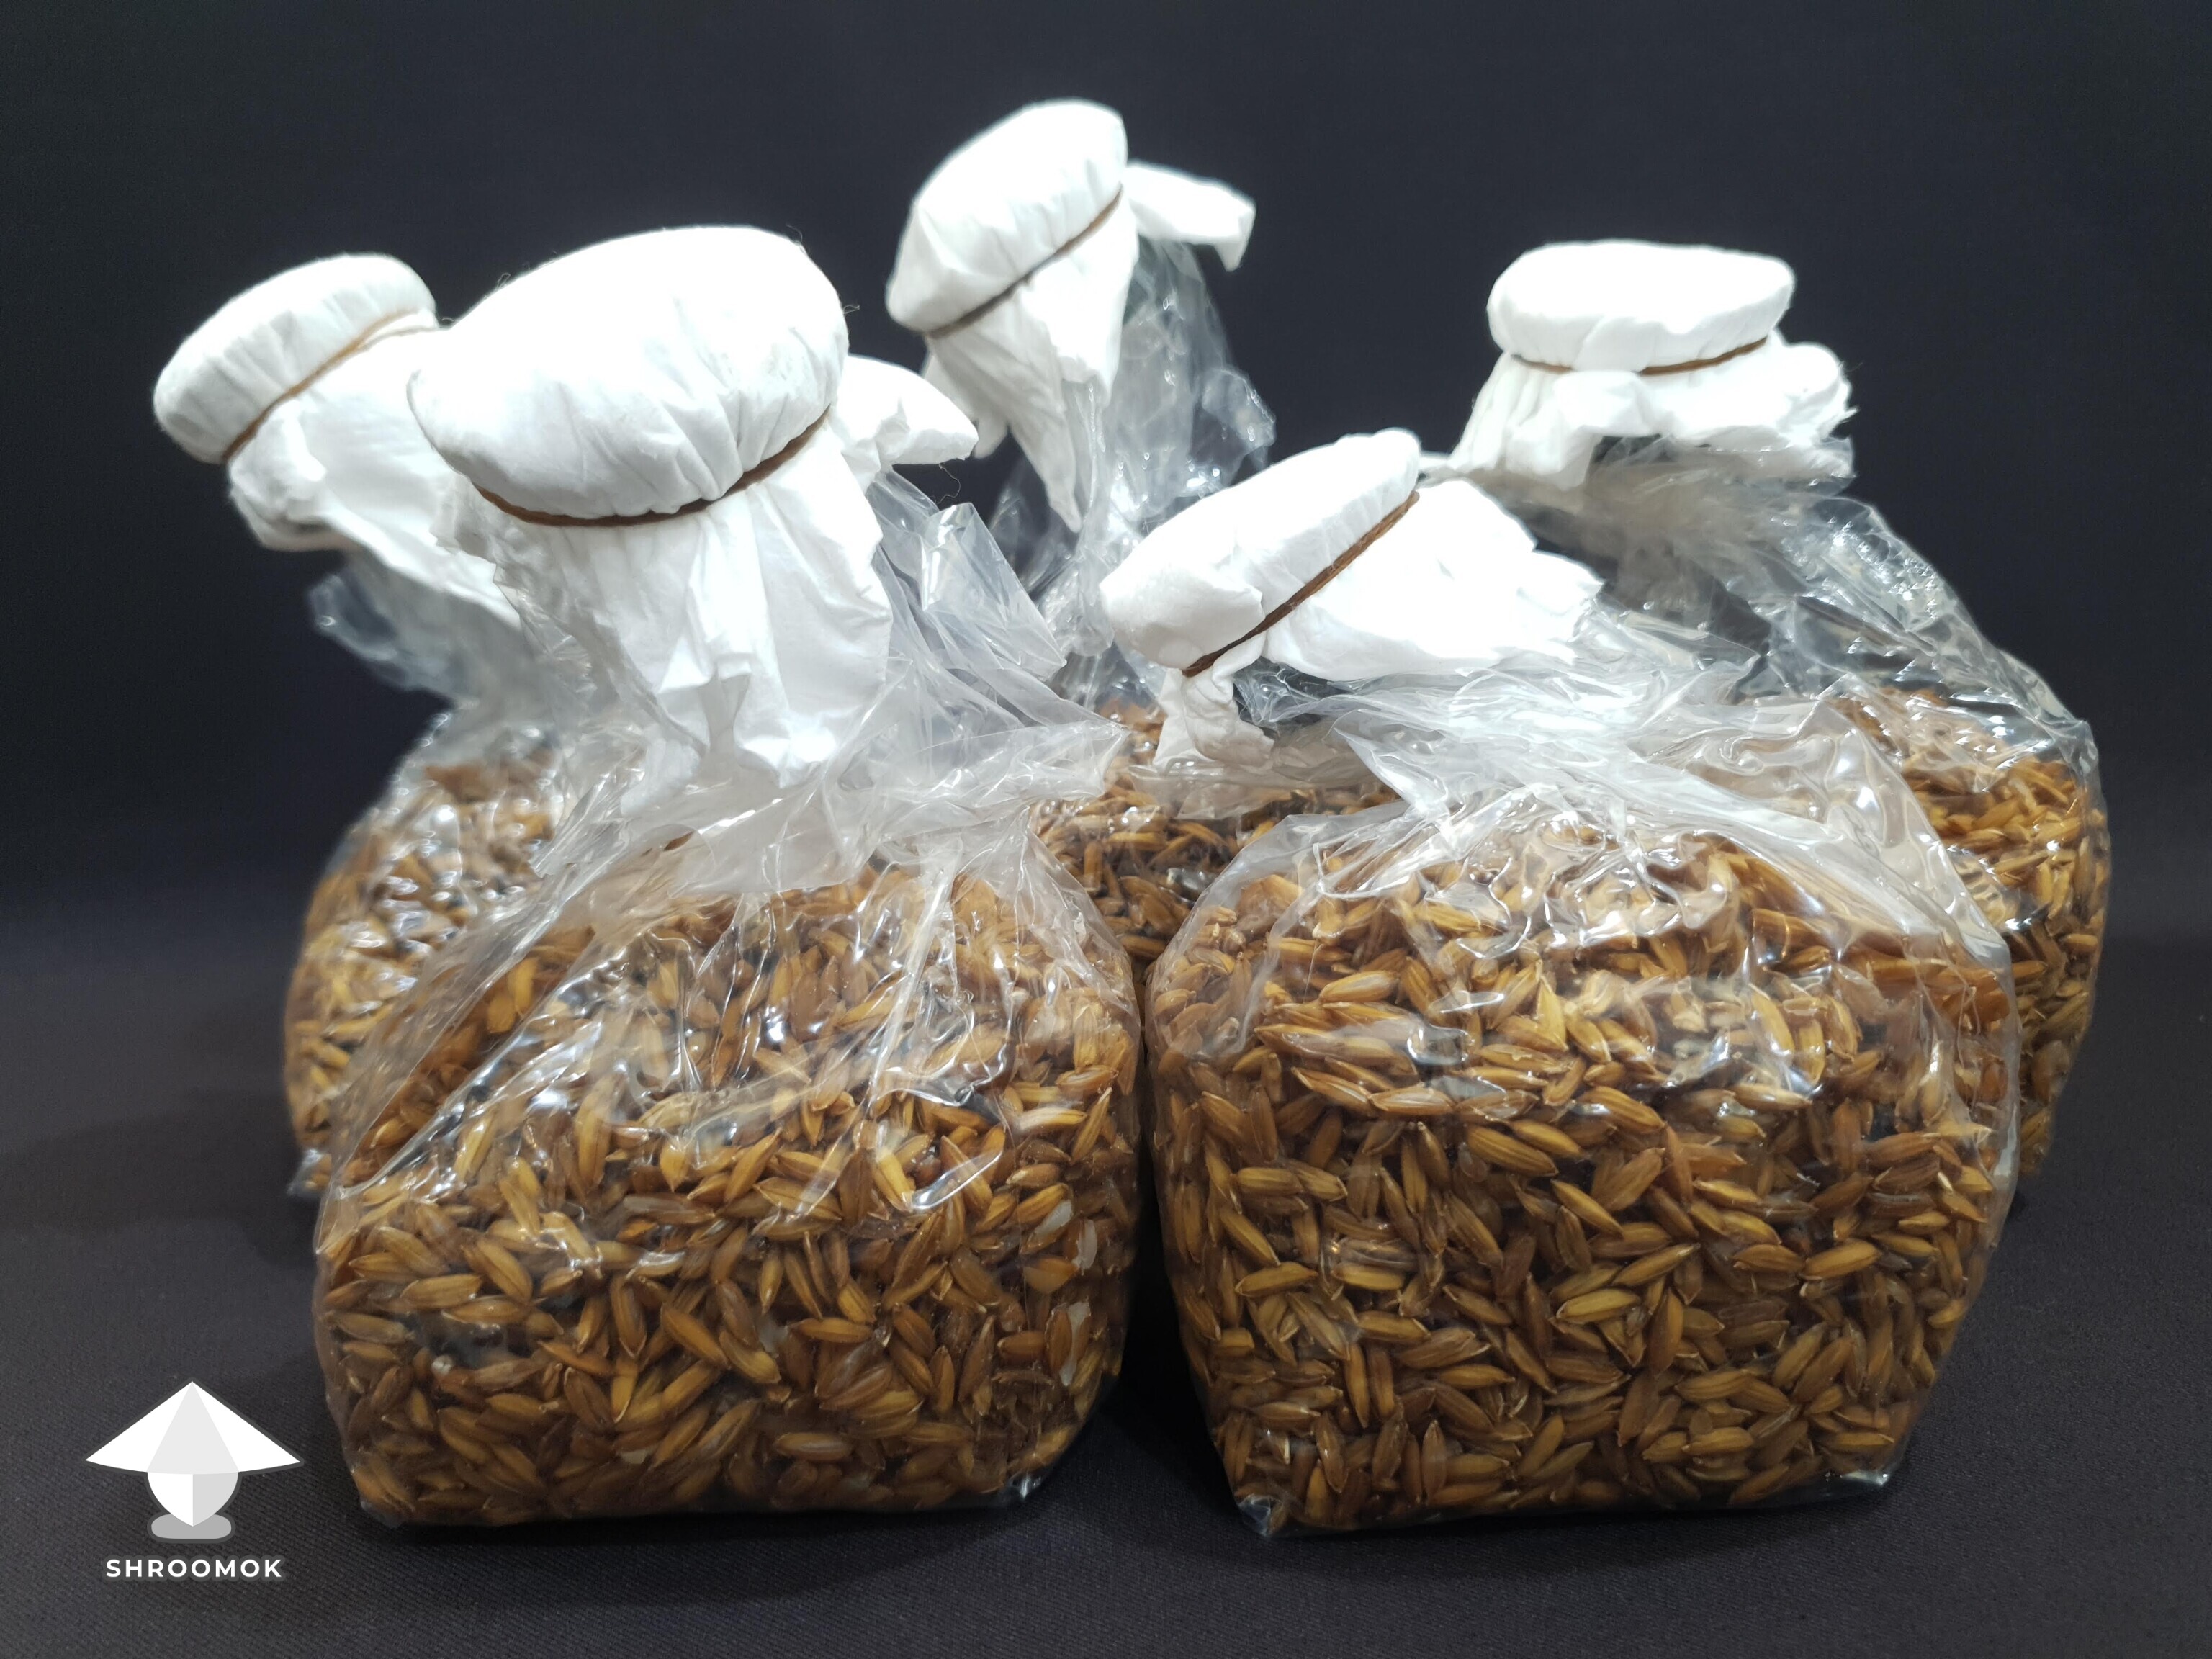
Day 1. Grain and Bags preparation
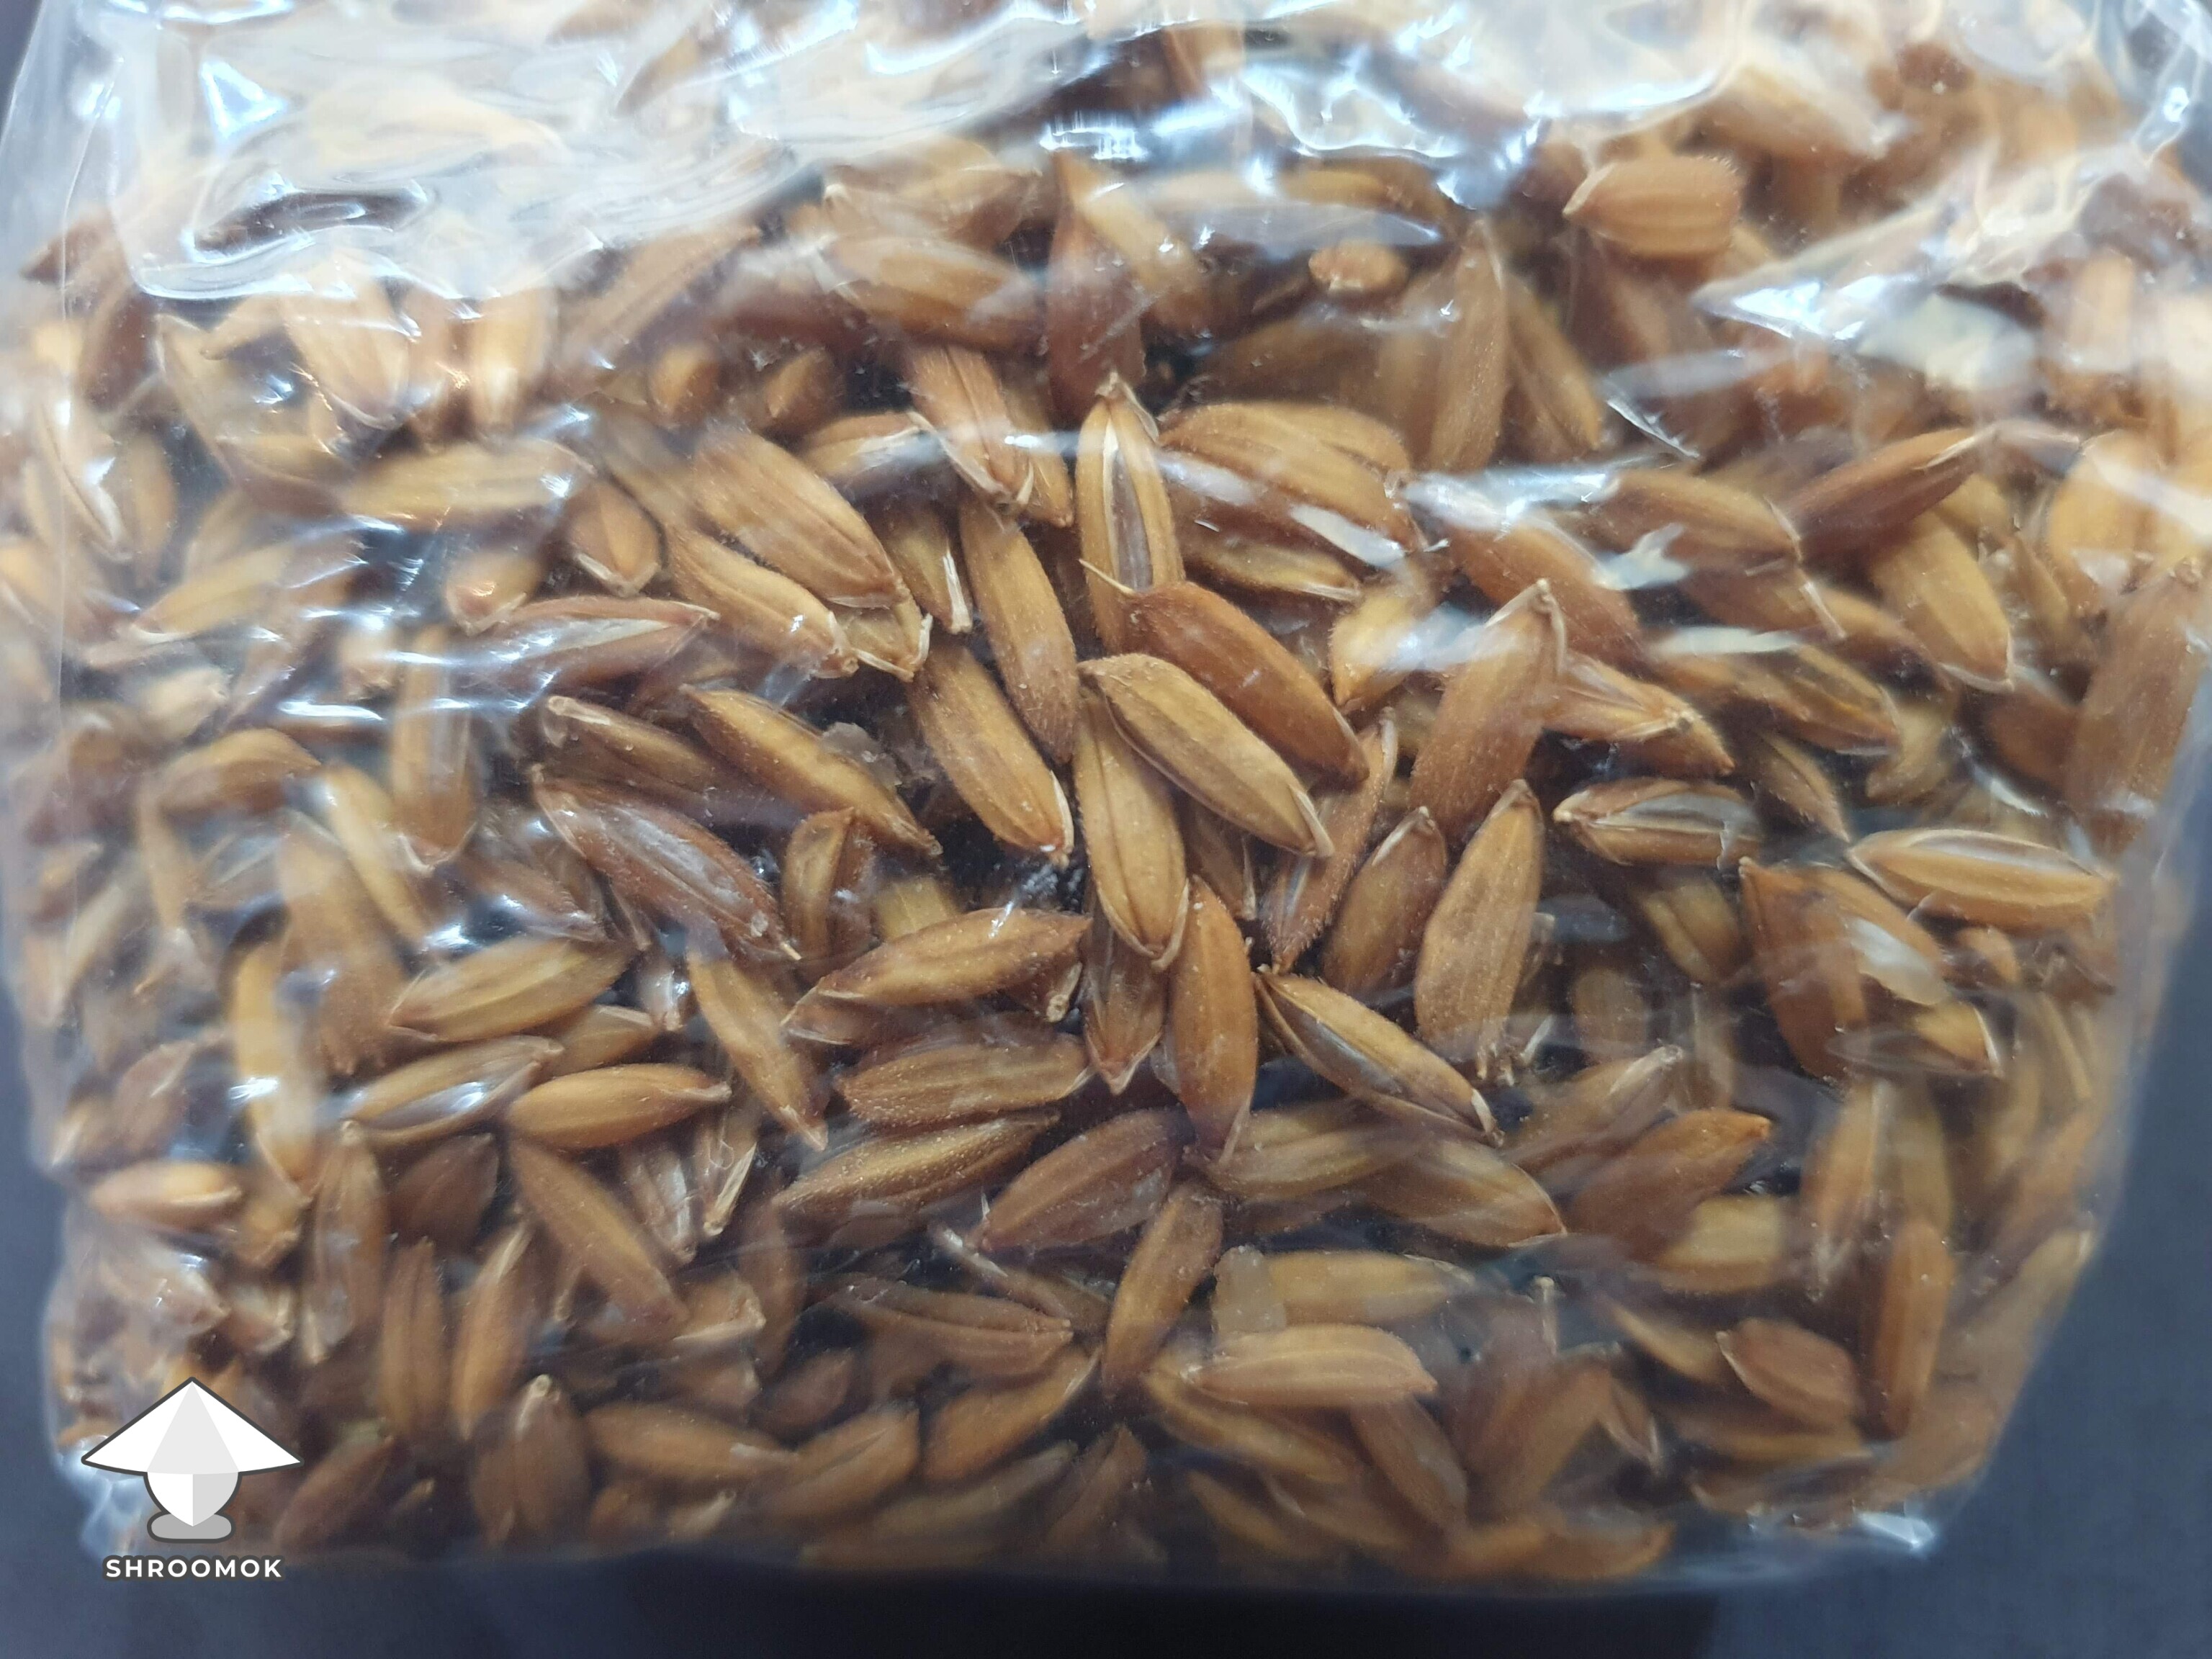
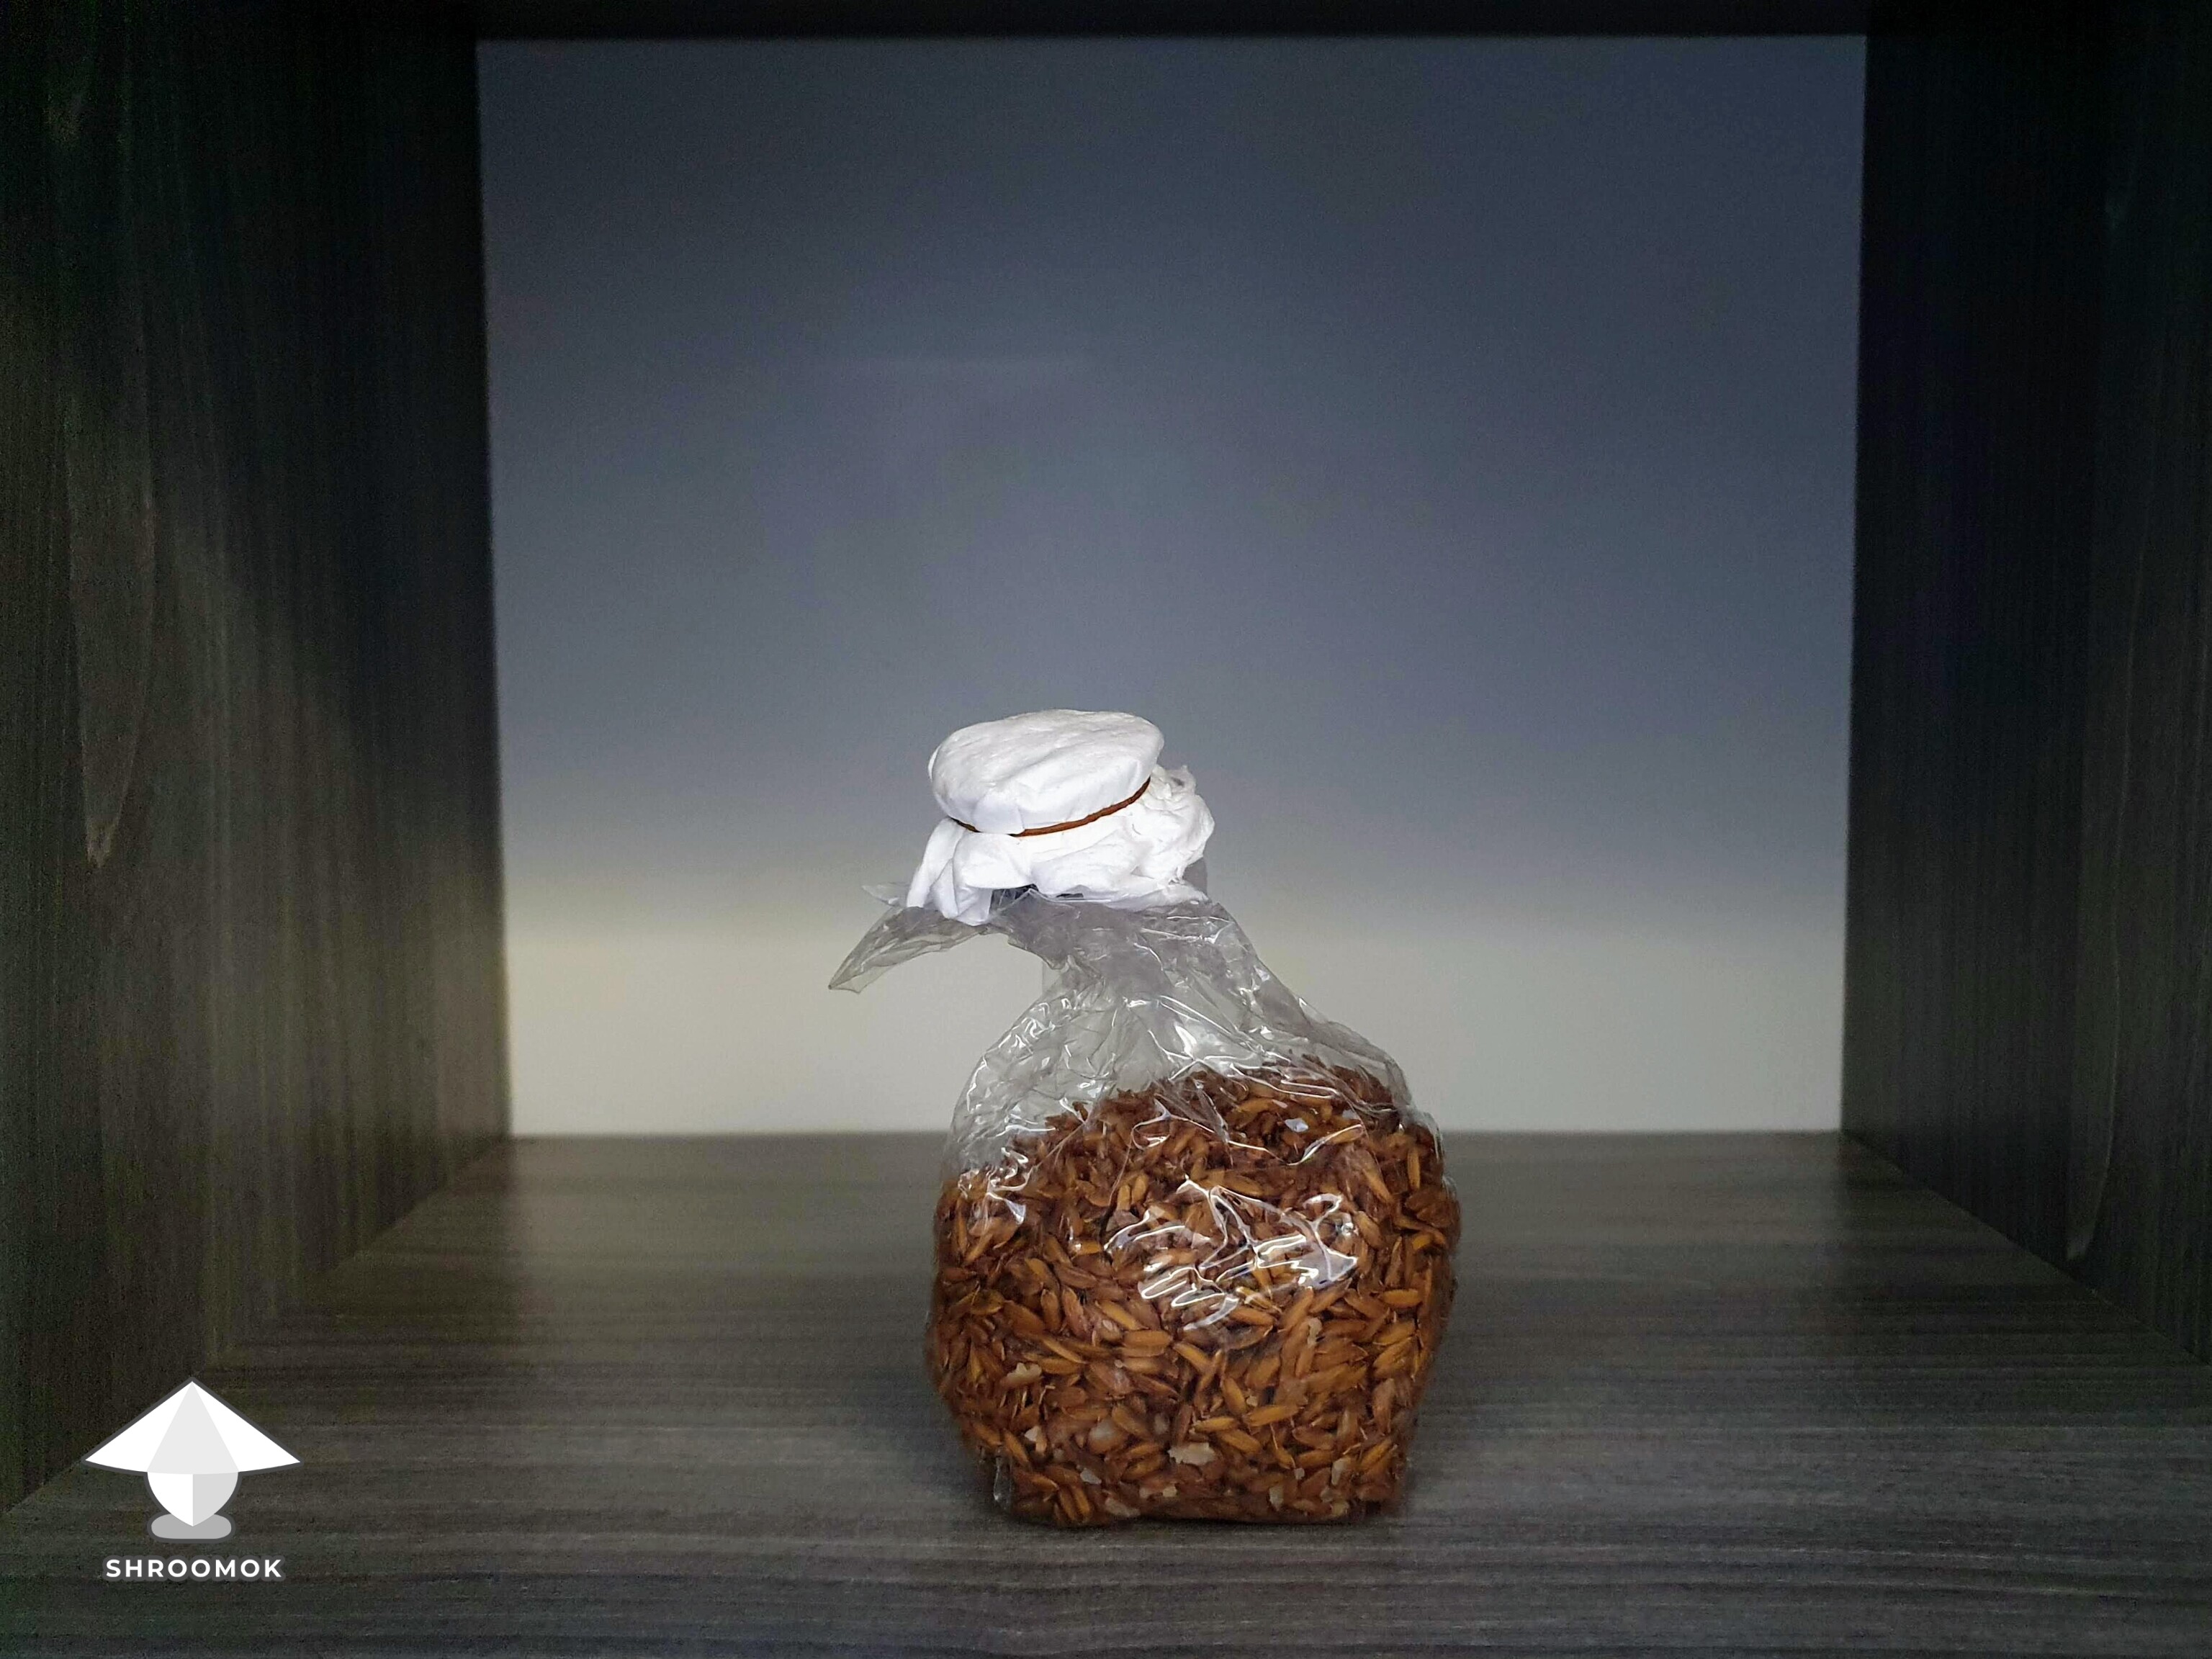
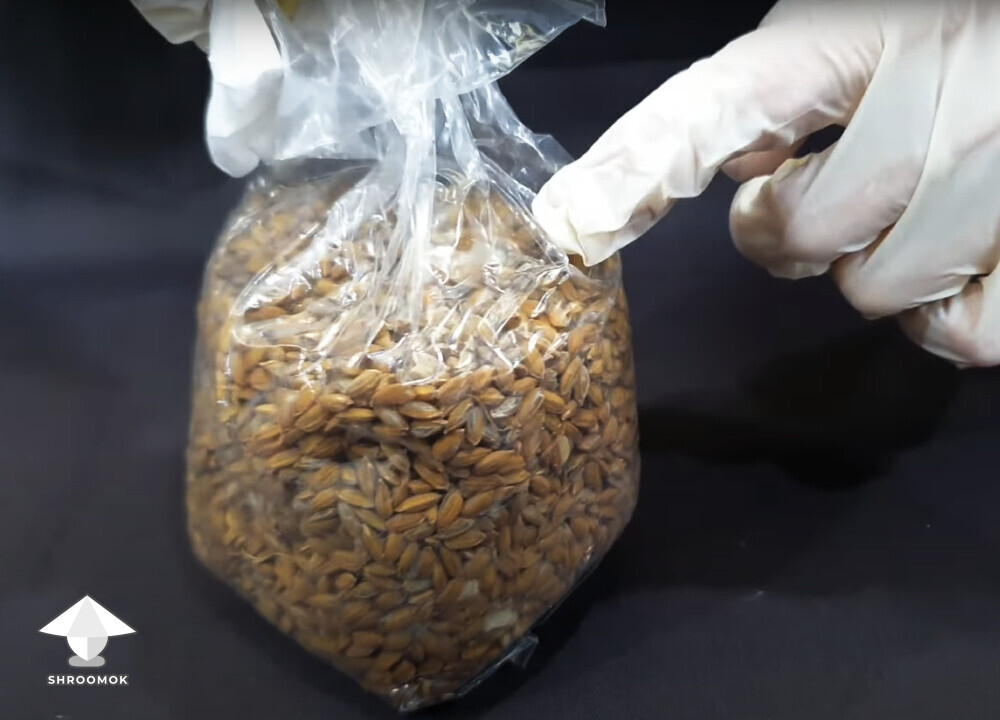
I prepared whole rice bags. To do this I soaked the grain in water overnight and boiled it for 30 minutes. Drain, let it dry for another 30 minutes. Then, I filled autoclavable bags and made air filters for better steam sterilization and gas exchange during the colonization period.
This is actually how whole, non-peeled rice in husks looks. Nothing else is added to the grain substrate.

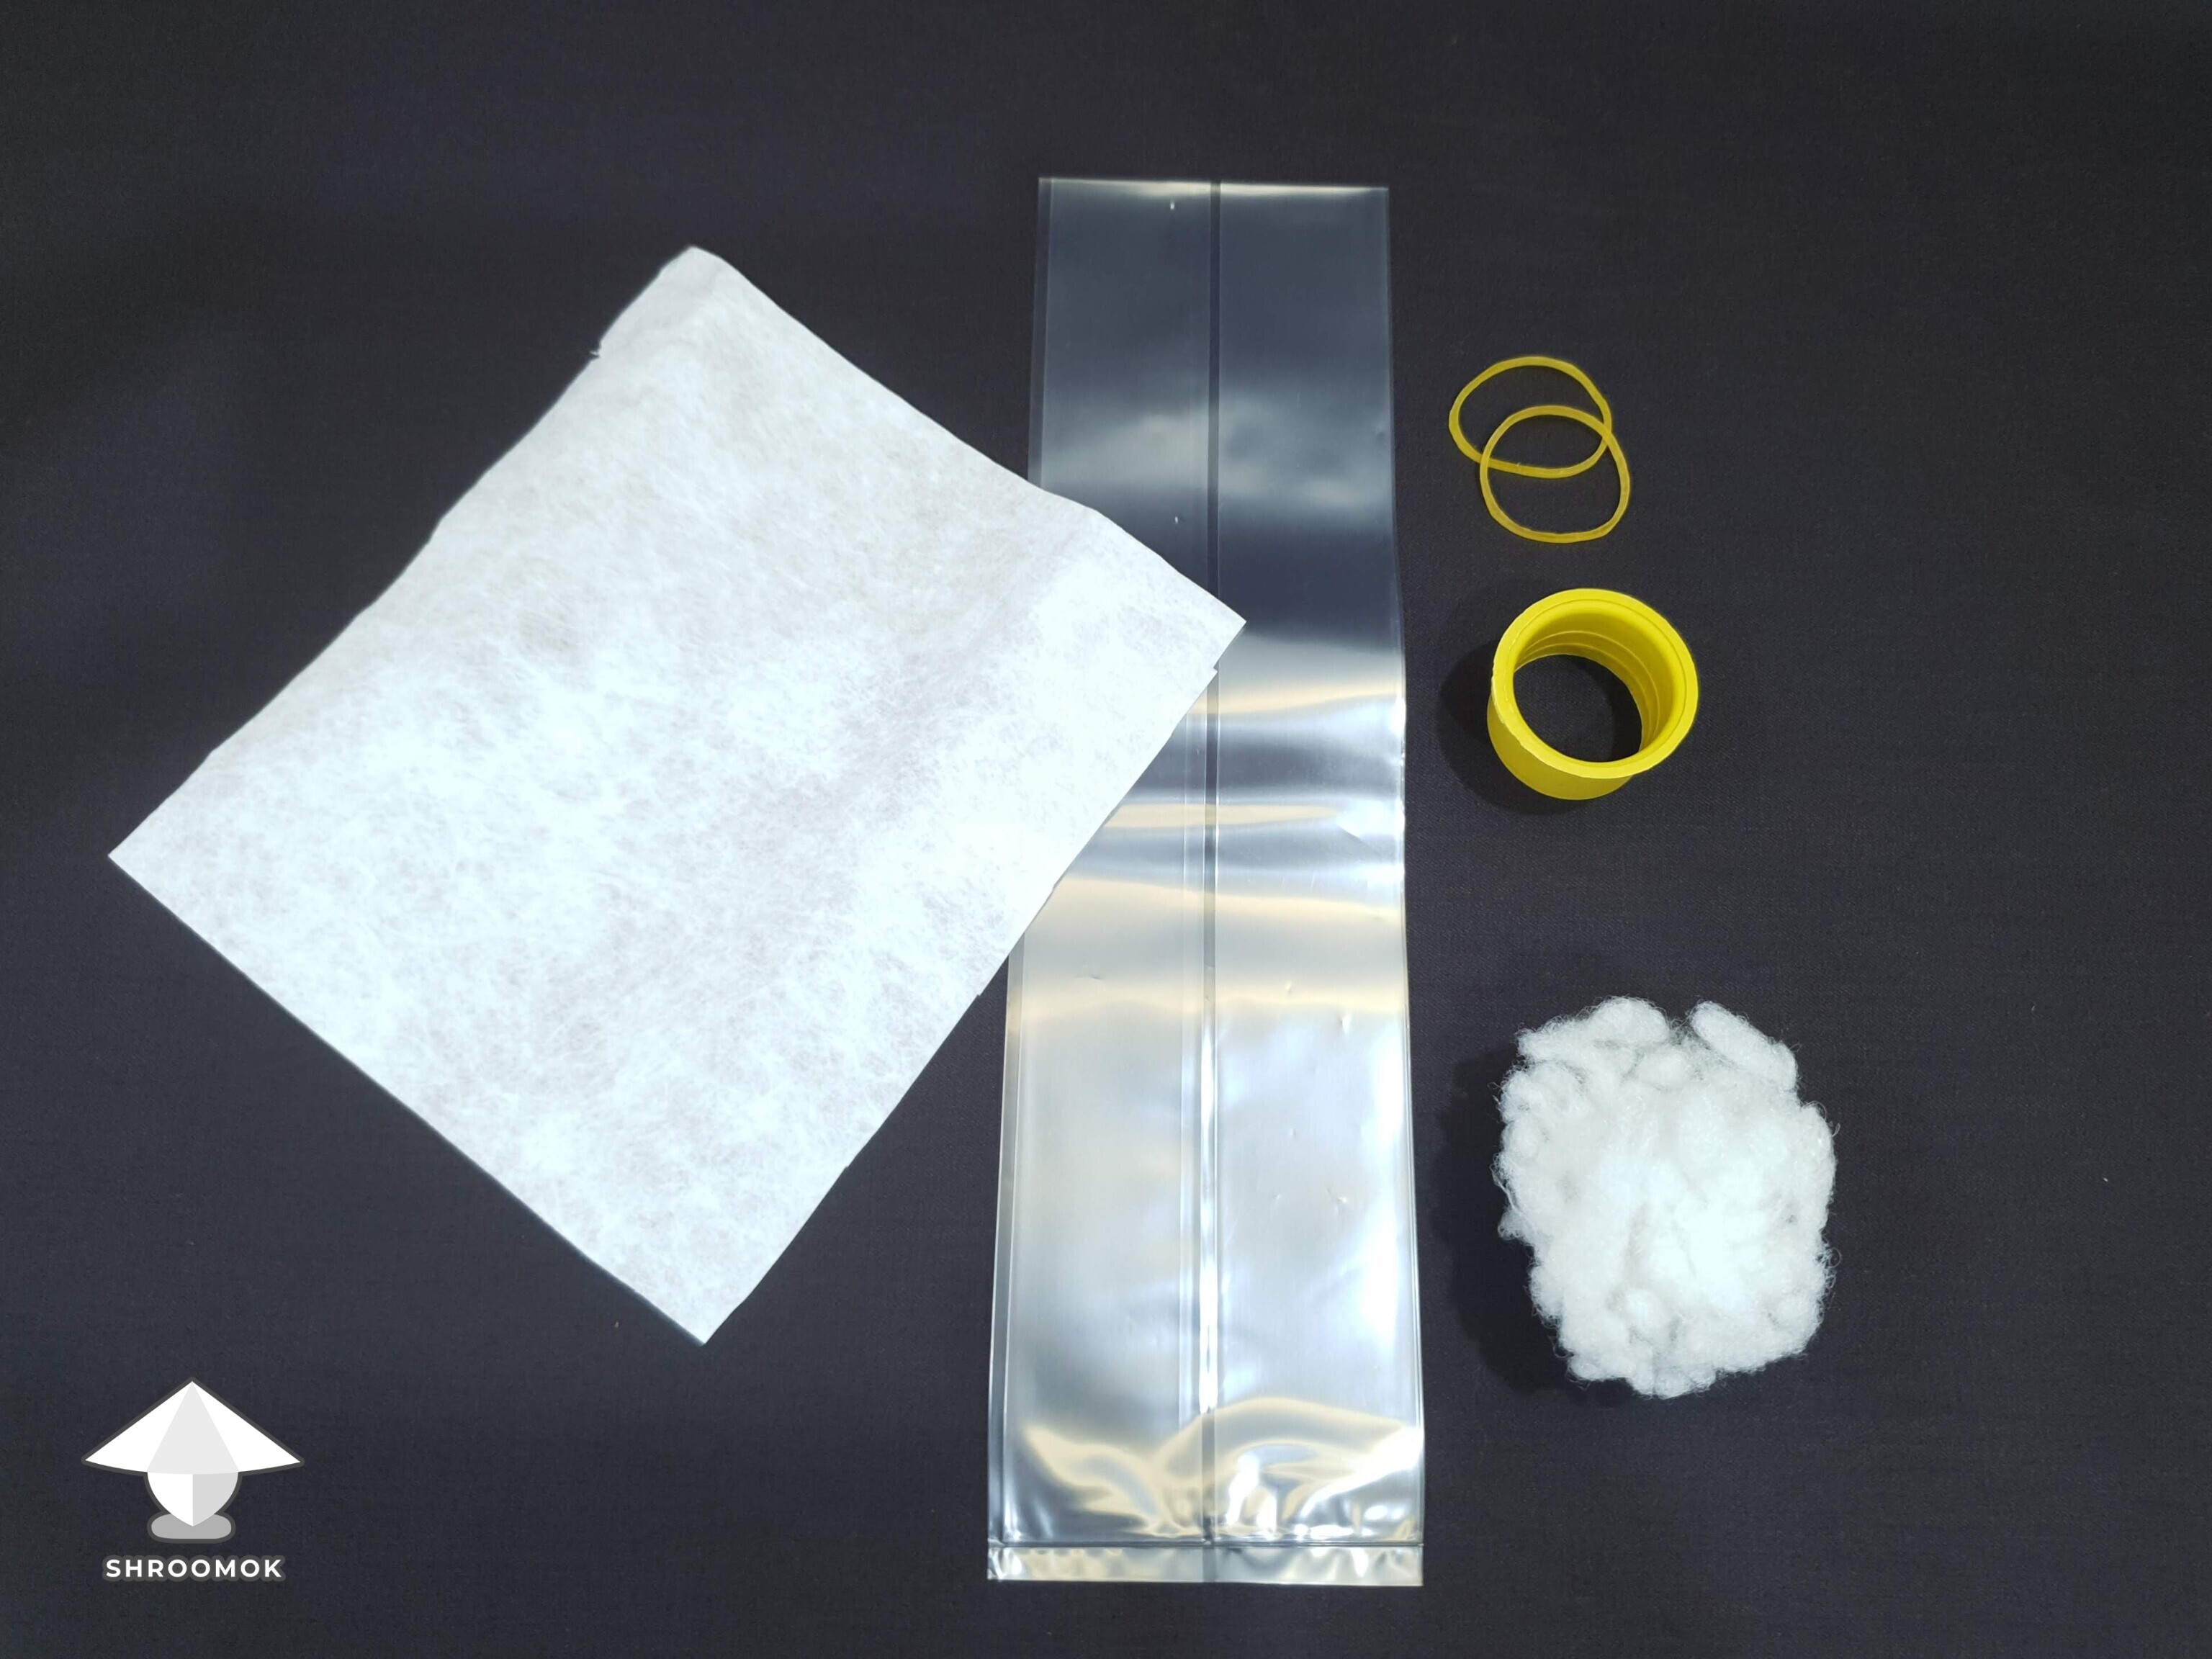
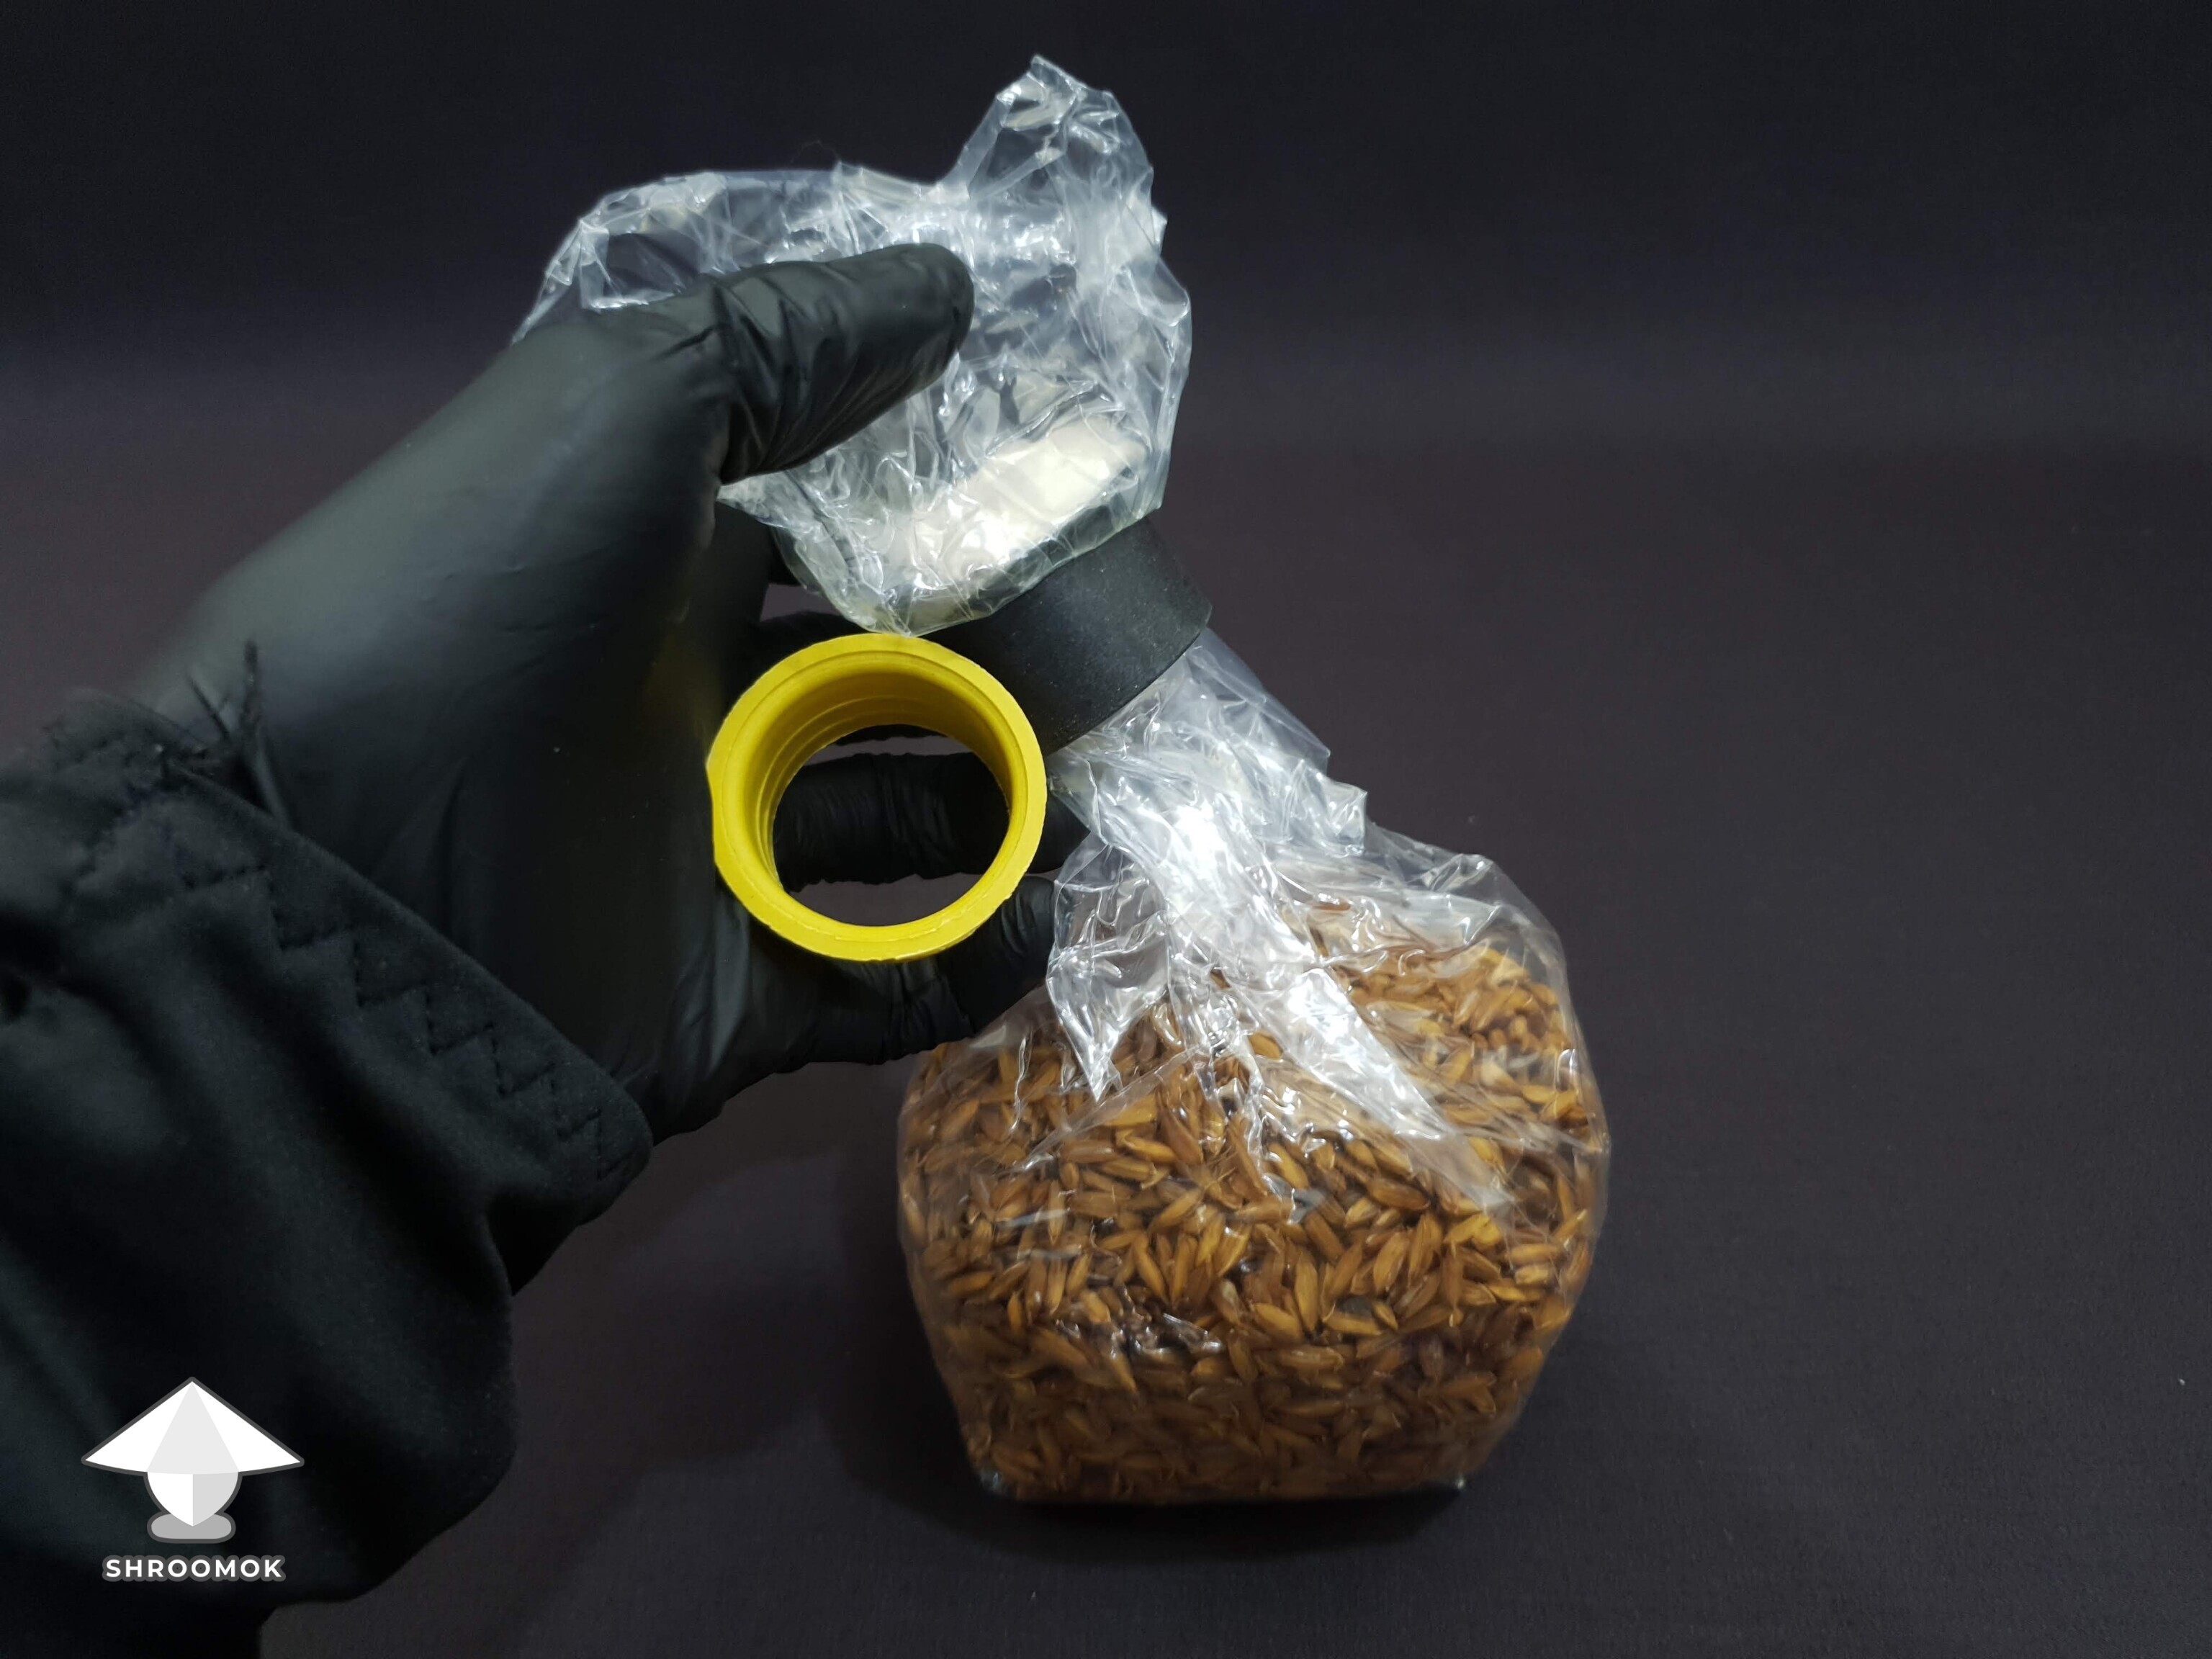
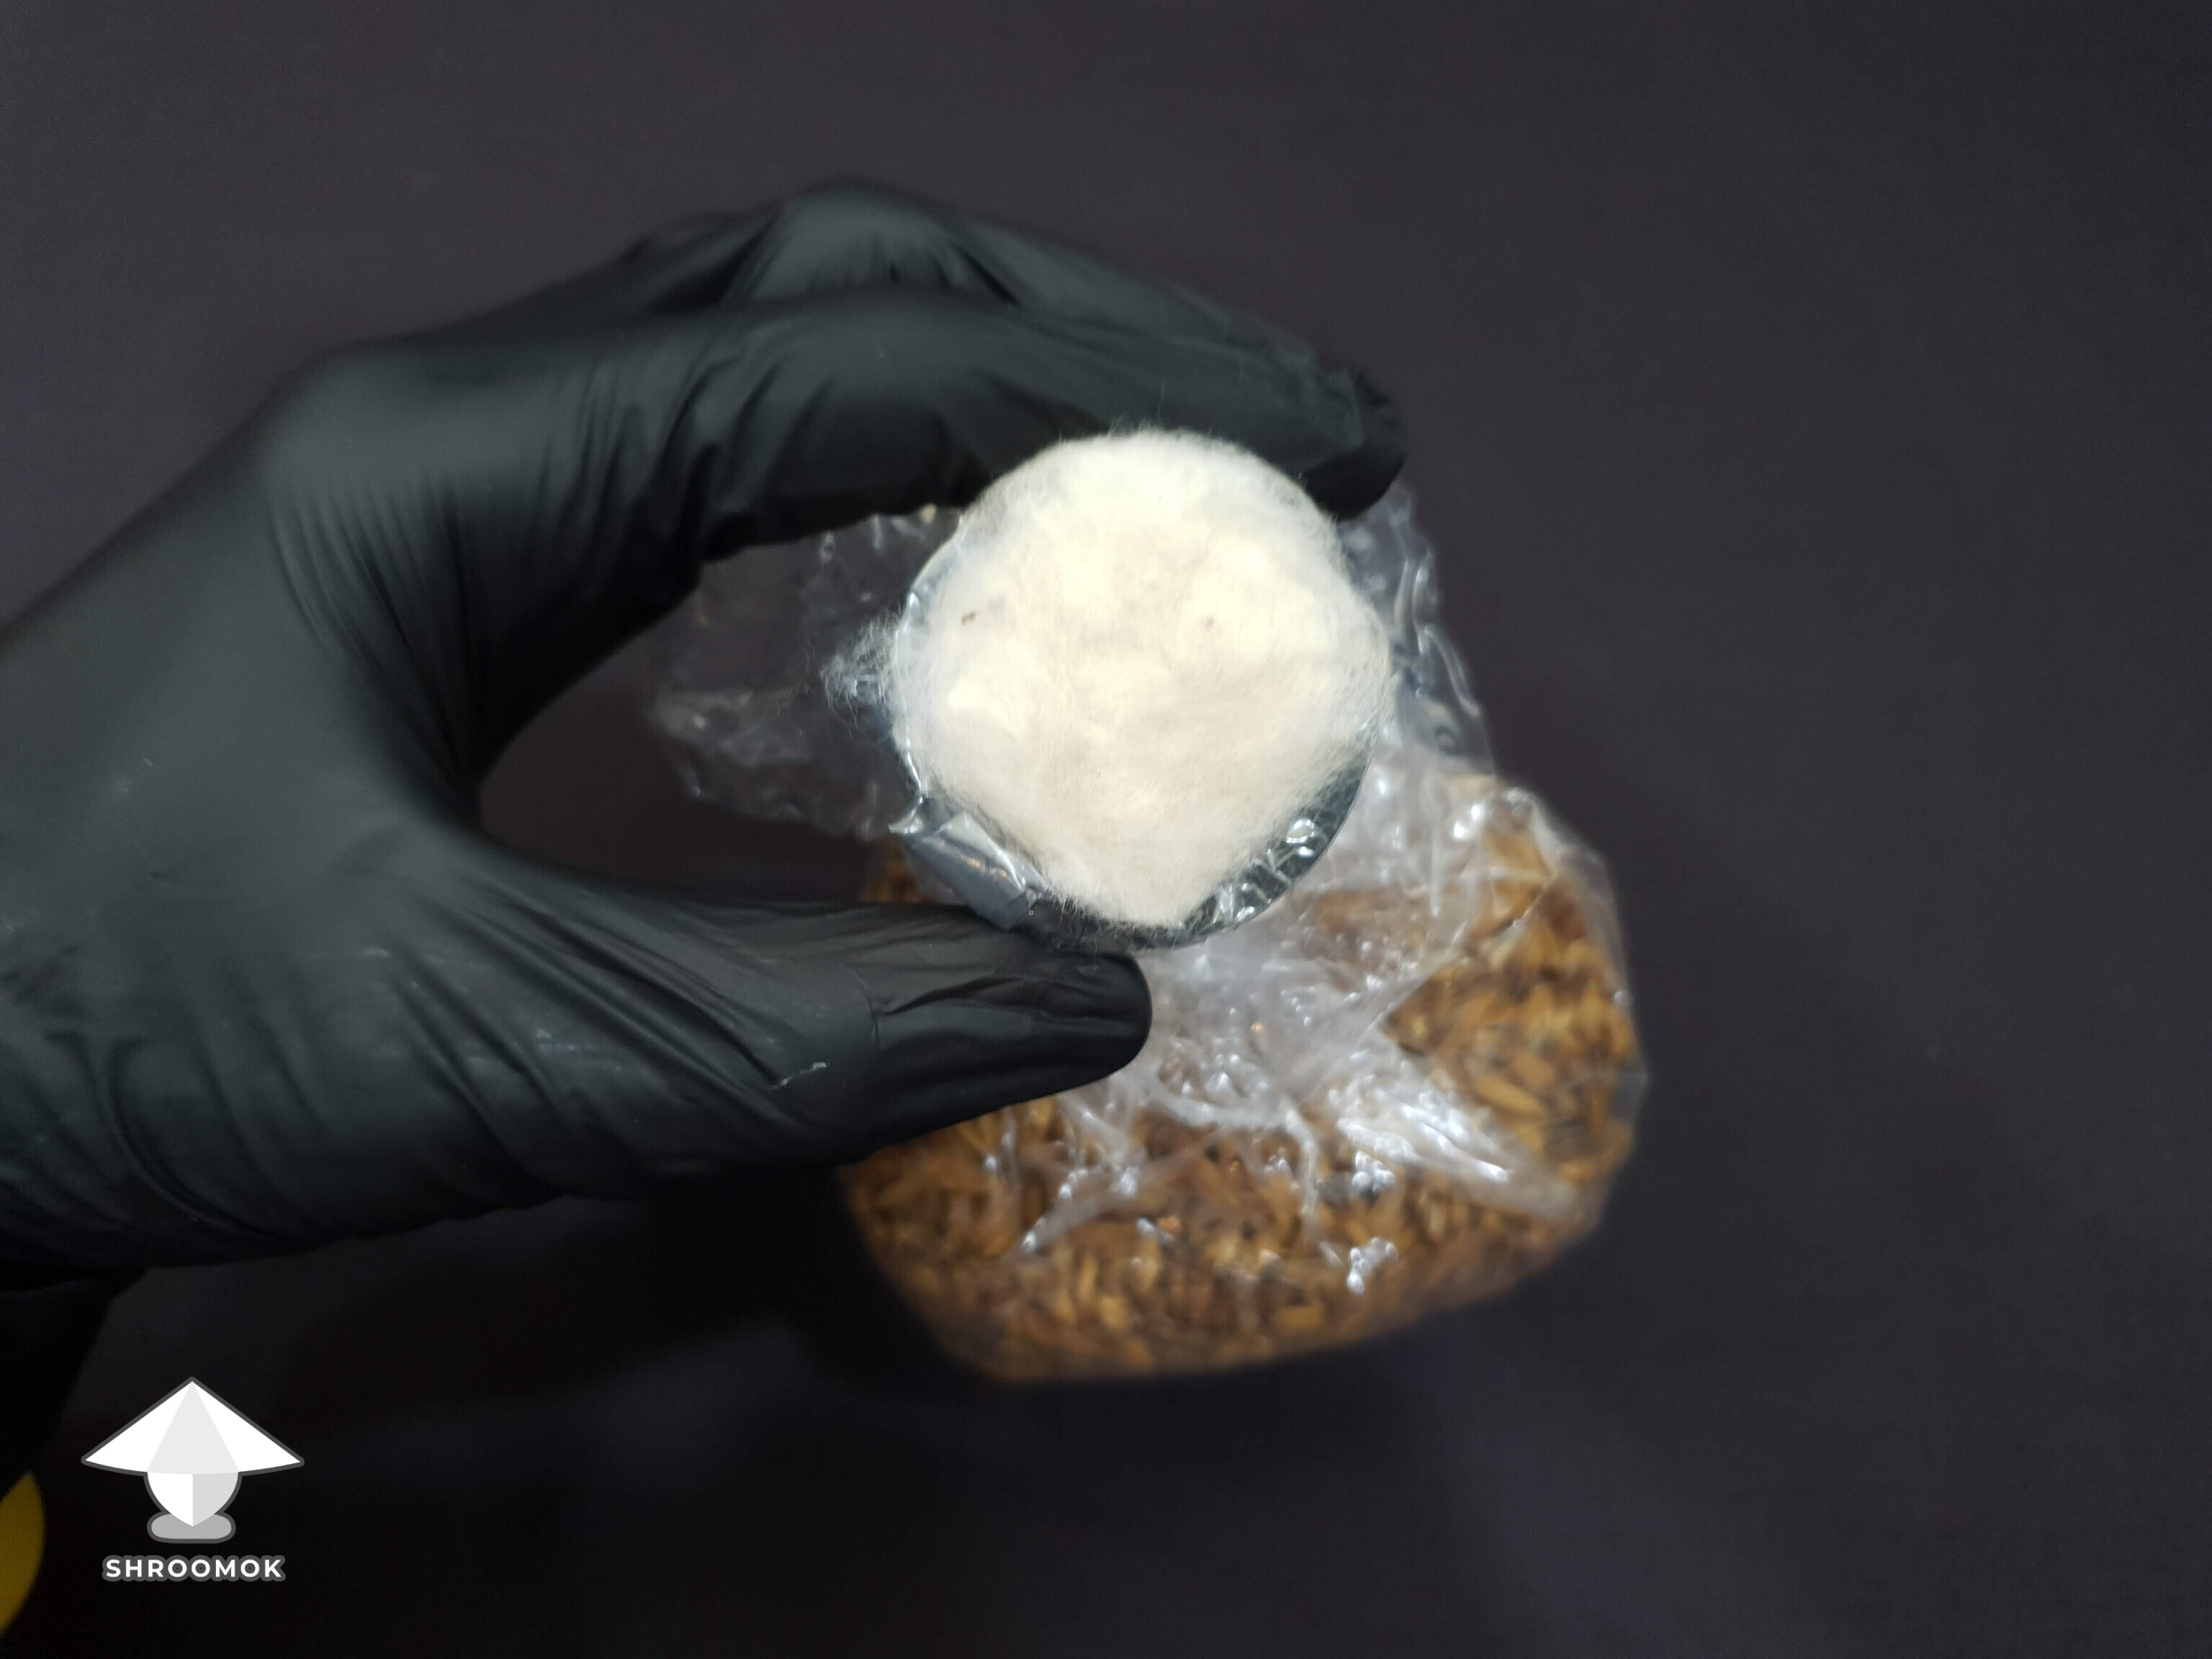
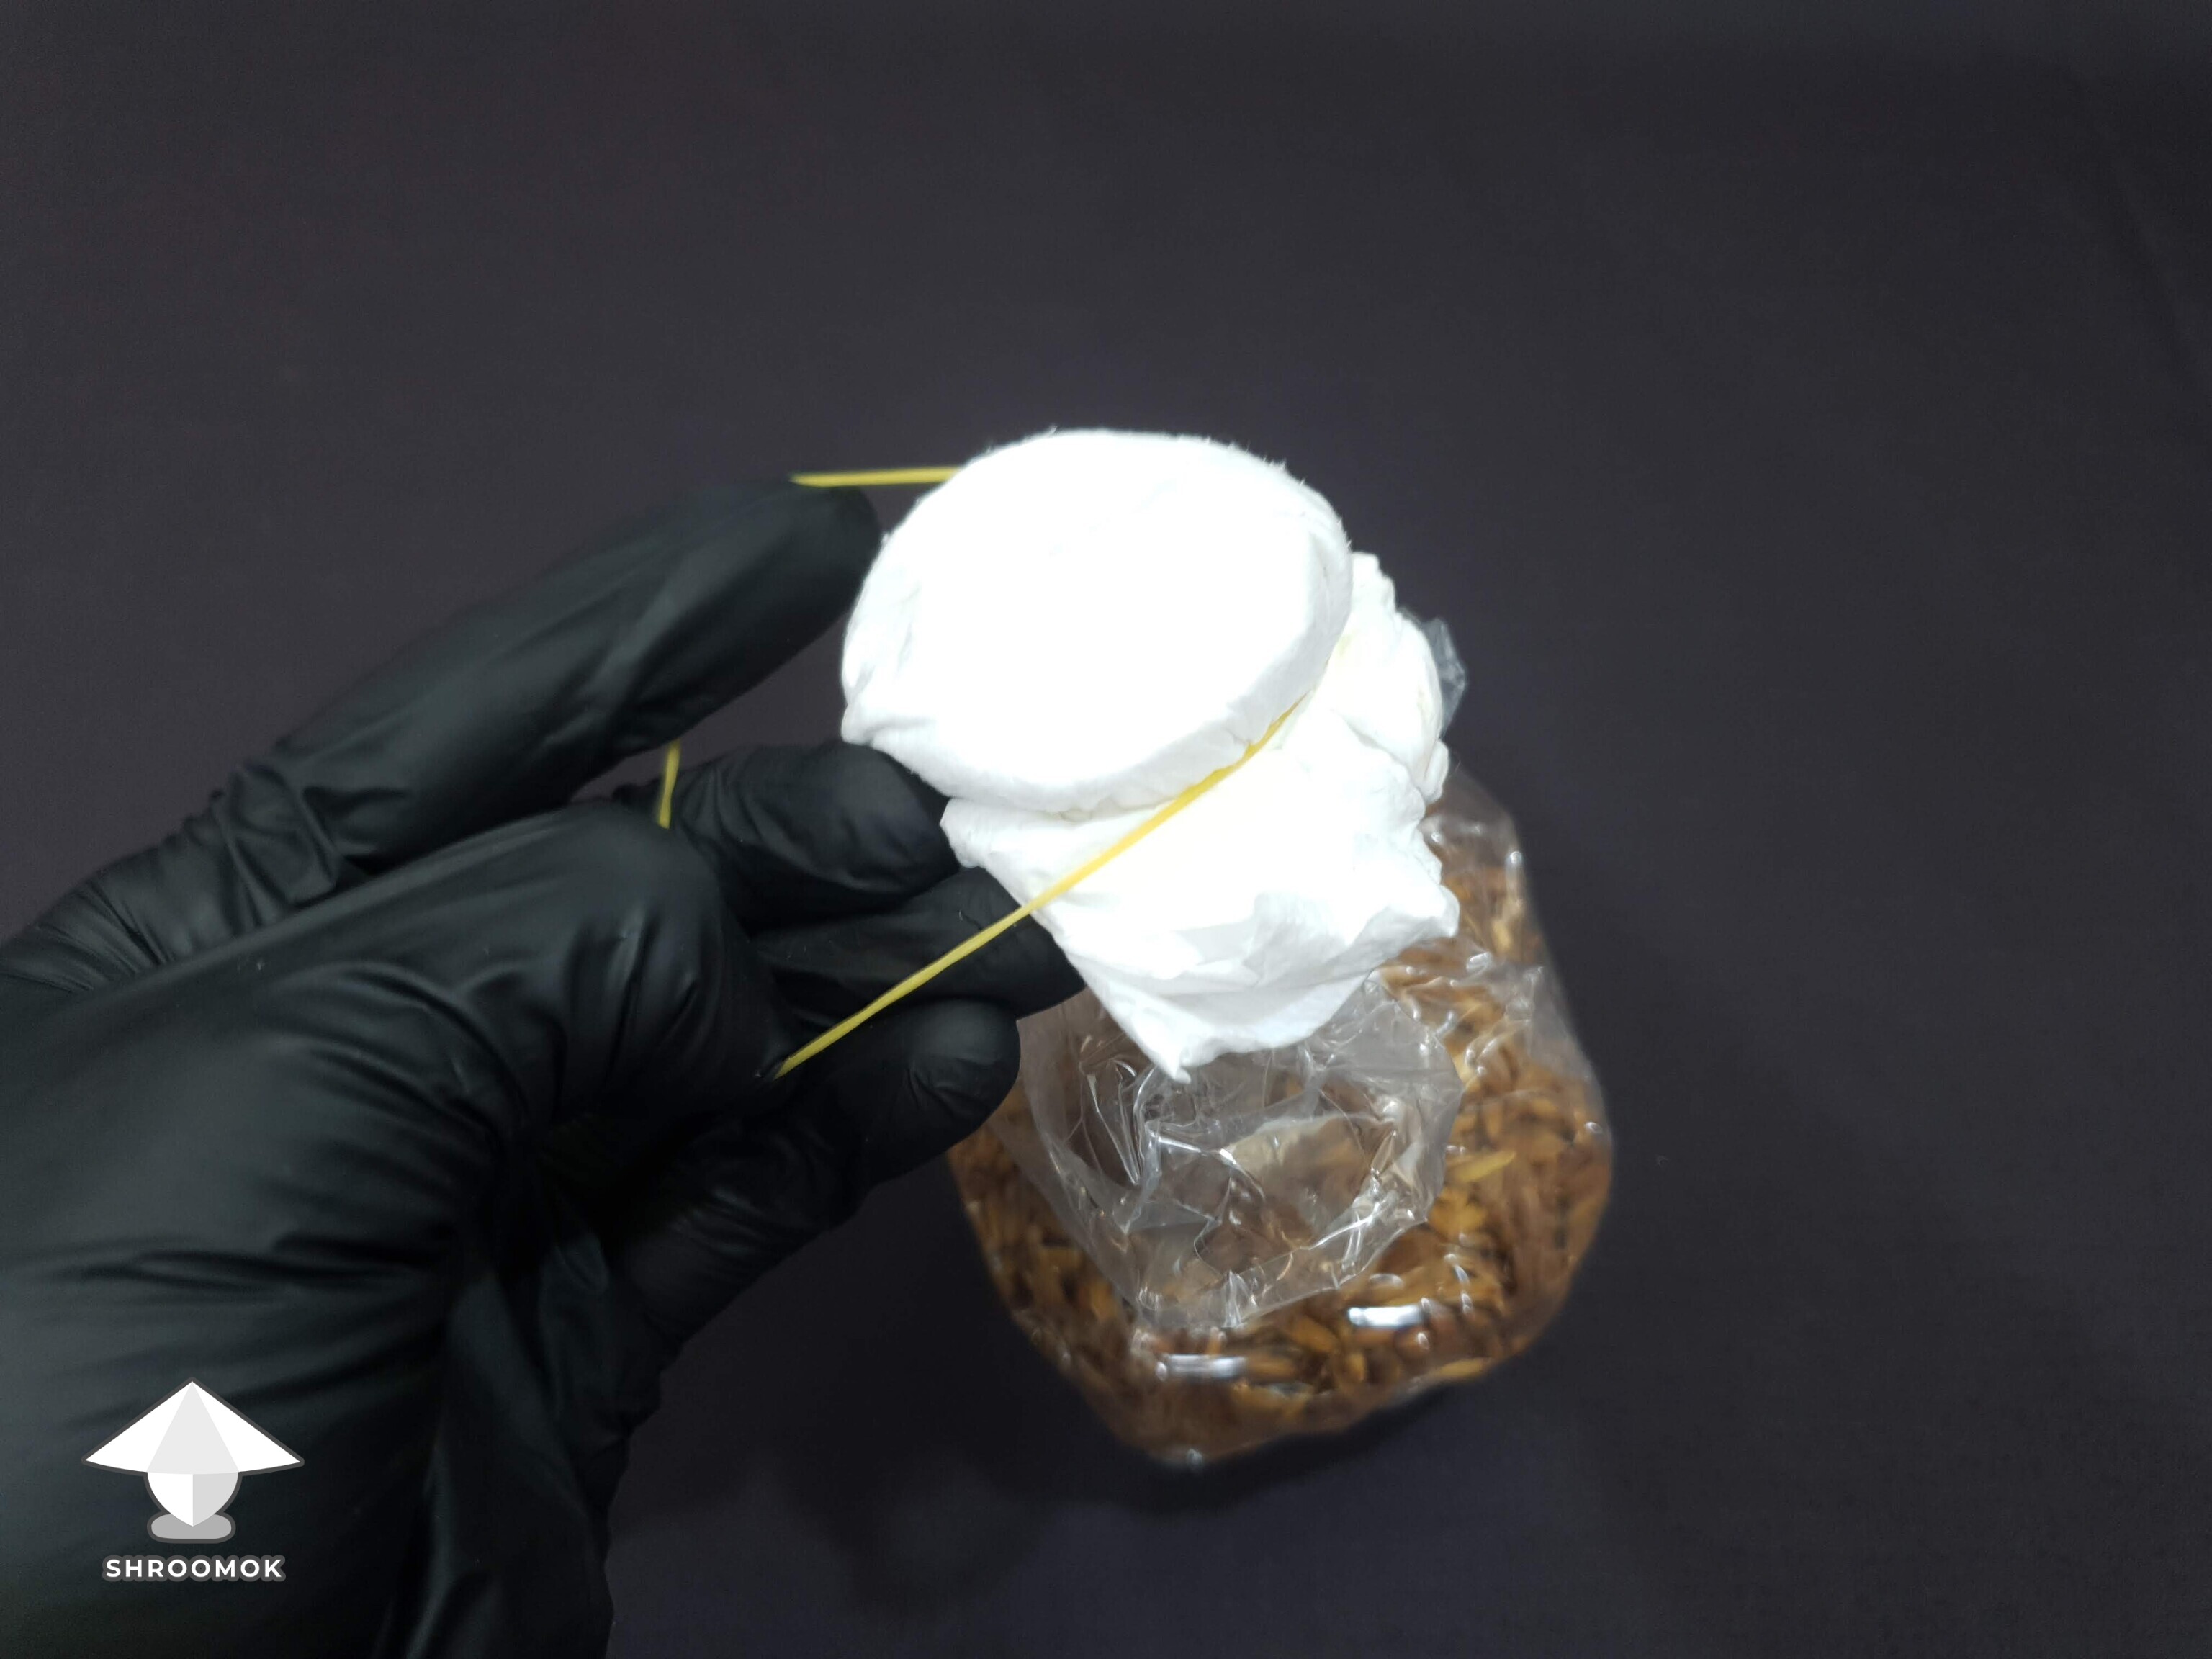
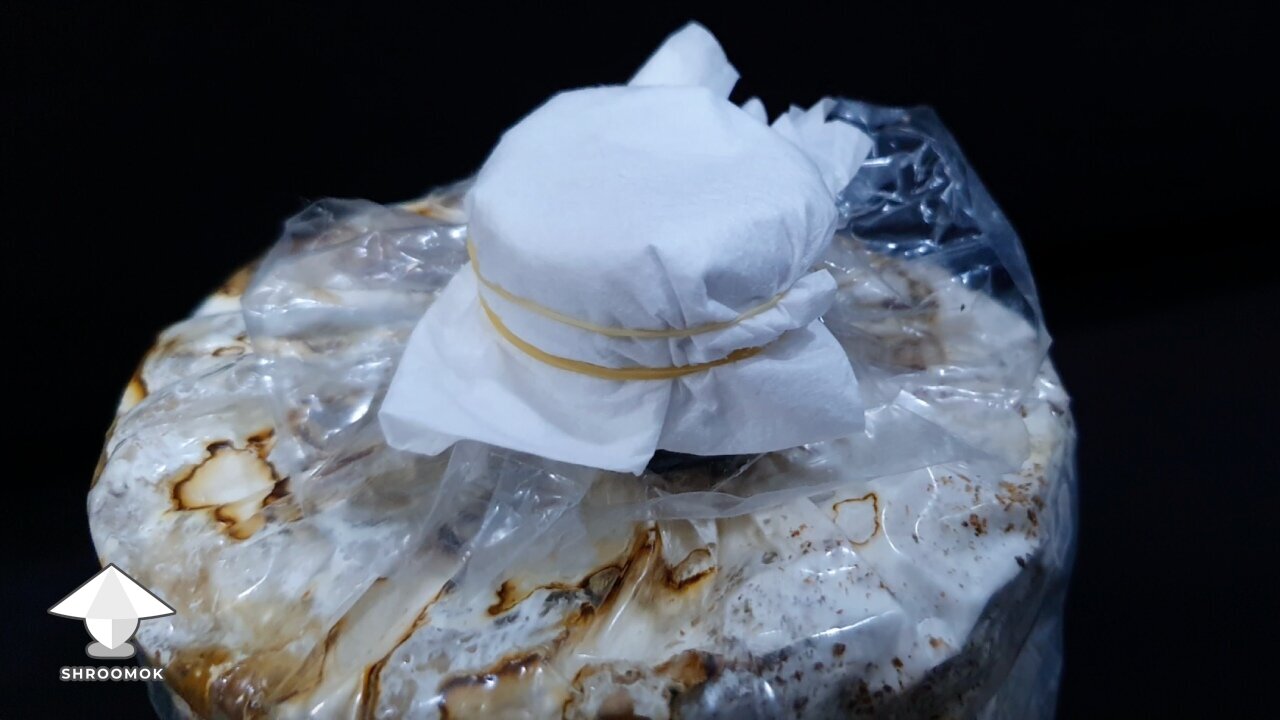
To make these bags, I used an autoclavable bag. For the air filter needed for gas exchange (and better steam sterilization), I used a plastic autoclavable cylinder plug, cotton or polyfill fiber, a protective synthetic filter paper-cloth cover, and rubber bands.

I fill the bag with grain (up to 1/3 of the volume) and wear cylinder plug on a bag.

Then I fill the plug with a synthetic fiber like polyfill (or cotton).

After that, cover it with filter cloth (folded twice to create 4 layers) and secure it tightly with a rubber band on top.

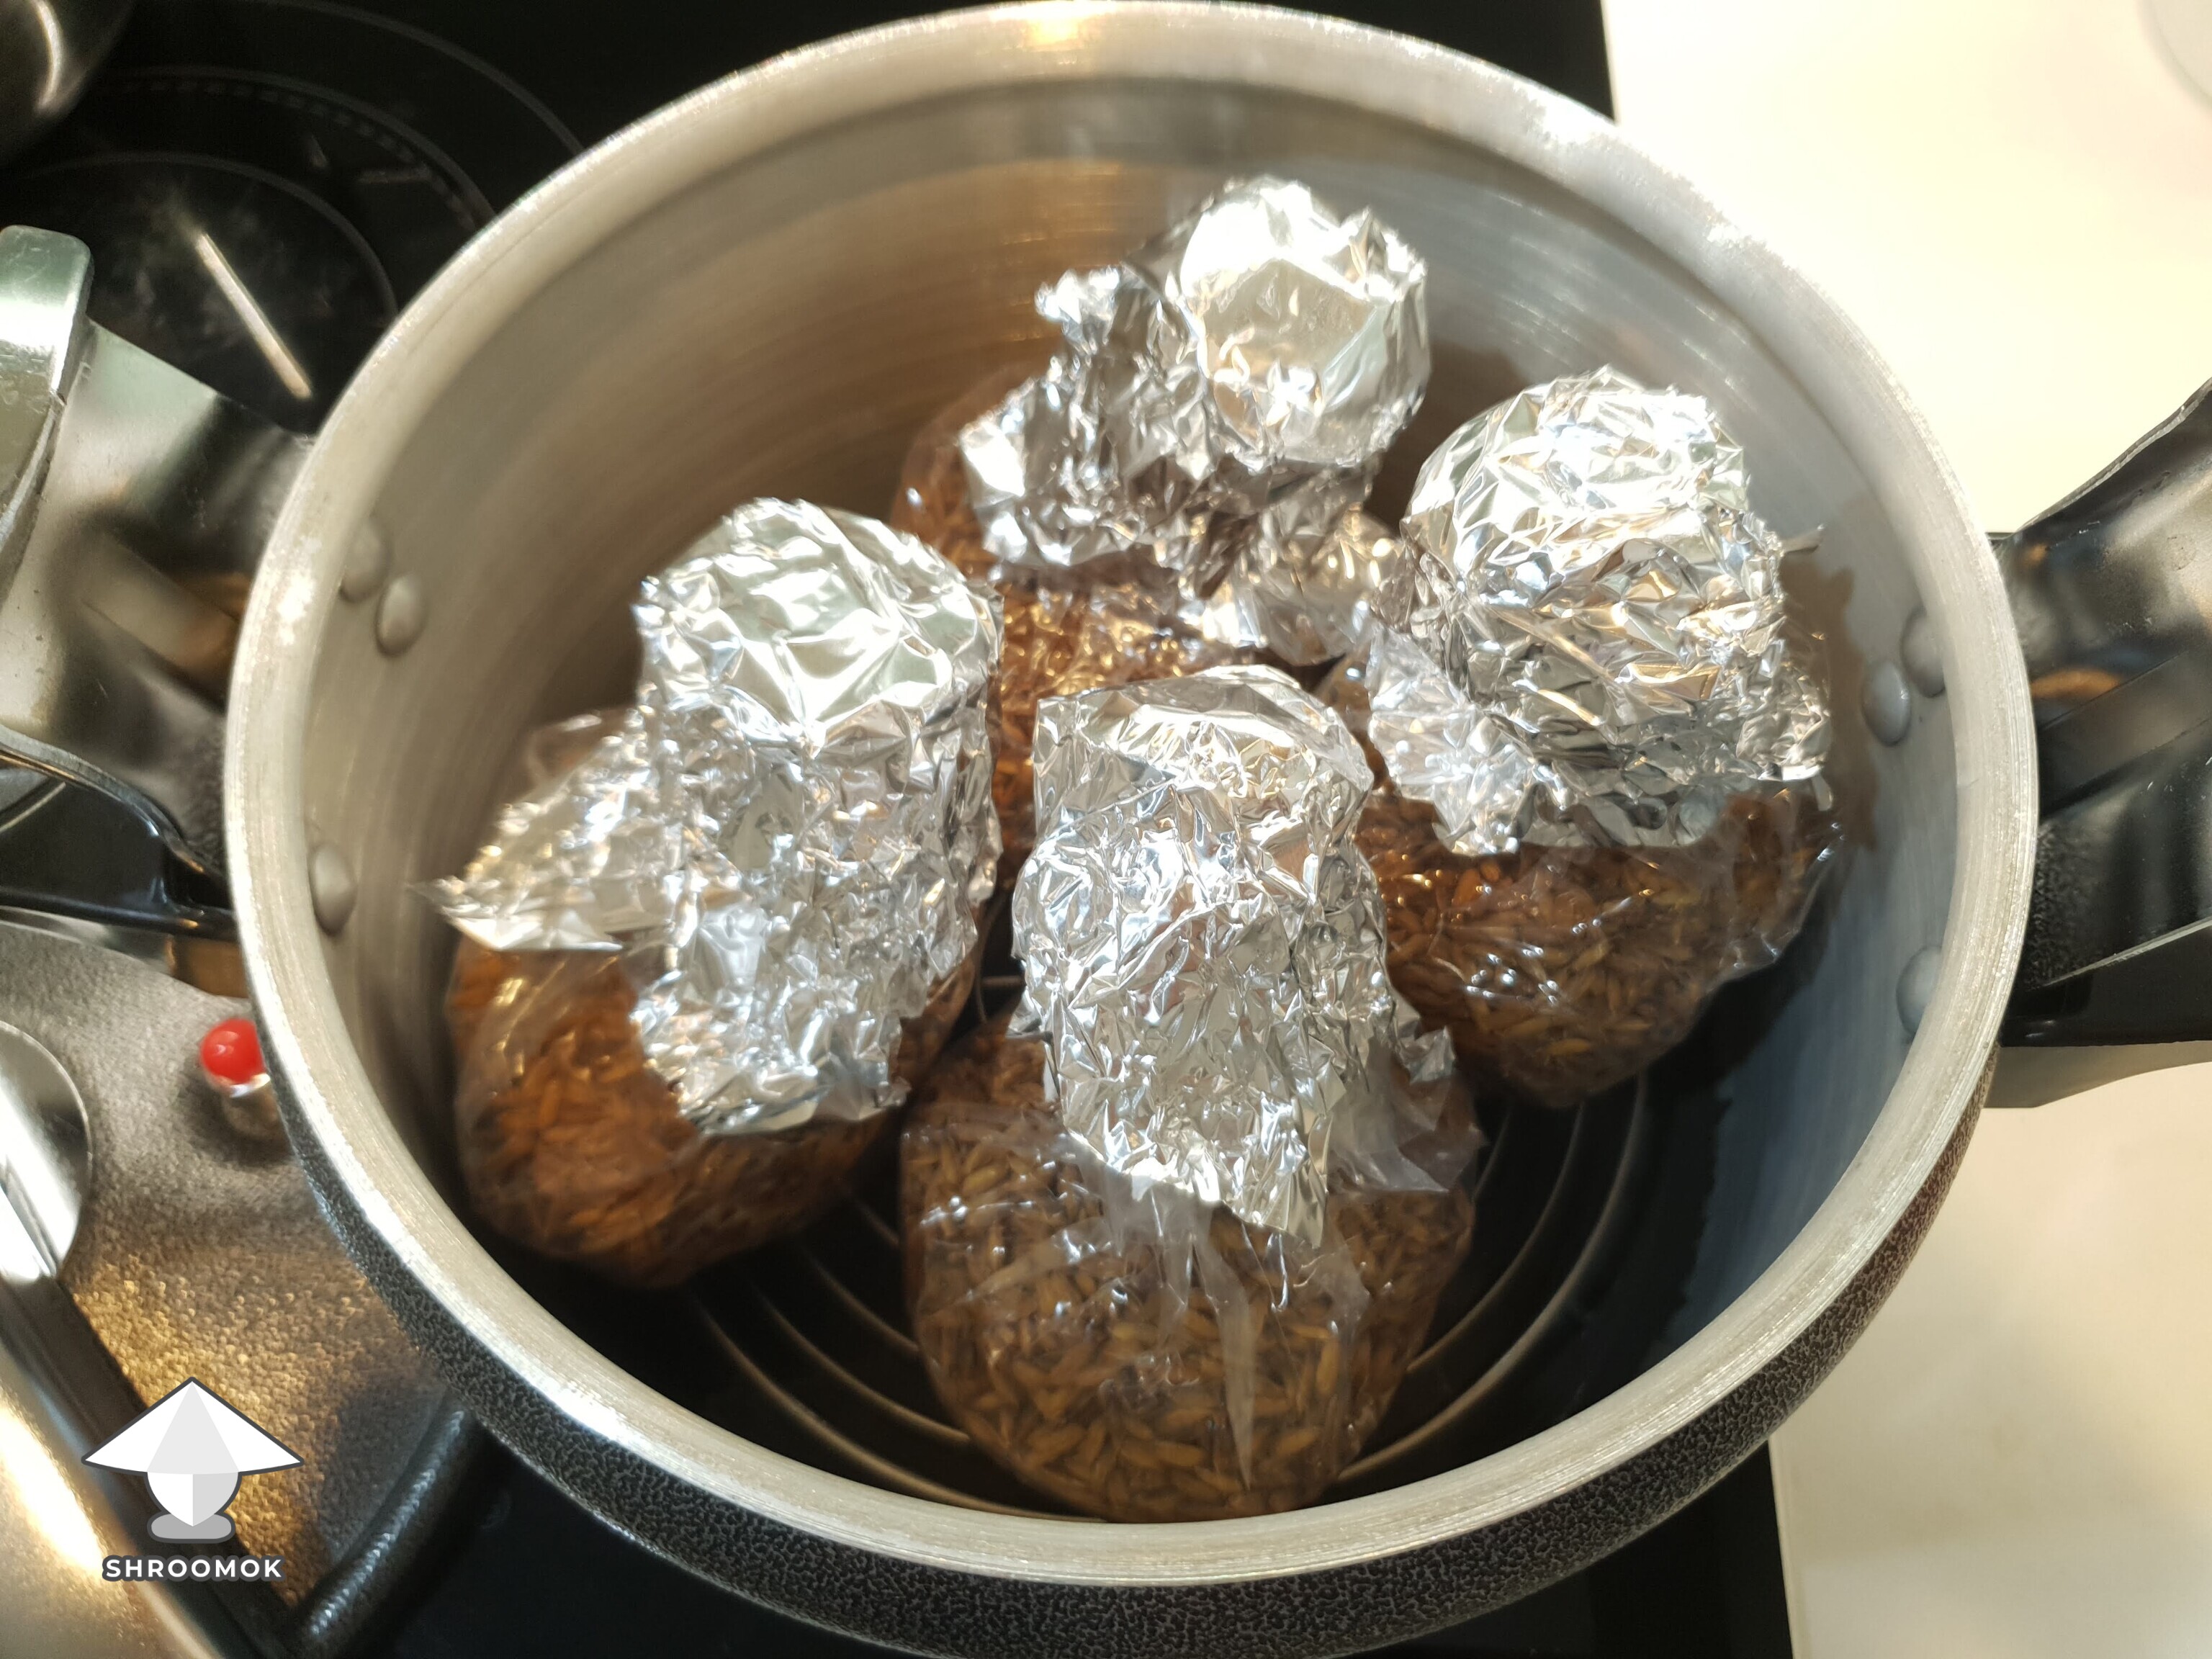
For sterilization in a pressure cooker, I cover the filters with aluminum foil to keep them dry.

Attachments

Day 2. Grain Bags Sterilization
I sterilized the bags in a pressure cooker for 2.5 hours and let them sit until they cooled down to room temperature. The next day, my bags were ready for inoculation. Actually, I inoculated them 3 days later after sterilization, and it's totally fine!
Pro tip: You can use sterilized grain within 3-4 weeks of storage.

Attachments
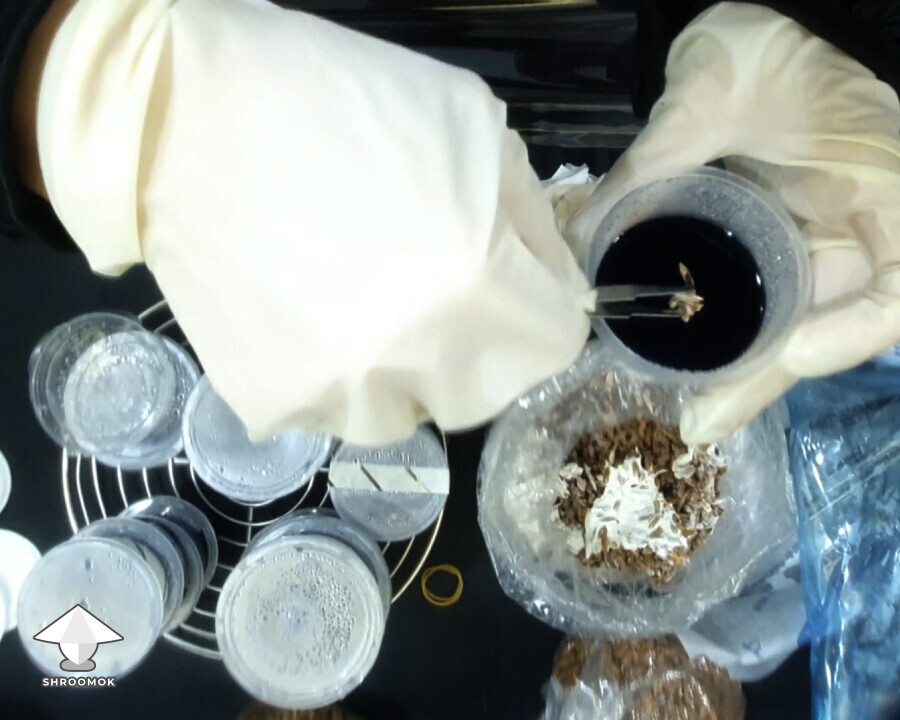
Day 5. Inoculation
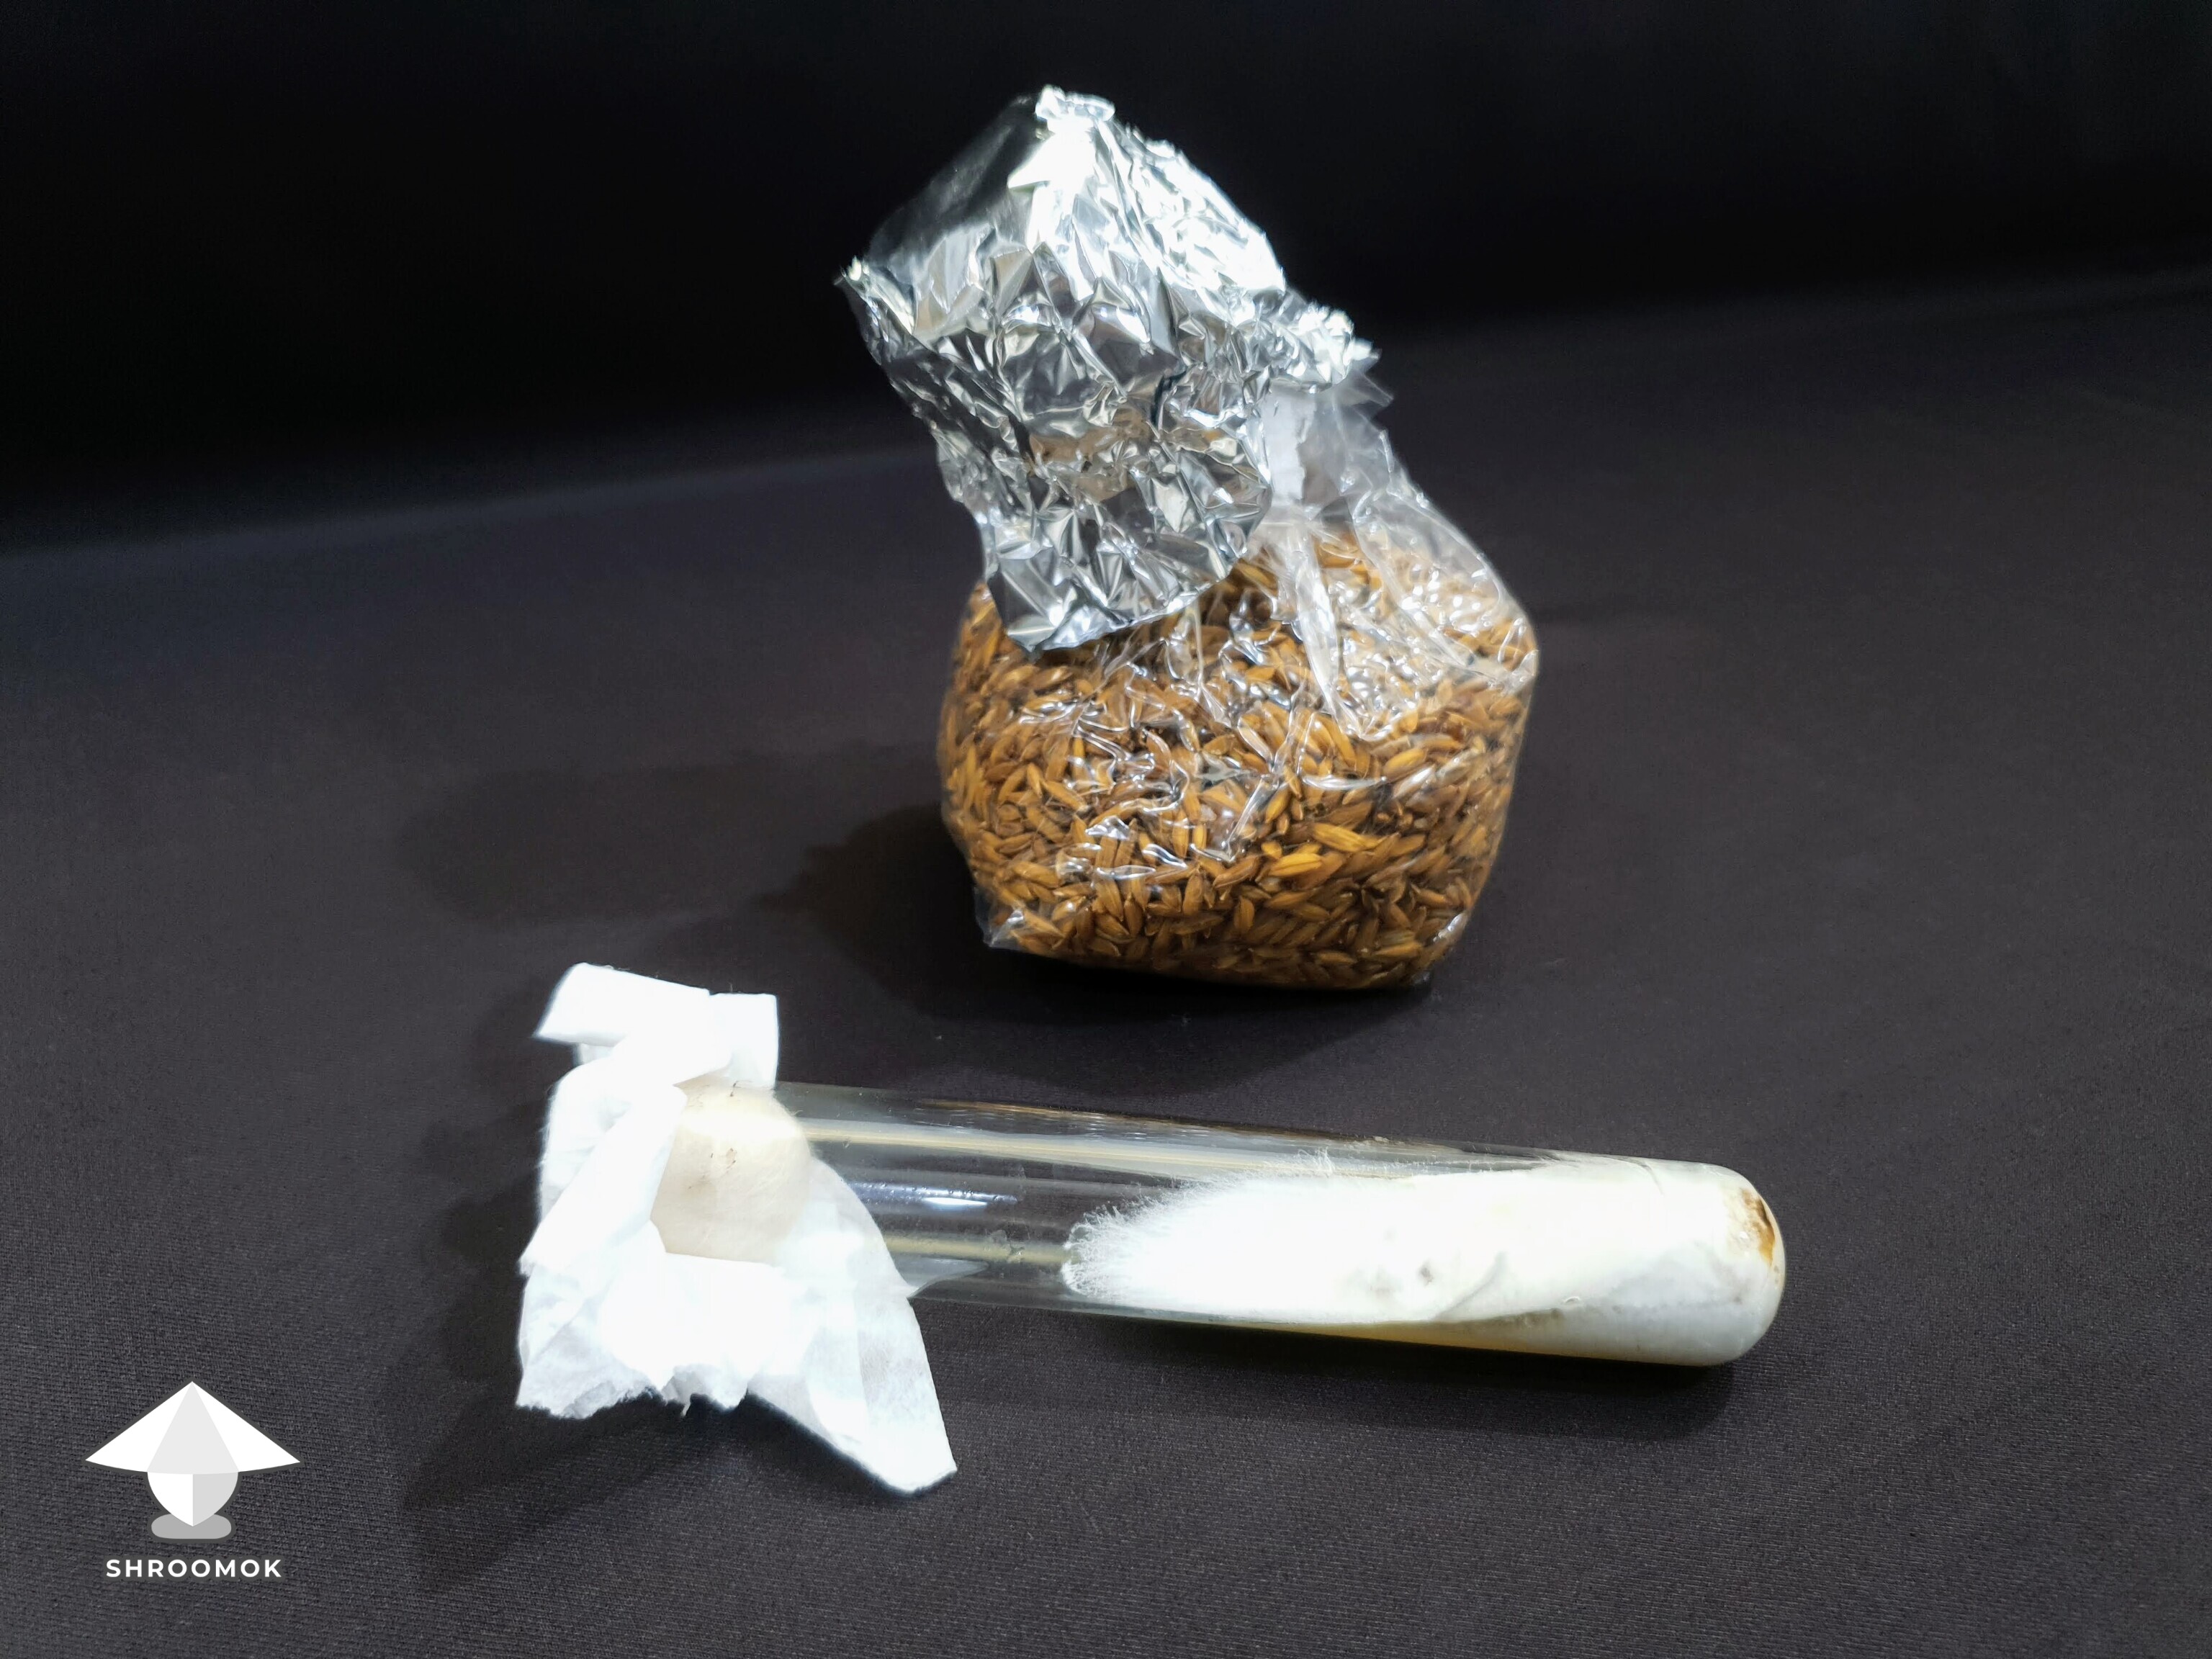
My inoculation method is an agar sample.

In the photo below, you can see an agar slant with mushroom culture.

I mainly use this method for long-term mycelium storage, as well as for multiplying mycelium through agar-to-agar transfers and further inoculation. By the way, agar slants are the best method for preserving genetics for years. From my experience—at least 3 years for sure!
If you are interested in this technique, check out the detailed guide here: Agar Slants
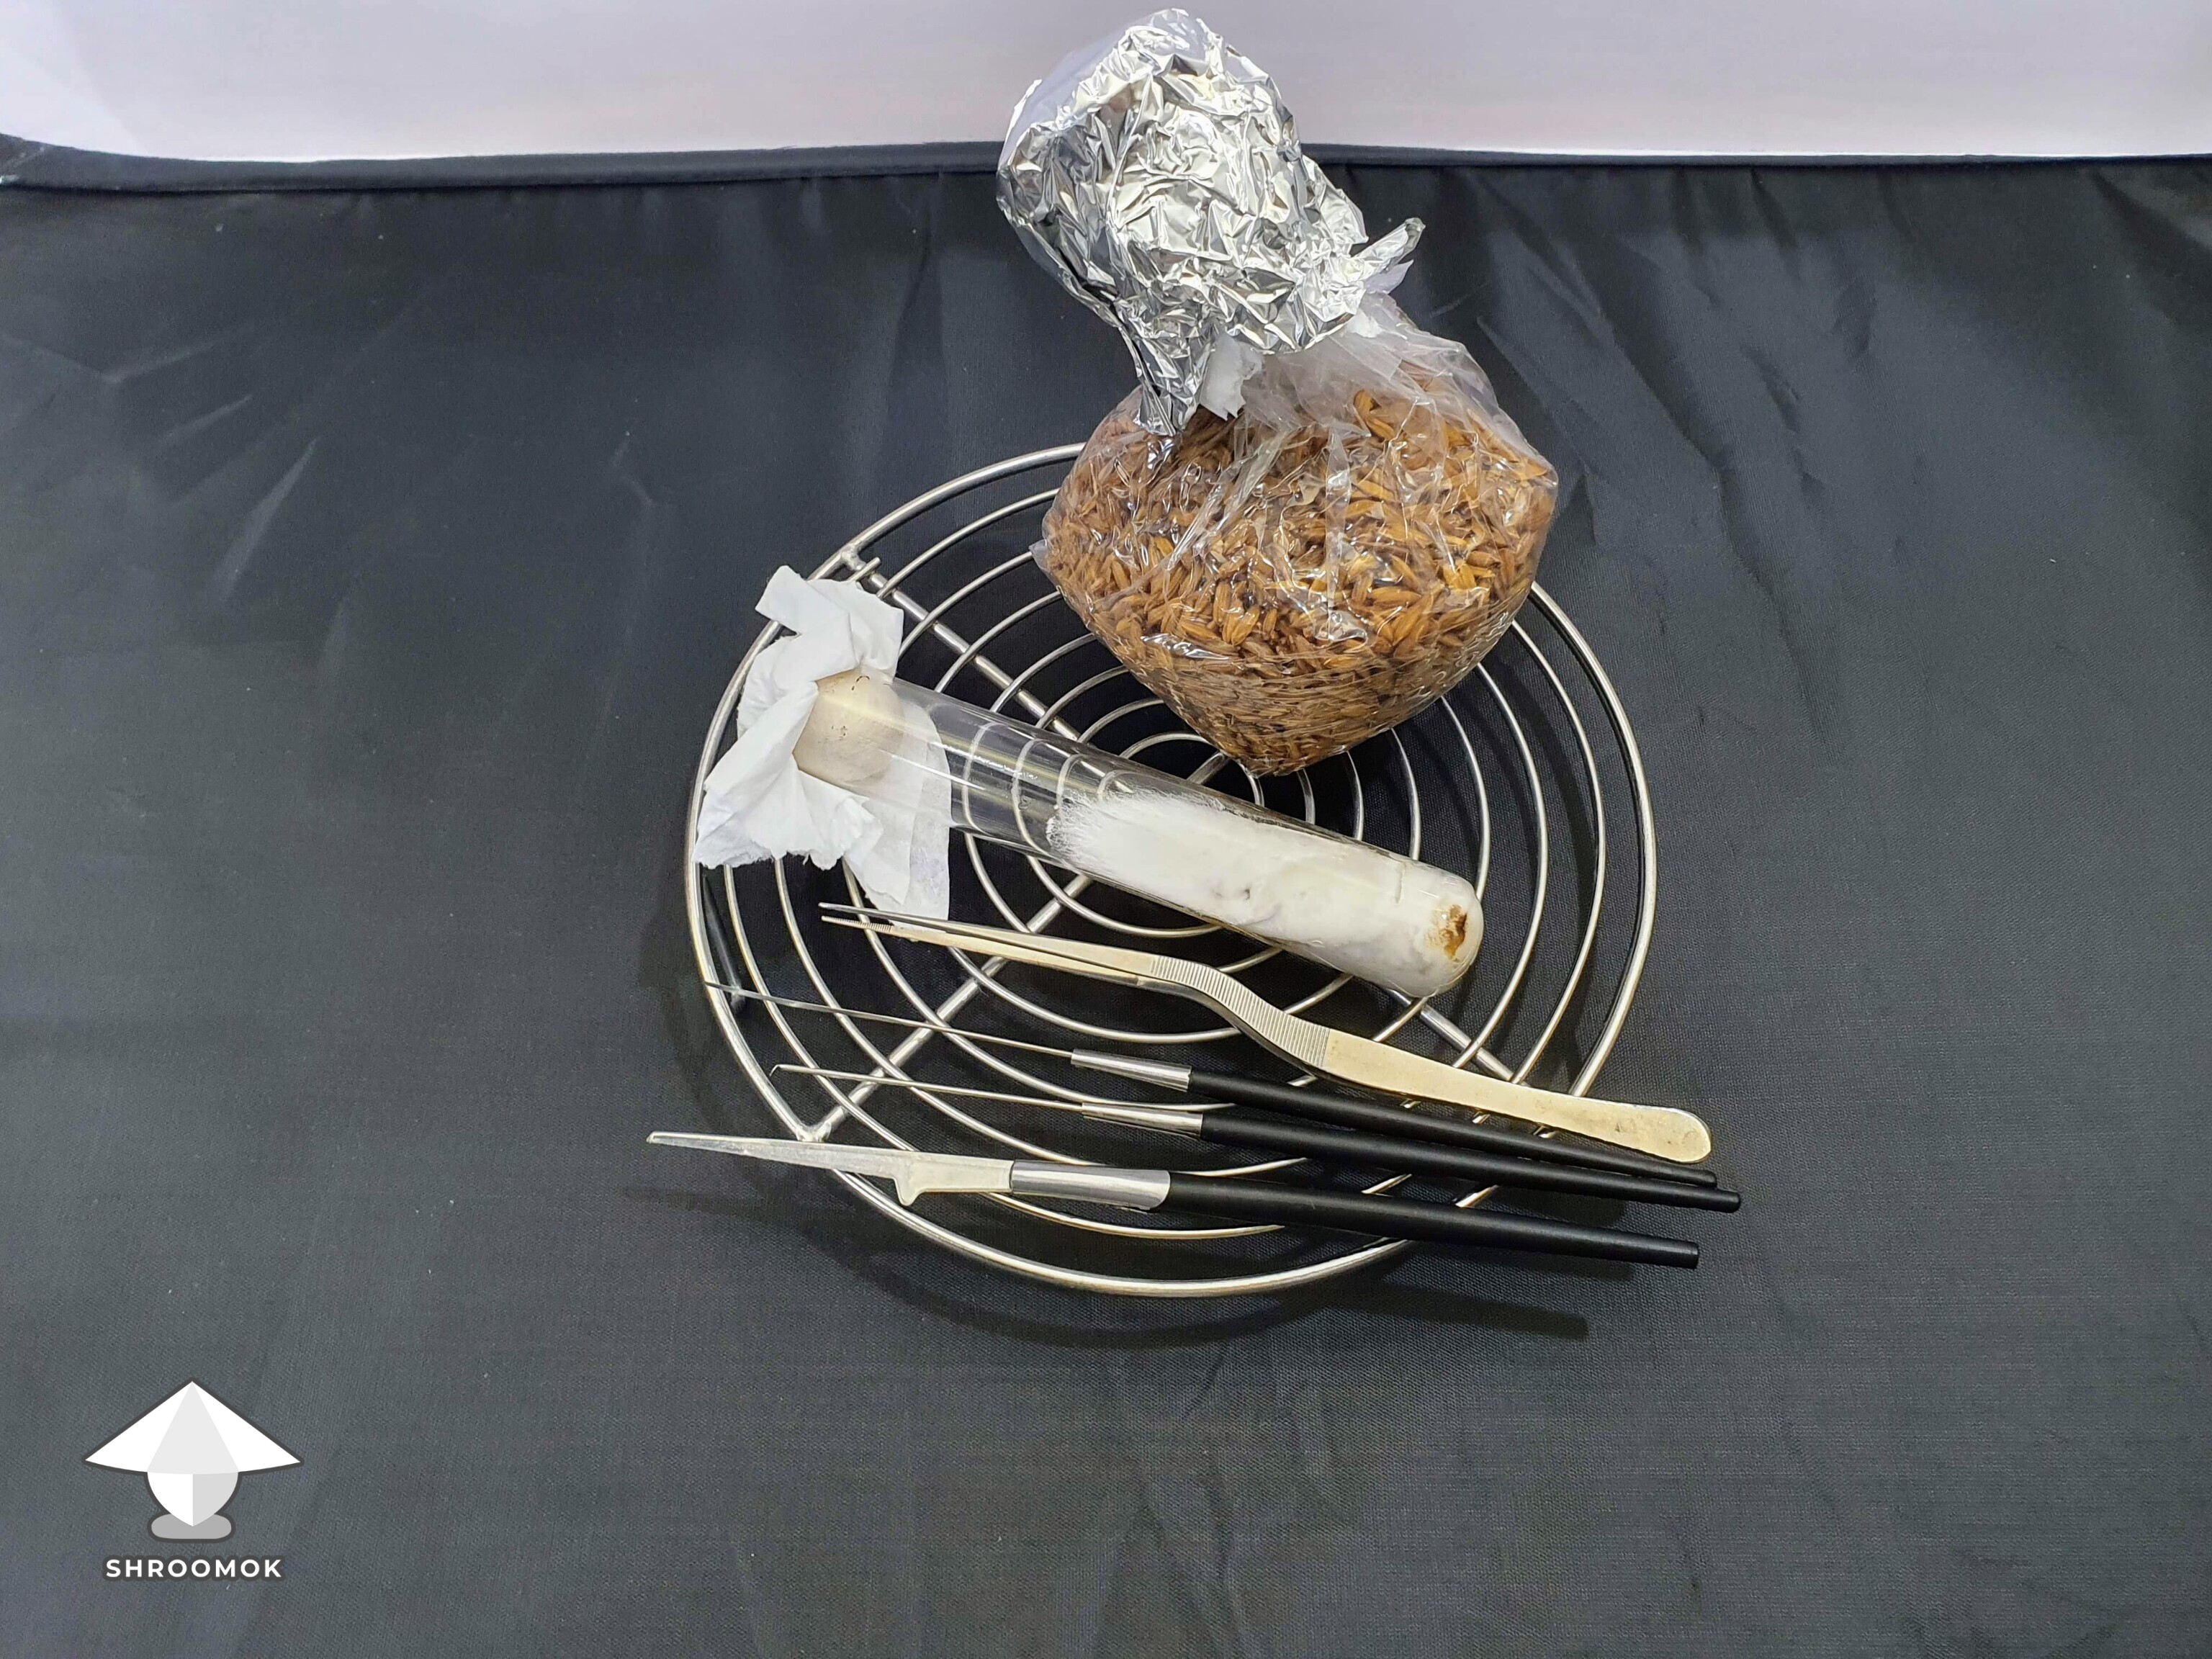
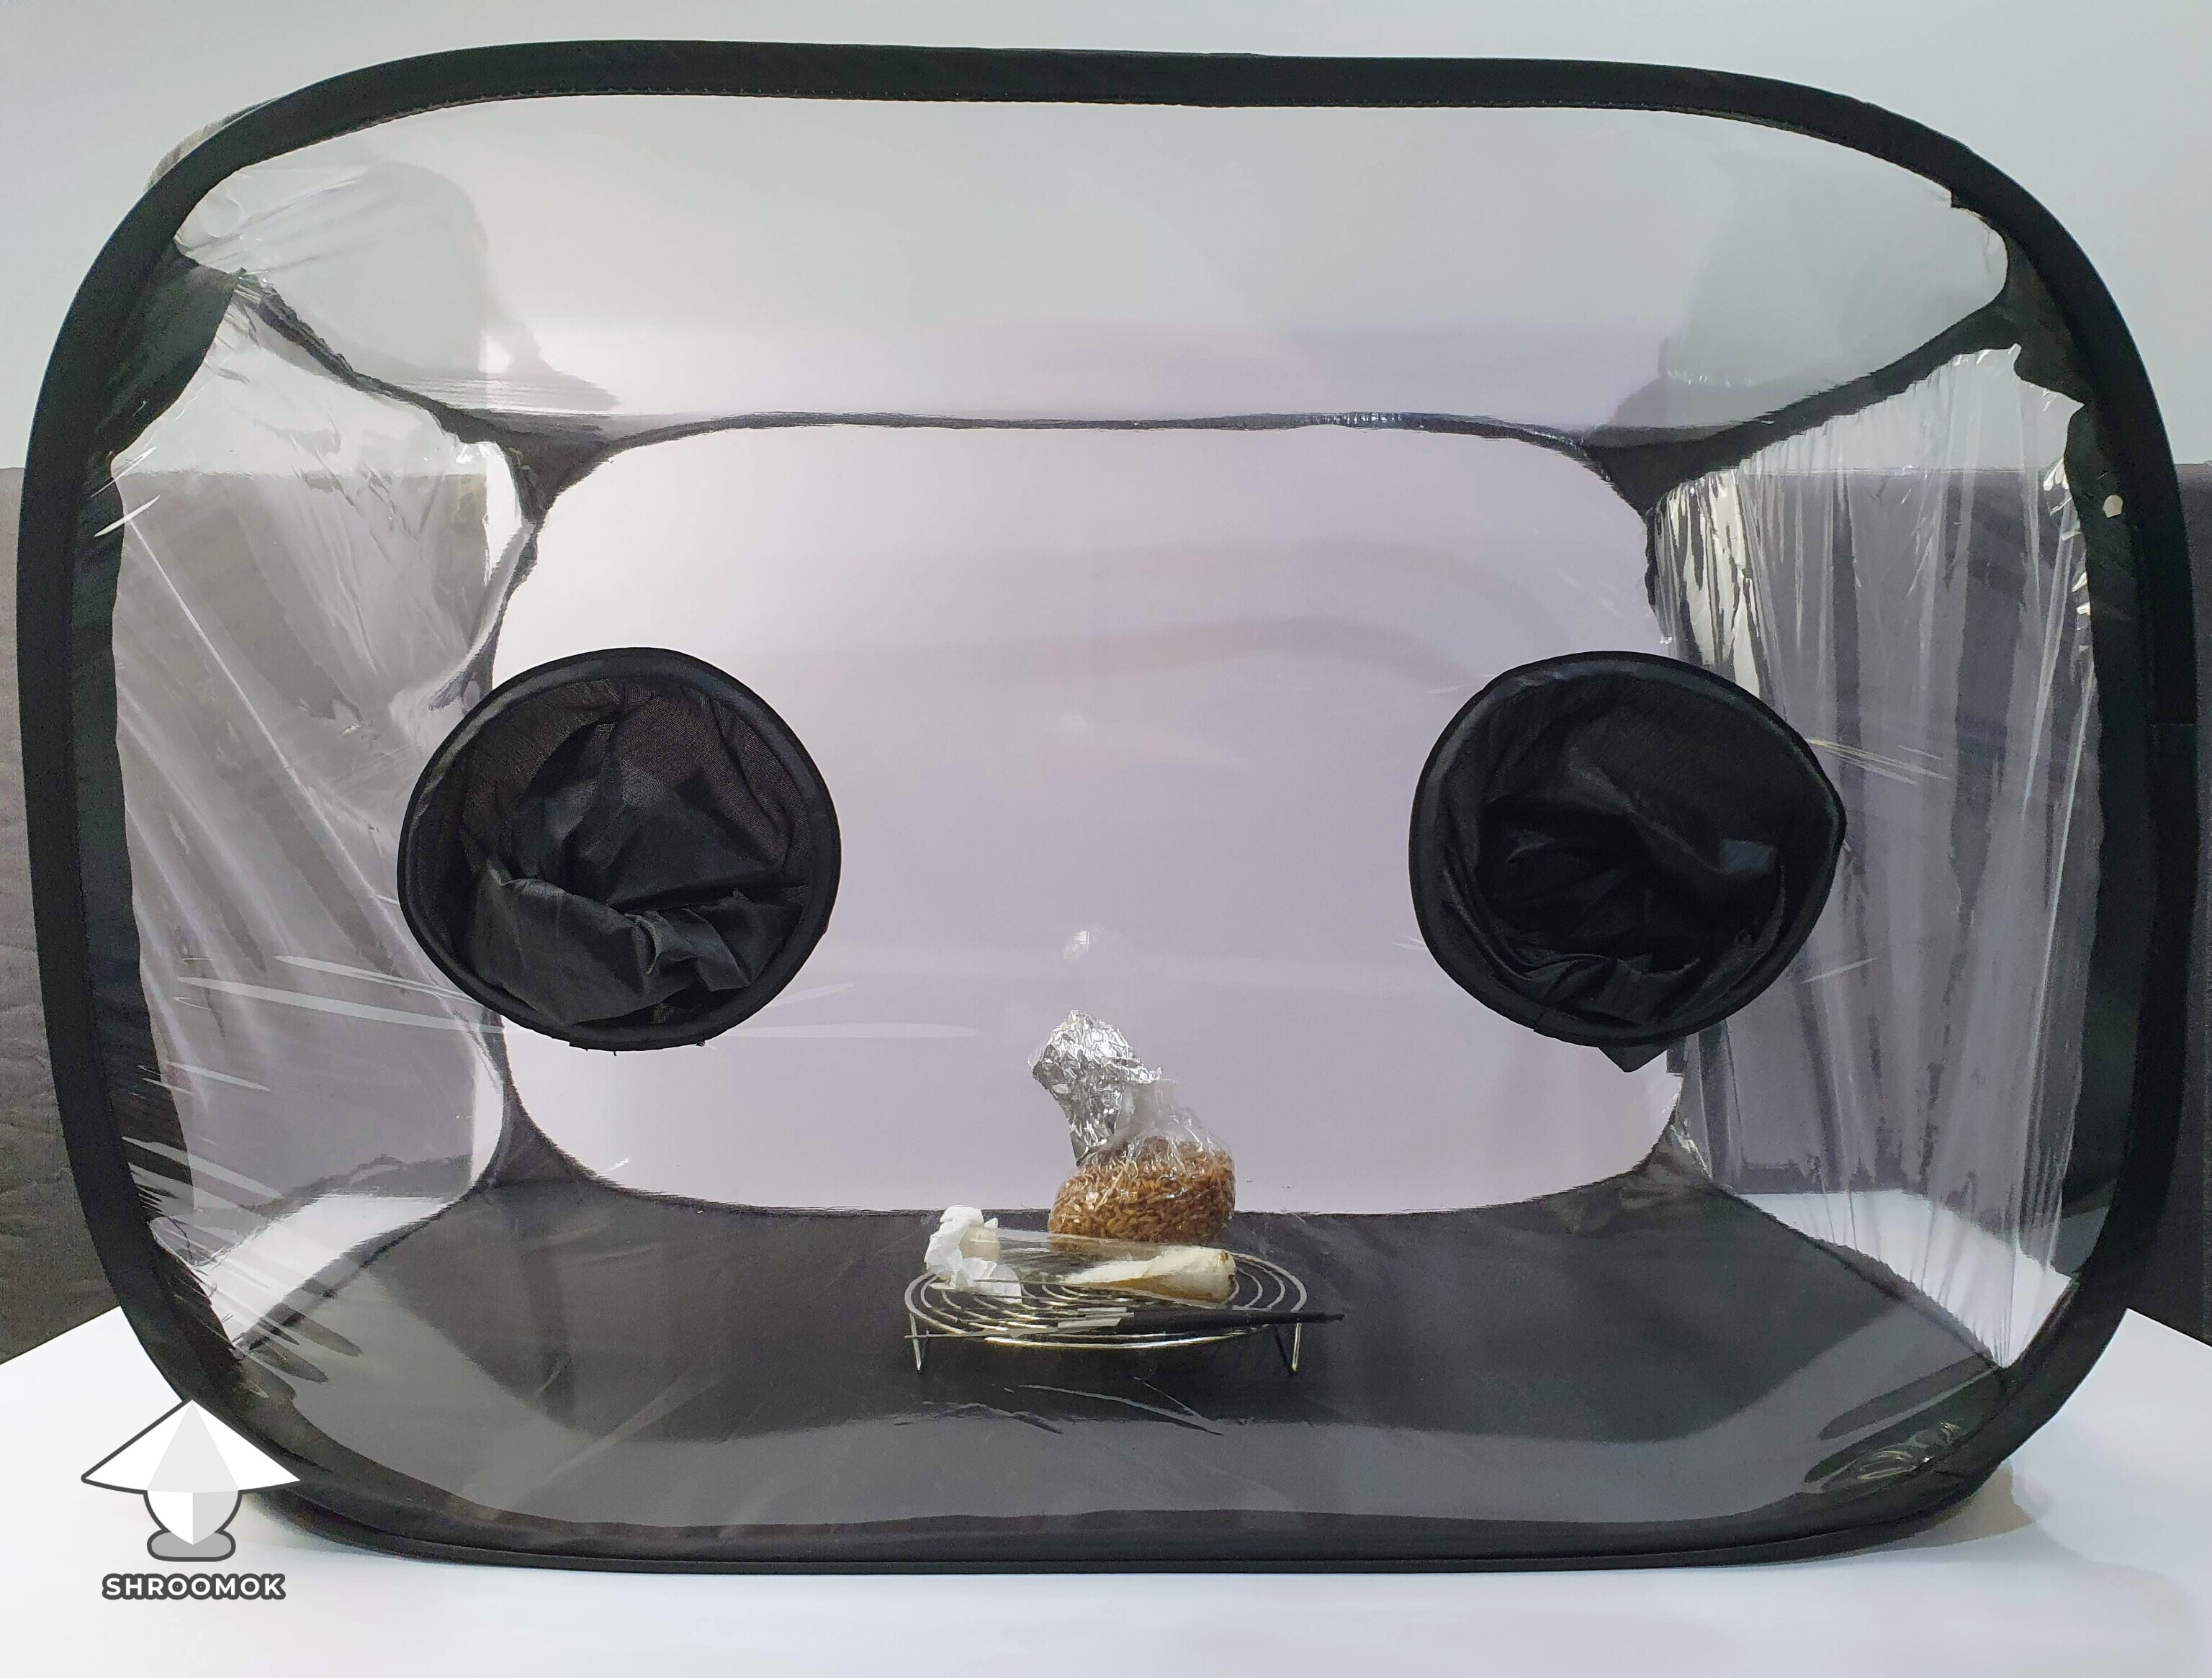
Since I had to open the bags for agar inoculation, I proceeded in the Still Air Box.

All tools, agar and grain bag inside SAB. I inoculated only one grain bag with Ganoderma Multipileum also called Antler reishi (it produces deer antler-like mushrooms).

After inoculation, I placed the bag in a dark closet and left it to incubate at room temperature. During the colonization period, temperatures fluctuated between 70–77°F (21–25°C).

Attachments
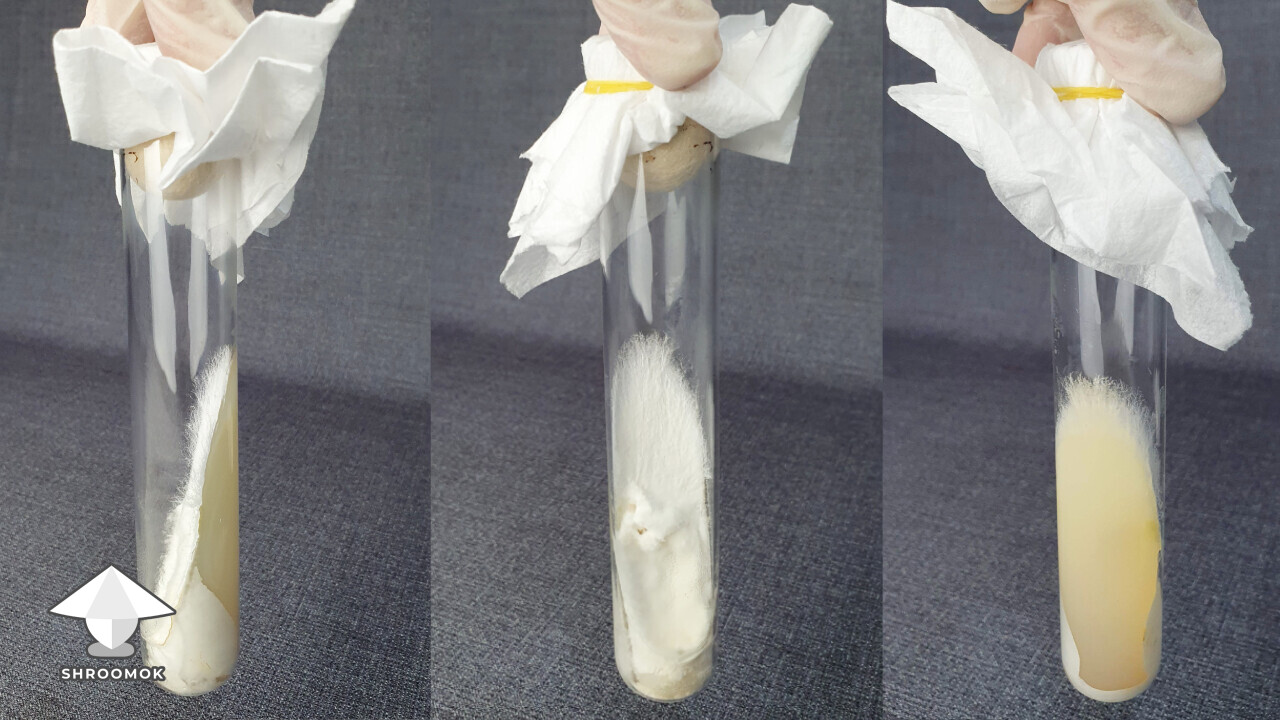
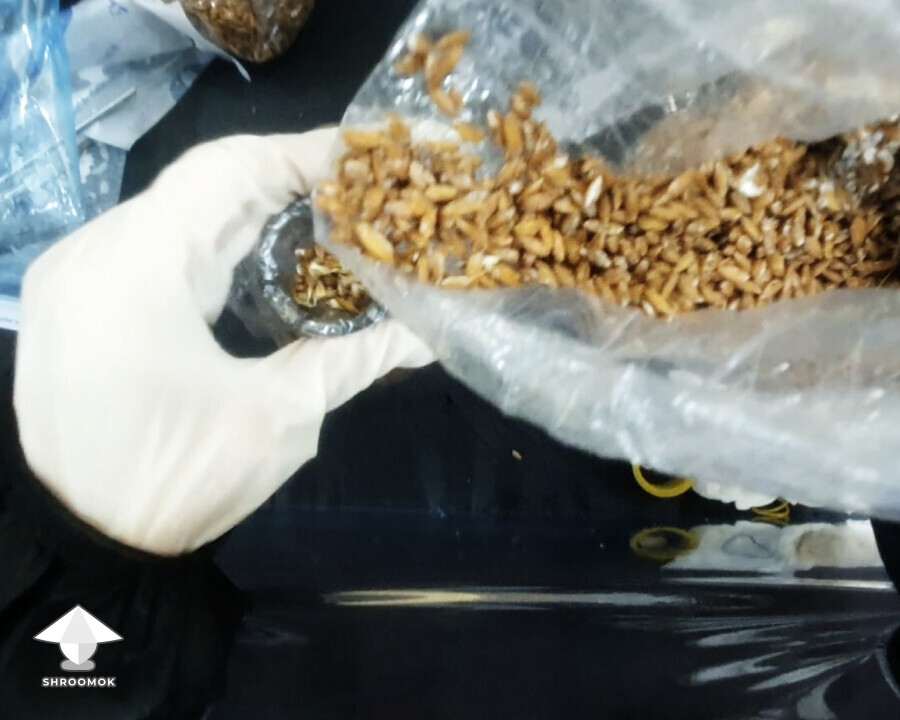
Day 7. Colonization period and first signs of mycelium
Two days after inoculation, visible signs of mycelium growth can be seen on the top of the rice grain. Unfortunately, it's hard to capture in a photo how the mycelium from the agar sample comes down and spreads onto the grains.

During the colonization period, I don’t do anything extra — just stay patient and wait for the mycelium to spread.
Attachments
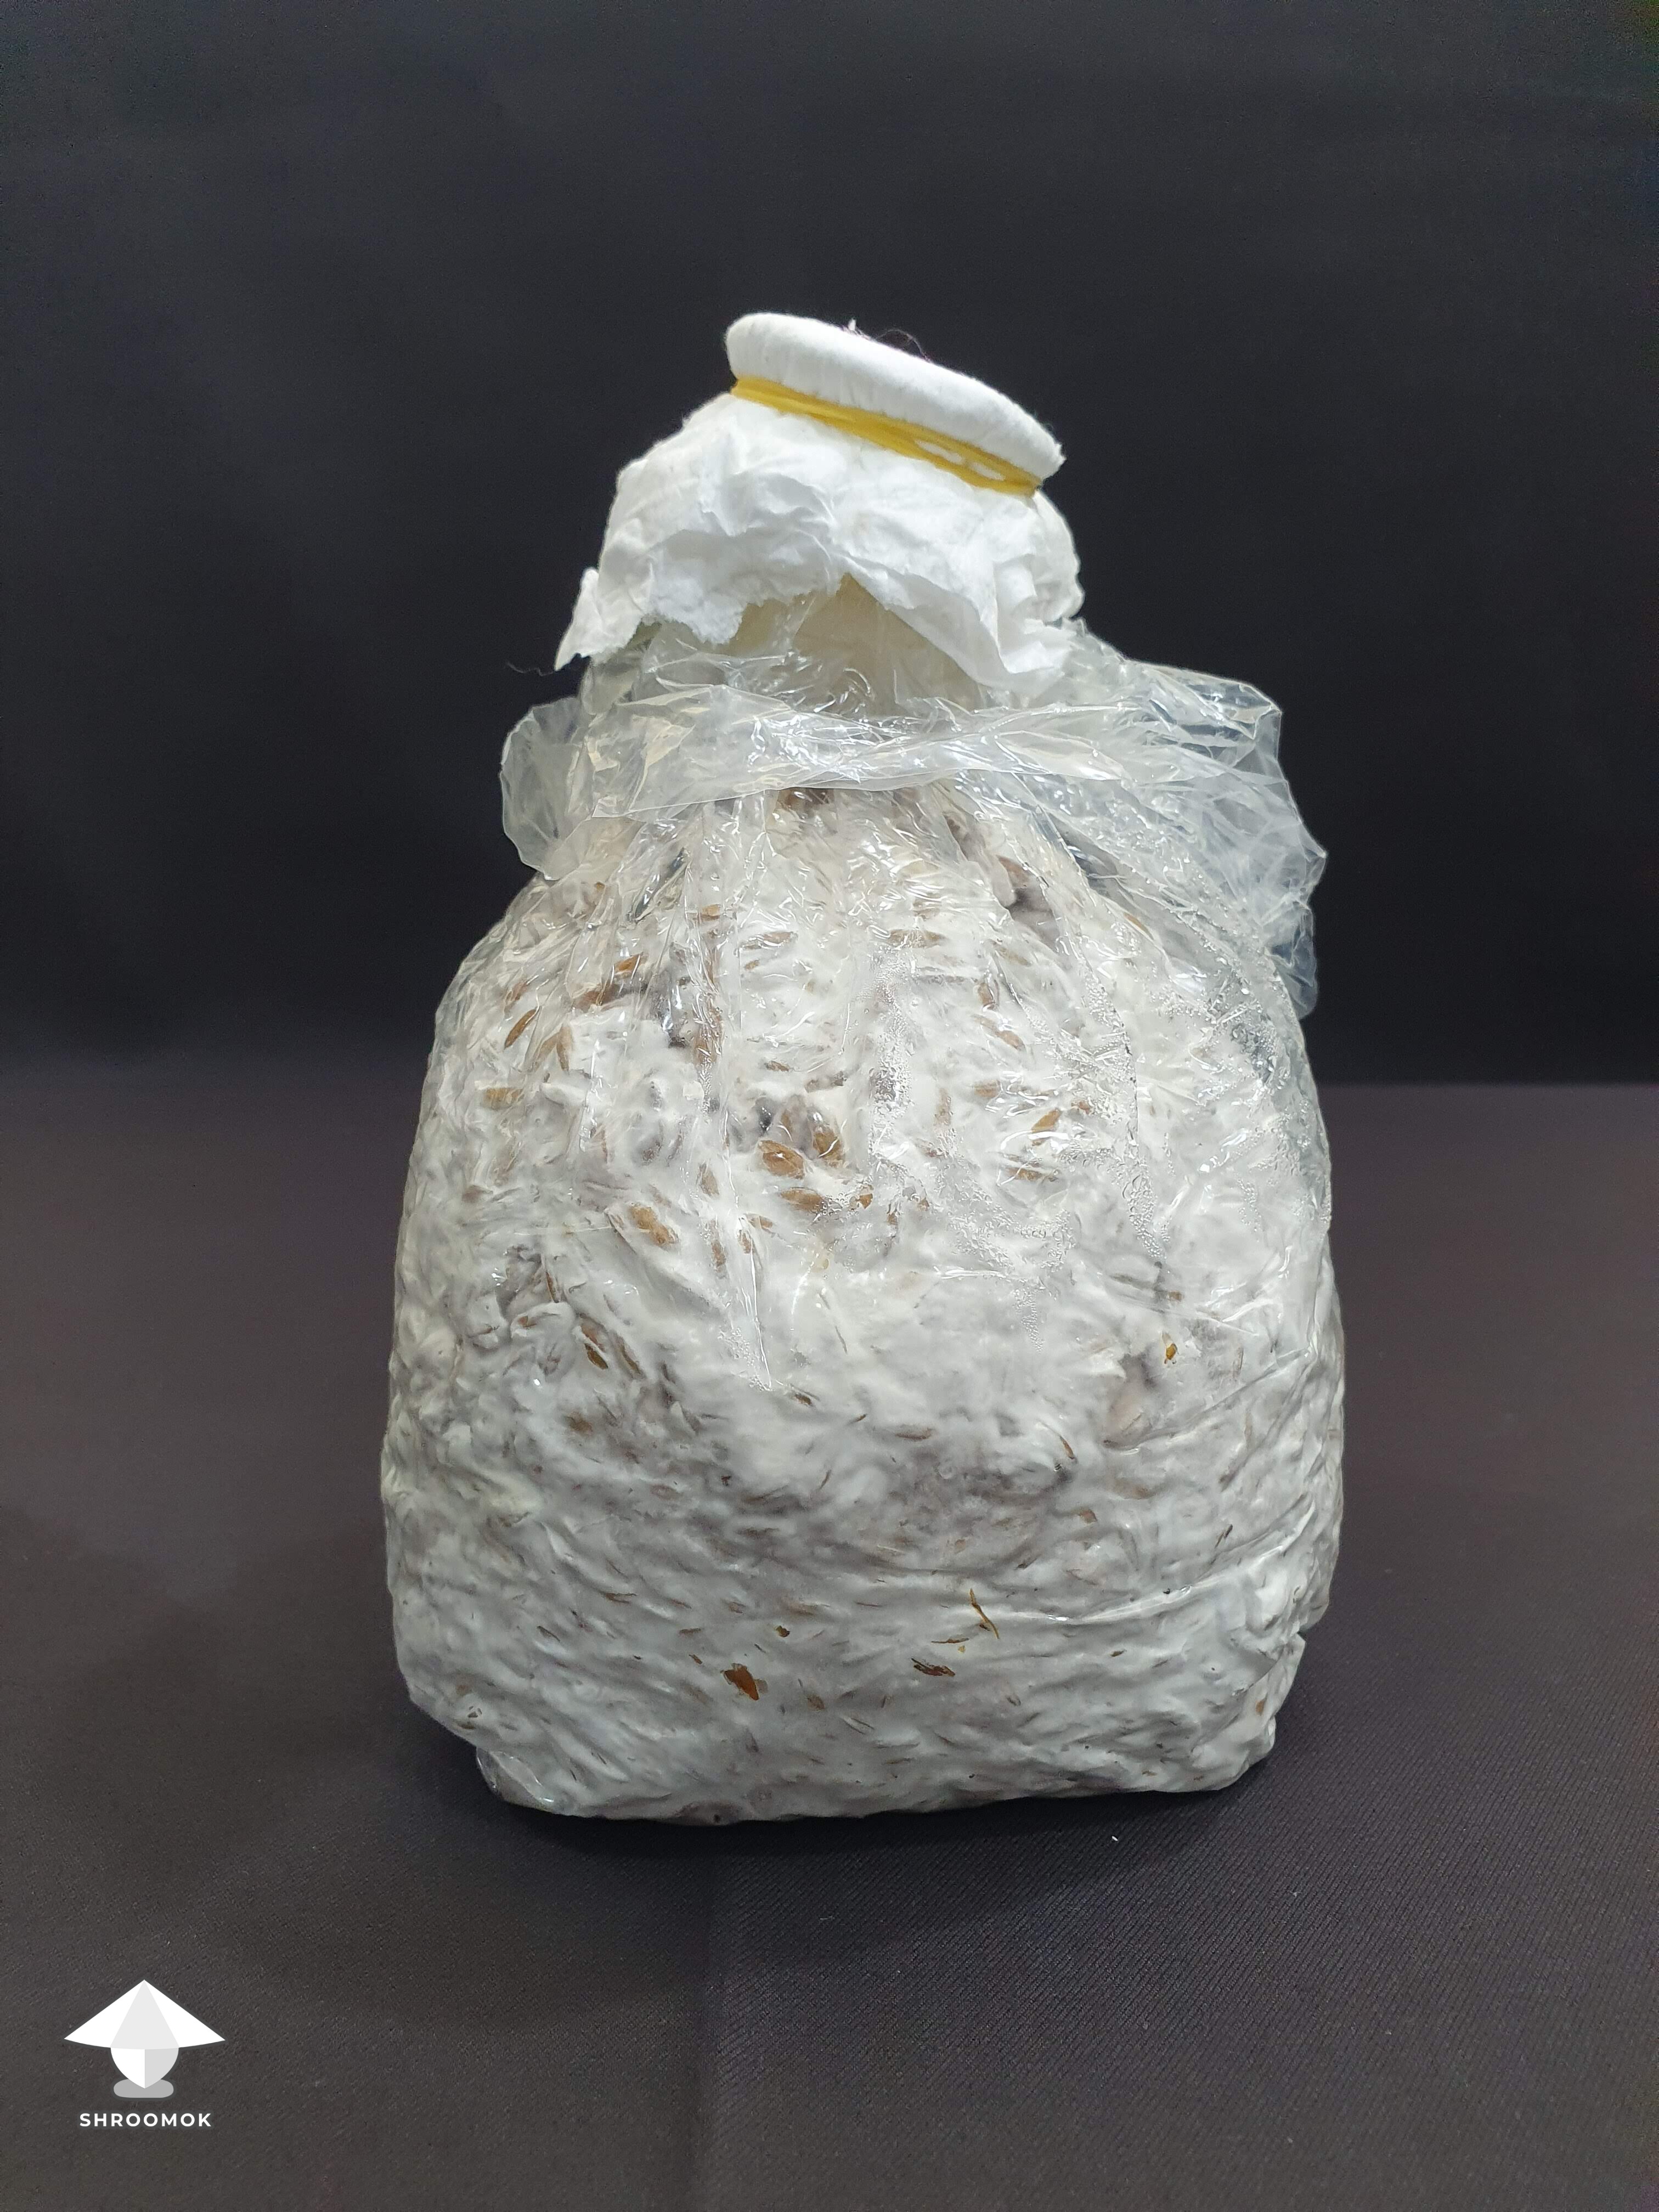
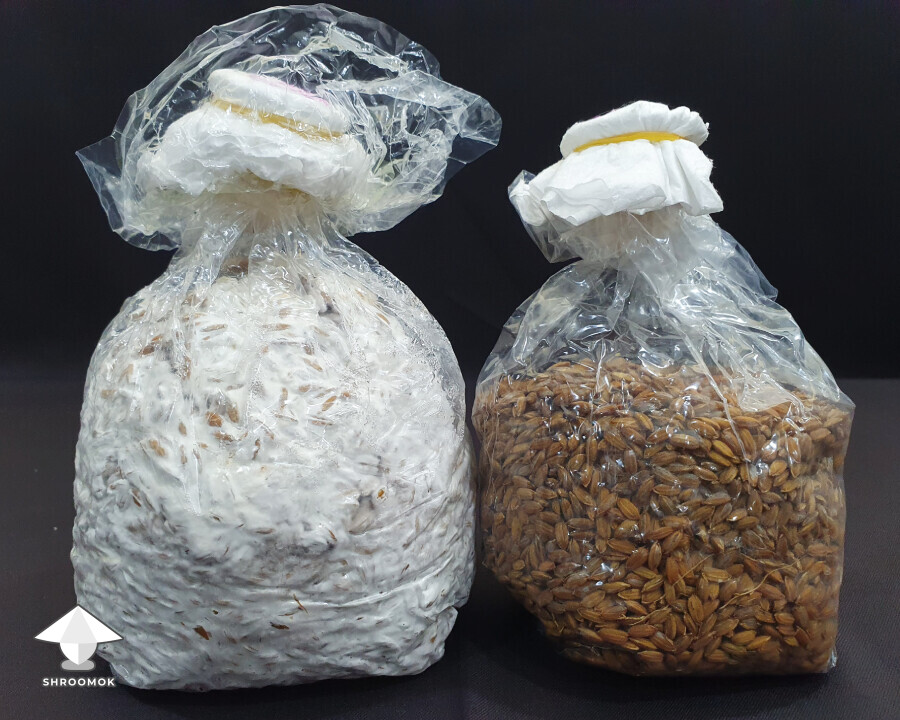
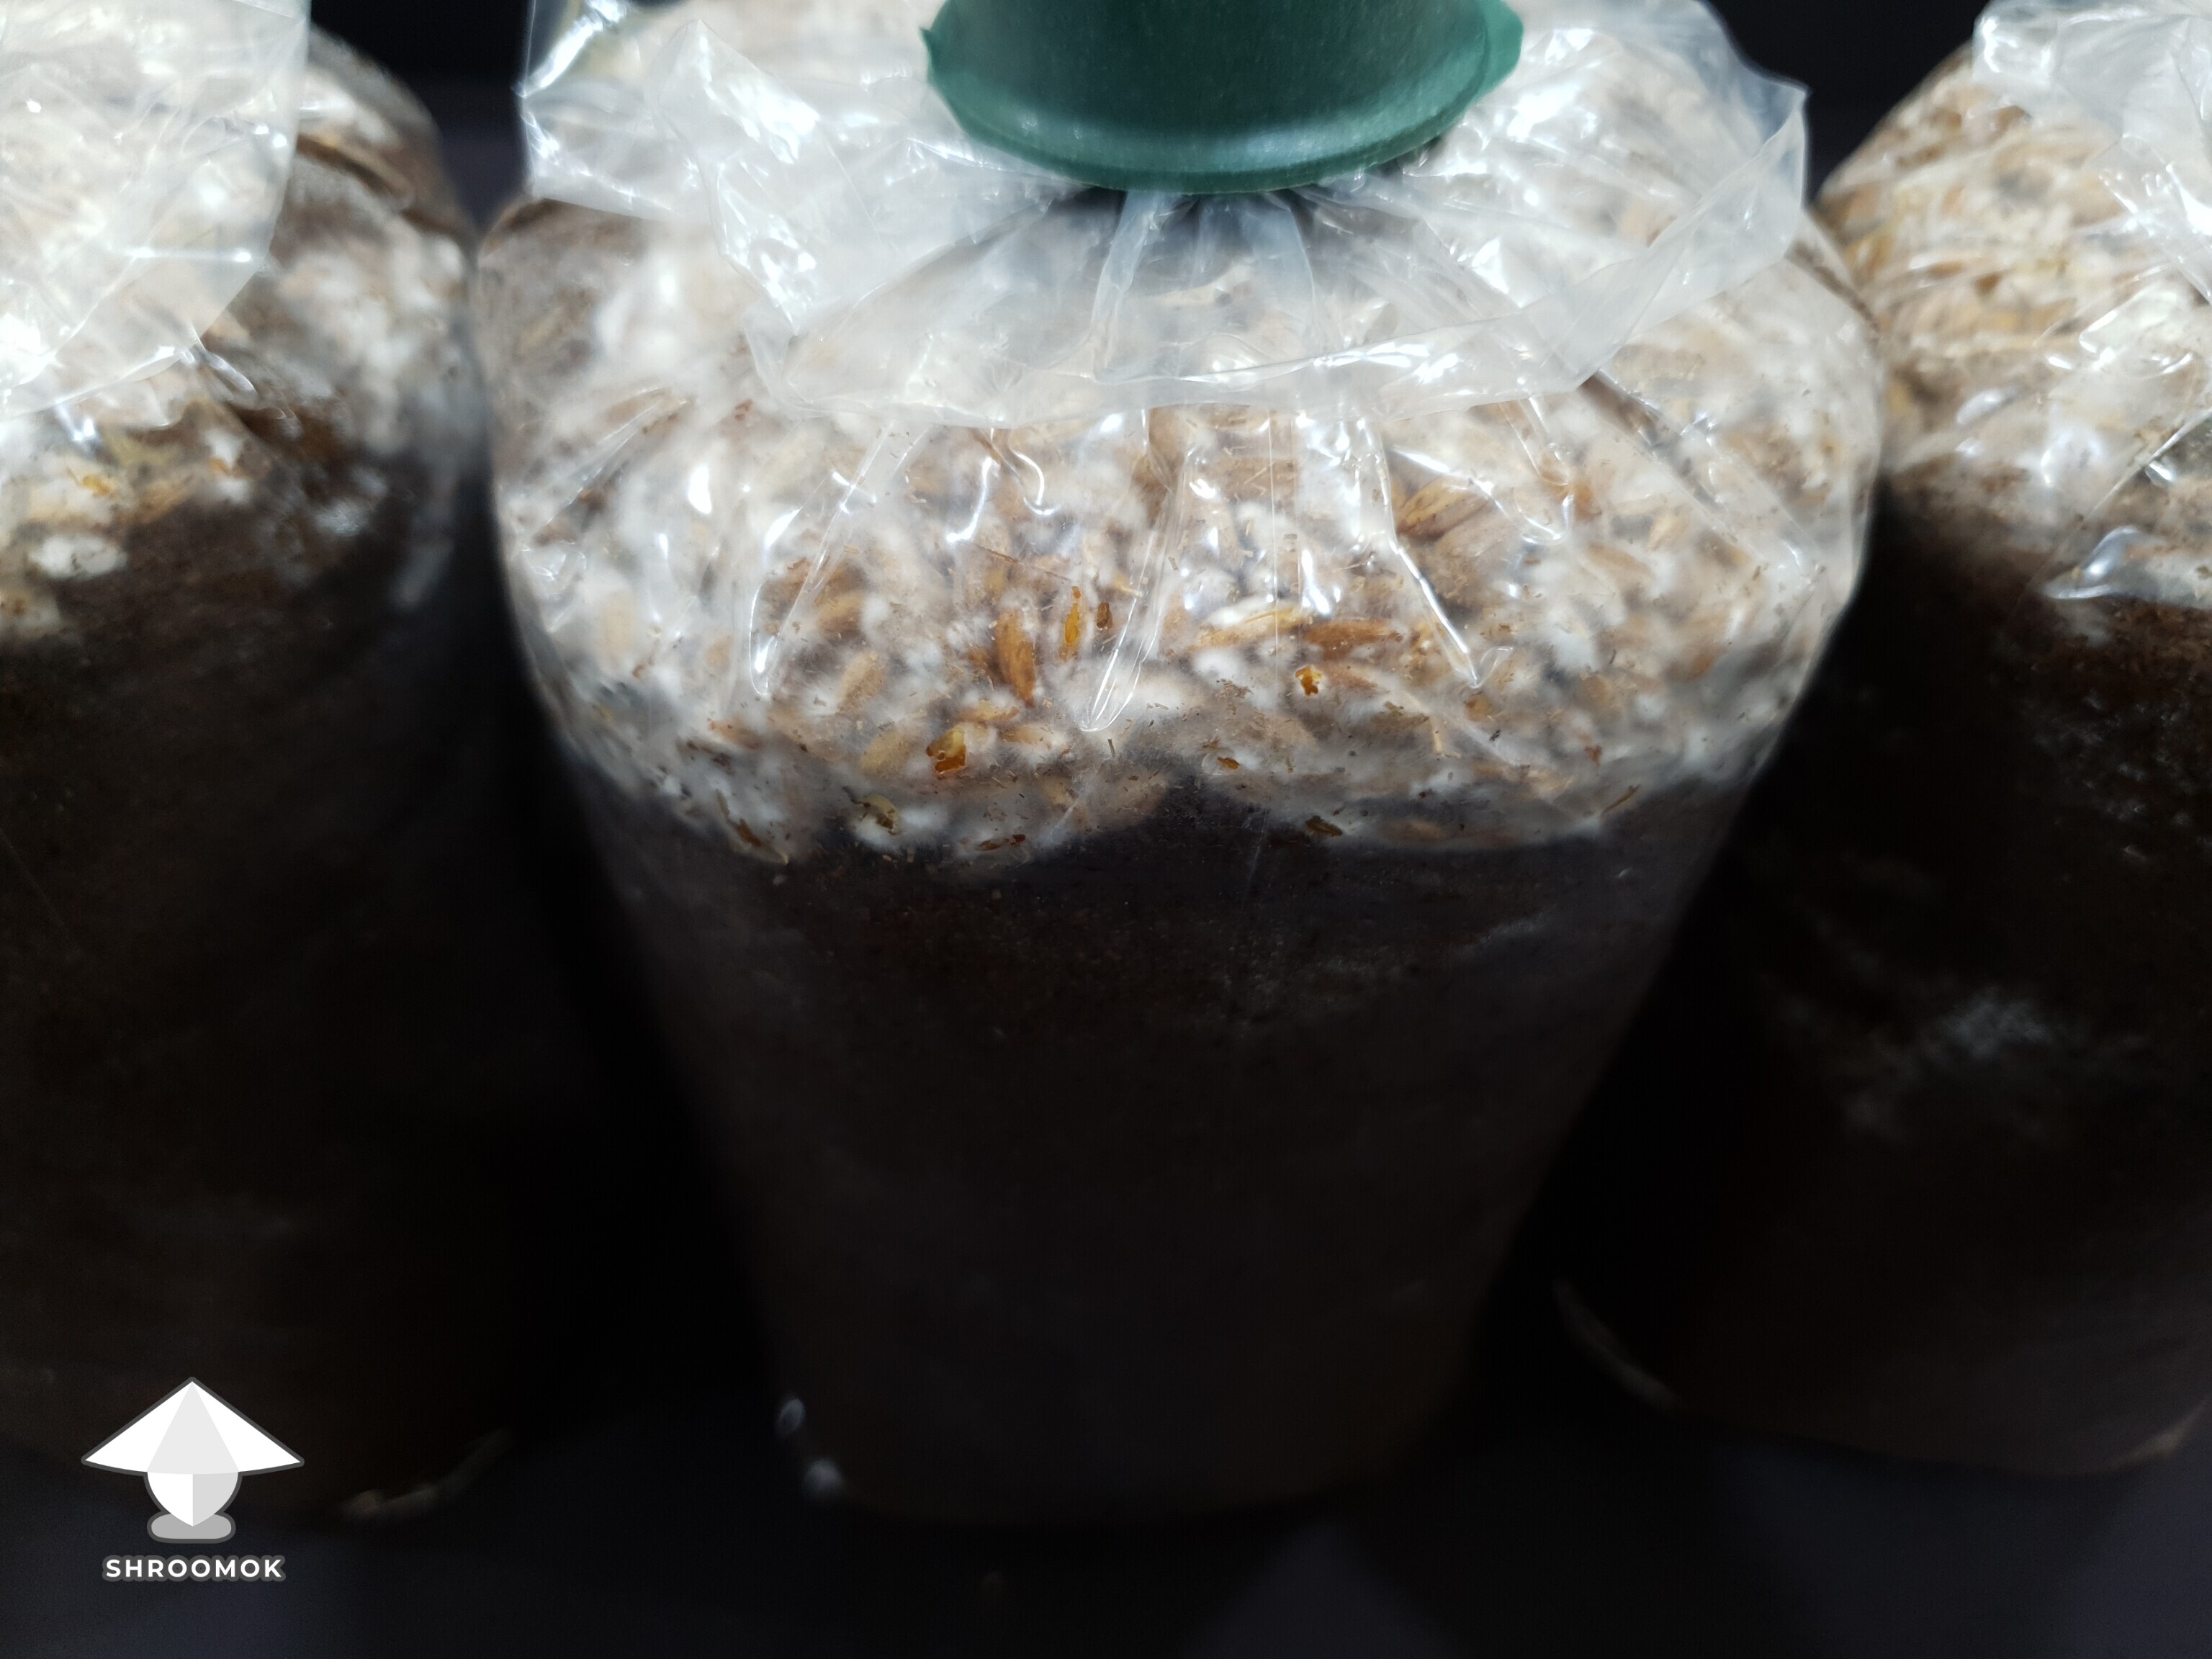
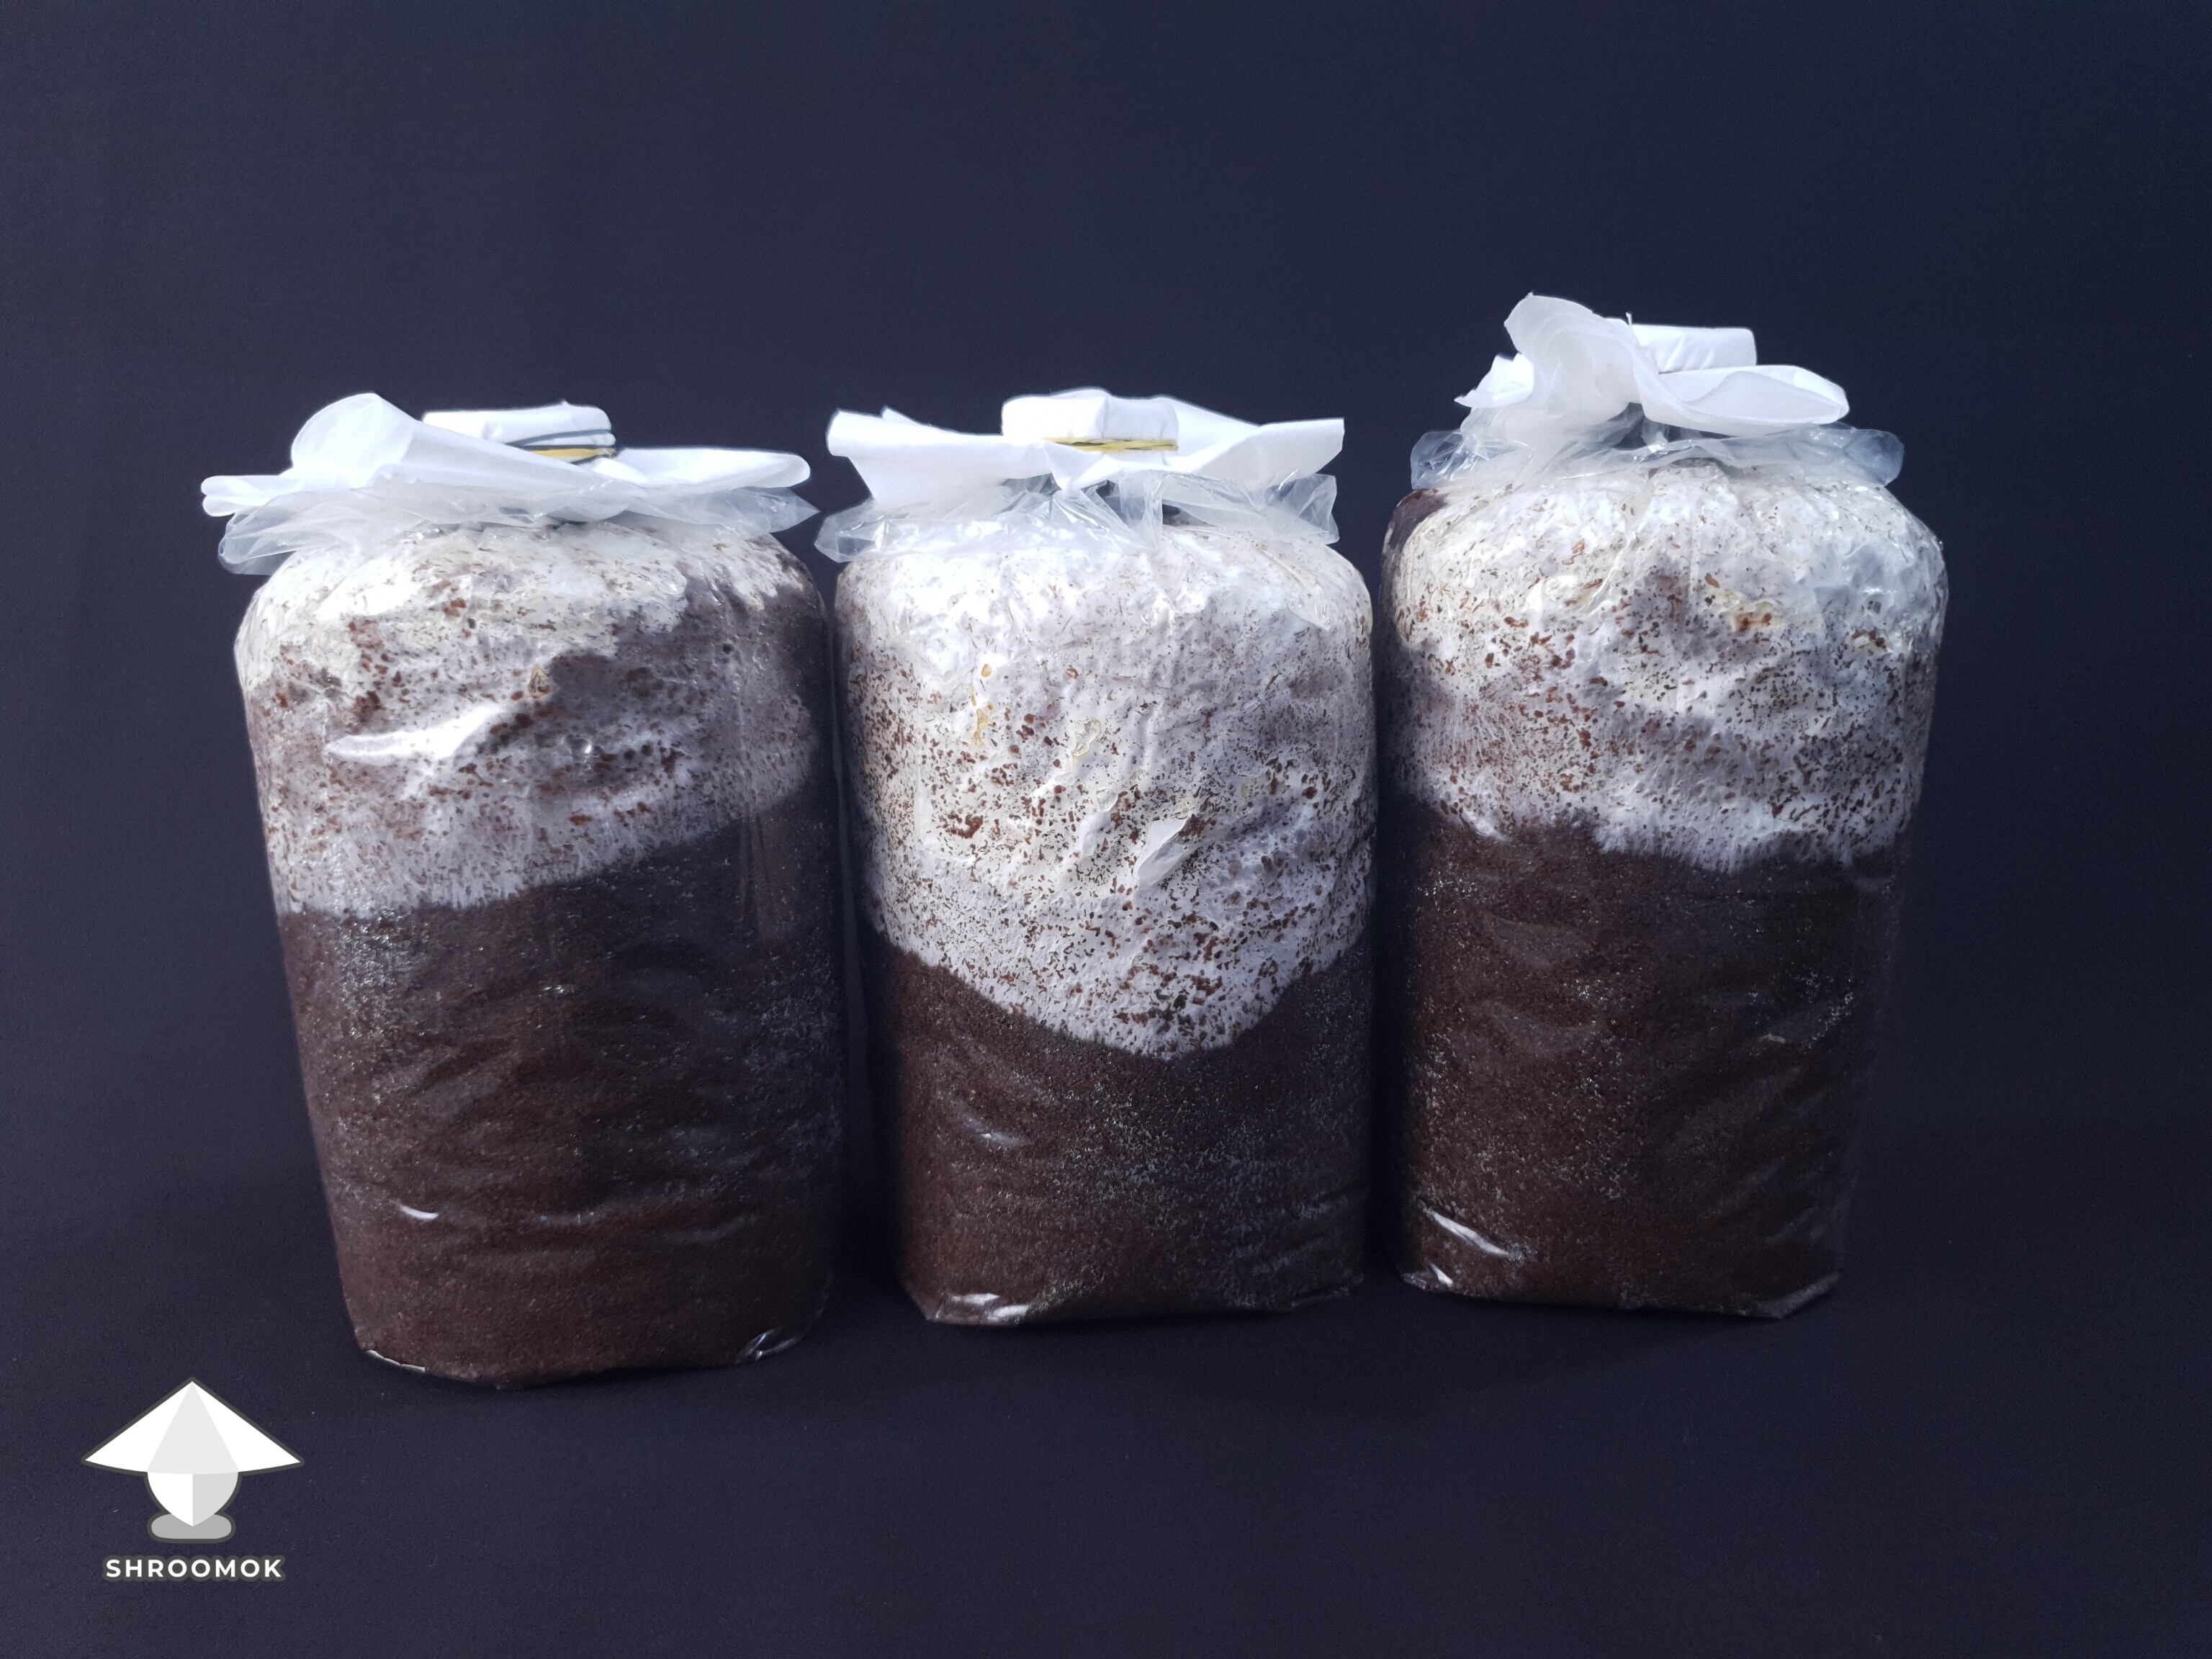
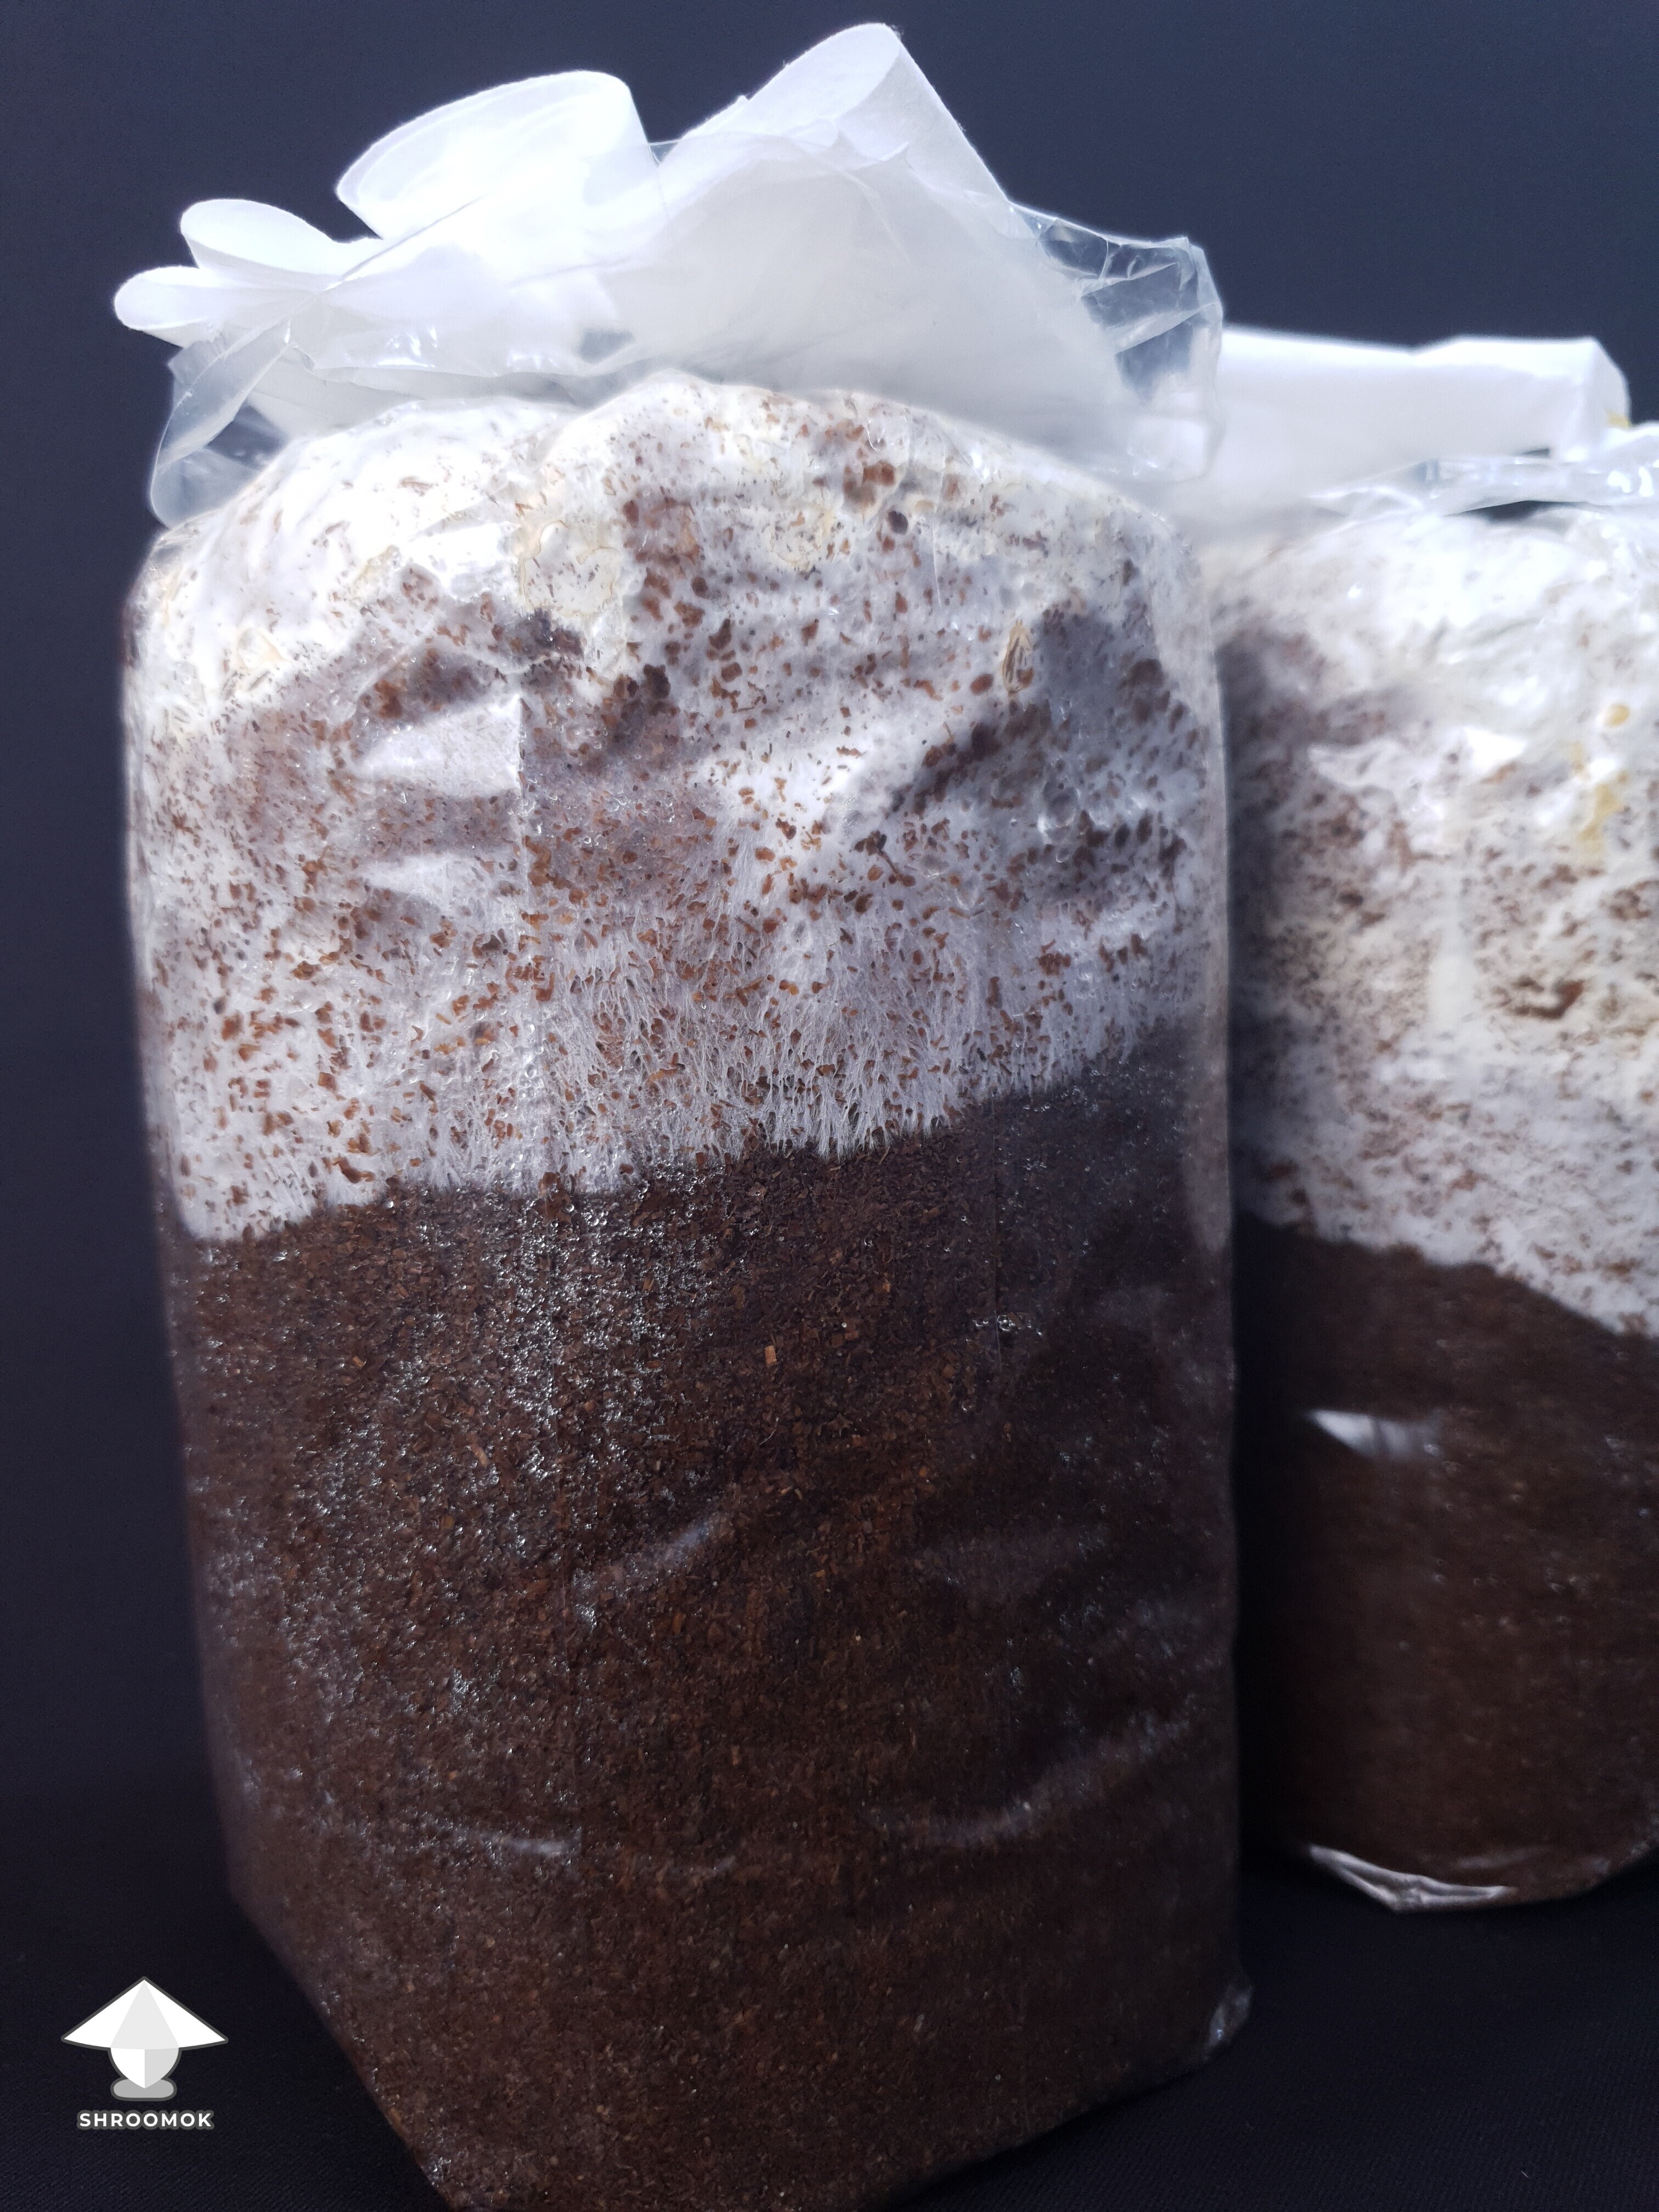
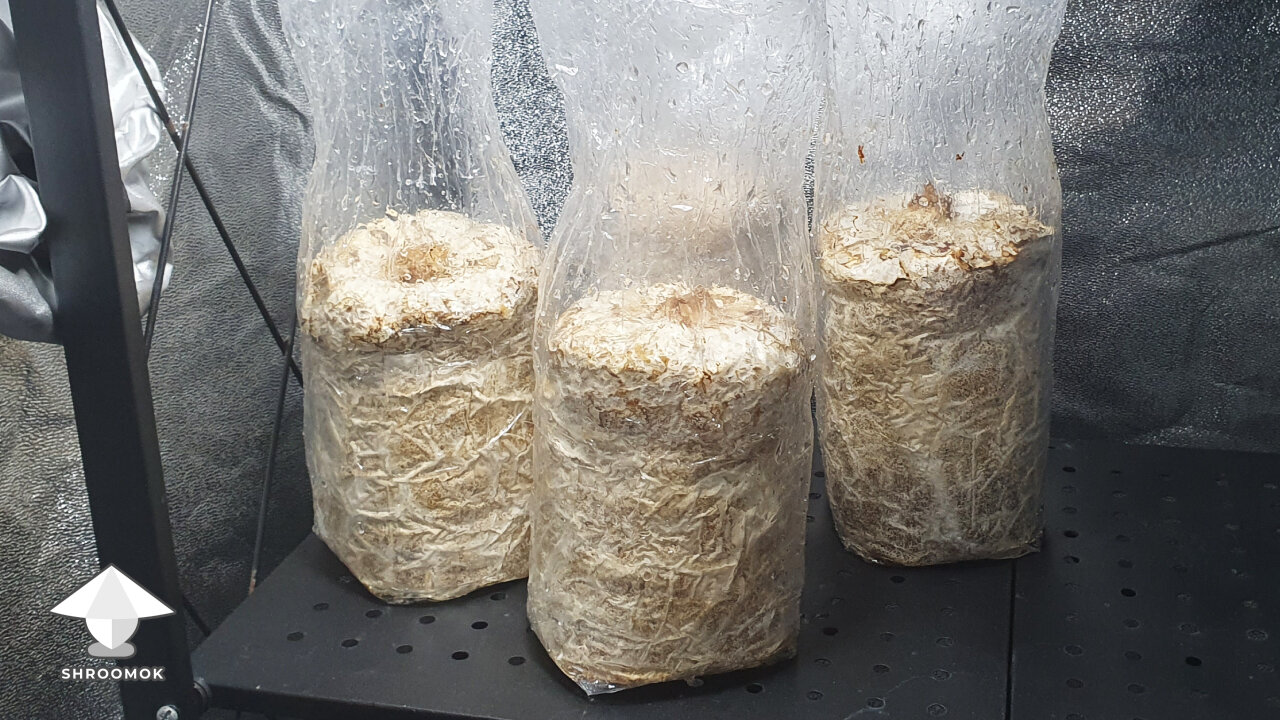
Day 19. Colonization Period Updates
In just two weeks (actually, in 10 days) after inoculation, the grain bag with my Antler Reishi was fully colonized.

Reishi is considered a slow-growing mushroom (especially during the fruiting stage), but colonization was surprisingly fast. The mycelium was very hungry, aggressive, and rapid — it’s one of the fastest genetics I’ve ever grown! For comparison, here’s my bag with Antler Reishi and Lion’s Mane. Both were inoculated two weeks ago, but the difference is incredible!

It’s time to take the next step!
Attachments
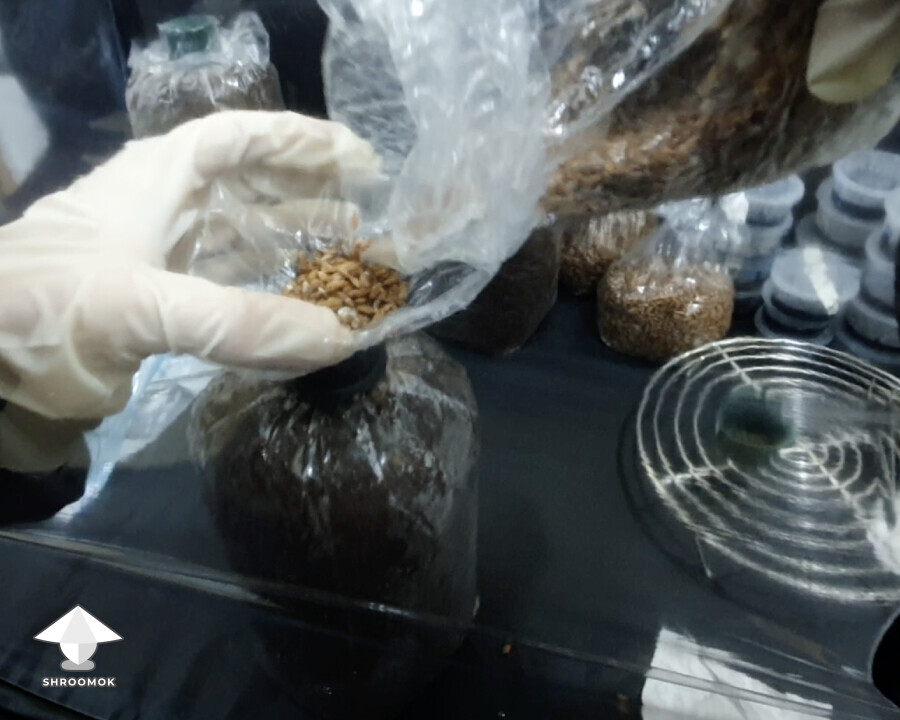
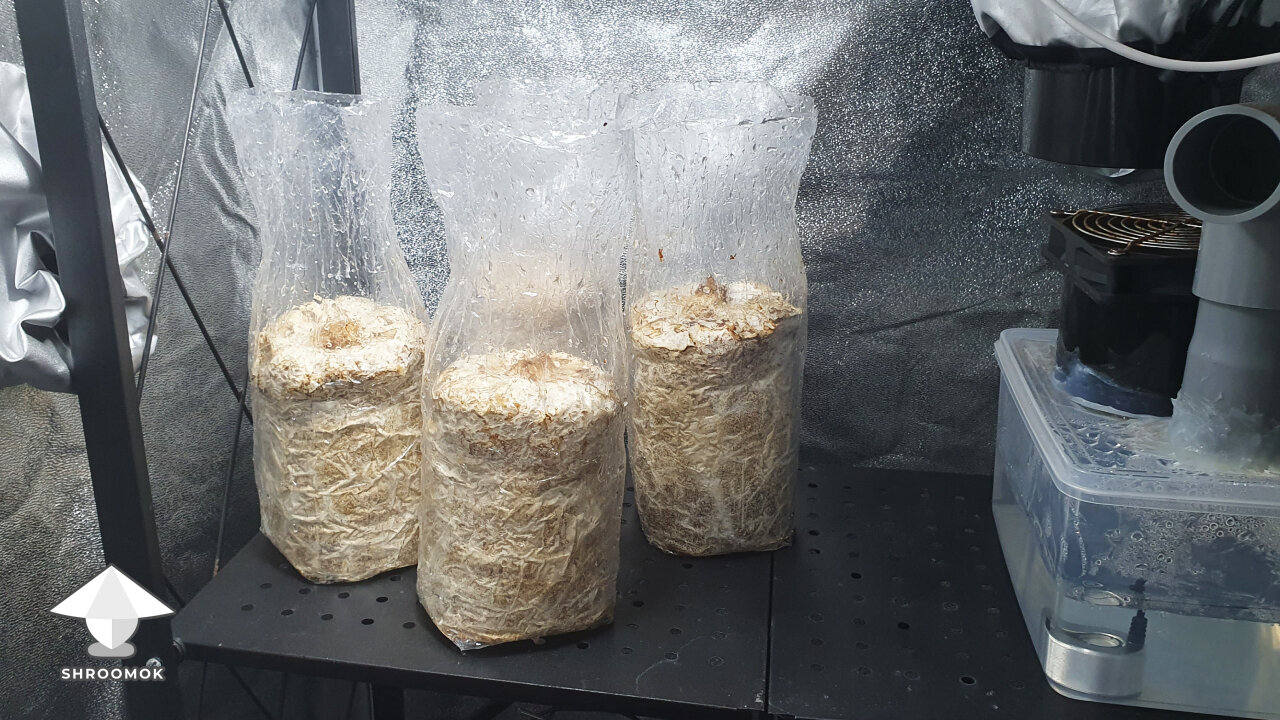
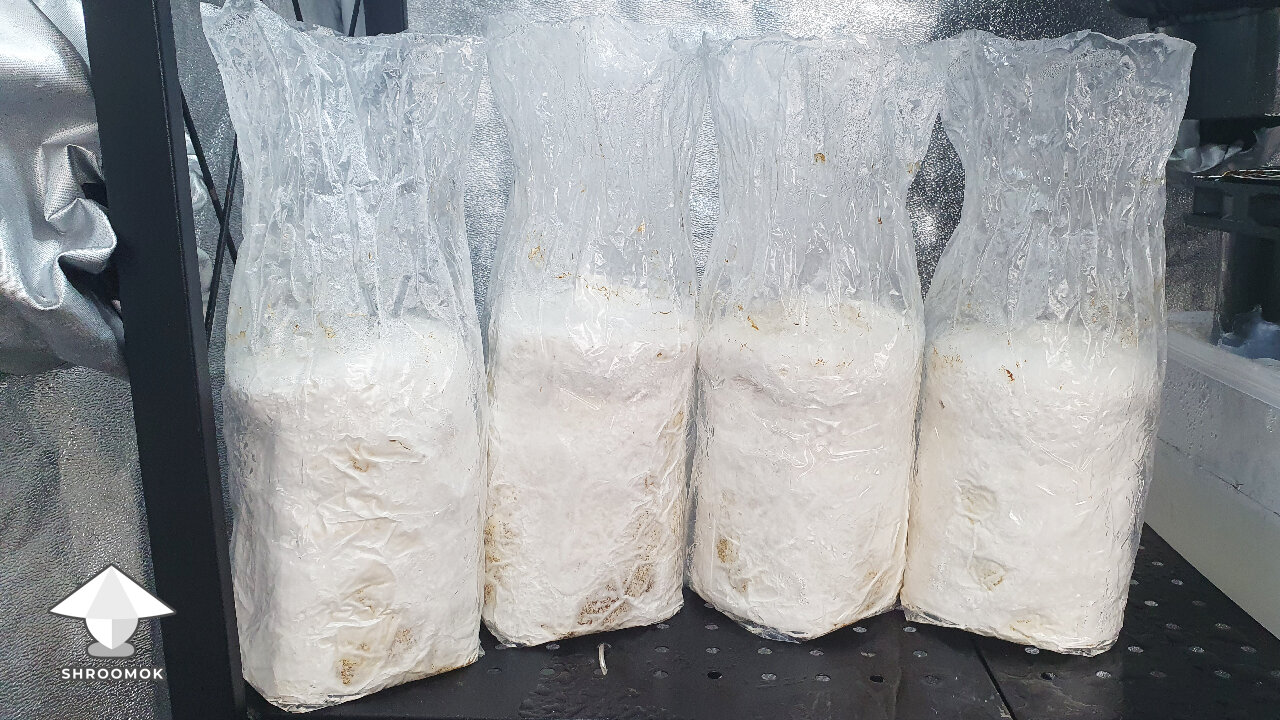
Day 20 (Part 1). Bulk Bags and Spawn Transfers in a Still Air Box
It was a busy day because I wanted to divide this one spawn bag into several different transfers:
Grain to Agar (G2A) - need to prepare agar
Grain to Grain (G2G) - need to have grain bags
Grain to Bulk (Spawn to Bulk - S2B) - need to prepare Bulk bags
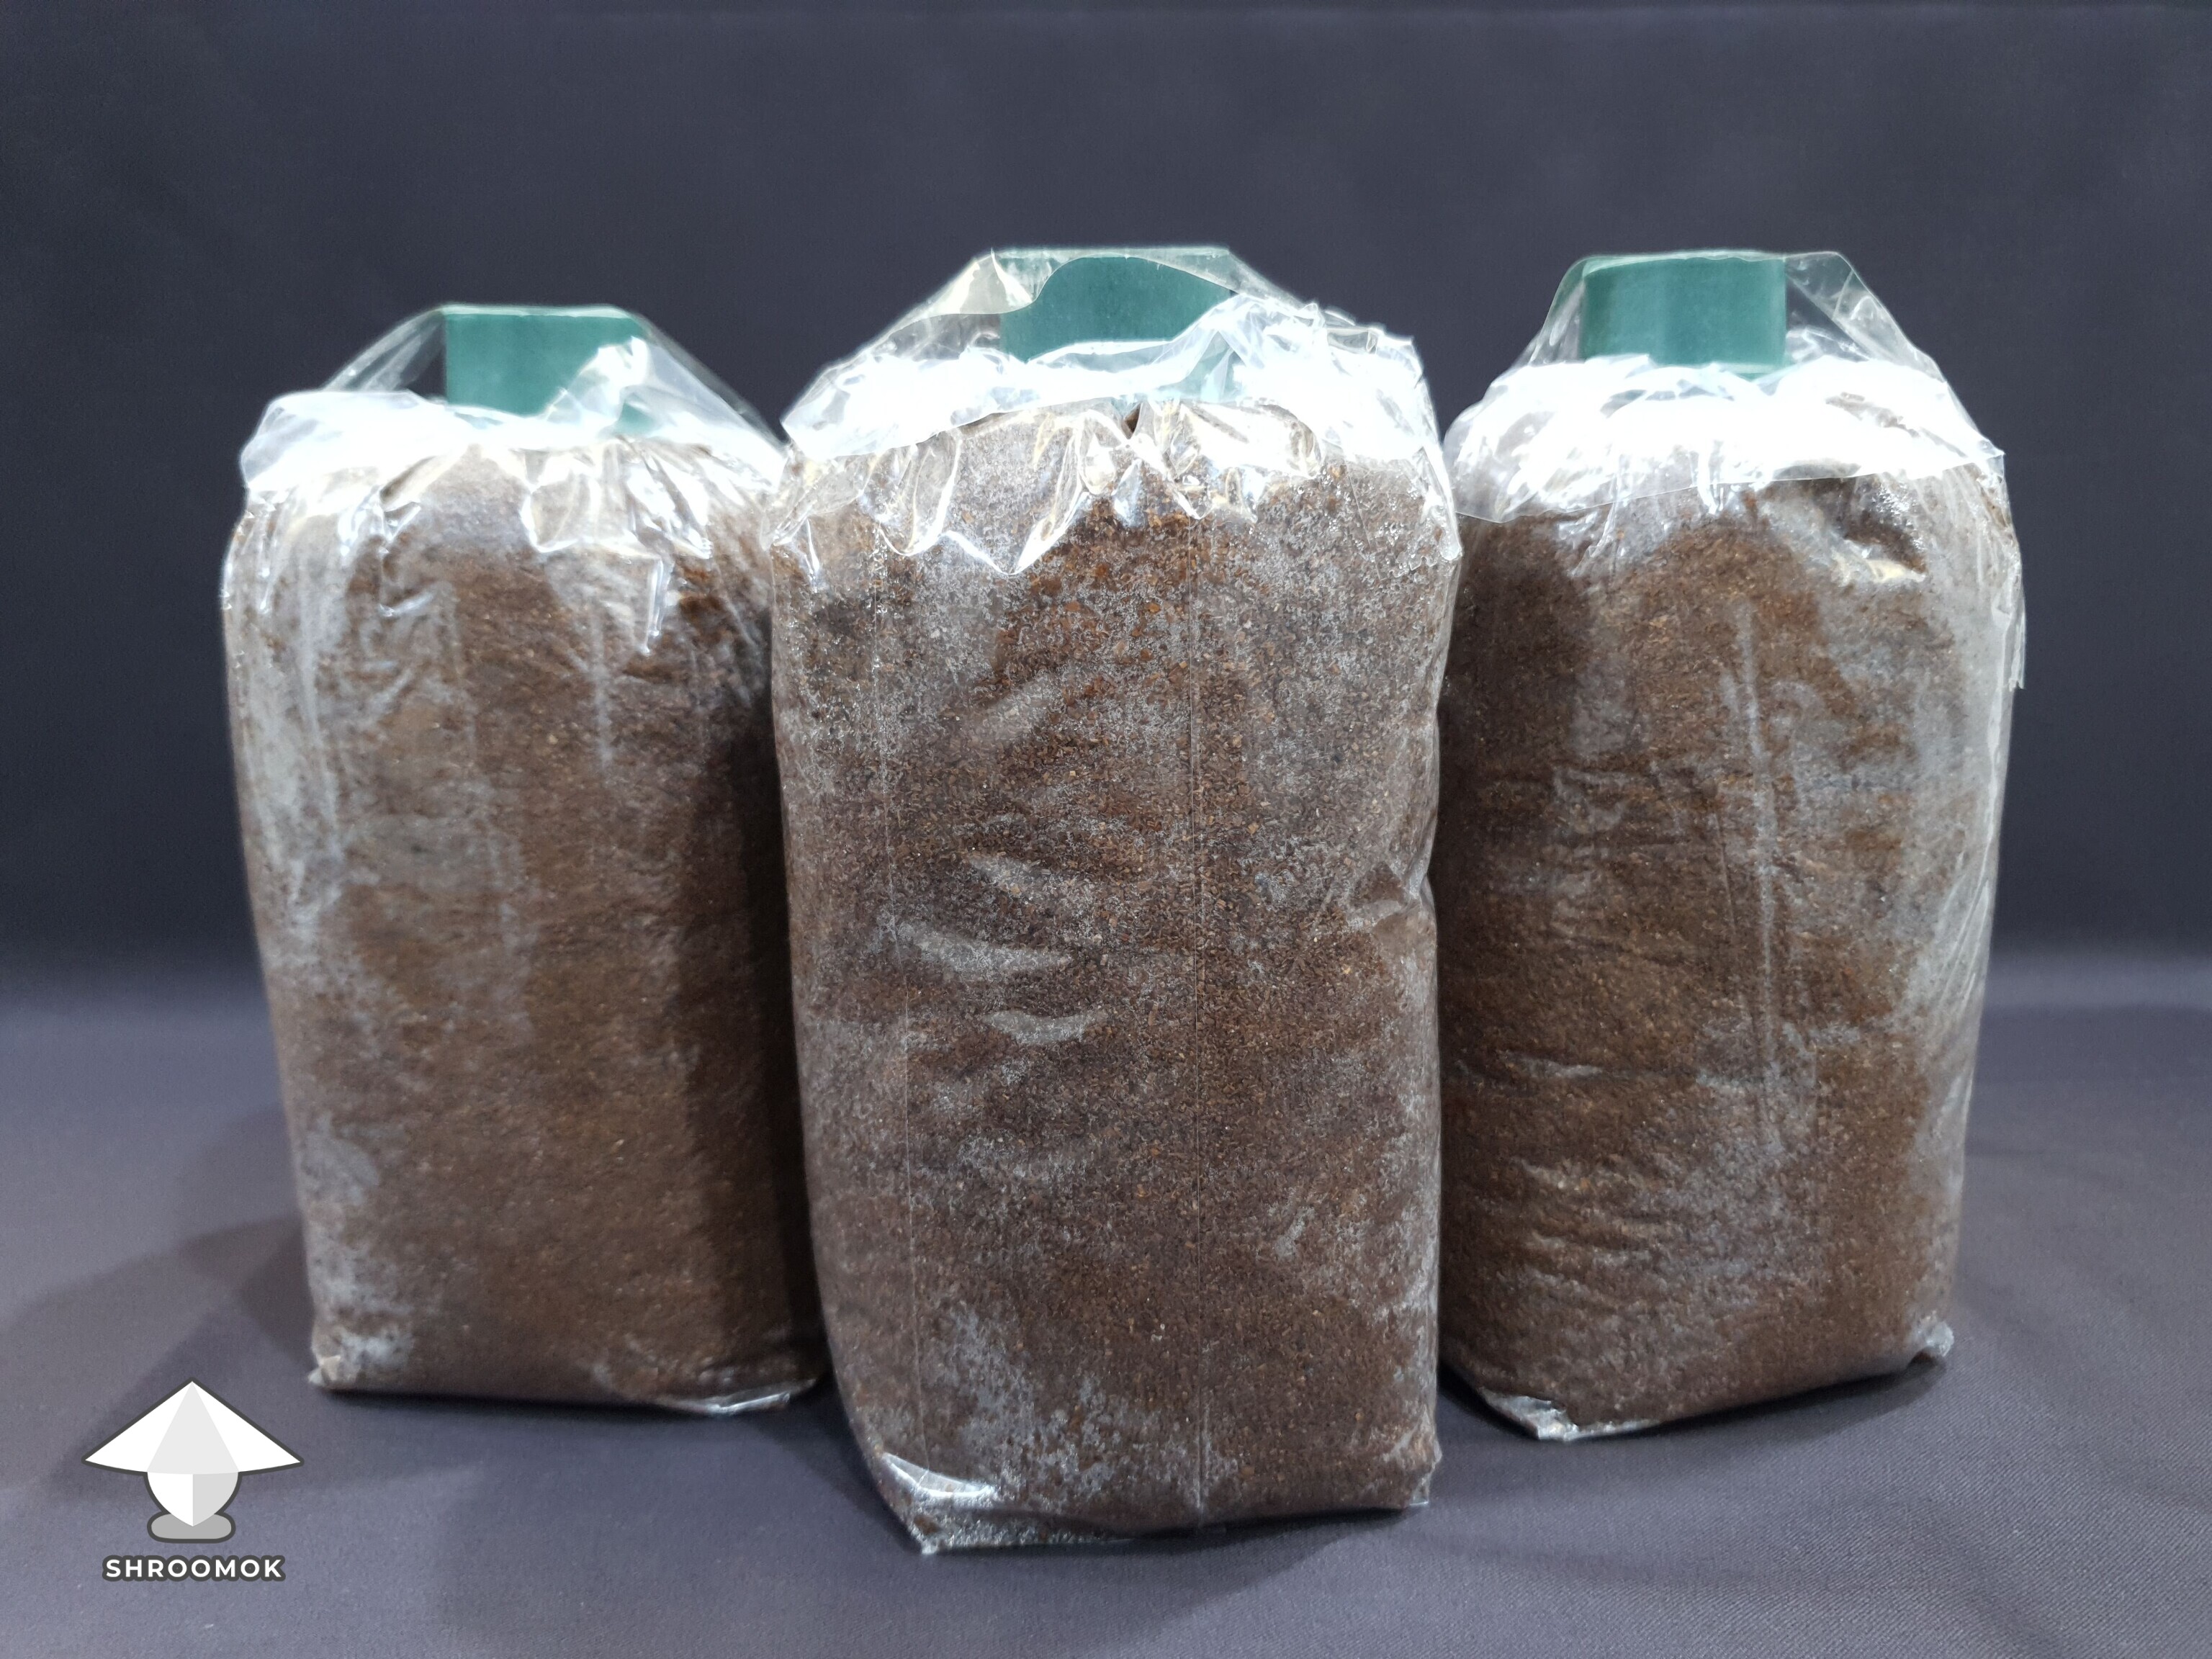
So, I prepared three bags with a substrate mix of 95% hardwood sawdust and 5% rice bran. Gypsum is beneficial, but I didn’t add it.
The moisture level is around 60%. I used the traditional "field capacity" test to check:
grab a handful of the substrate, squeeze it as hard as you can, and only a few steady drops should come out—this means the moisture level is perfect!
For these bags, I used large heat-resistant grow bags, filled them with the substrate, and closed them with plastic cylinder plugs with caps. I then pasteurized them for 8 hours. Once they cooled to room temperature, they were ready for the Spawn to Bulk step. Each bag weighs about 3 lbs (1.5 kg).

Attachments
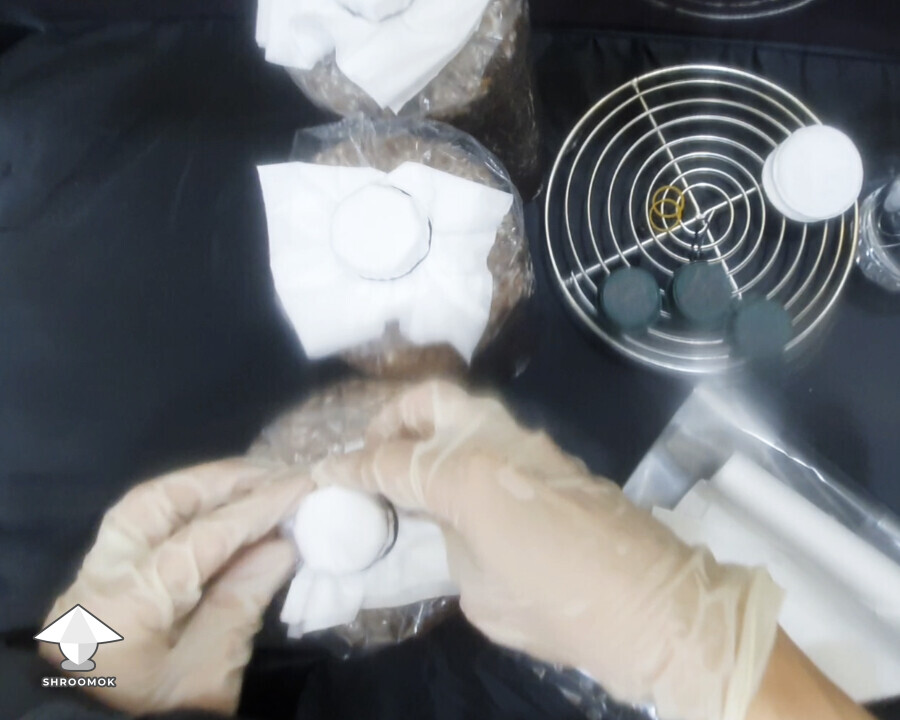
Day 20 (Part 2). Transfers
I set up a Still Air Box (SAB) and placed all the necessary stuff inside.

Then I made transfers in SAB one by one:
1) Grain Spawn to Agar
I prepared no-pour agar cups (5PP heat-resistant cups) and put grain spawn sample in each cup. This was mainly for demonstration—to show one of the ways to save mycelium.

Pro Tip: You can also inoculate an agar plate with grain spawn samples from a pre-made grow kit. This way, you can save the genetics for future attempts and save money! 😉
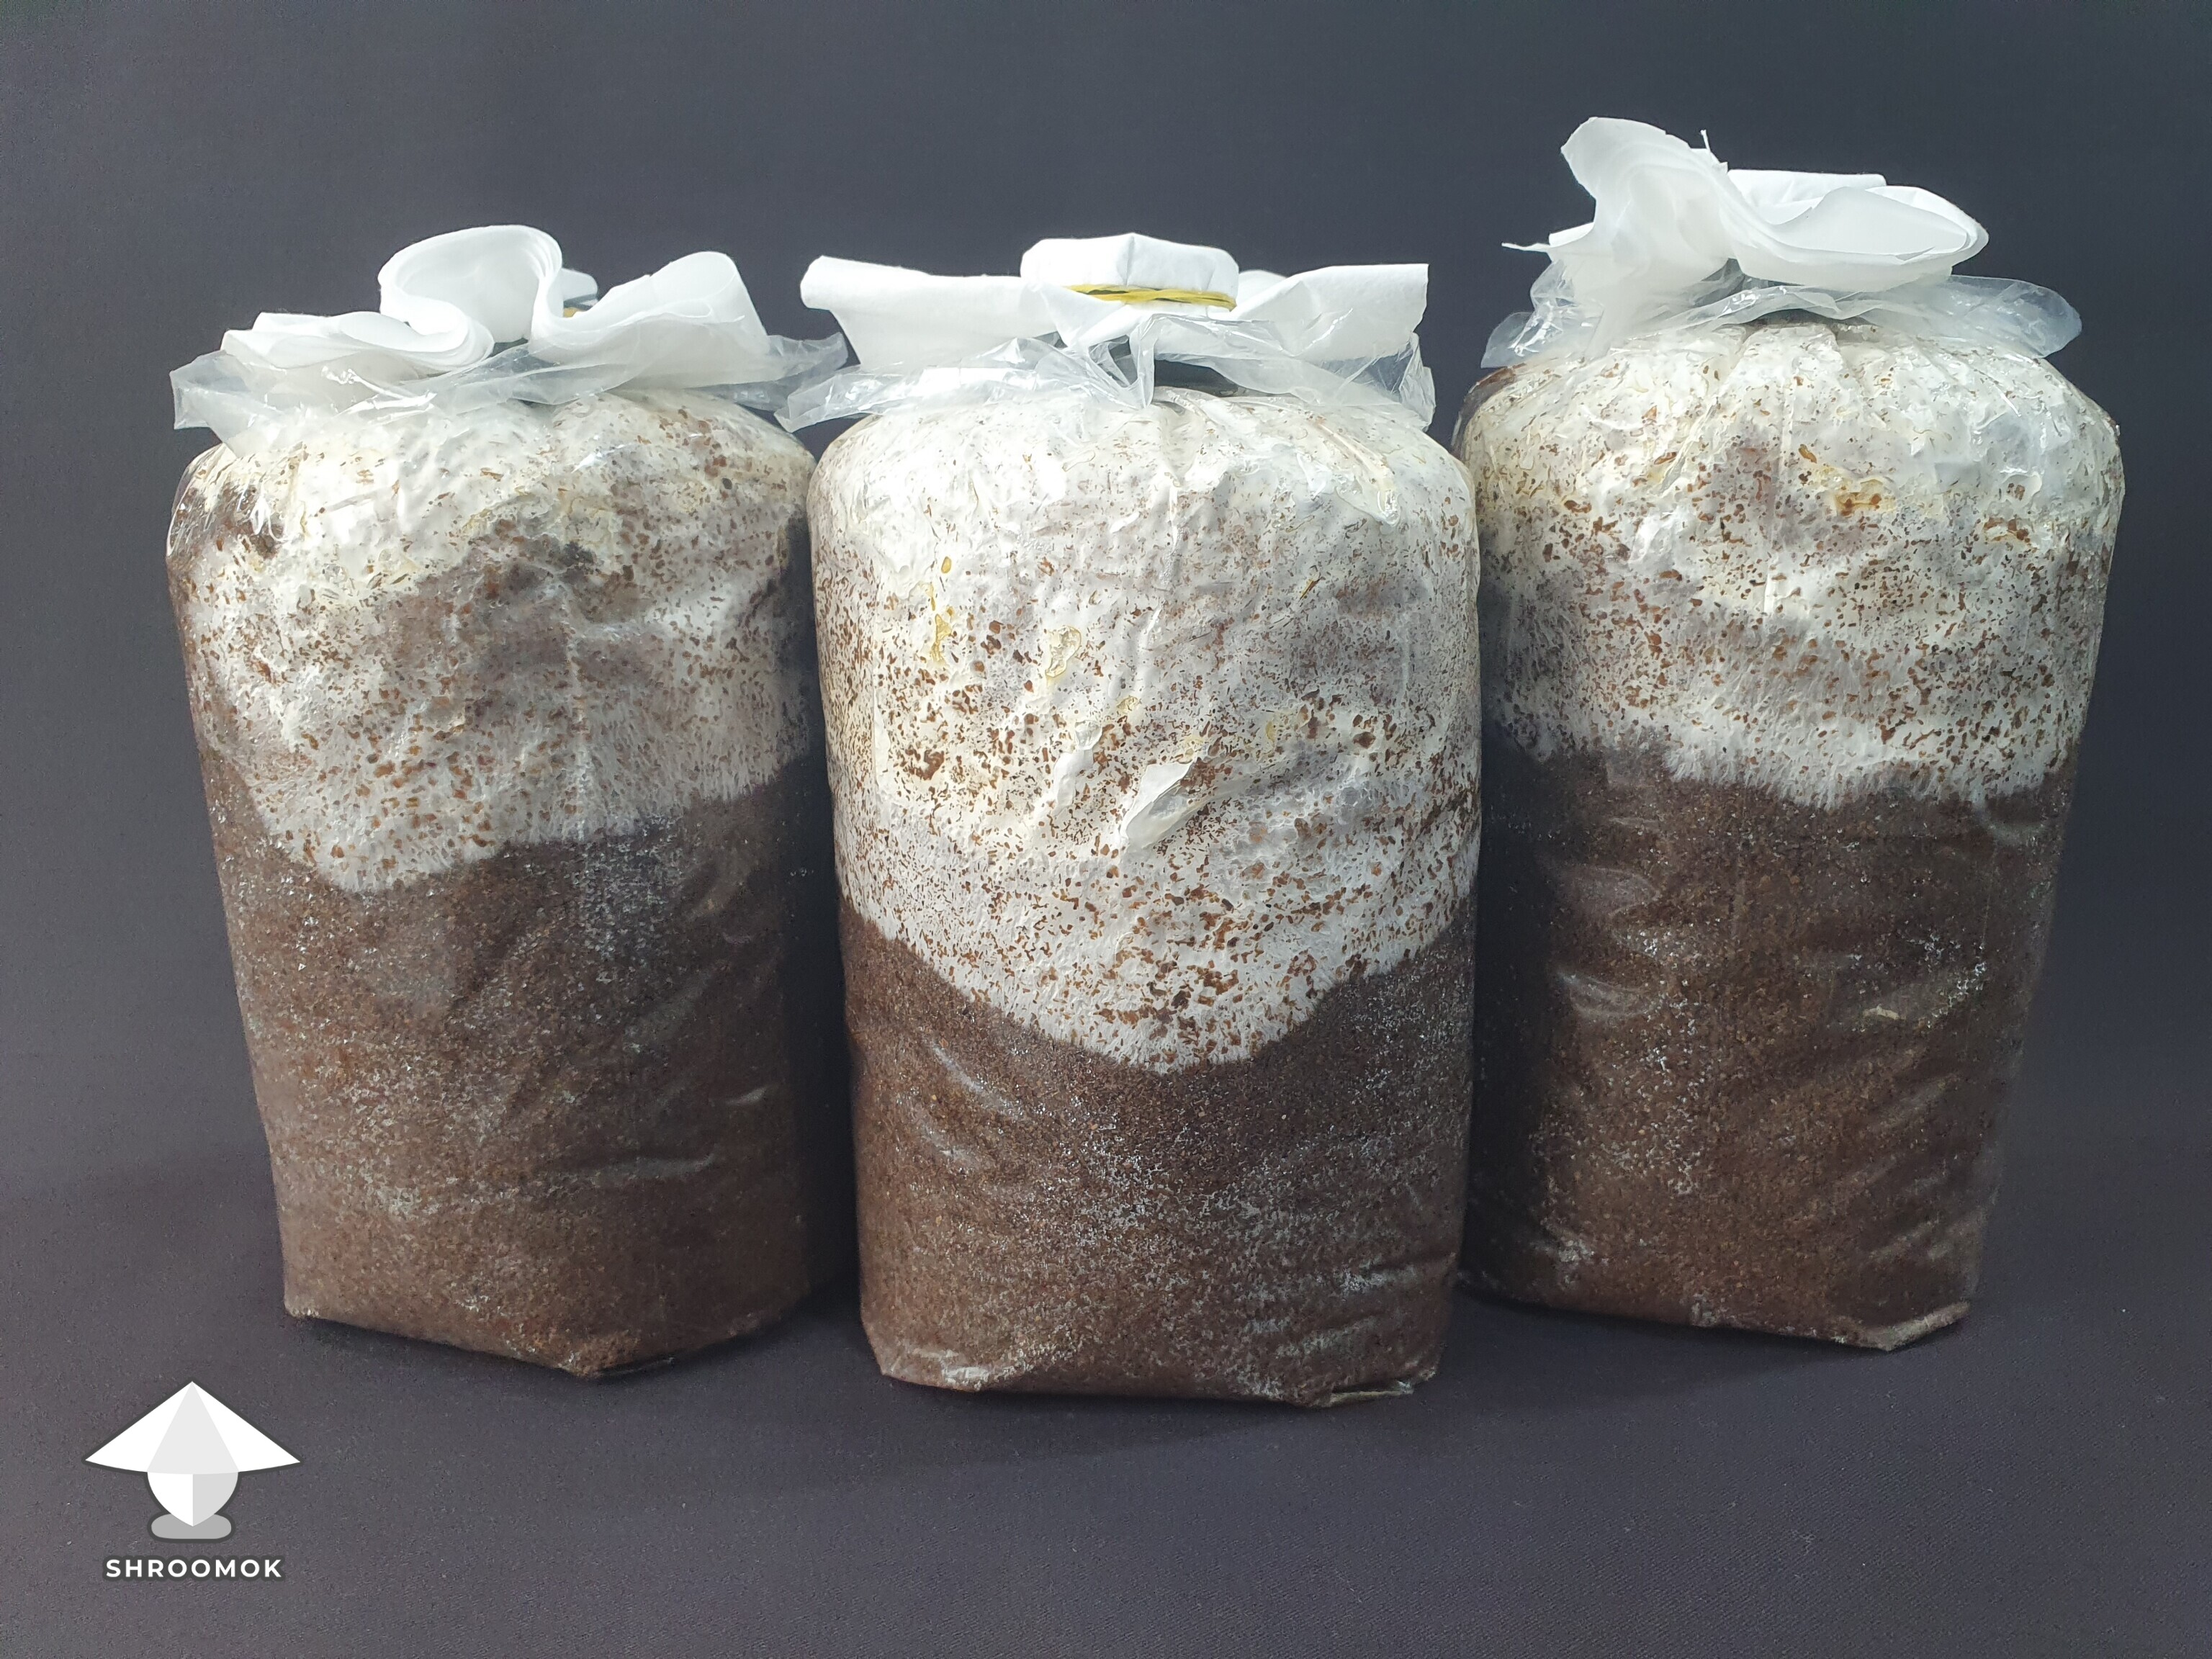
2) Grain to Grain Transfer I used the same spawn bag for Grain to Grain transfer, inoculating three more grain bags with Antler Reishi. This method speeds up colonization significantly.

Pro Tip: You can also multiply mycelium from pre-made grow kits using Grain to Grain transfers! Detailed process here: Grain to Grain Guide
At this stage, the mycelium is strong enough, reducing the risk of contamination. Colonization also much faster because you're using active mycelium, and each grain becomes a starting point for mycelial growth. If you introduce just 1 tablespoon of spawn, you’ll create at least 100 active points of mycelium growth!
3) Spawn to Bulk Finally, I did a Spawn to Bulk transfer (moving the spawn to the fruiting substrate) to prepare three blocks for mushroom fruiting.

Pro Tip: One grain spawn bag (about 300 g or 0.7 lbs) is enough to inoculate 20–30 grain or bulk bags. I only needed one tablespoon per bag, but of course I used much more.
The day was all about expanding mycelium and preparing for the main (fruiting) stage. Things are looking great, and I’m excited to see how these blocks develop!
Attachments
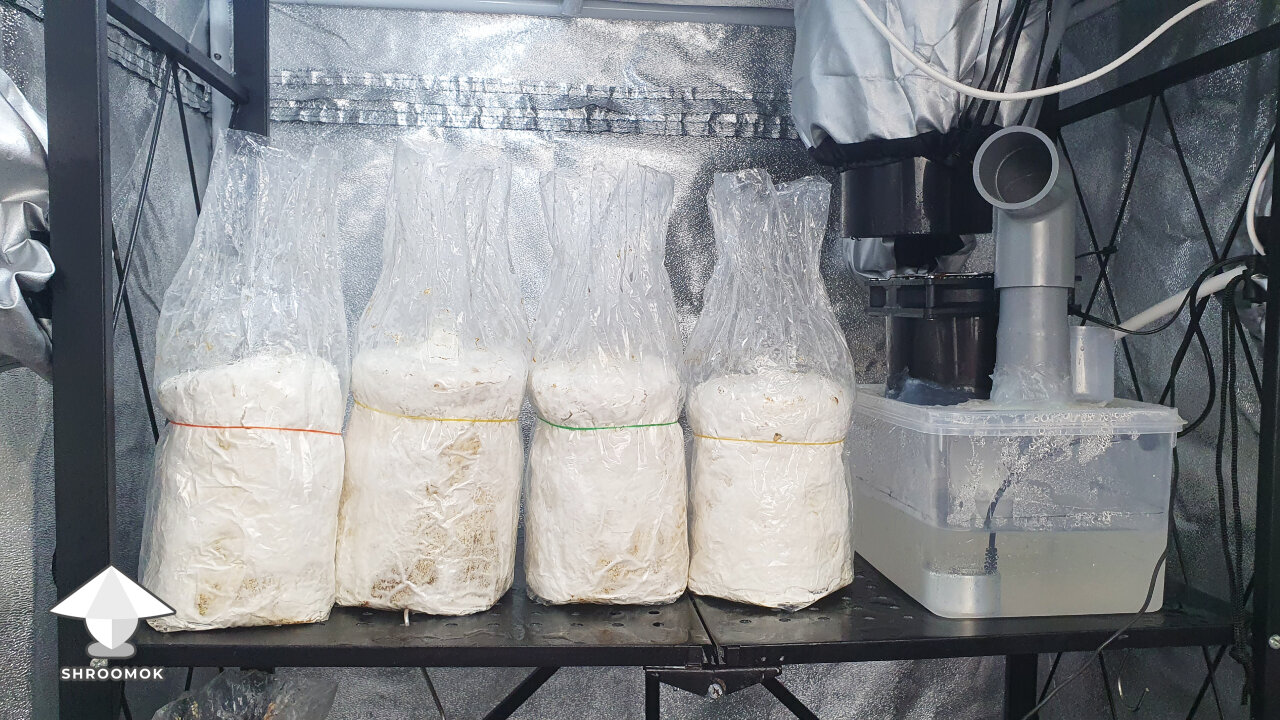
Day 23. Mycelium Run Update
Here are my fruiting blocks 3 days after the Spawn to Bulk transfer.

The grain has turned white again, and the mycelium has already spread onto the sawdust substrate.

It’s time to remove the caps and replace them with breathable filters (4 layers).

Attachments

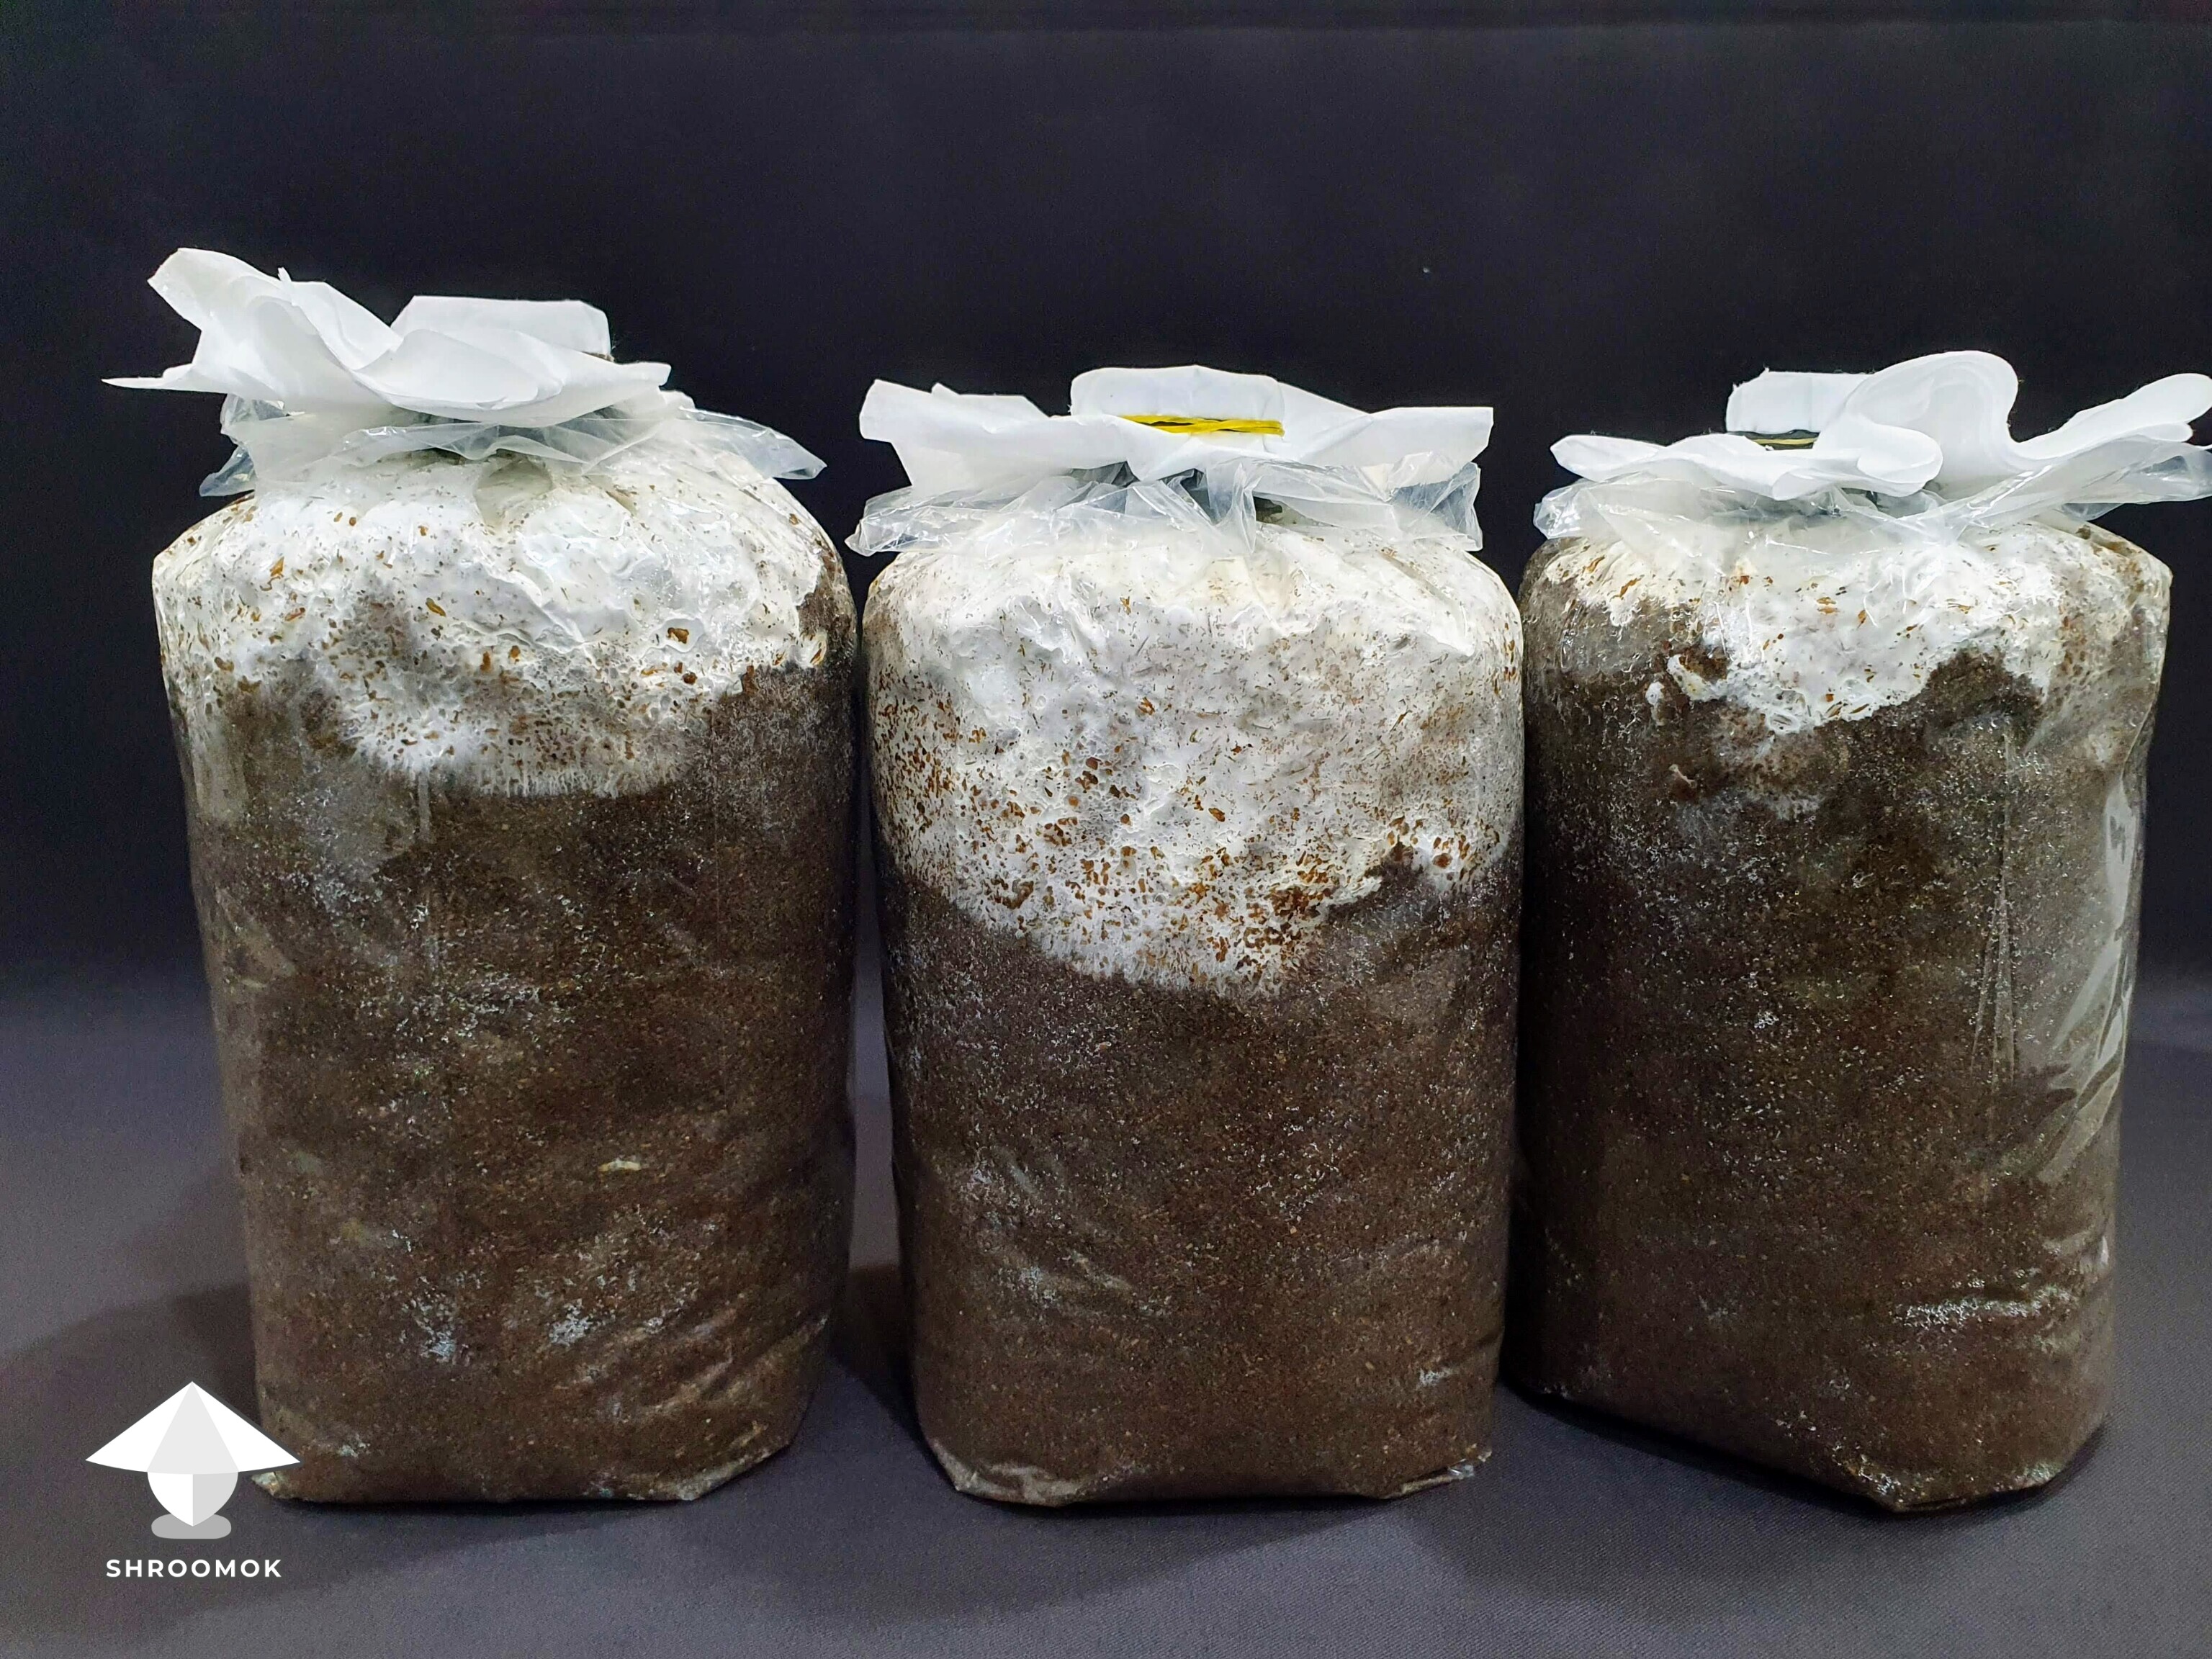
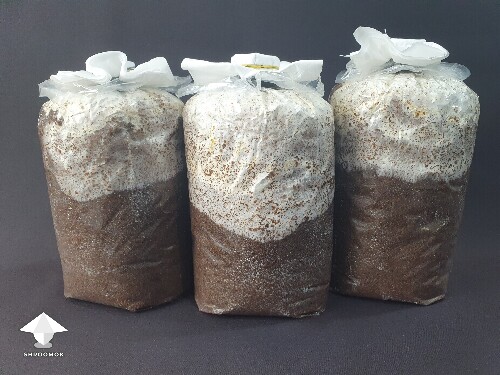
Day 29. Mycelium run update
My fruiting blocks with Antler Reishi - 9 days after the Spawn to Bulk transfer.

Attachments
Day 34. Mycelium run update
Antler Reishi fruiting blocks 14 days since Spawn to Bulk. Mycelium growth has become faster.

Photo with different light.
The other side of the same blocks.

Beautiful mycelium ropes.

Run mycelium! RUN!

Attachments
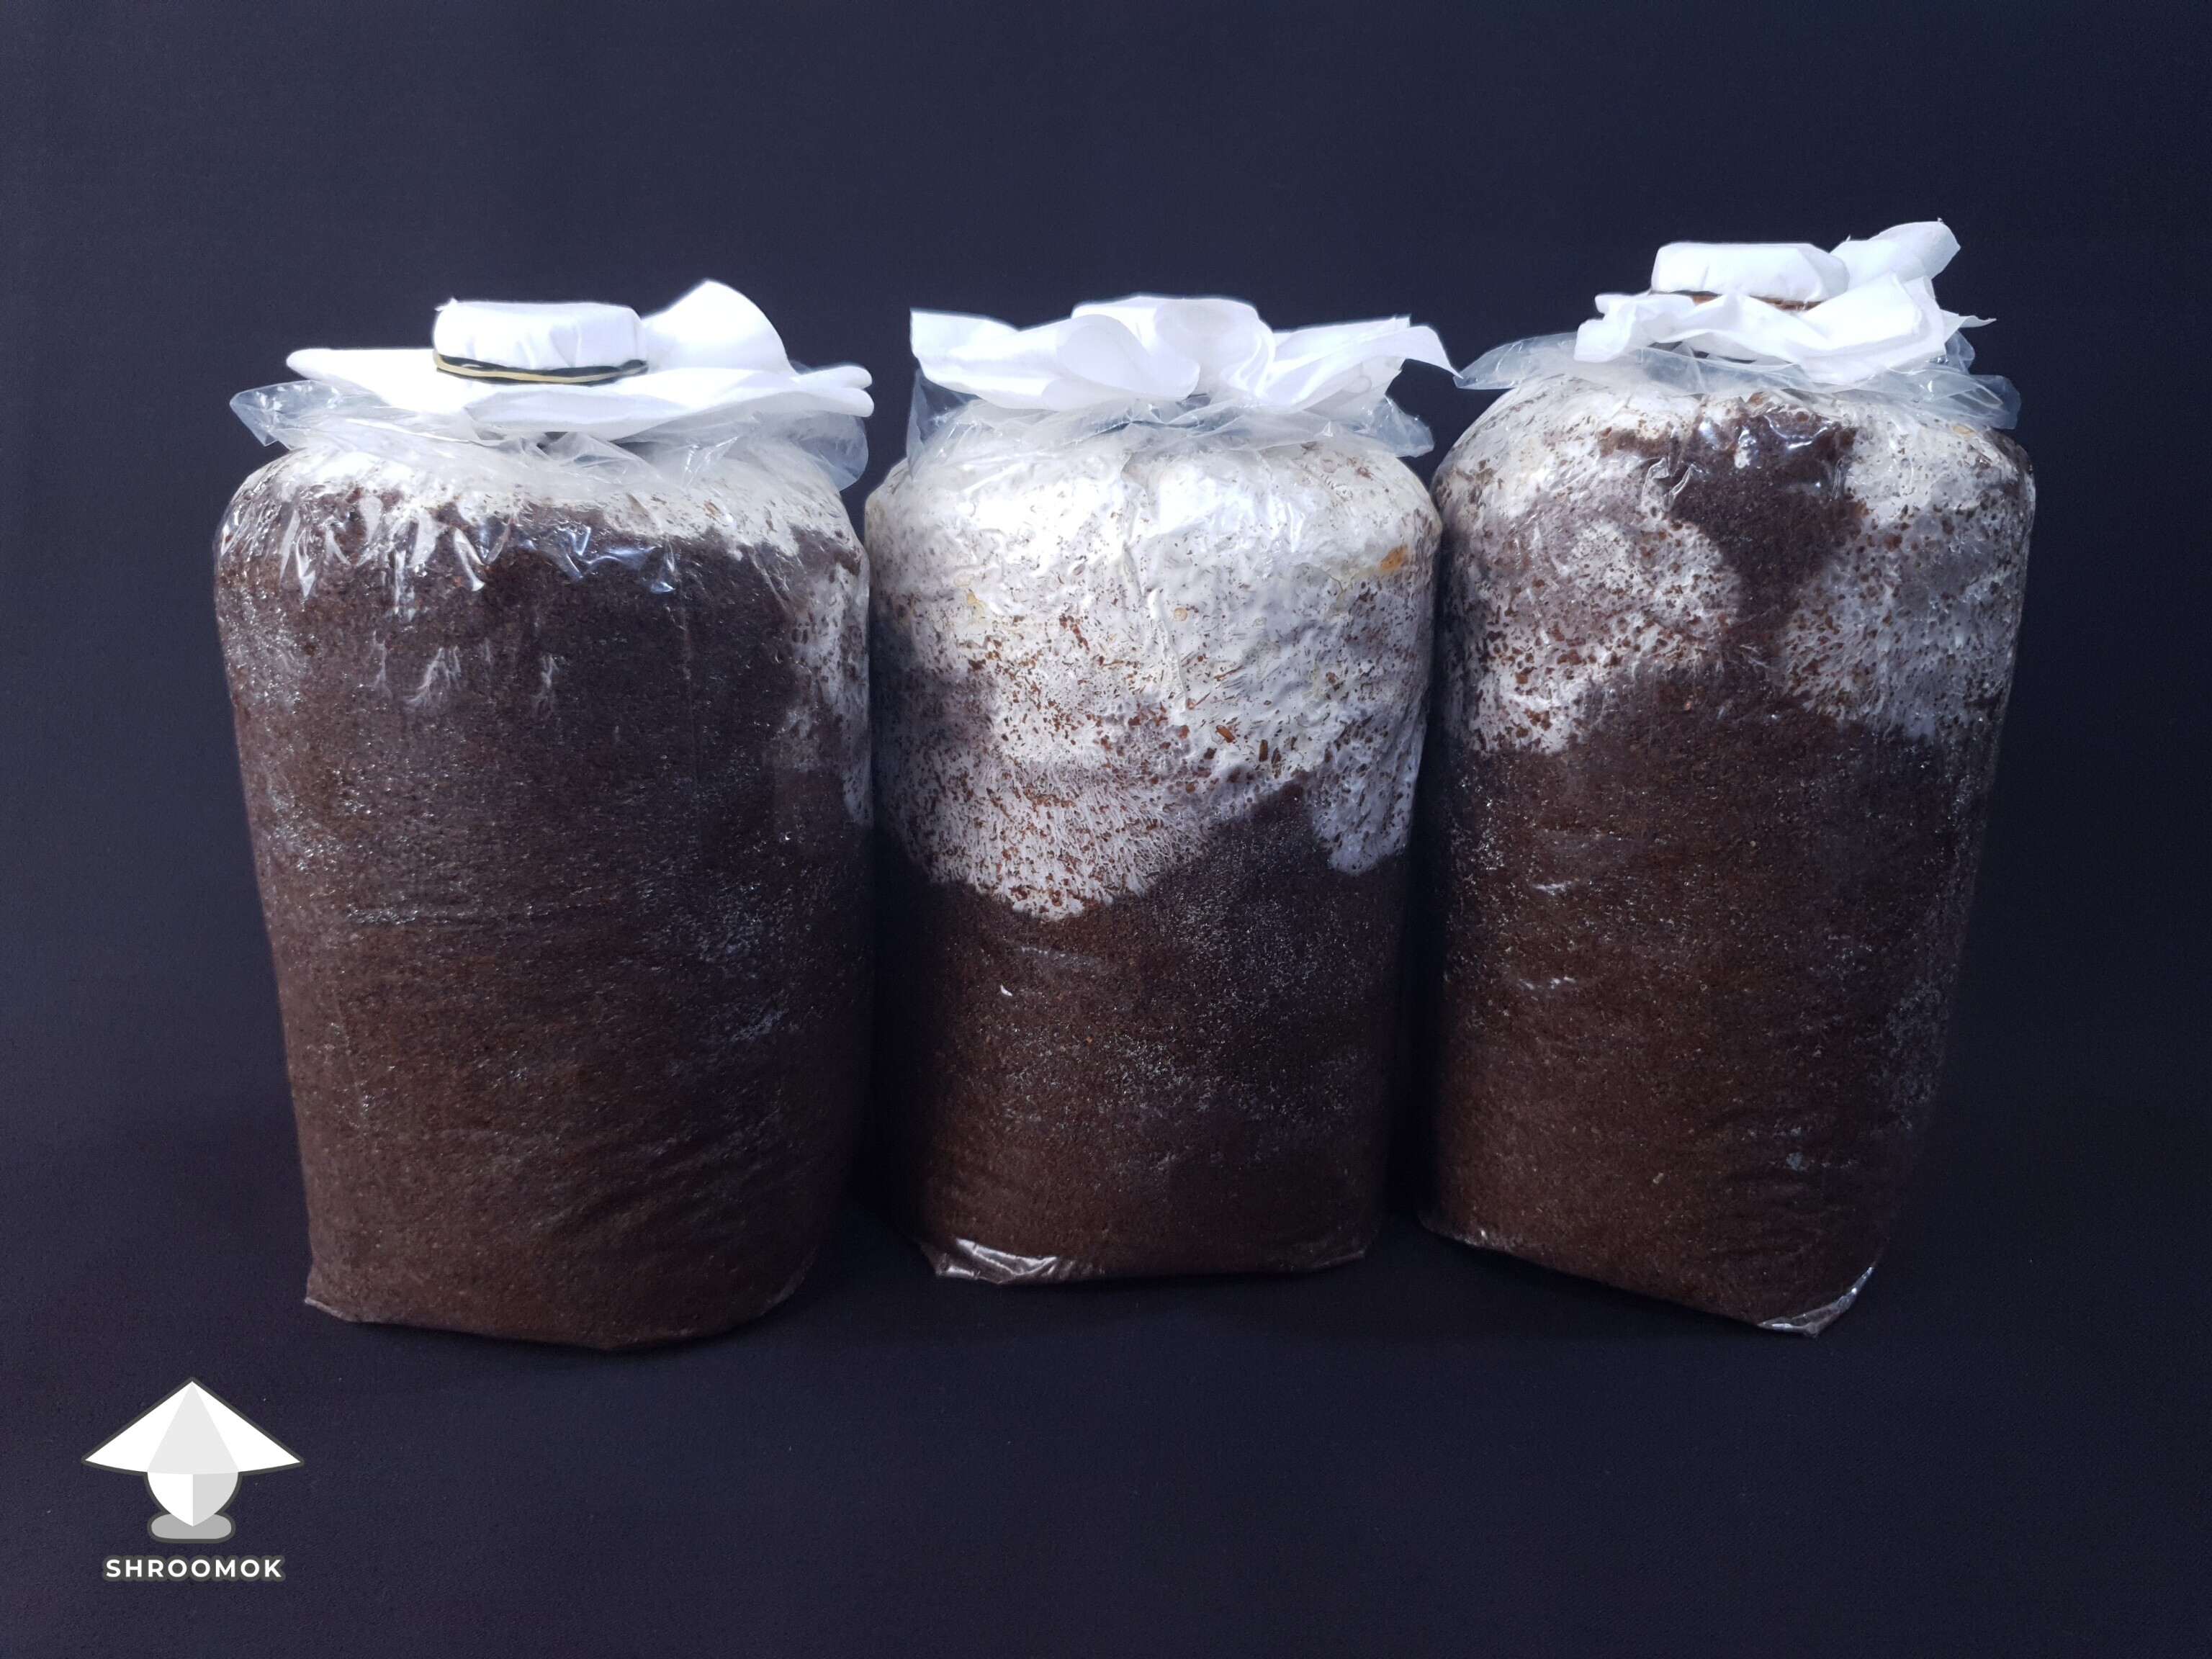
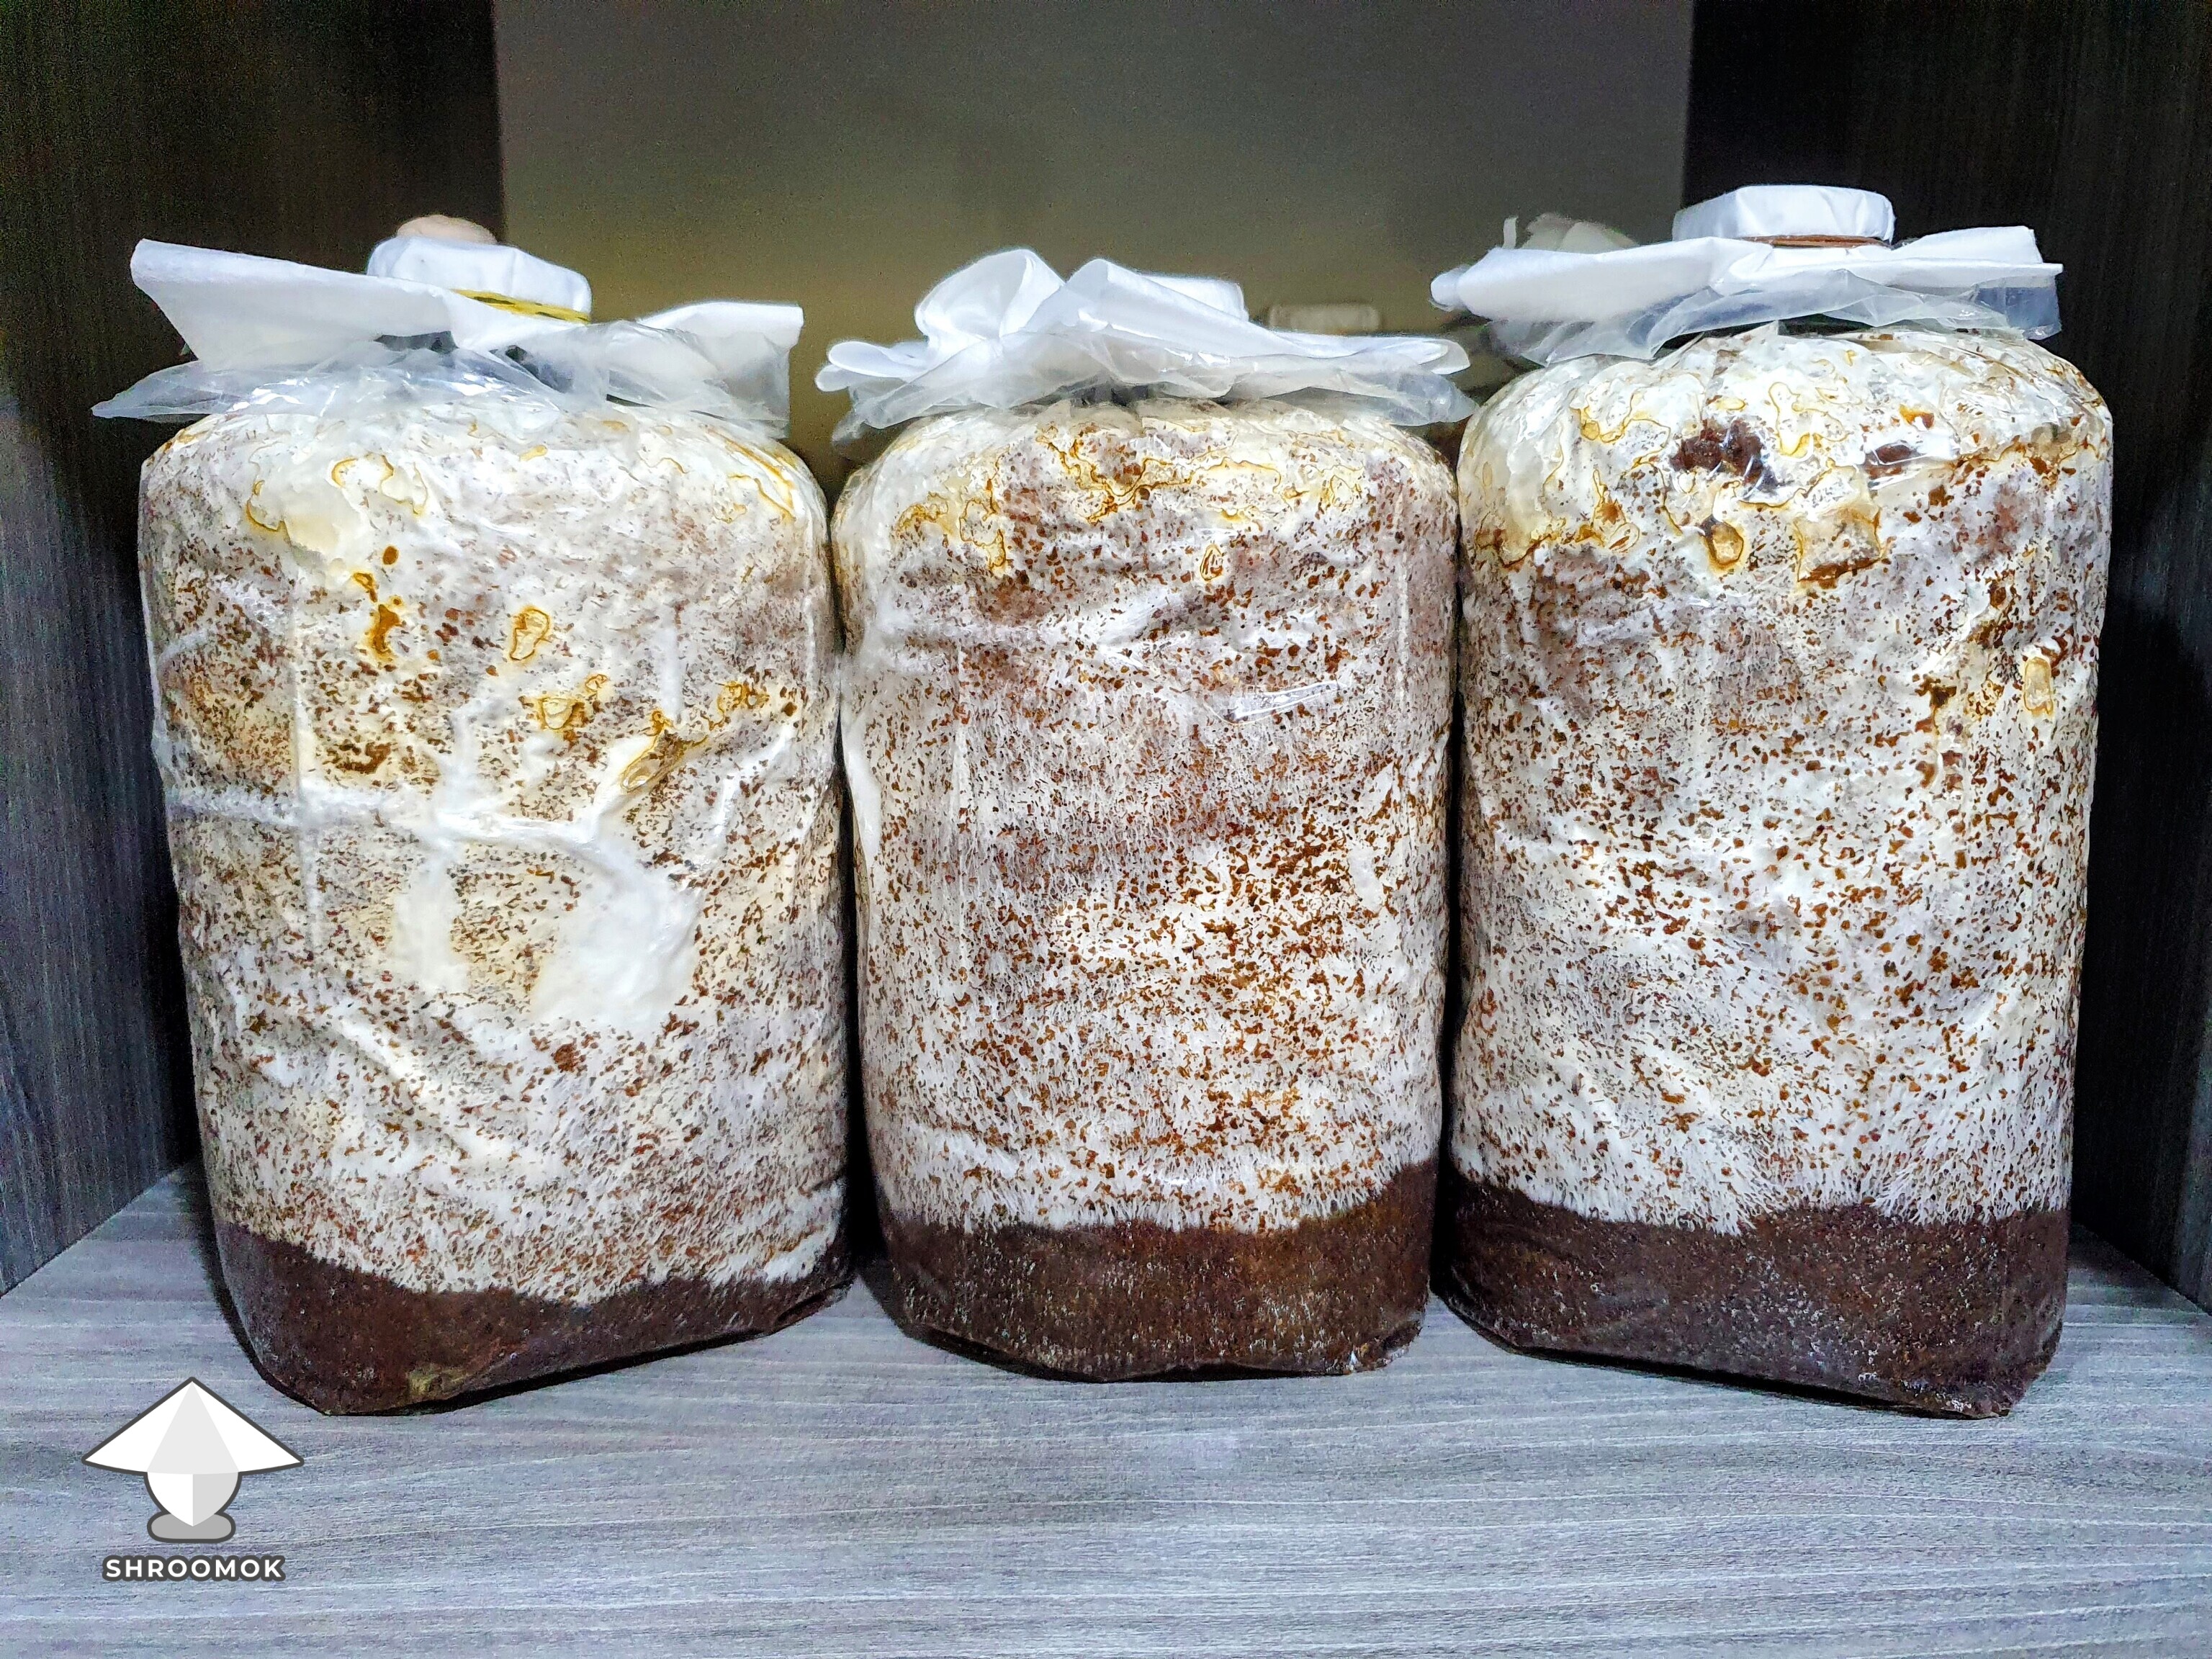
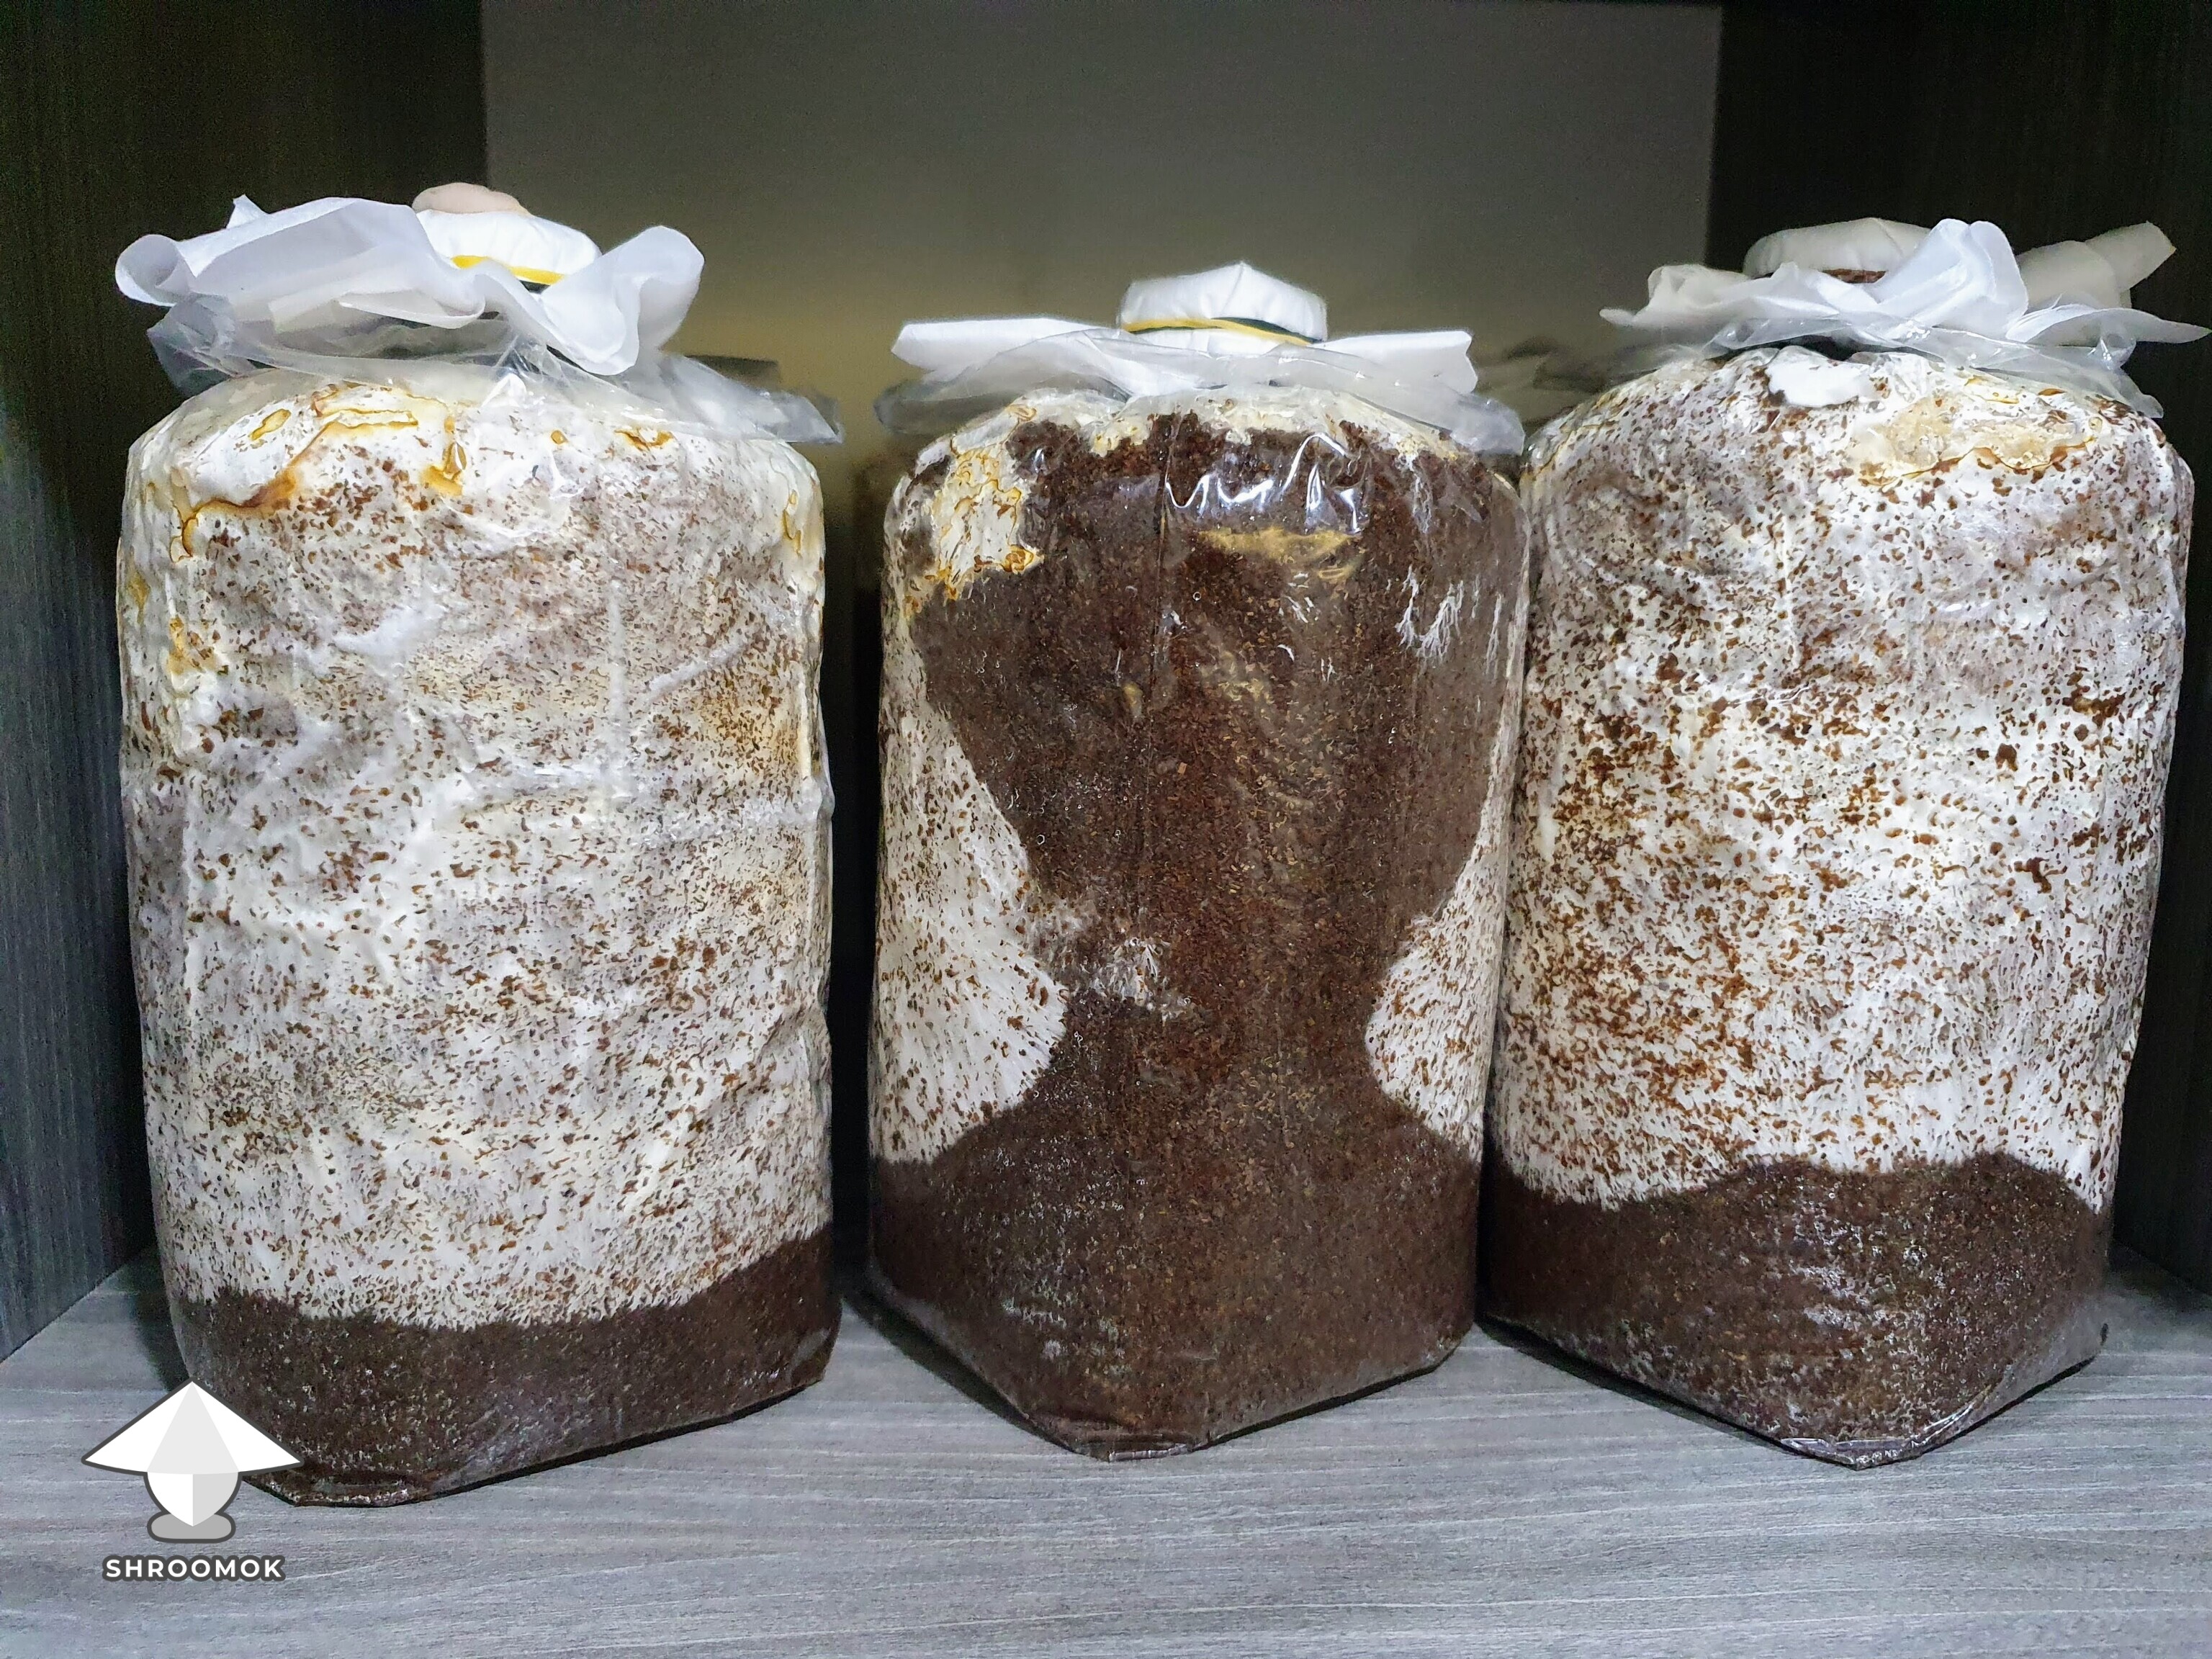
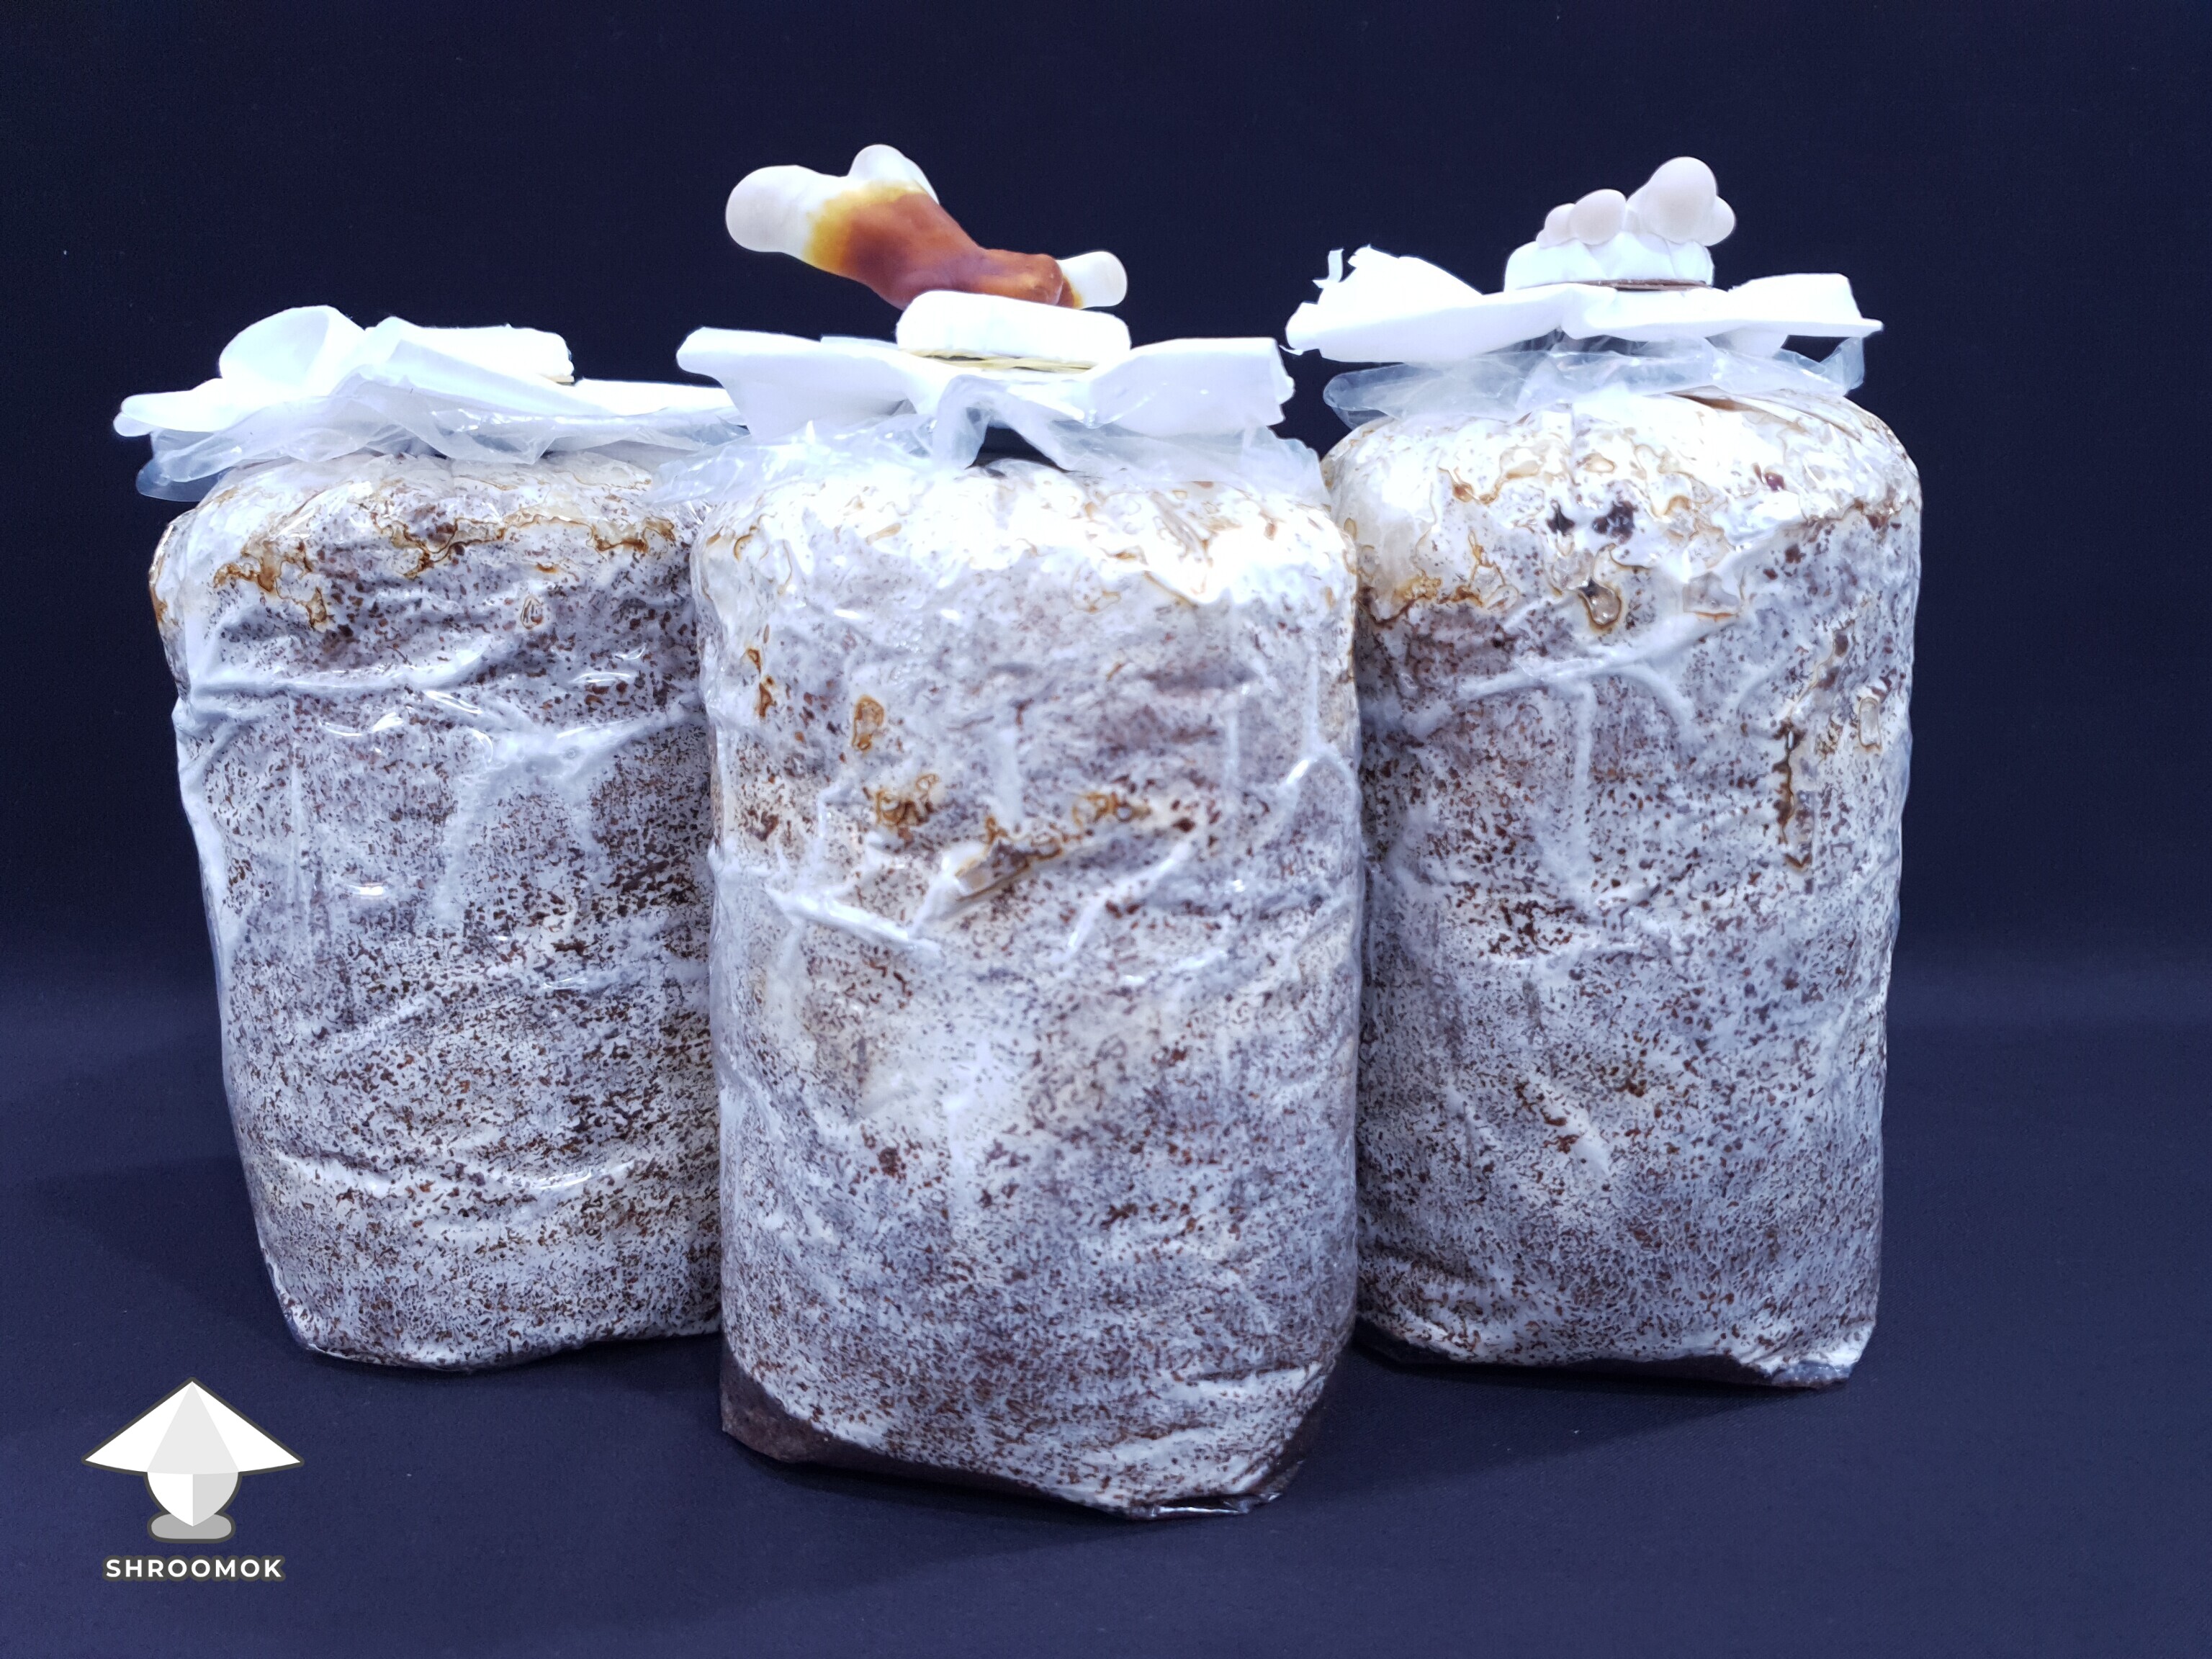
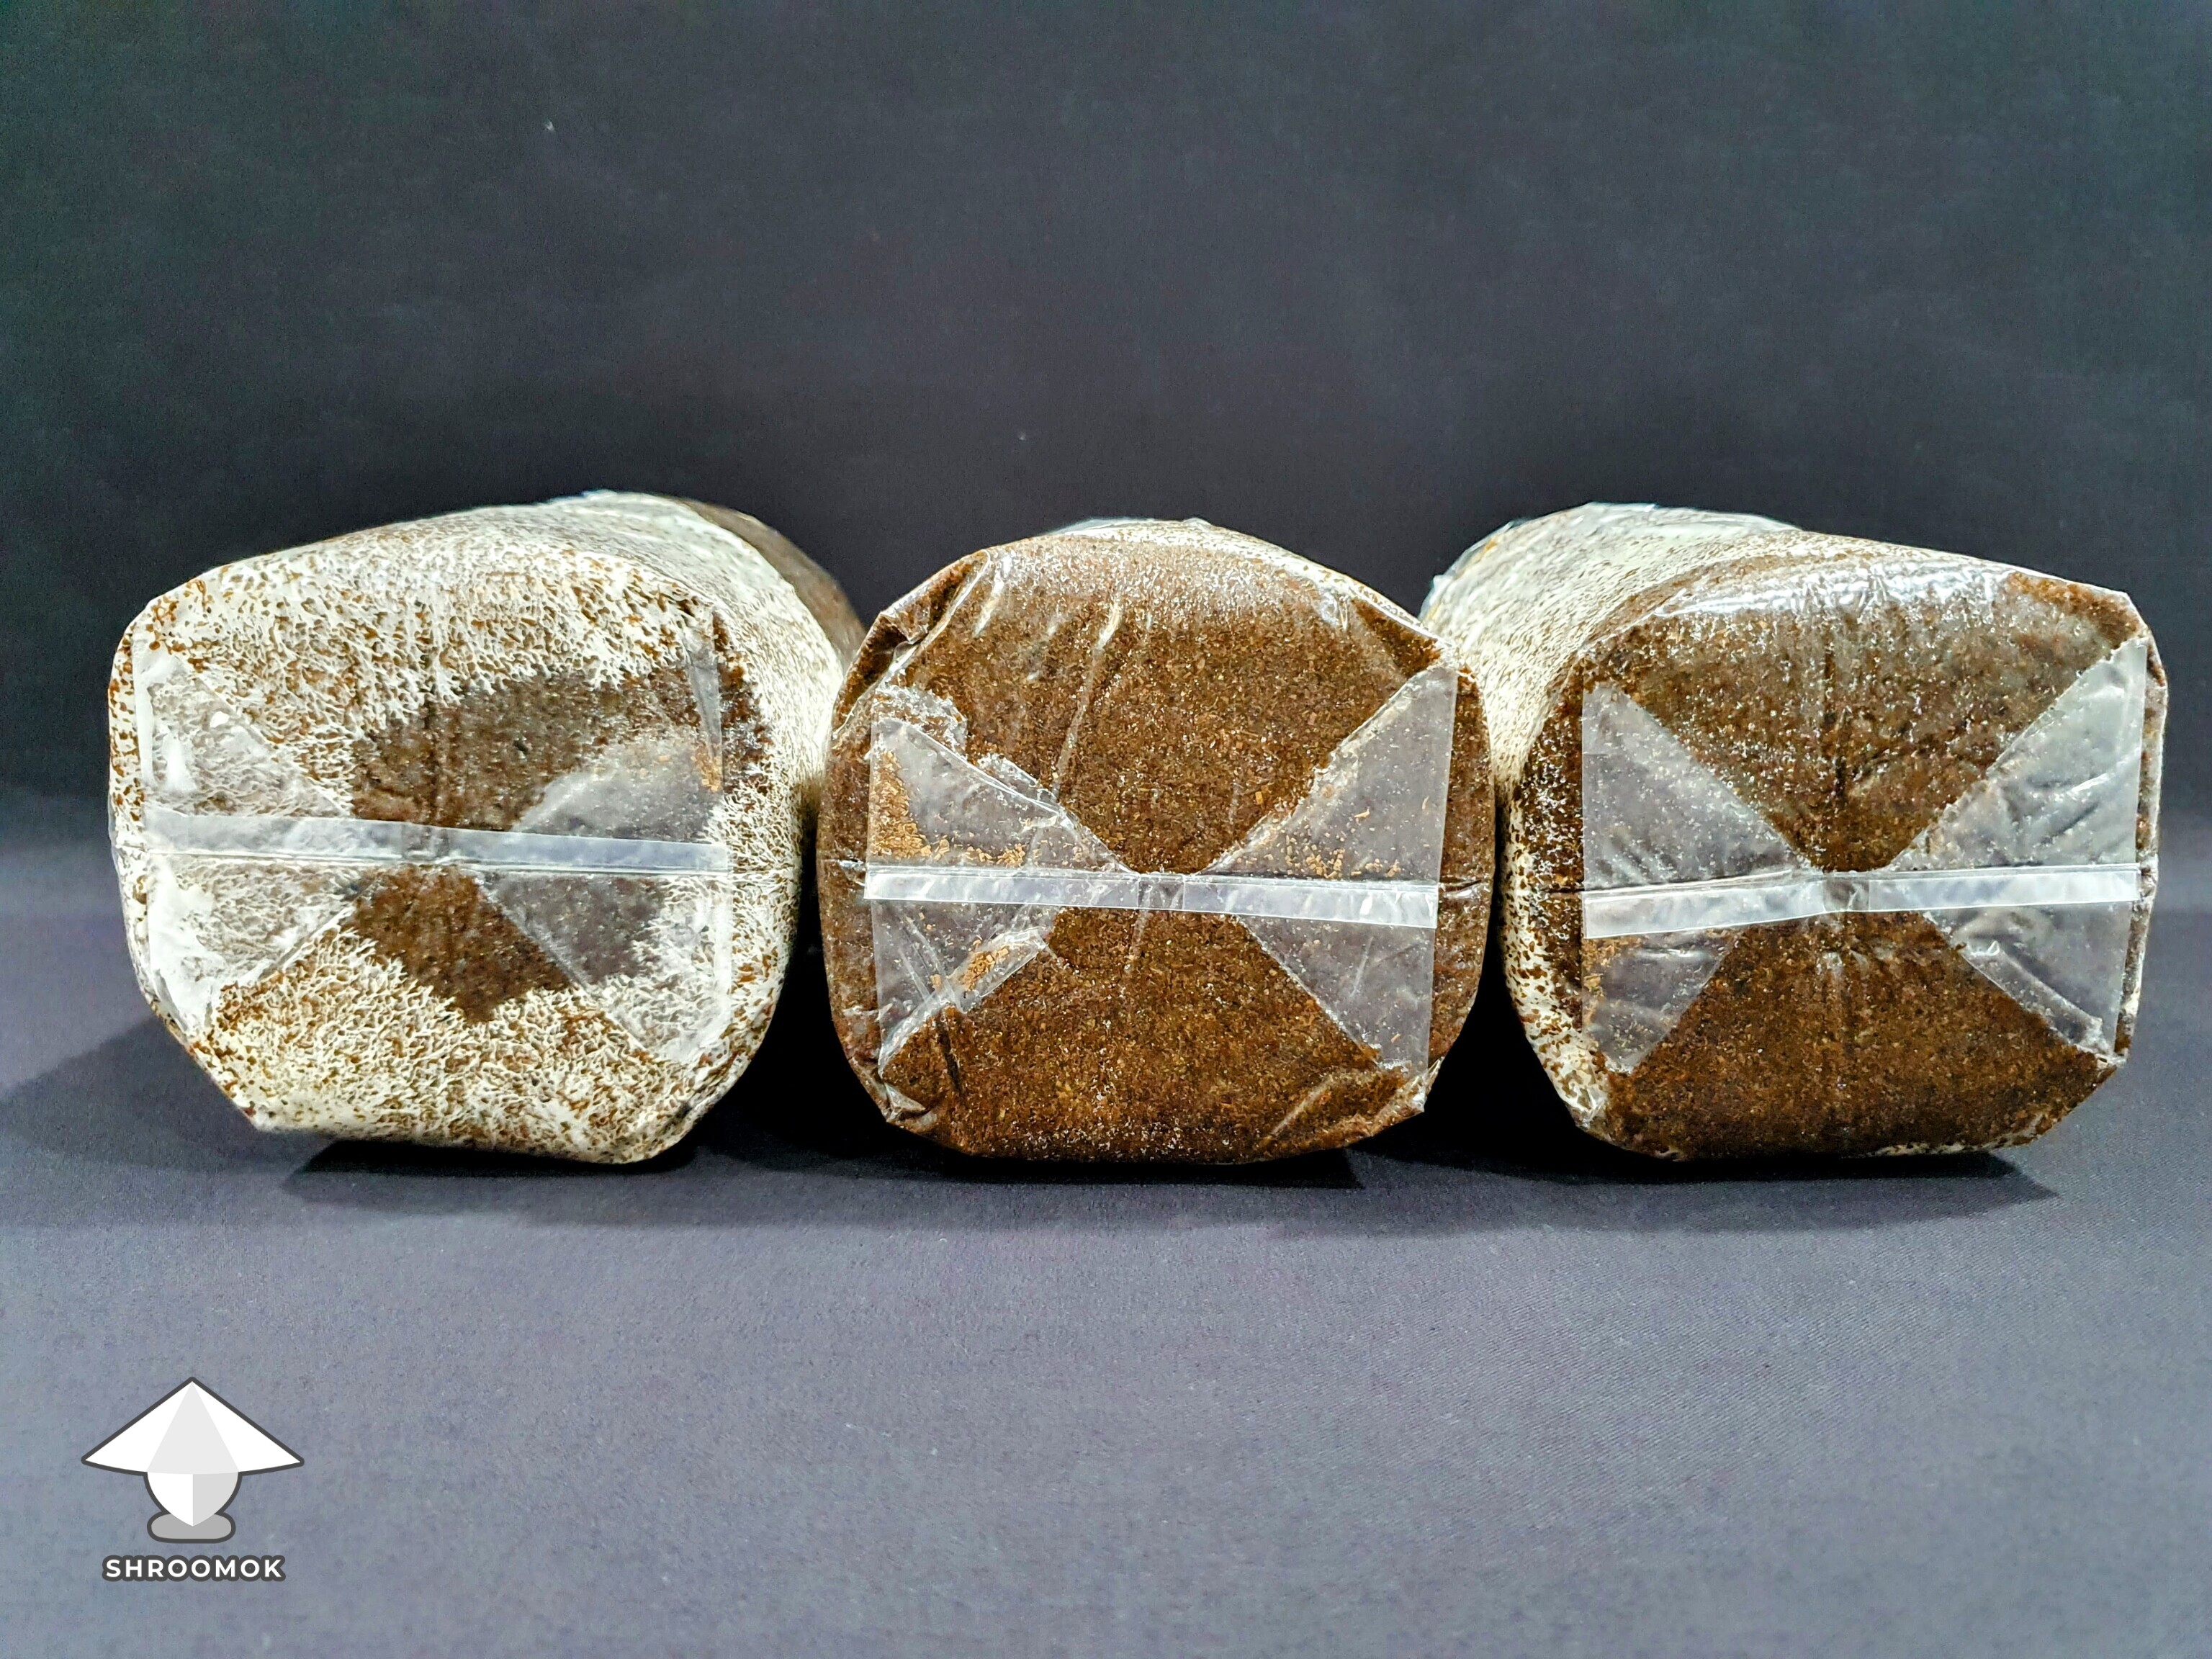
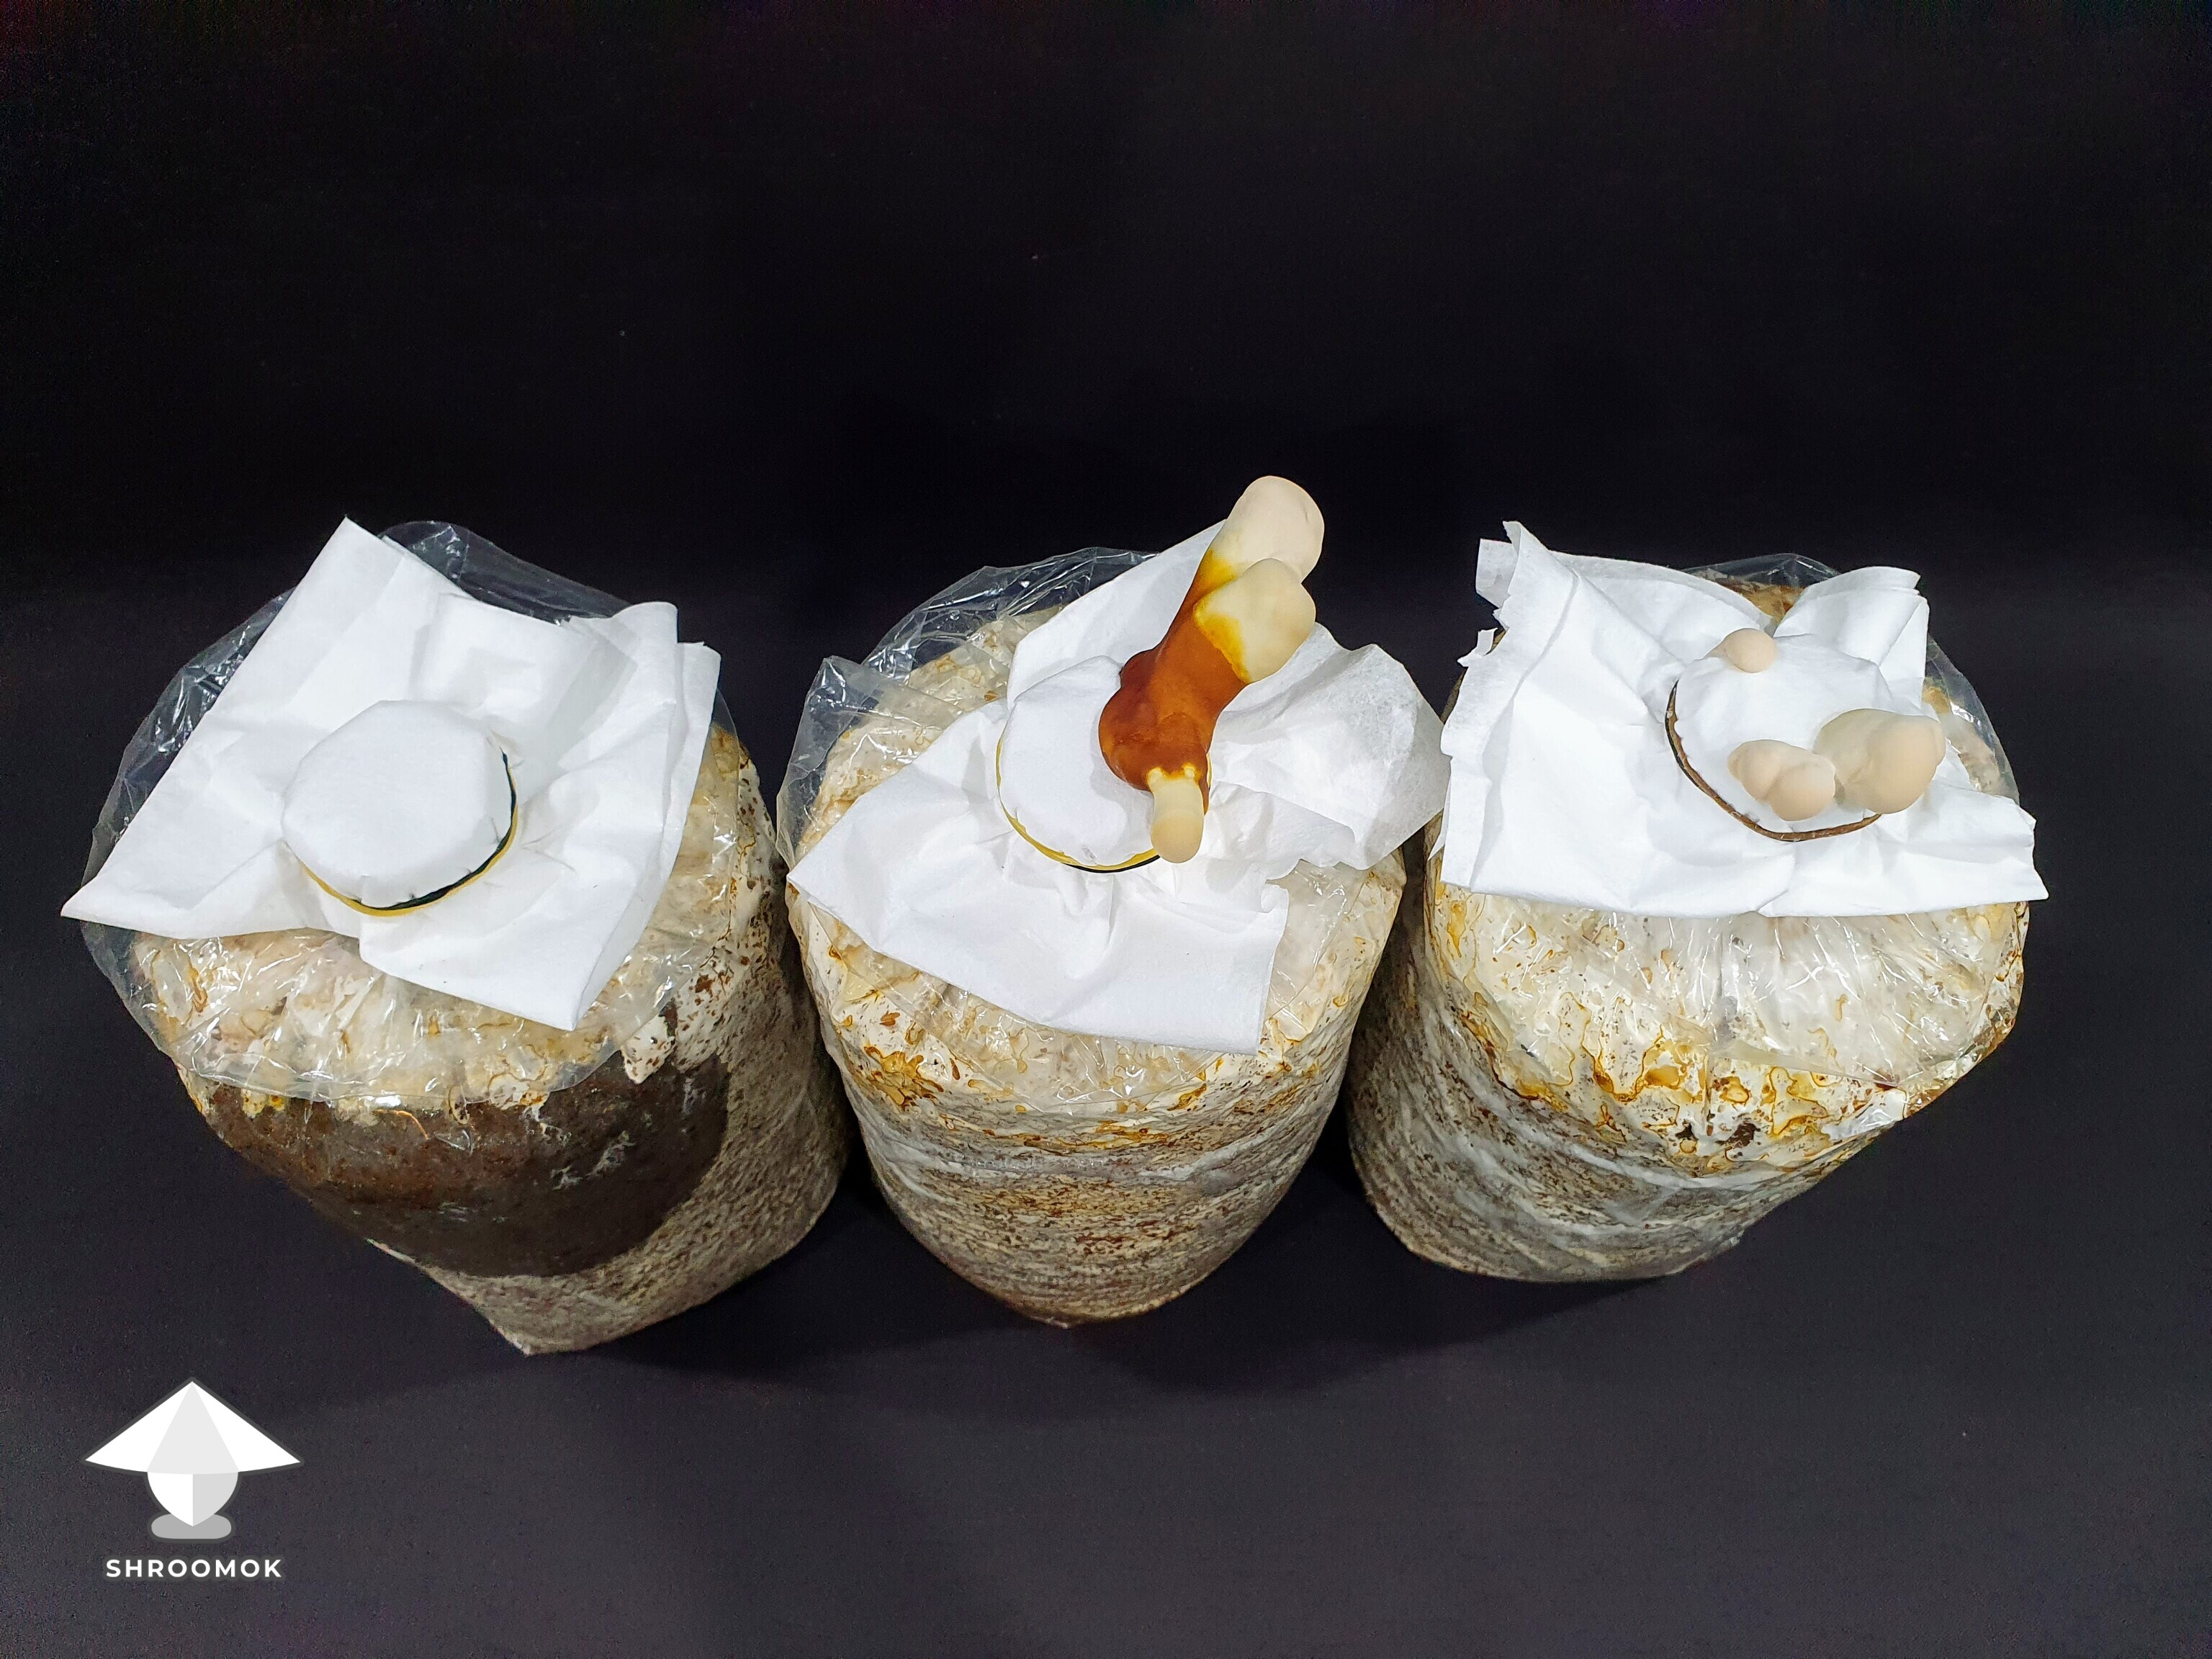
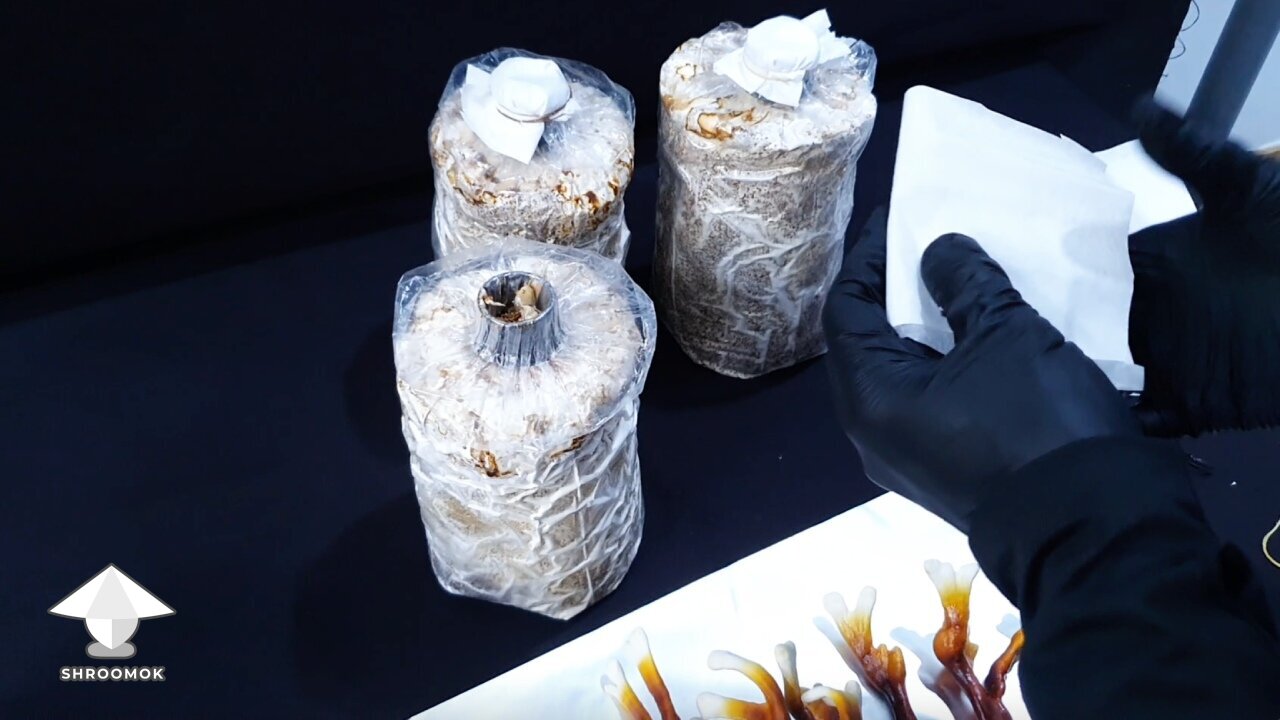
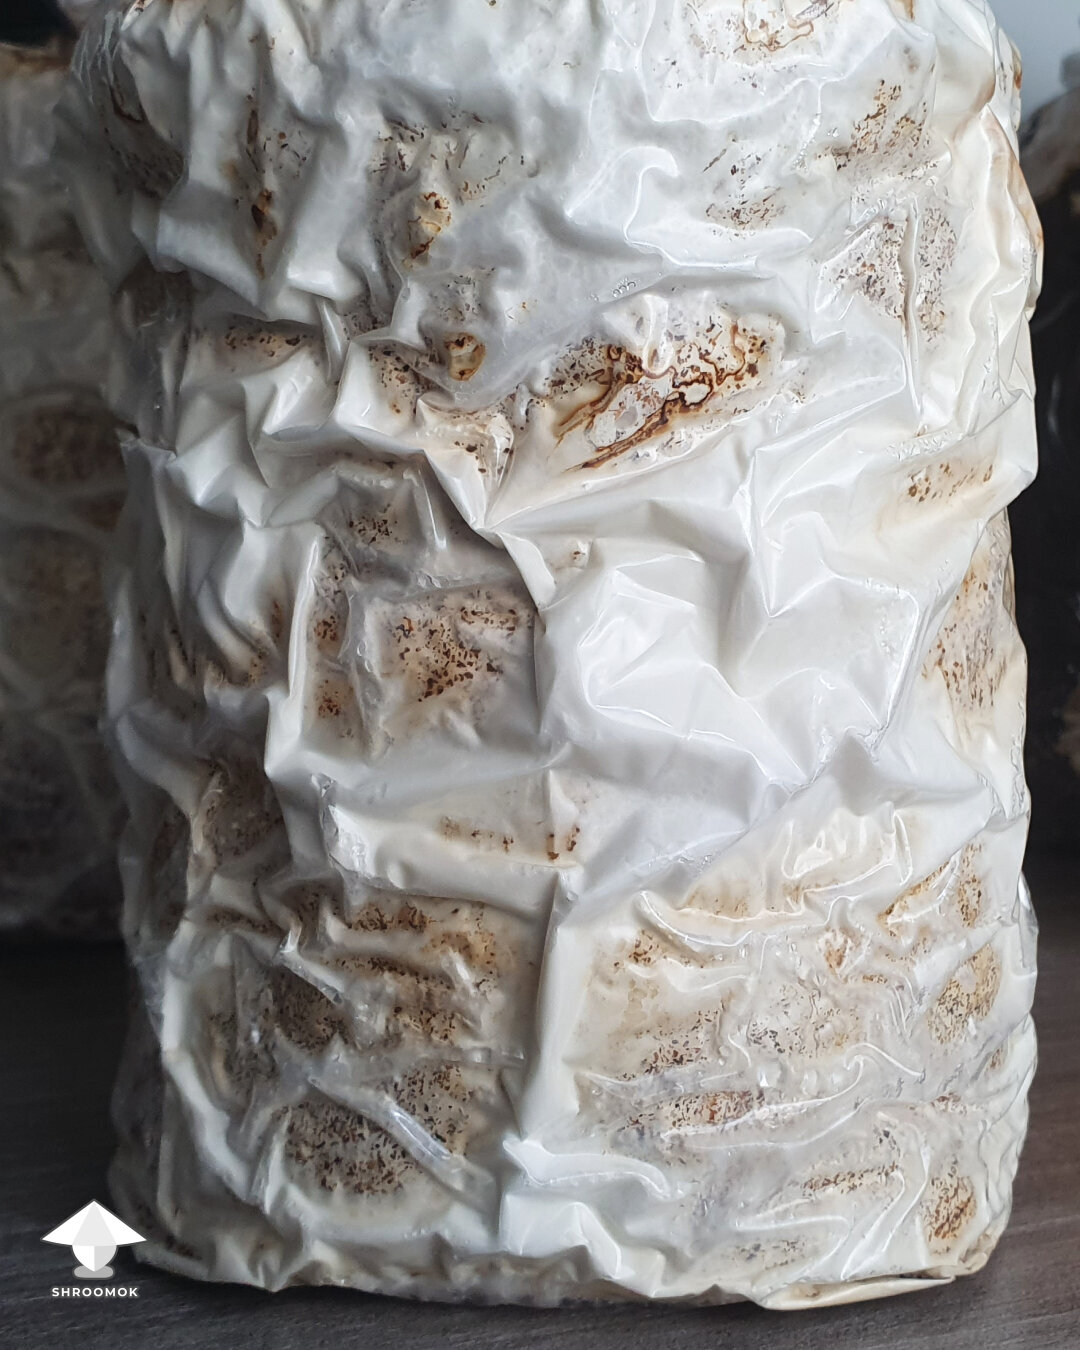
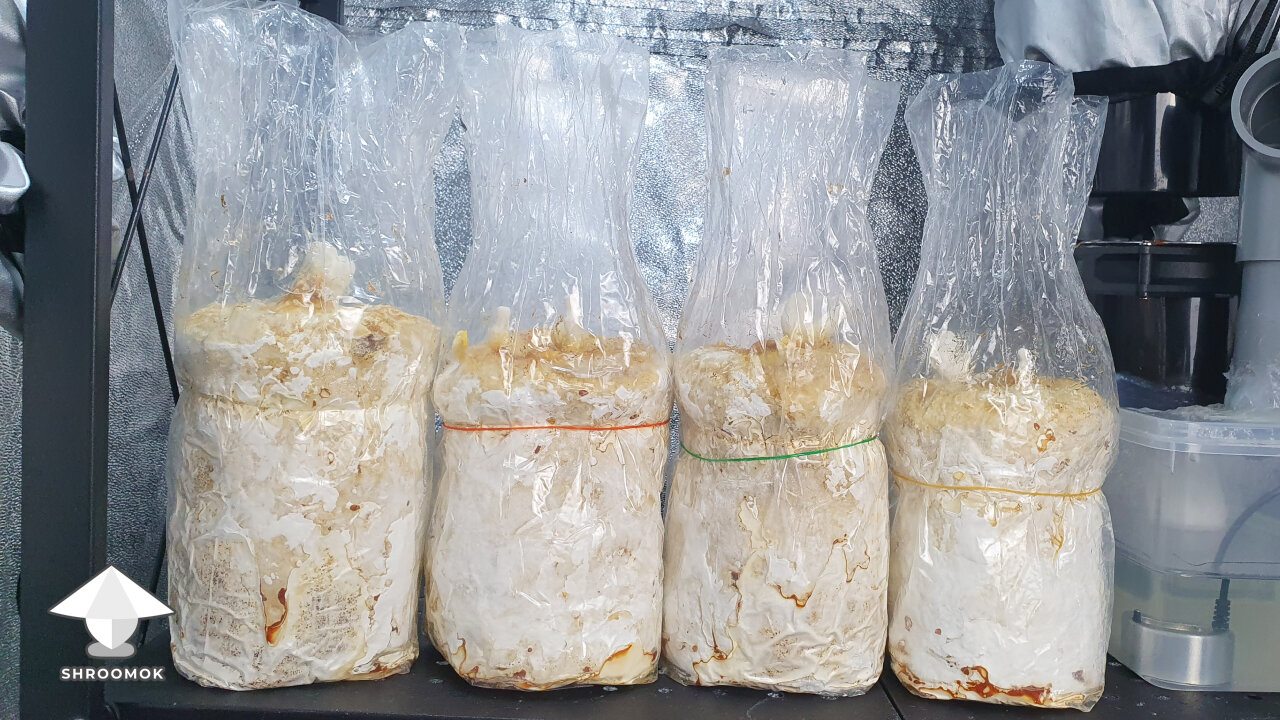
Day 44. Bulk colonization update
Antler Reishi fruiting blocks — 24 days since Spawn to Bulk!
The mycelium growth is looking pretty good so far!

Here’s a shot from the other side of the bags. One of the bags still has a big gap in colonization, but no worries, that's totally normal at this stage.

Exciting update! The fastest bag has already started forming a fruit body — right through the air filter!
Even though it’s not fully colonized yet, it’s clearly eager to grow.

Starting from today, I have to leave all the bags completely unattended for about 7–10 days while I'm away.
Let’s see what surprises they’ll have for me when I get back! ;)
Attachments
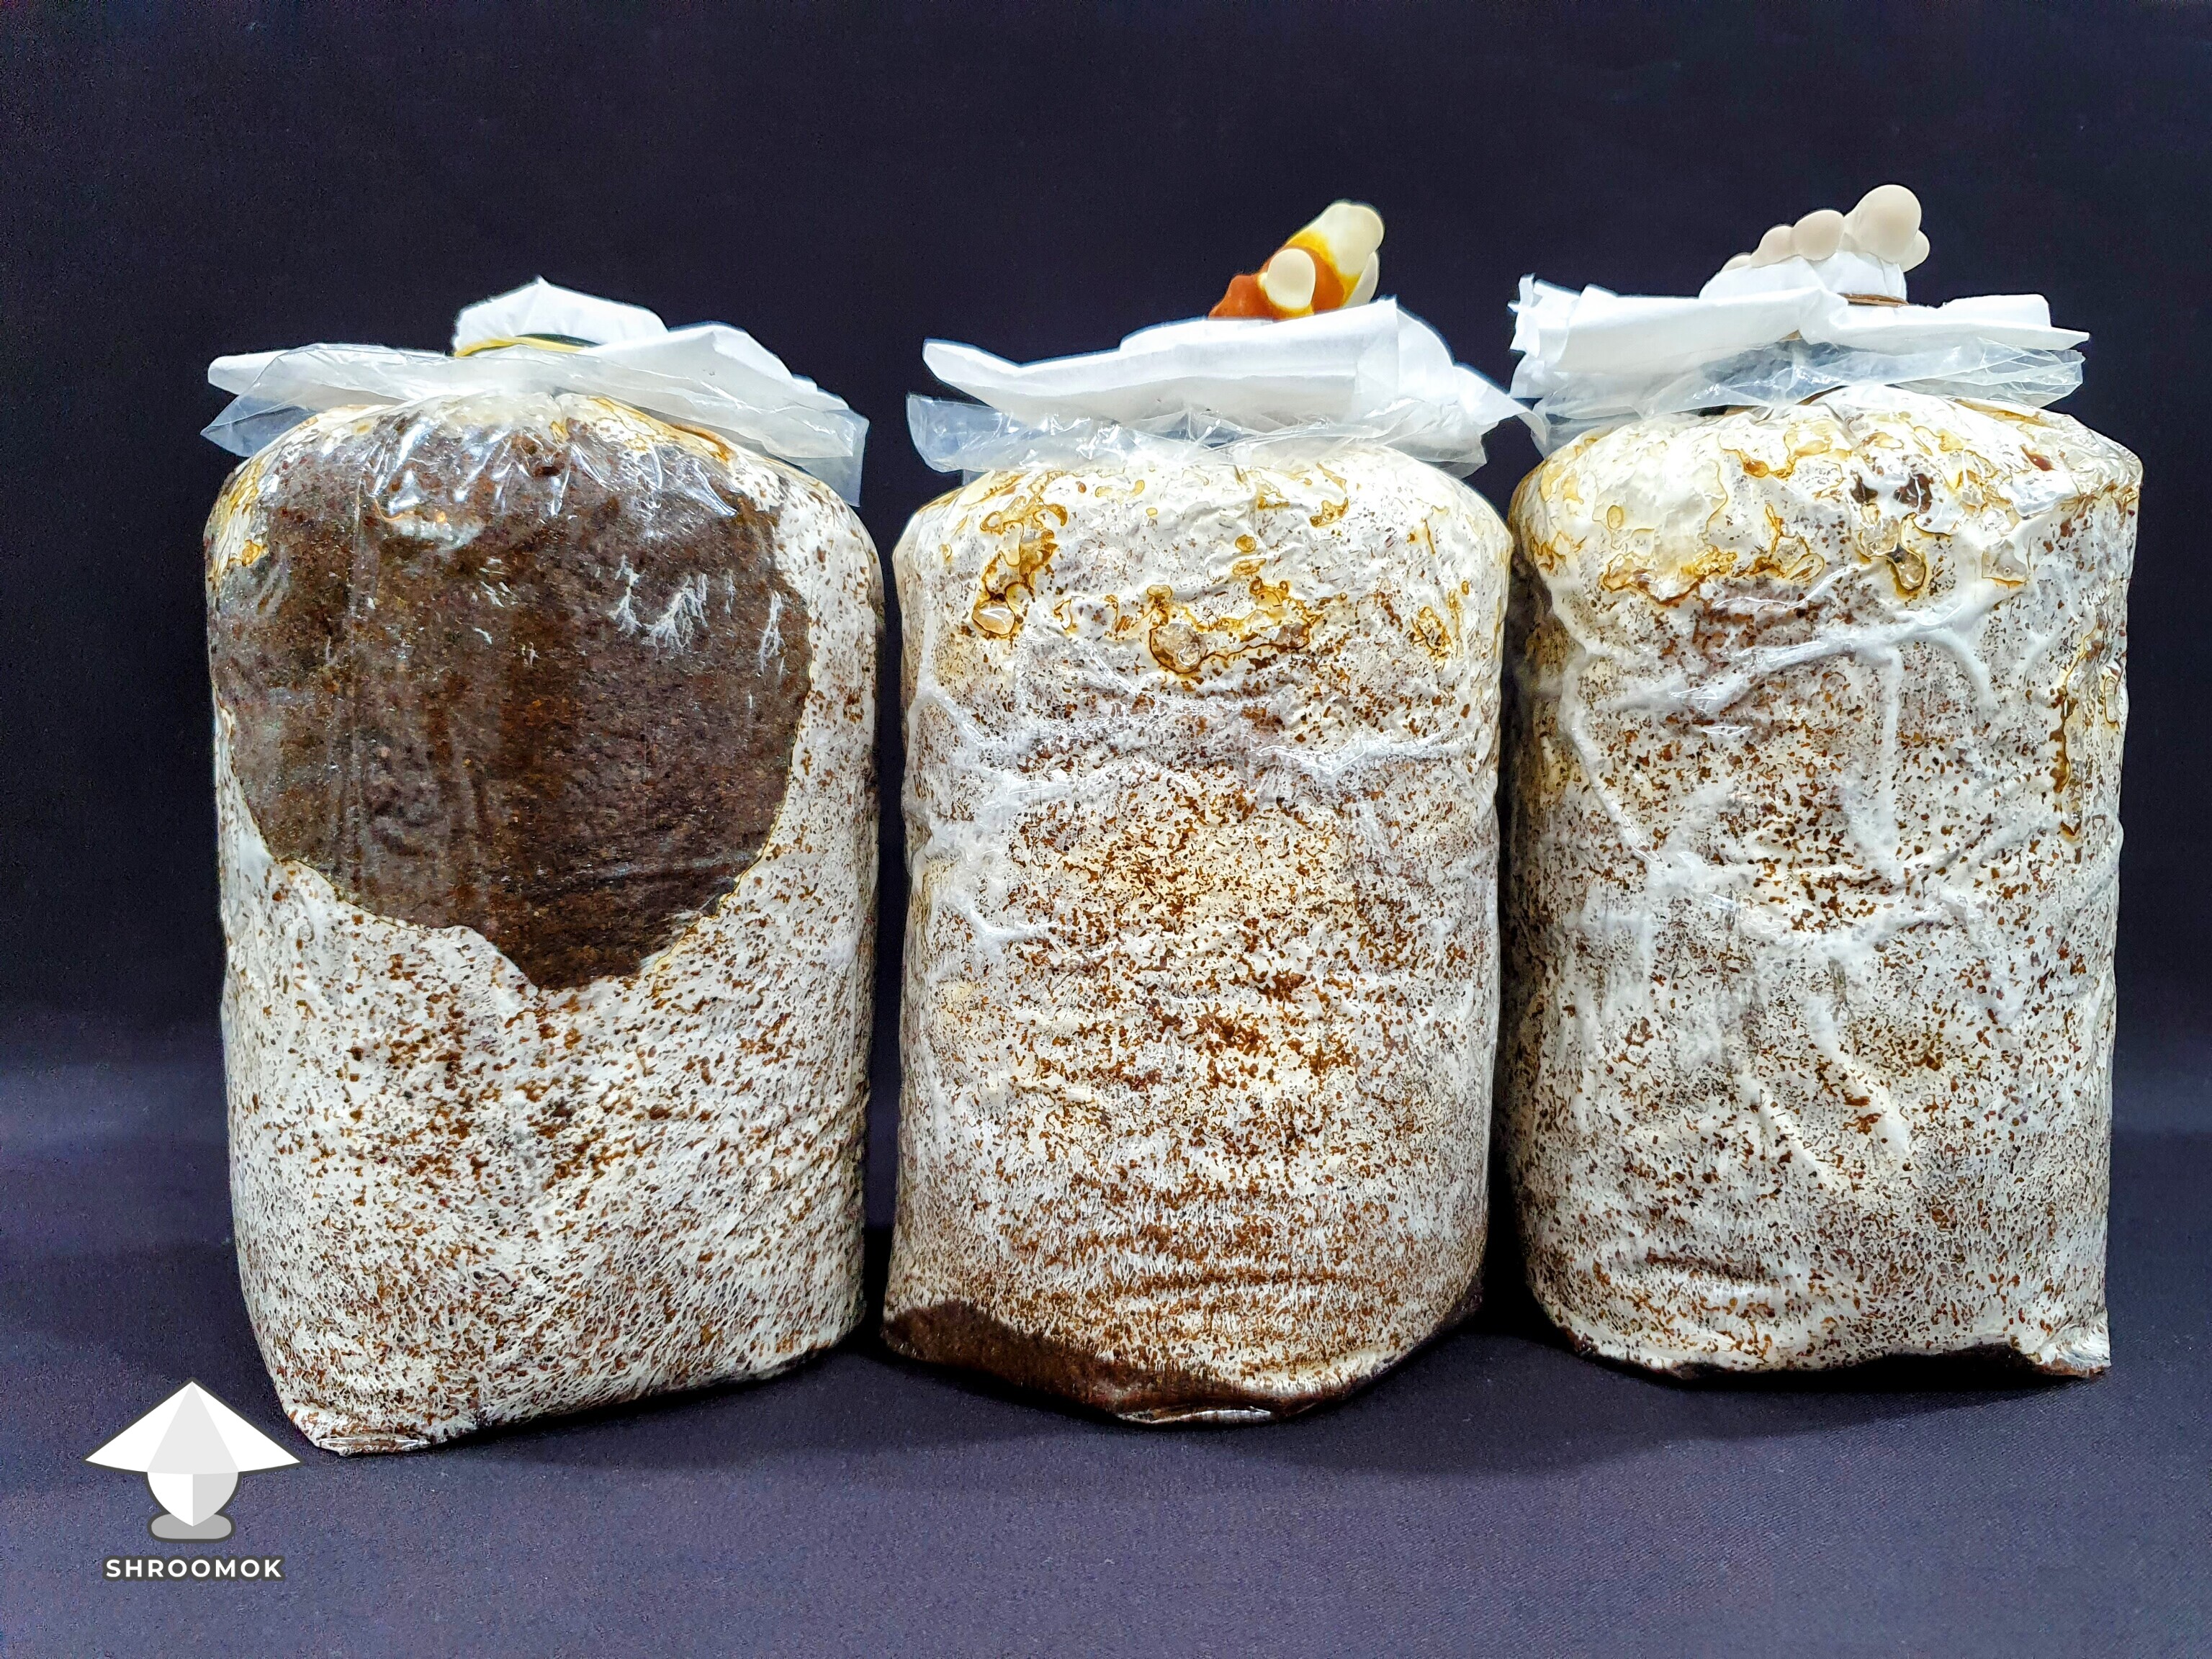
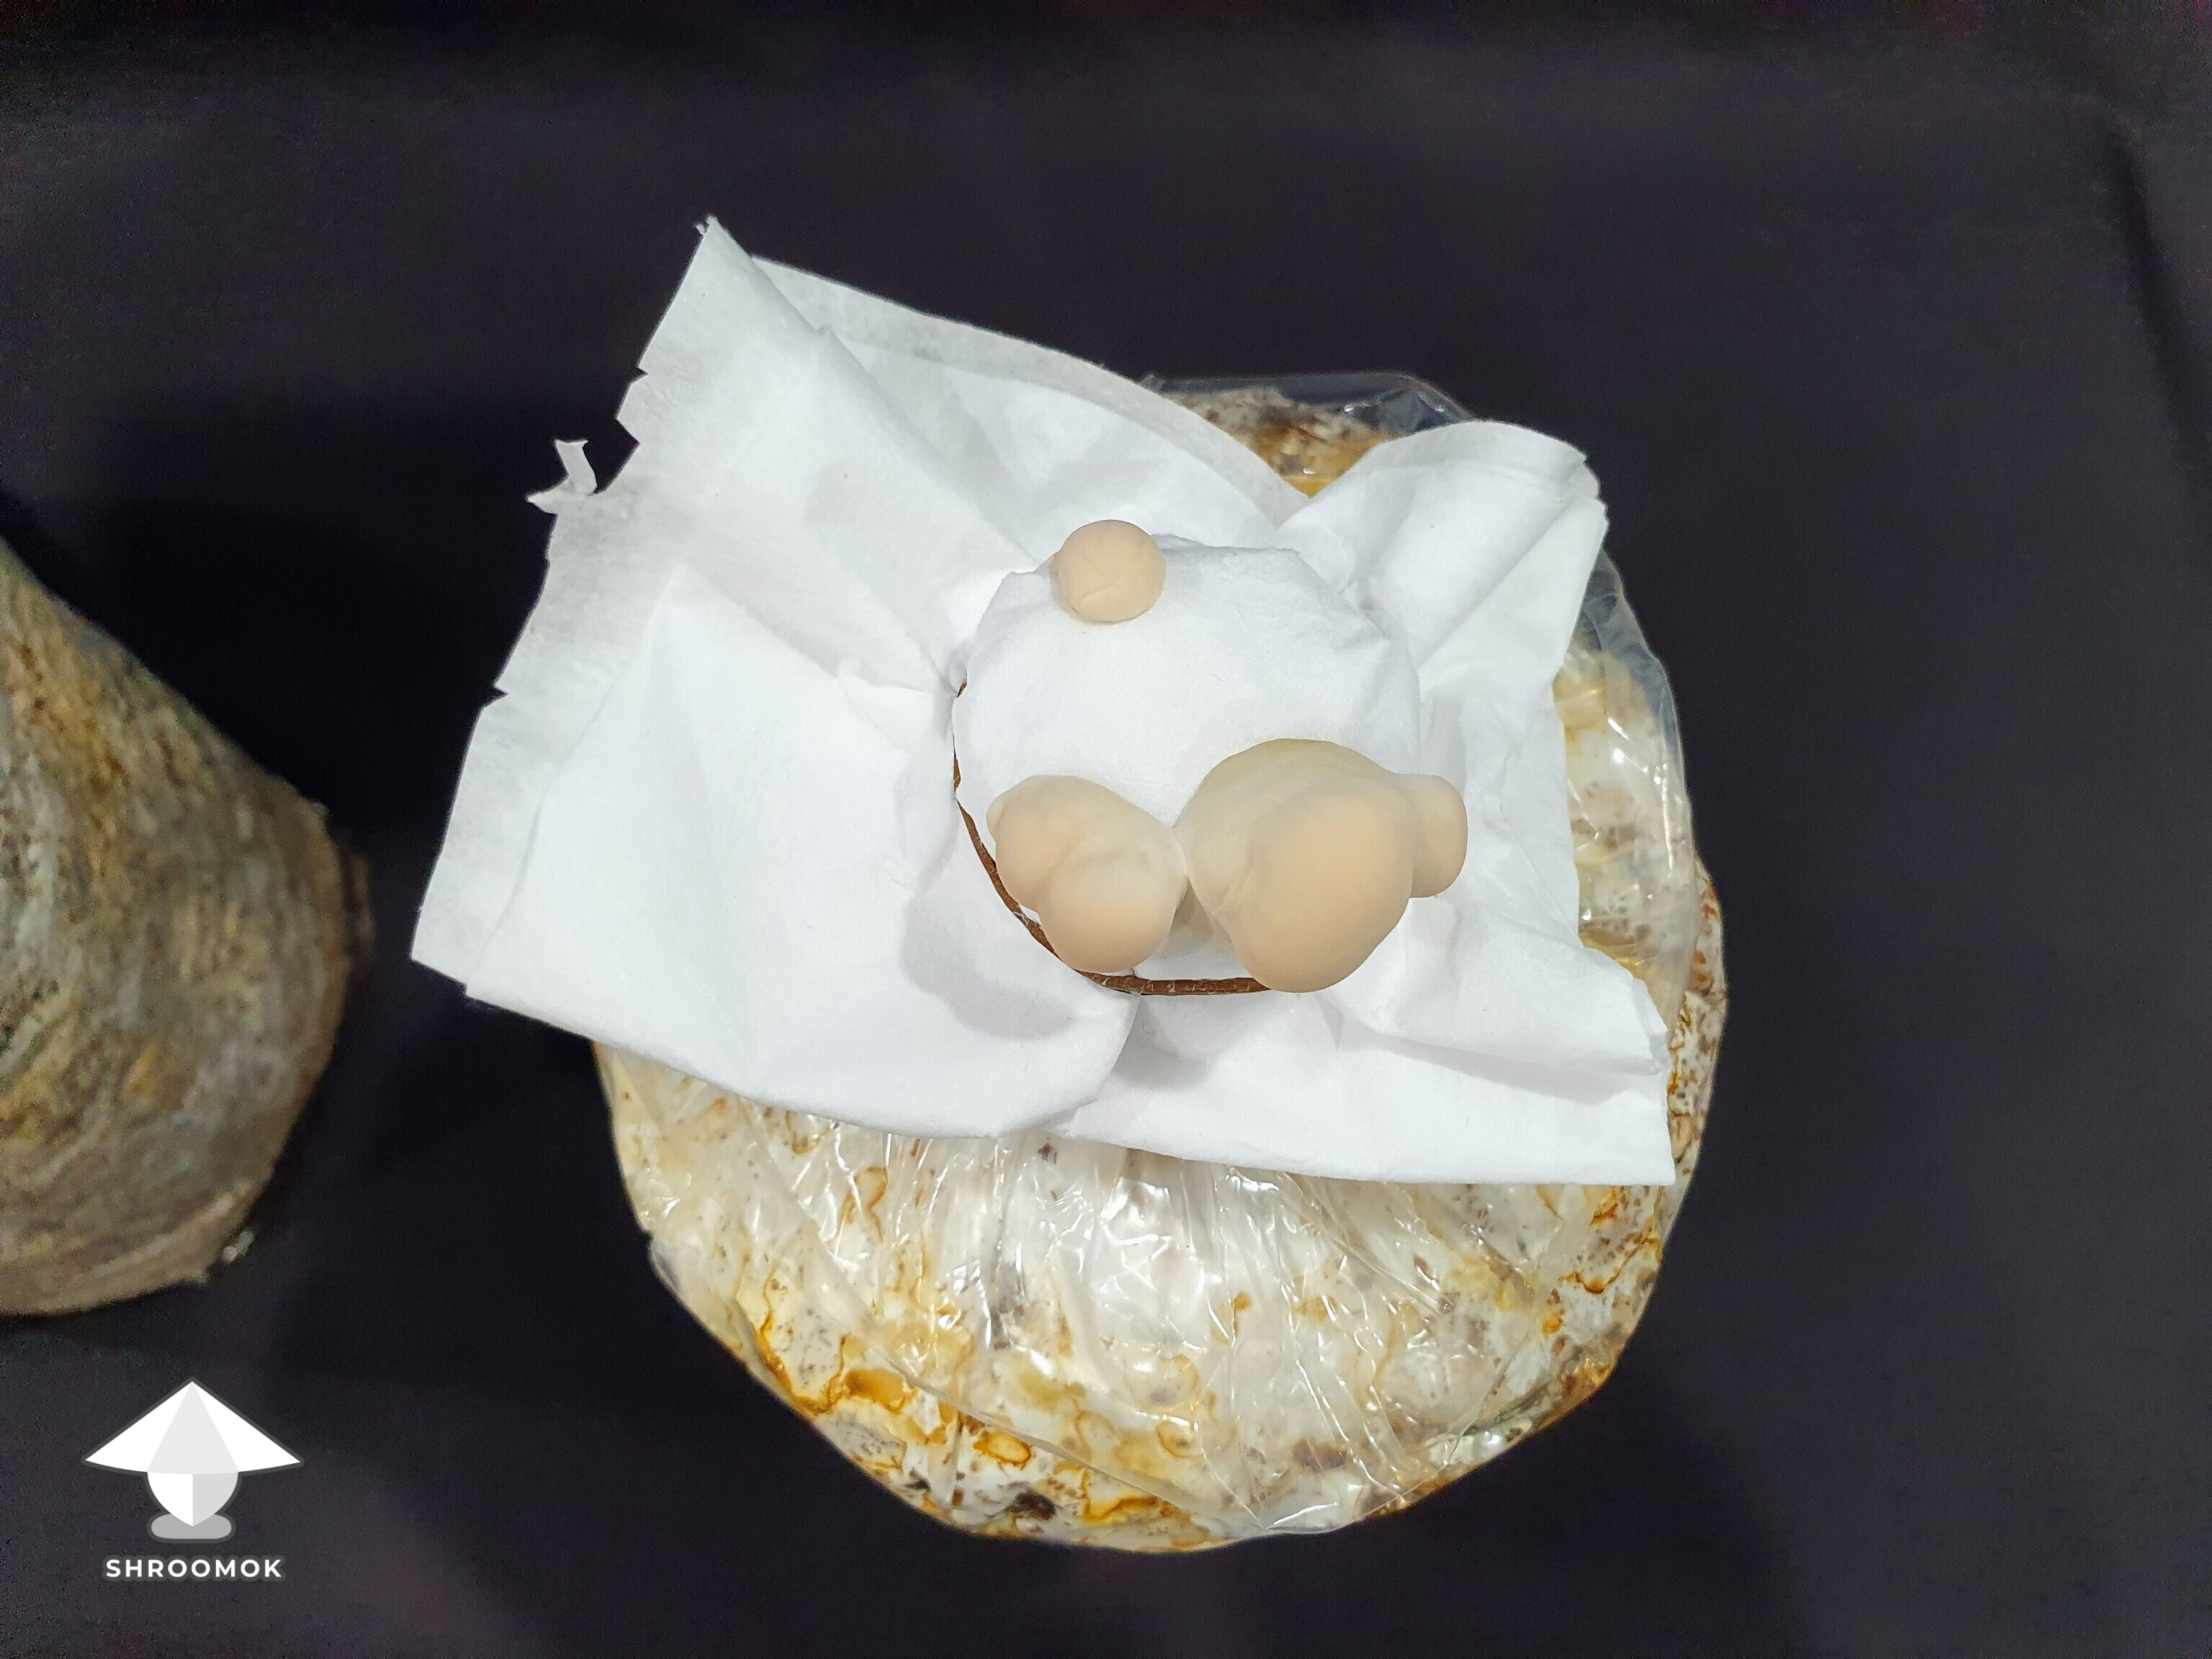
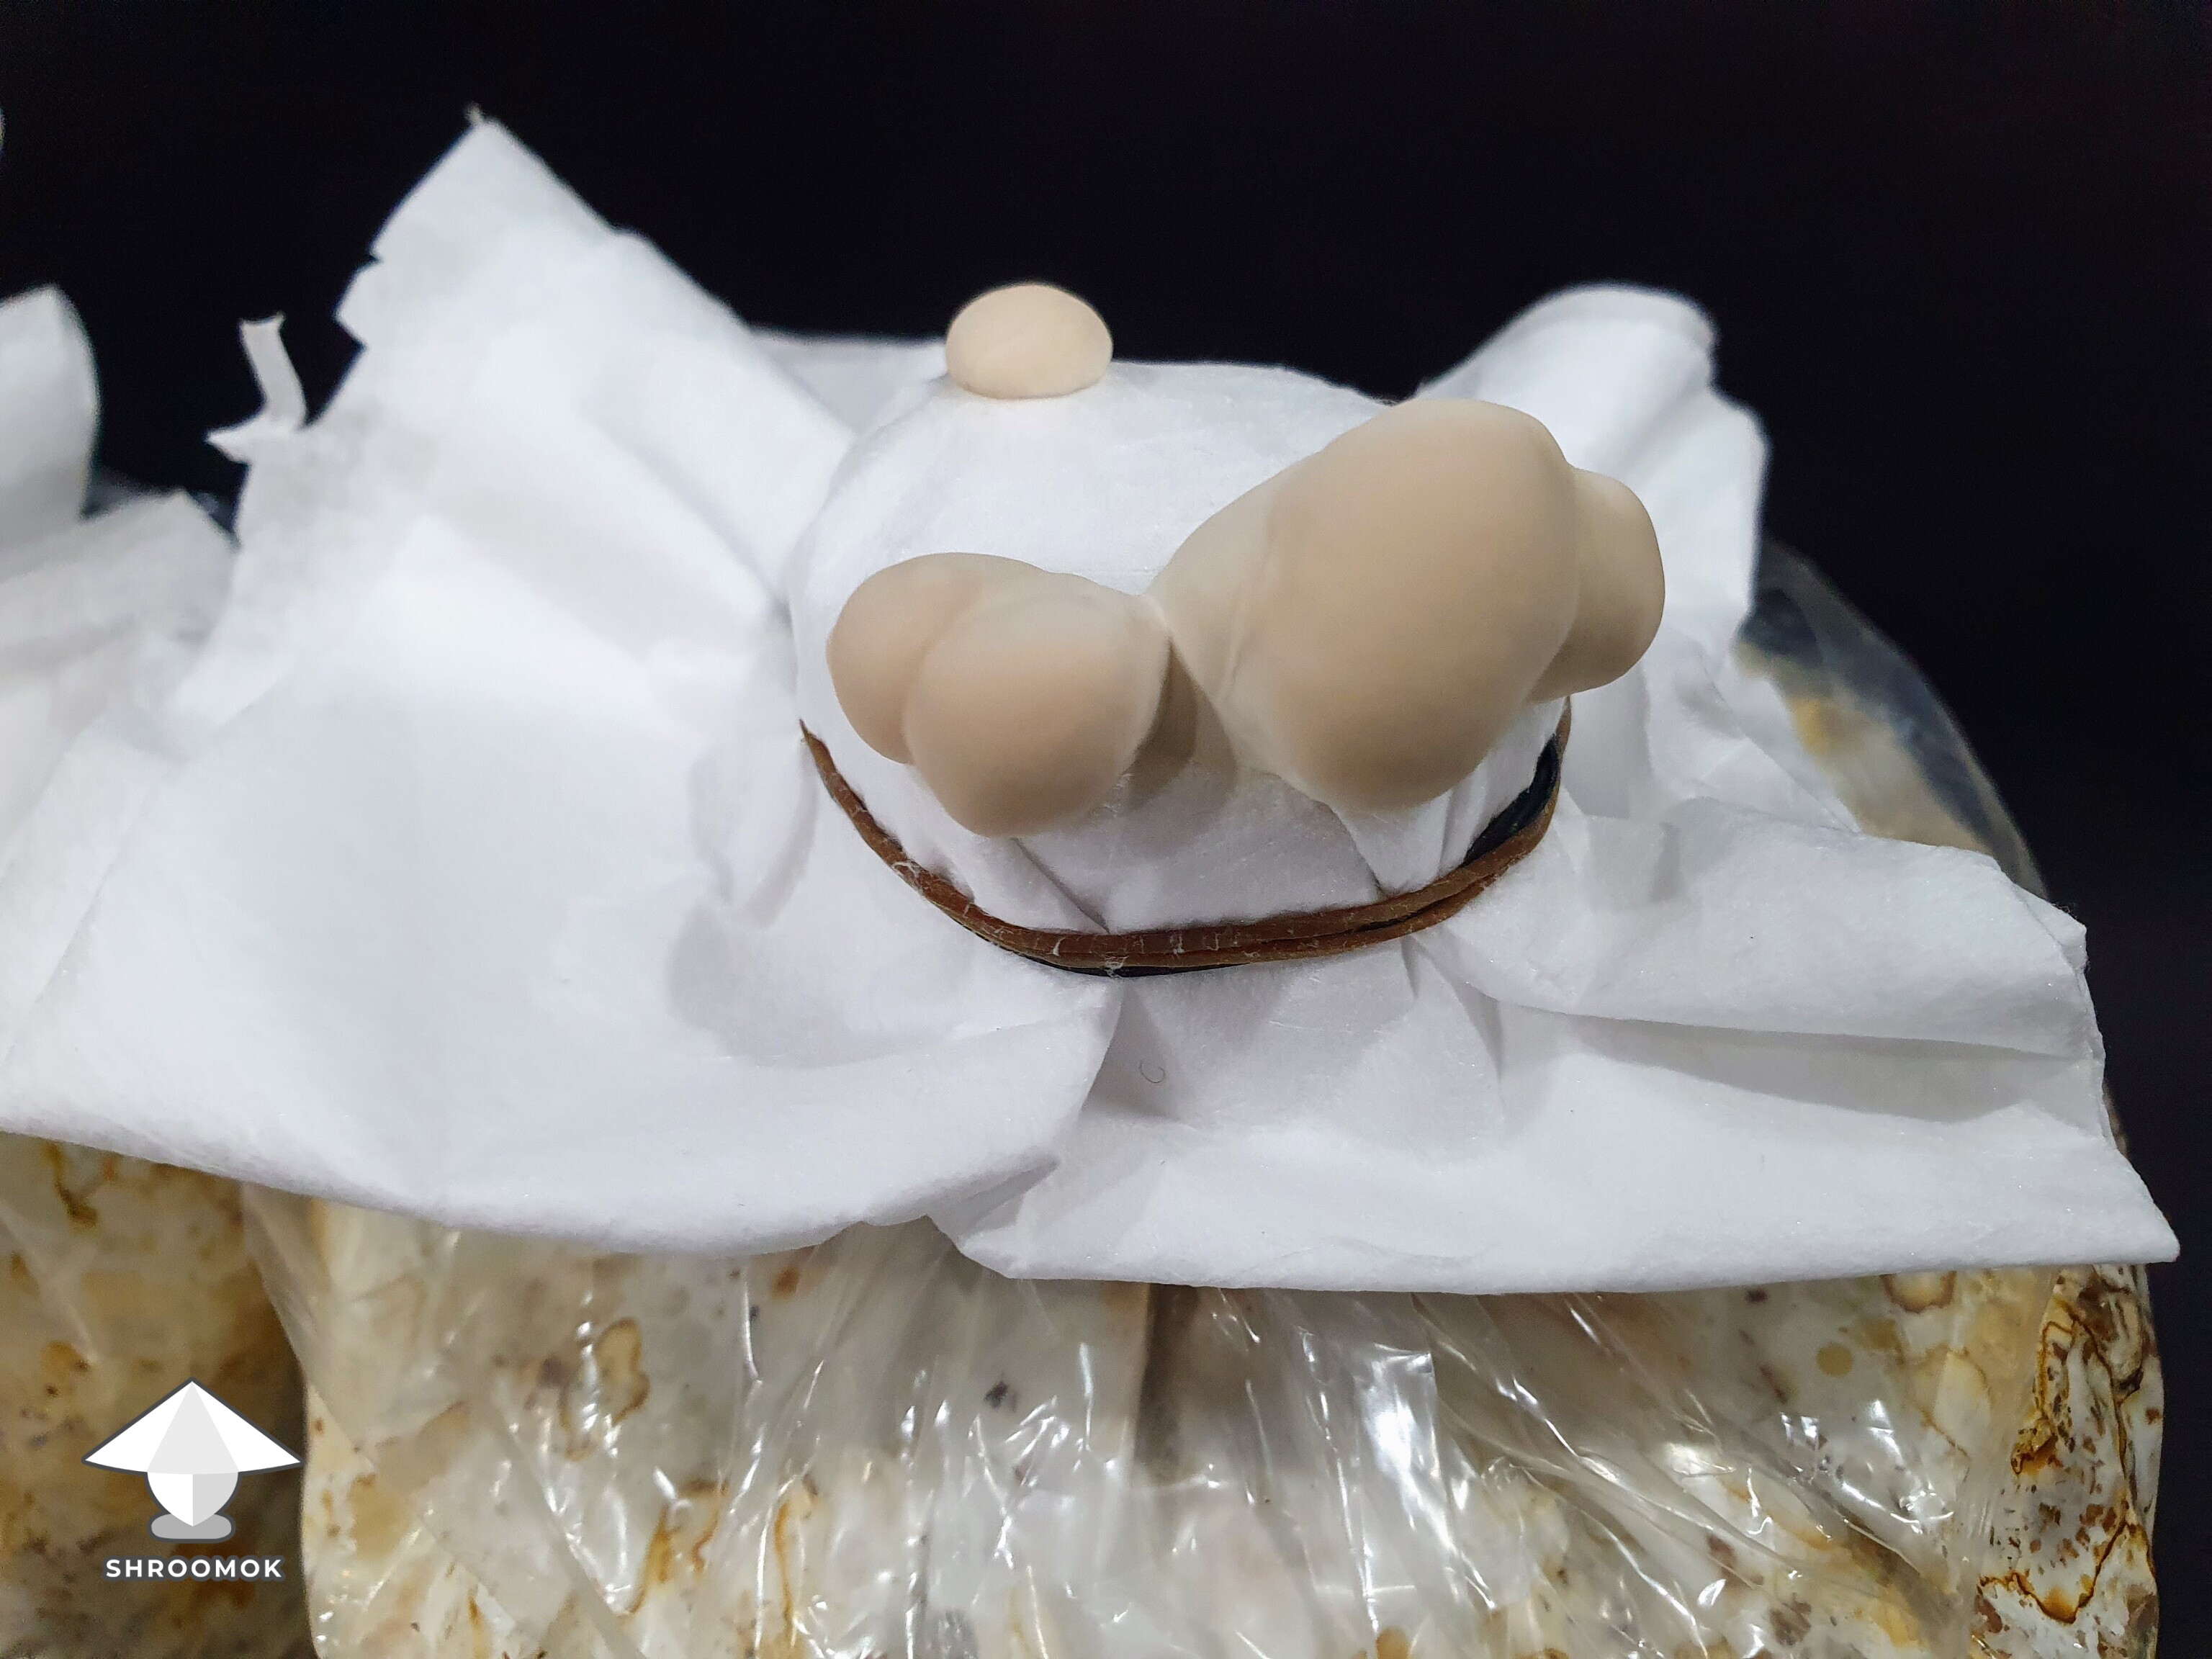
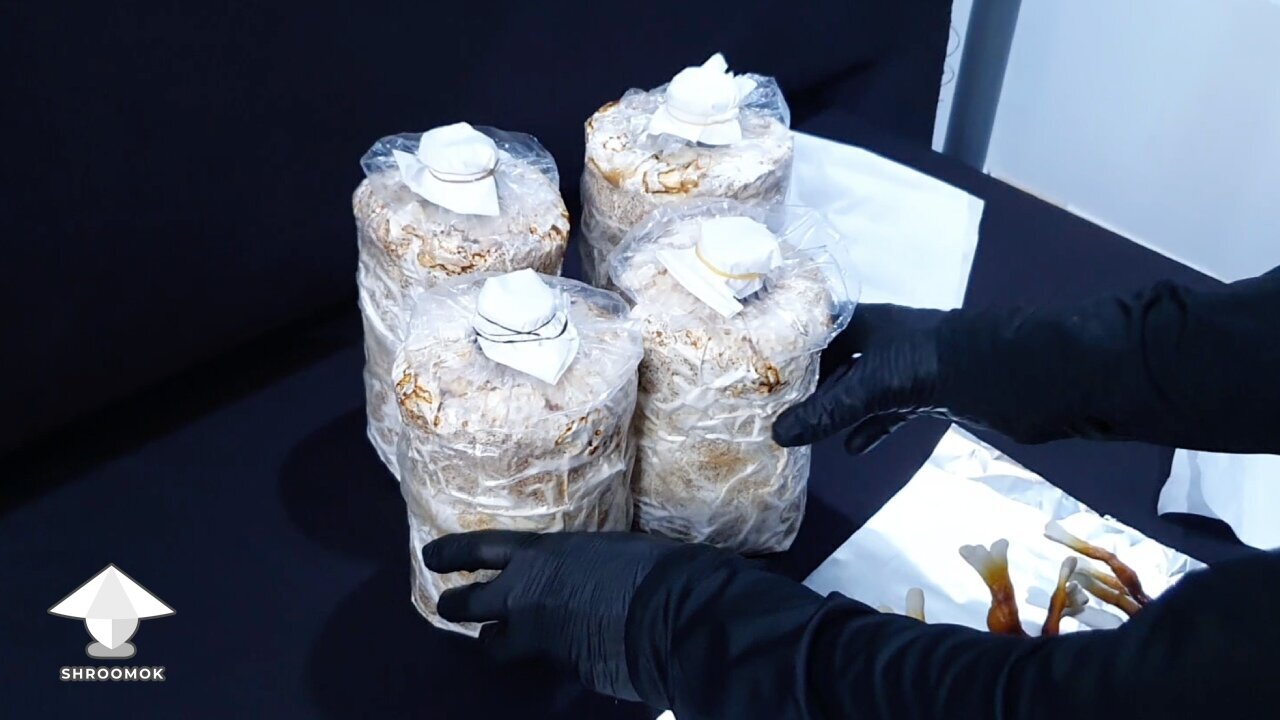
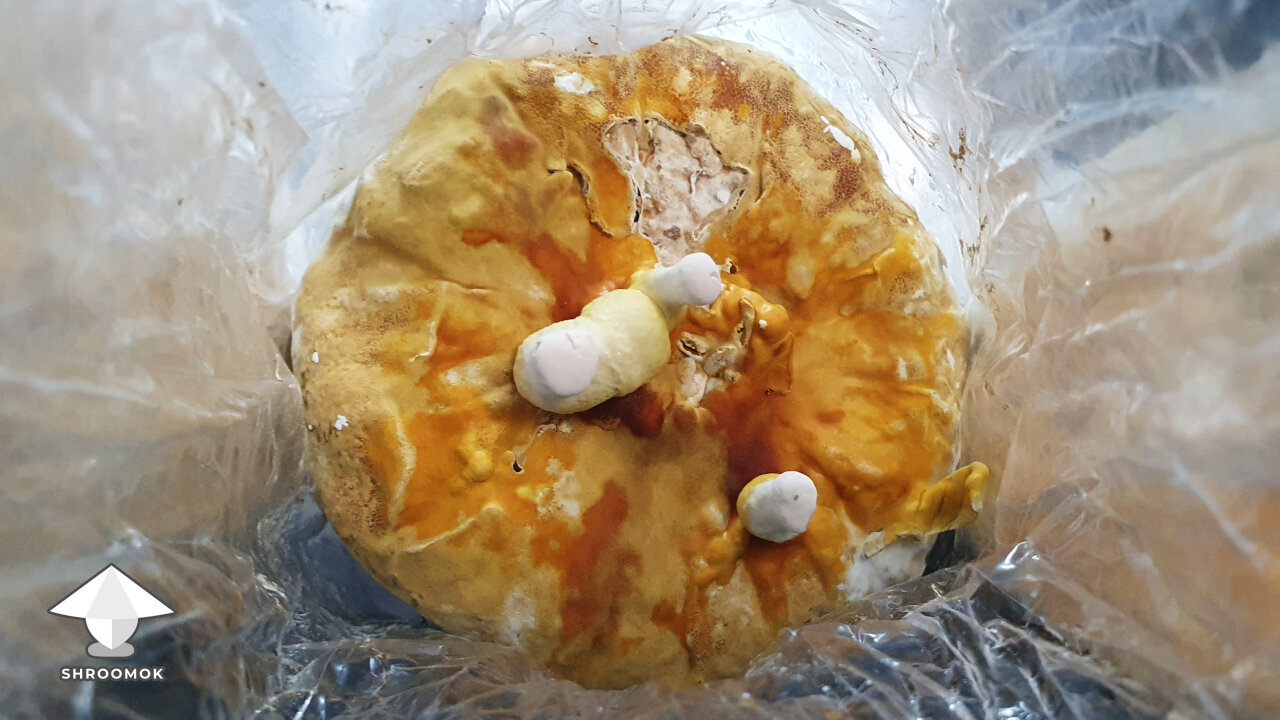
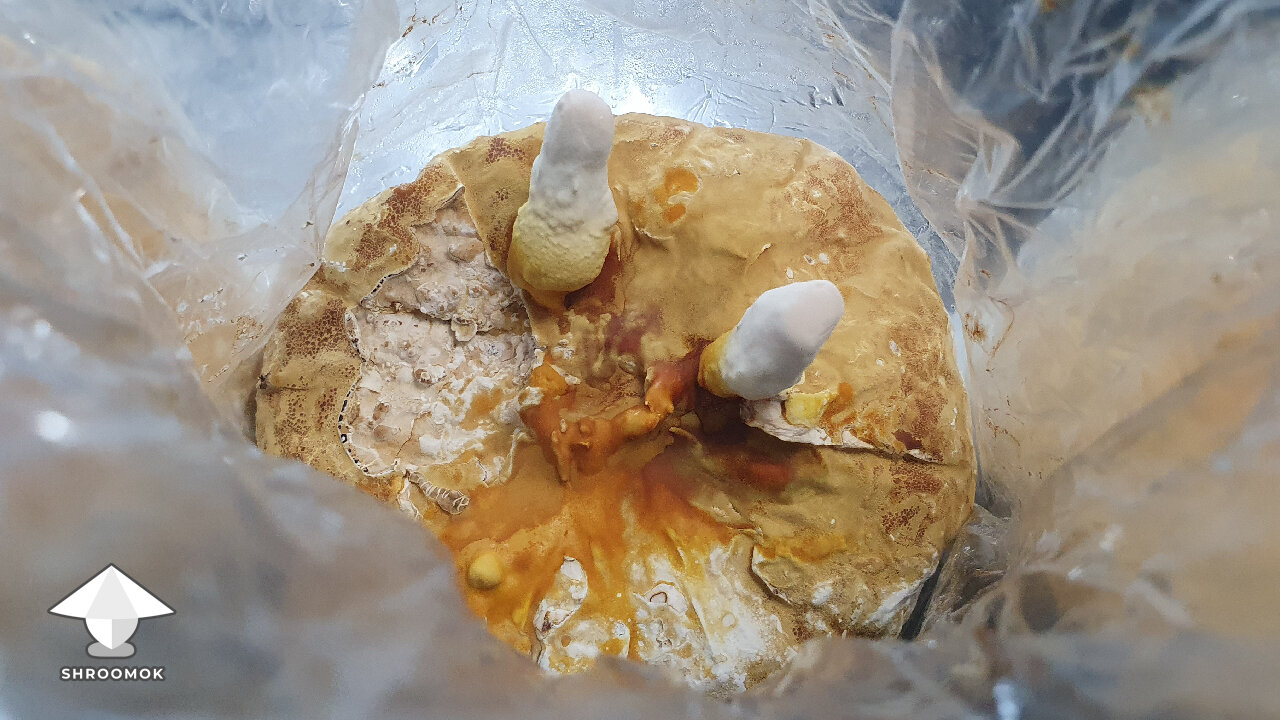
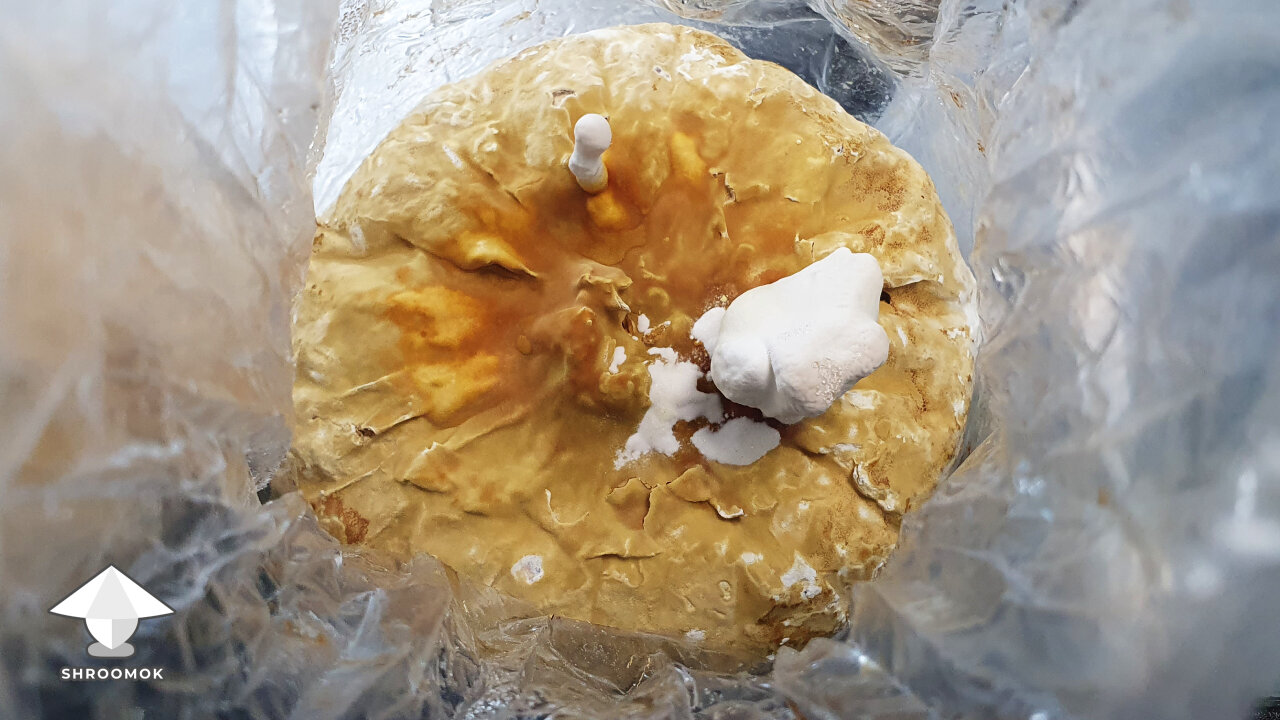
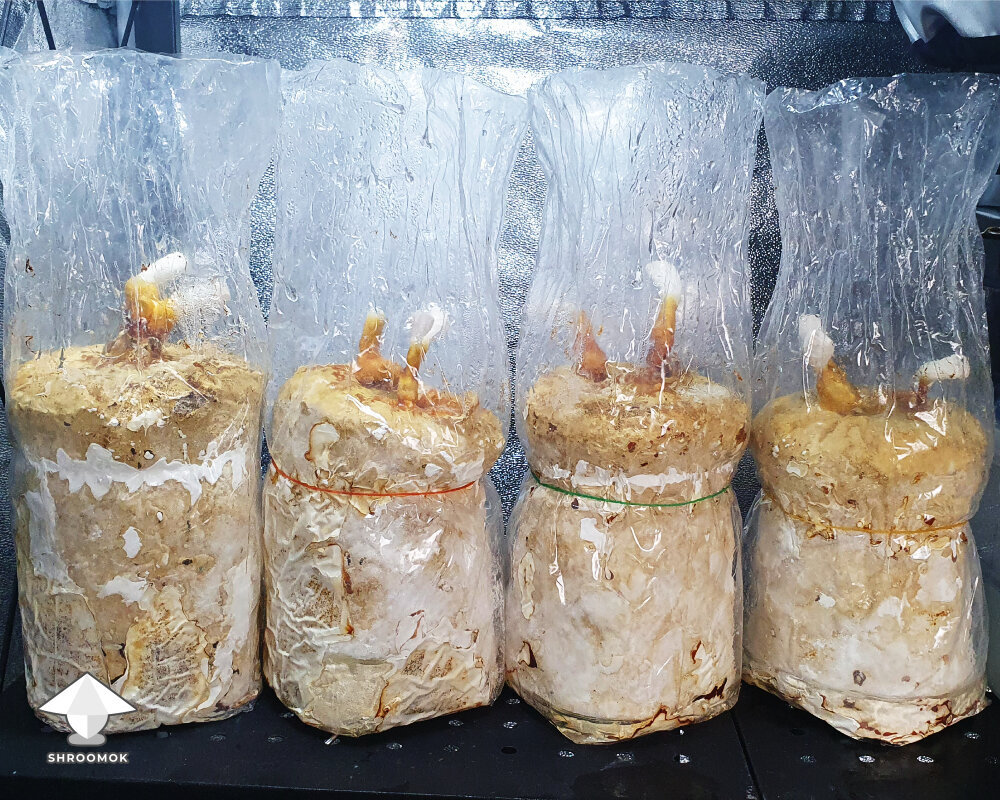
Day 54. Fruiting bag colonization update
Antler Reishi fruiting blocks — 34 days since Spawn to Bulk.
As you might remember (from previous post), I had to leave all the bags completely unattended while I was away from home. And here’s the update — 10 days later, and wow, what a change!

The blocks have turned rock-solid, like real bricks.
When you touch them, they’re actually warm, which means mycelium really produce heat.
However, the bottom parts are still catching up — they’re not fully colonized yet and are moving a bit slower.
One bag still has a bald area, but the bottom part is almost ready — it just used its energy in a different direction.

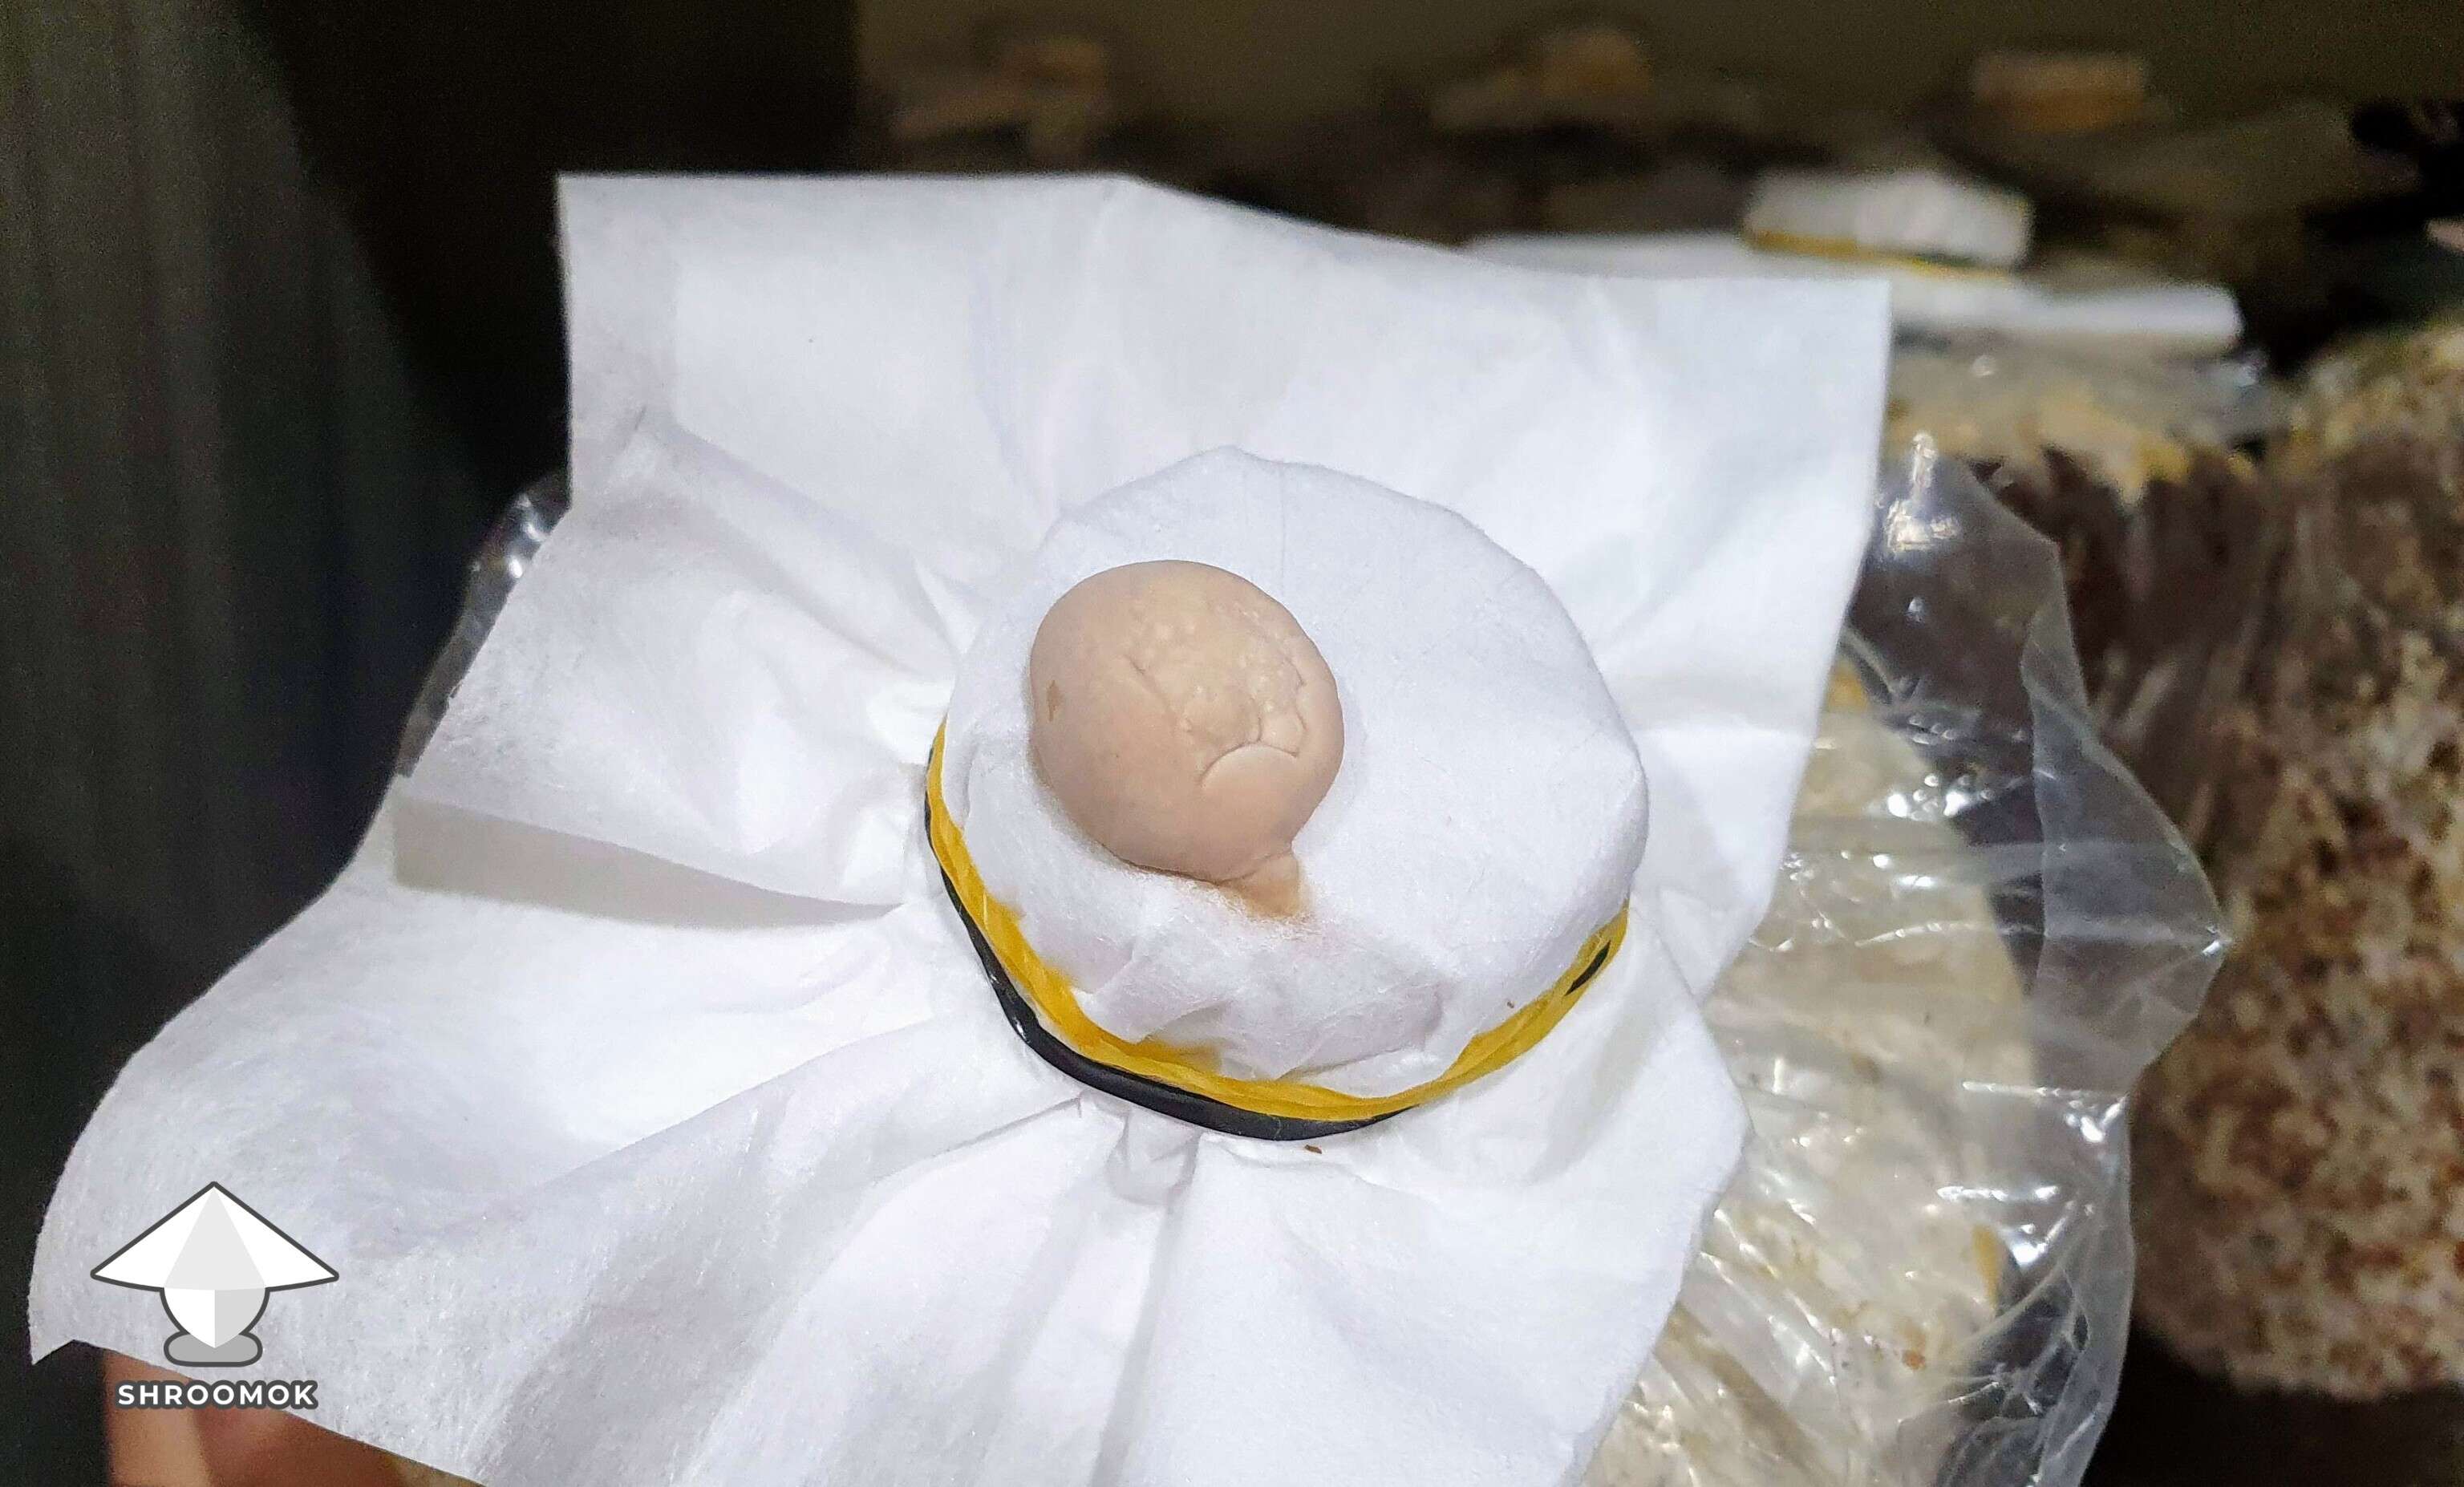
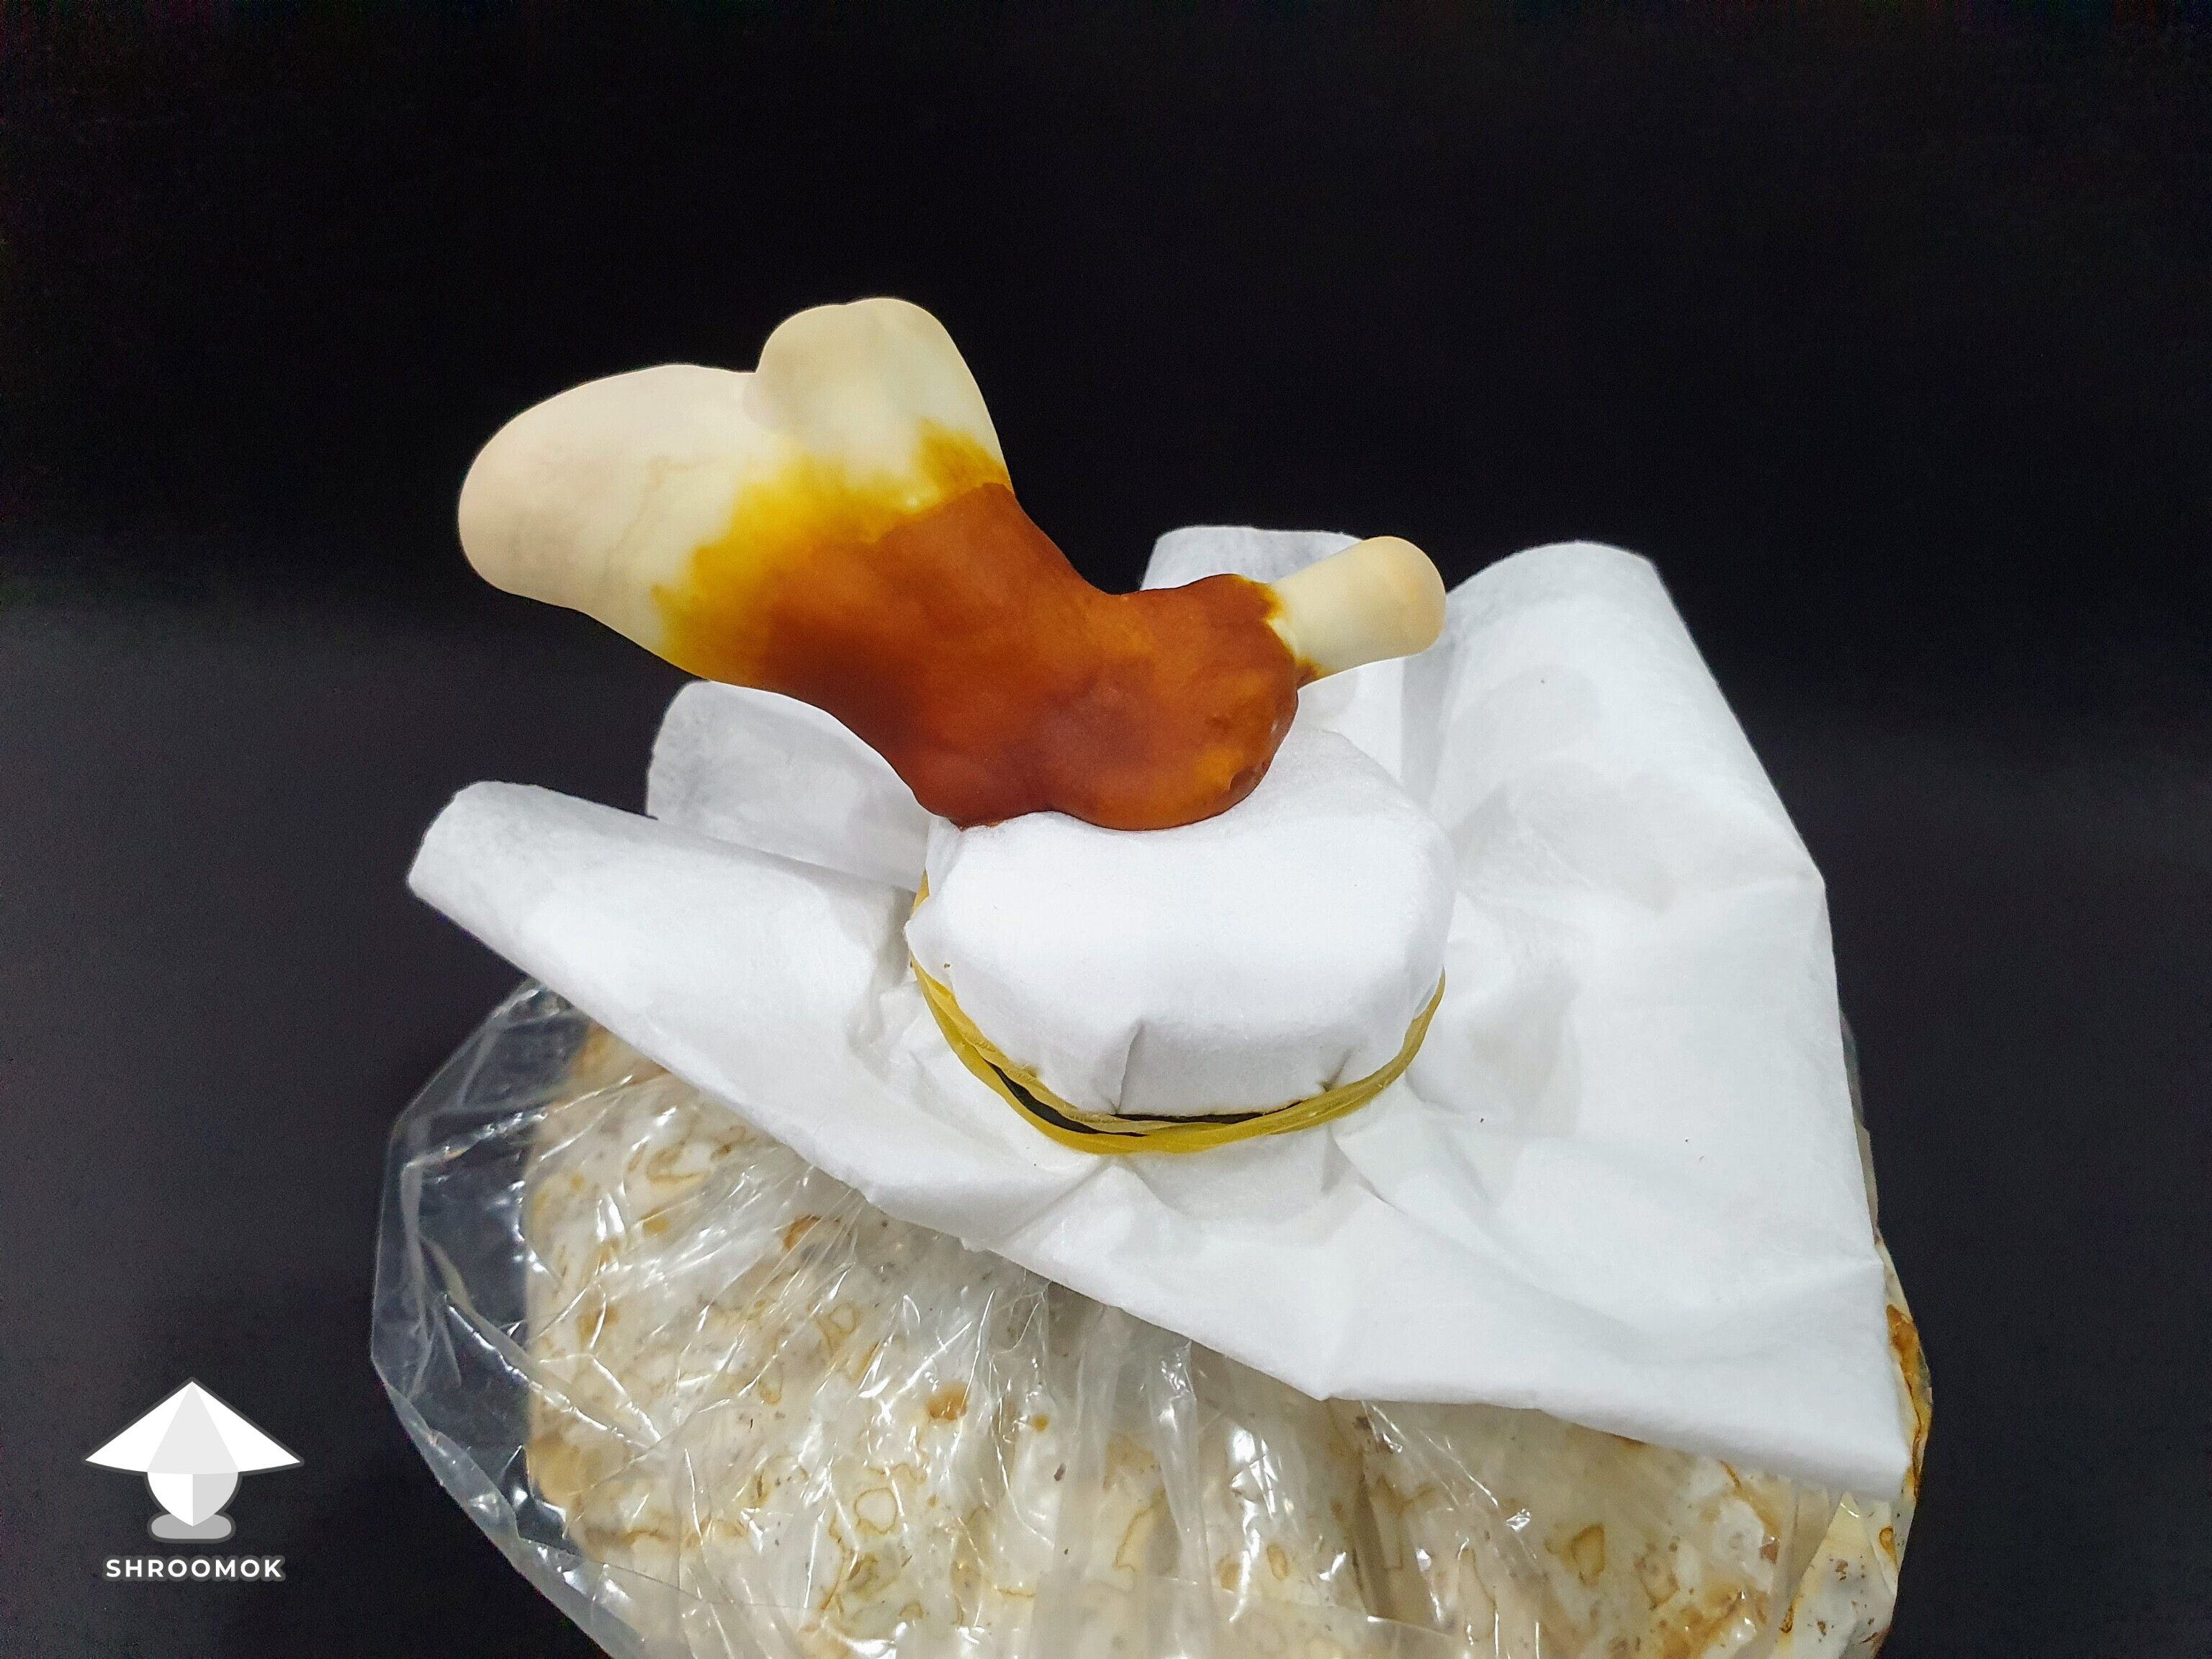
And here’s the best surprise! One of the pins grew so much while I was gone — it’s now almost a full-sized fruiting body!

Really looks like an antler.

Even better — another bag formed pins right on the air filter!
Mushrooms always find a way! ;)
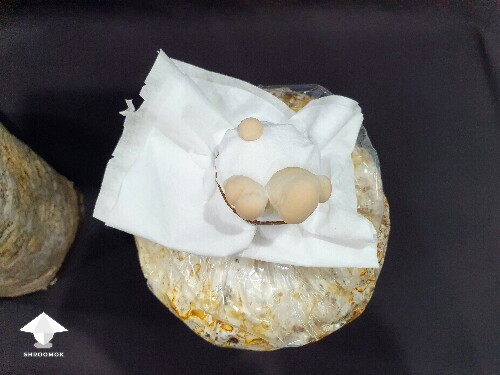

So, two bags are already fruiting!

I still need to give them another 3–5 days for the bottoms to fully colonize. Which gives me the perfect window to start setting up the fruiting chamber (grow tent) and get everything ready.
Super excited for the next phase! Stay tuned!
Attachments

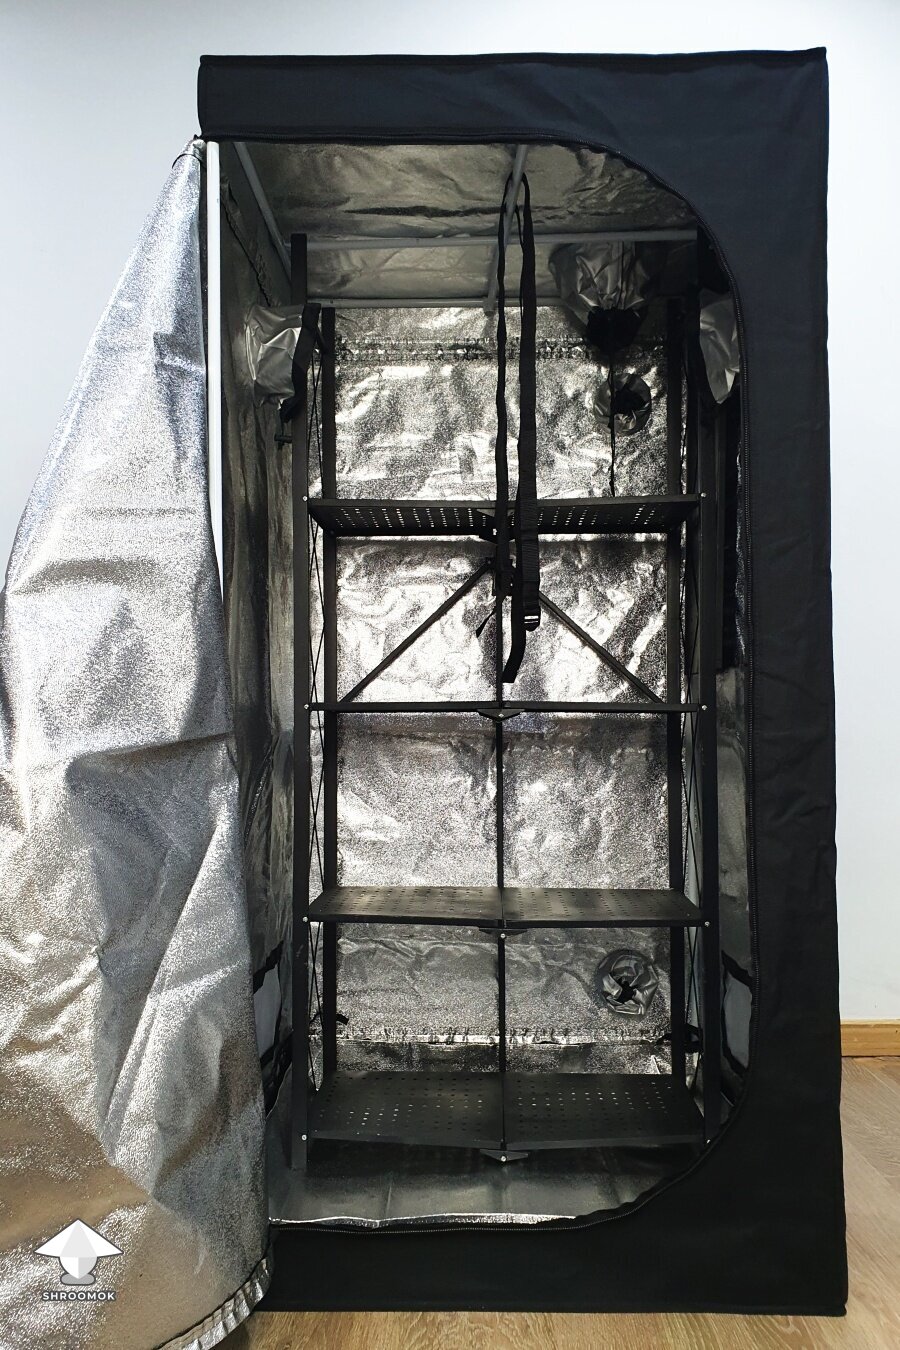
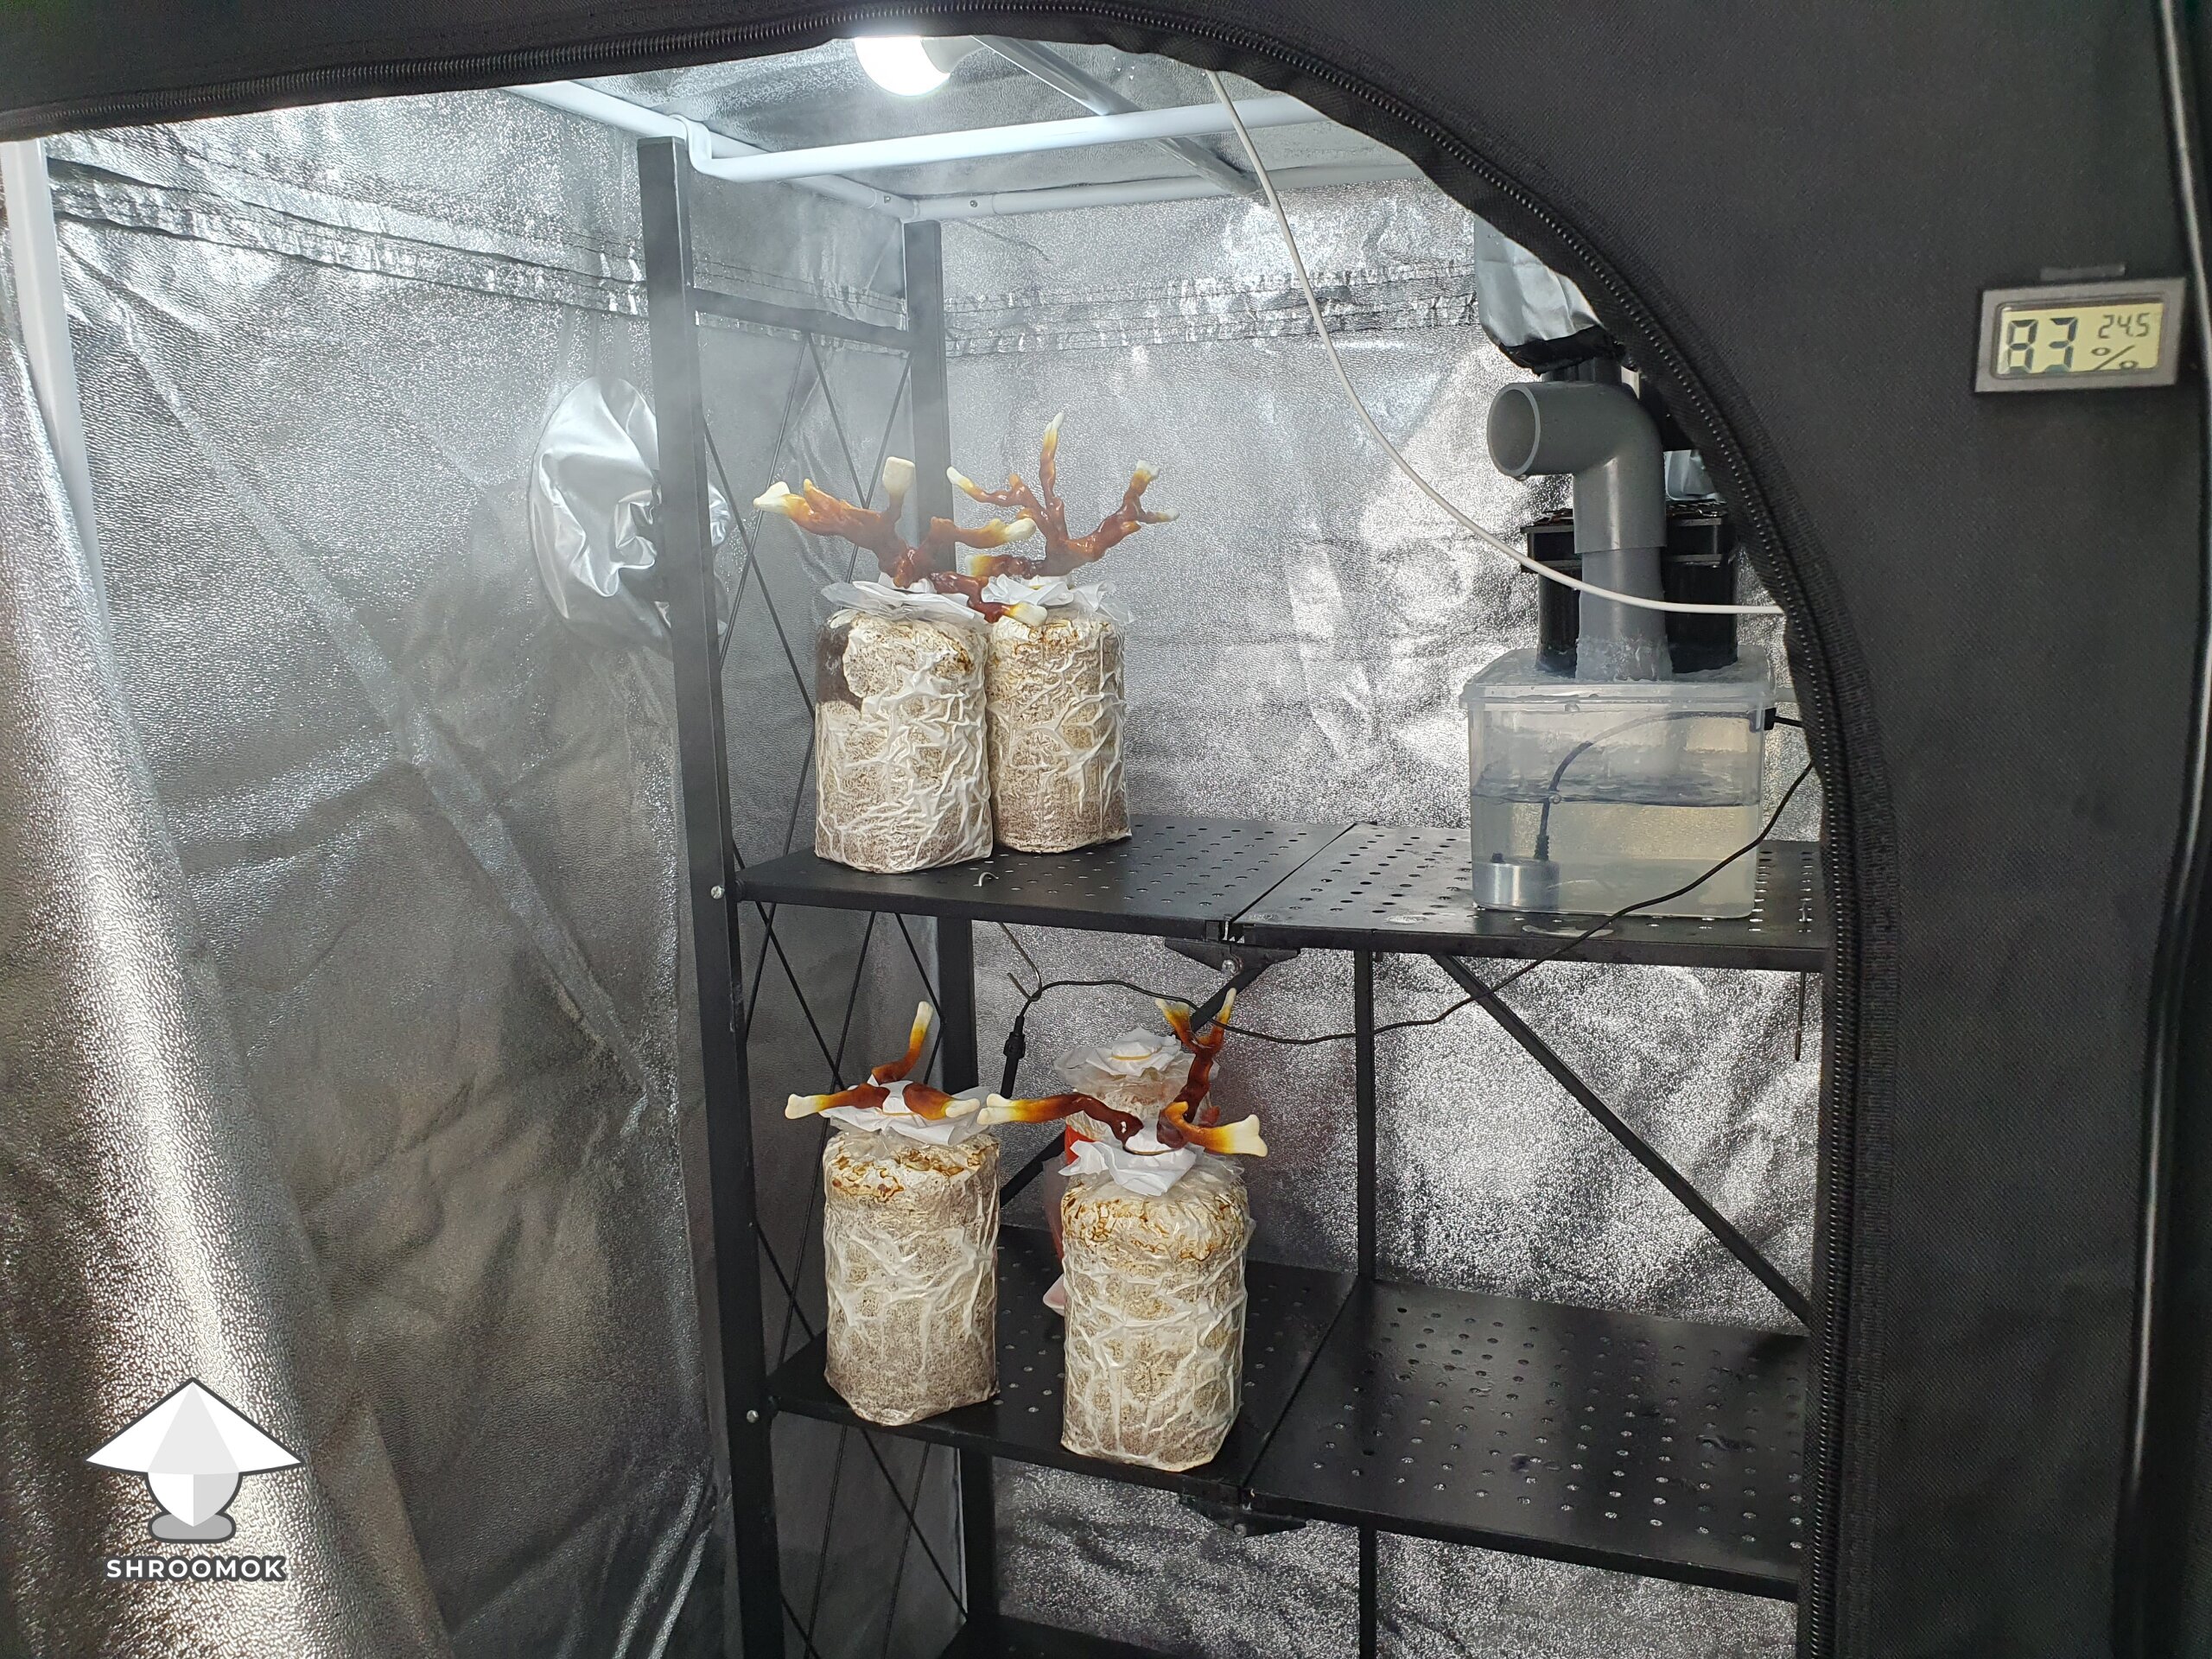
Day 55-60. Grow Tent preparation and Fruiting Conditions
Spoiler: You don't actually need a Grow Tent to grow Reishi 😉
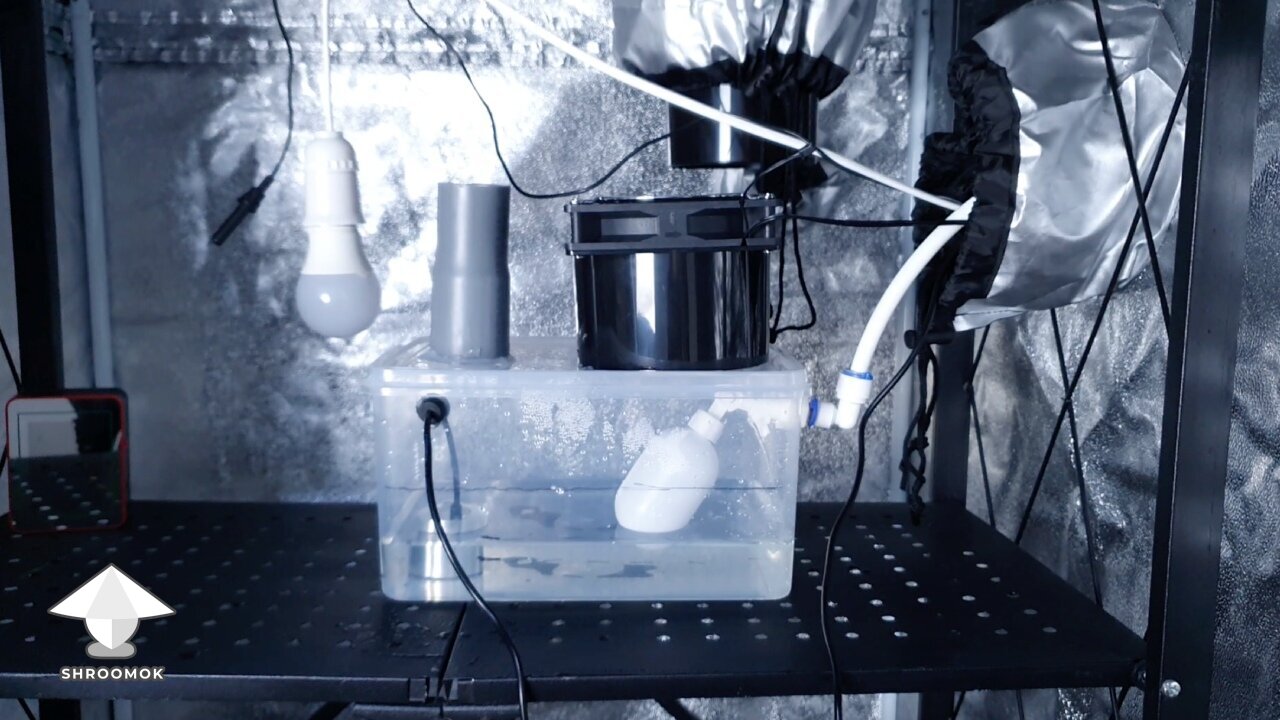
First, I assembled my grow tent and placed a metal shelf rack inside.

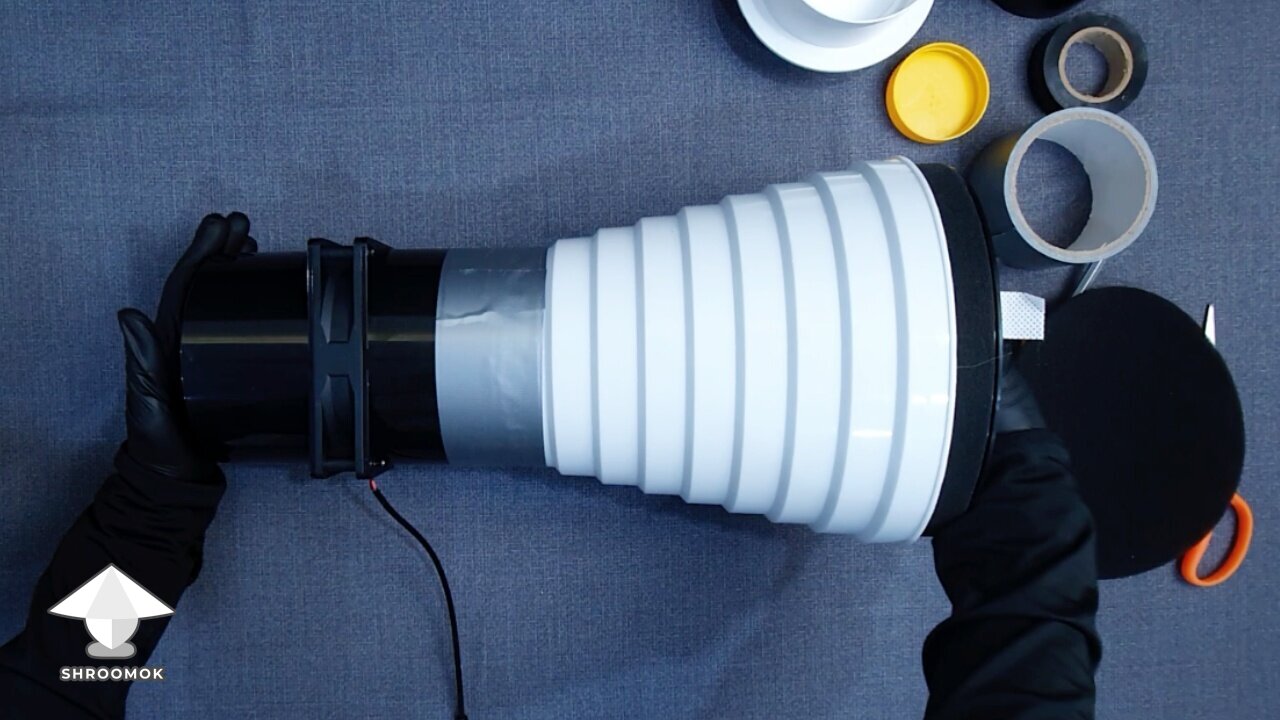
DIY Ventilation with HEPA
Next, I built a ventilation with a HEPA filter.


Then, I installed it on top of the tent.

This setup filters air through the HEPA filter (installed in white connector) and pulls air in. The incoming air also creates positive pressure inside the tent, which helps to reduce the risk of airborne contaminants.
Pro Tip: This method is much better for mushroom cultivation than setups where air is blown out of the tent, as those often draw in dirty air through gaps in the tent (especially from the floor).
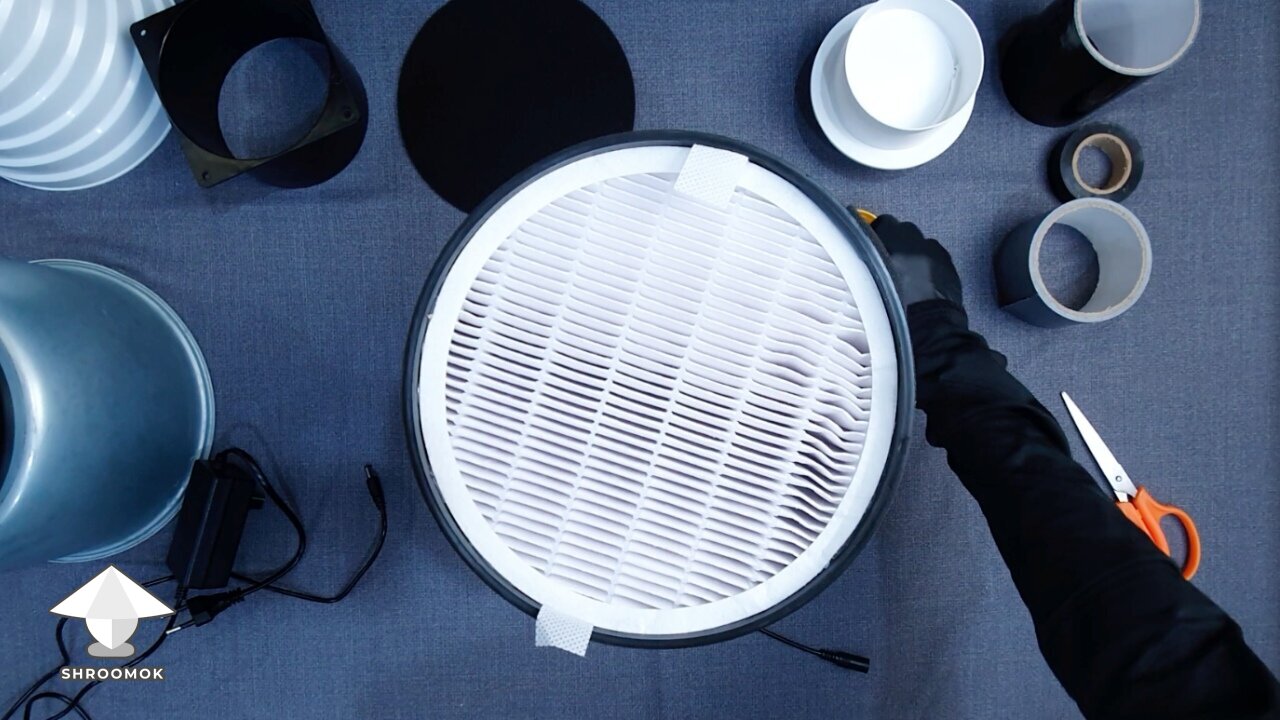
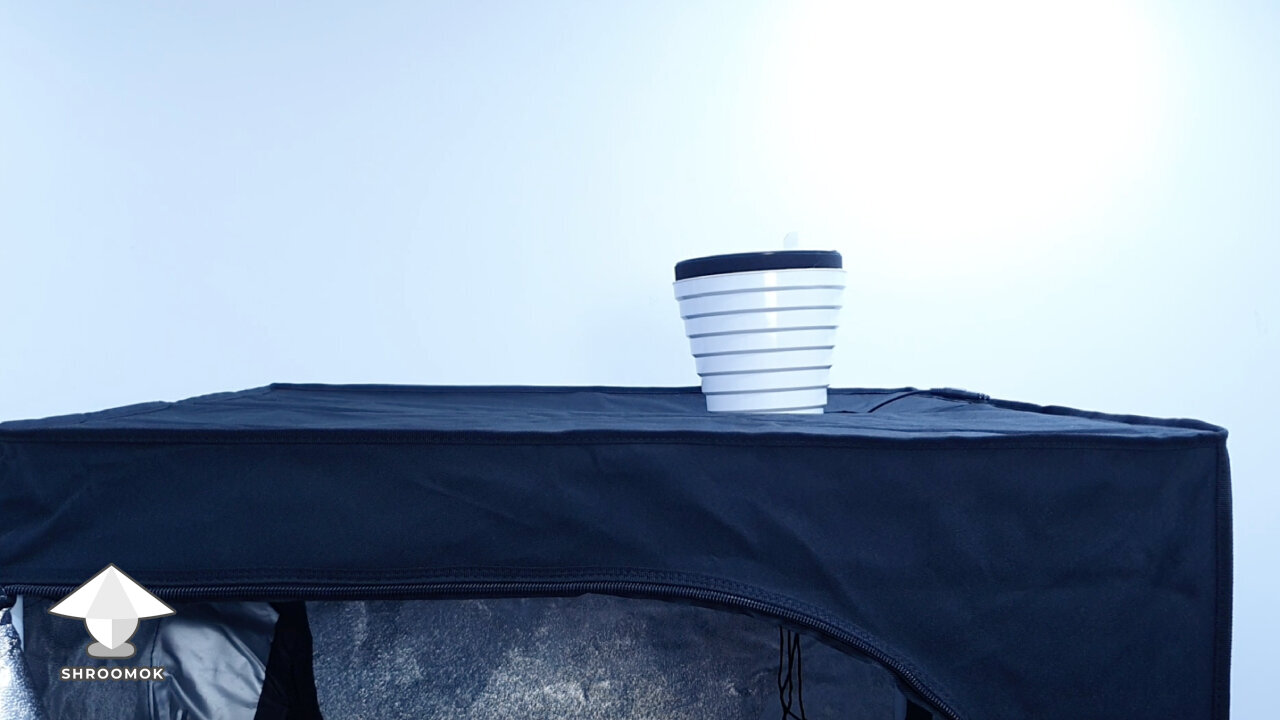
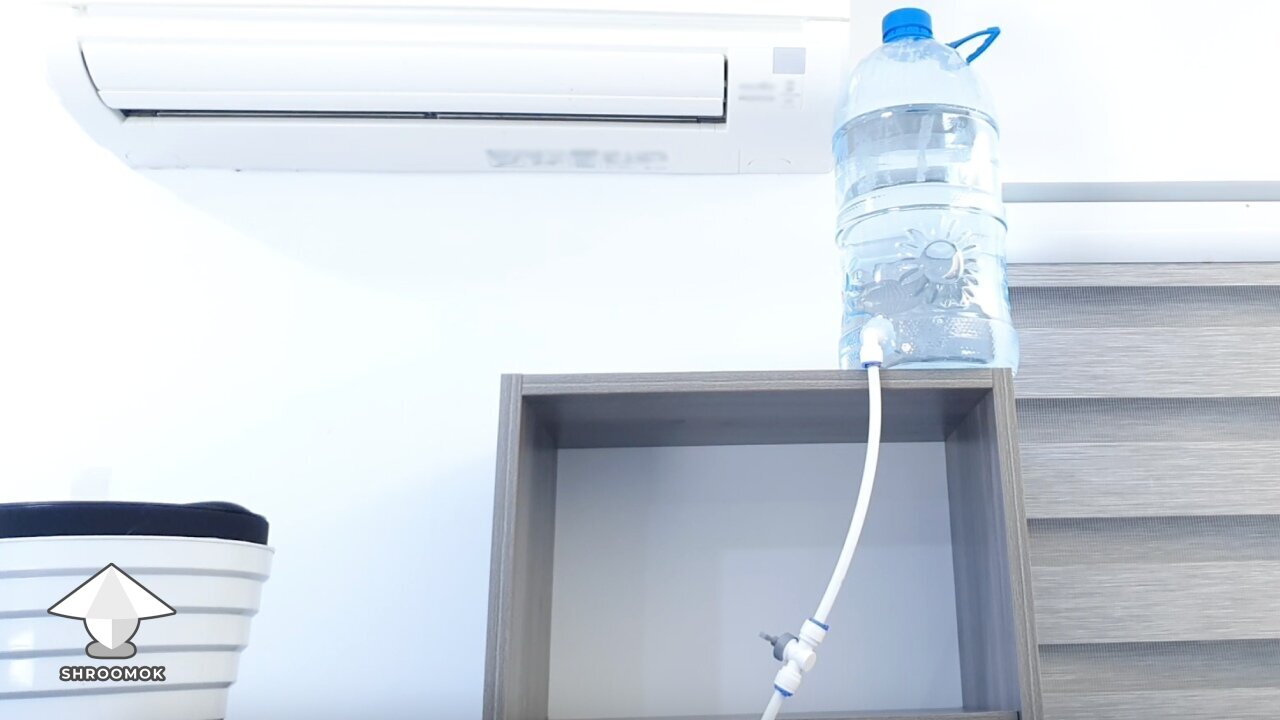
DIY Humidifier
After that, I built a humidifier using affordable items: a plastic food container, a PC fan, a simple fogger, a water float valve, some pipes and connectors and big water bottle (8 Qts/Liters).

The humidifier (a plastic box inside the tent) is connected to a large 8-liter water tank placed outside the grow tent.

Water from the large tank flows down and automatically fills the humidifier to the correct level, regulated by a float valve.

I only need to refill the big tank once a week and it's super convenient!
The fogger creates fine mist. The fan pushes mist through the pipe and helps spread it evenly throughout the tent.

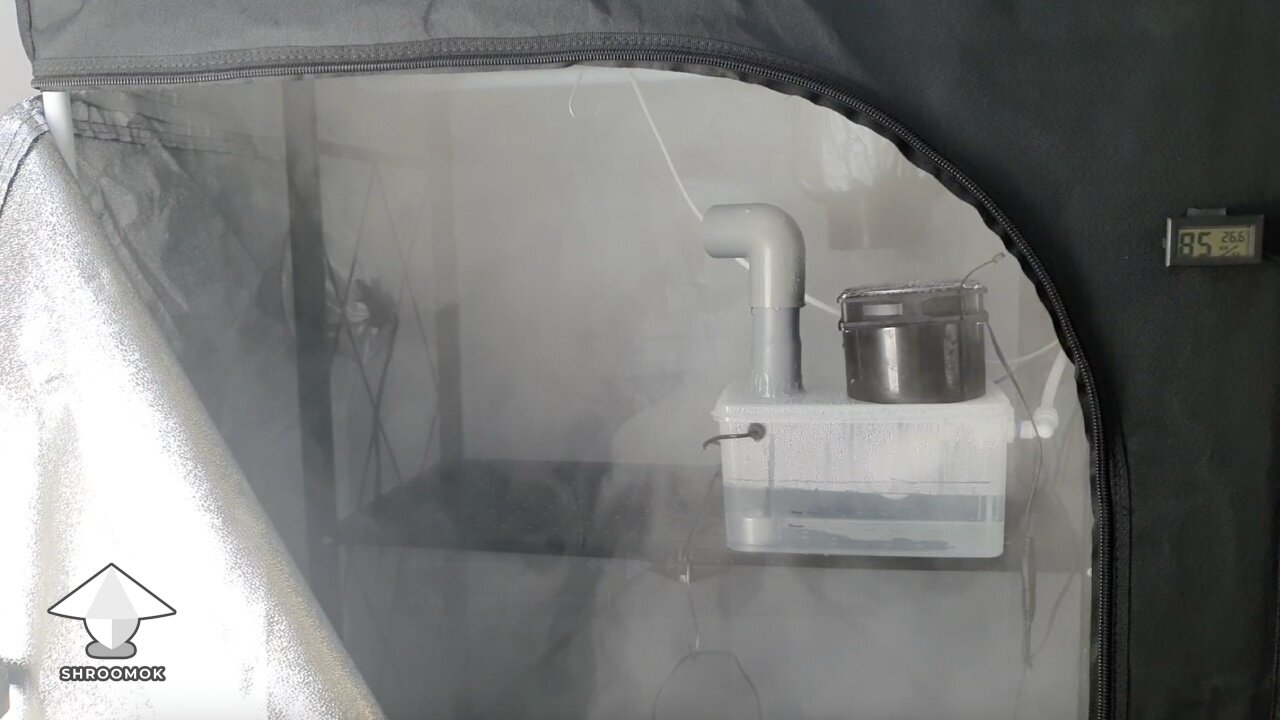
I ran a few tests to make sure everything was working properly, and the grow tent was finally ready for the fruiting stage!
Fruiting Conditions for the next several weeks
Temperature: it's hot season righ now and temperature in my fruiting chamber fluctuates between 74°–81°F (23–27°C). Sometimes reaching 82°–86°F (28°-30°C) if I turn off the AC.
Ventilation: 2–4 times per day. I run the system for 15–20 minutes each time. Ganoderma is highly tolerant to CO2, which is a great plus!
Humidity: 80–85%. I run the humidifier 2–4 times per day together with the ventilation, then let it continue for another 5–10 minutes. Total run time is around 20–30 minutes per cycle.
Light: 2–4 hours per day (cold white LED).
Note: I’m currently using only a thermometer and hygrometer as sensors. There’s no automation in my setup yet.
Attachments

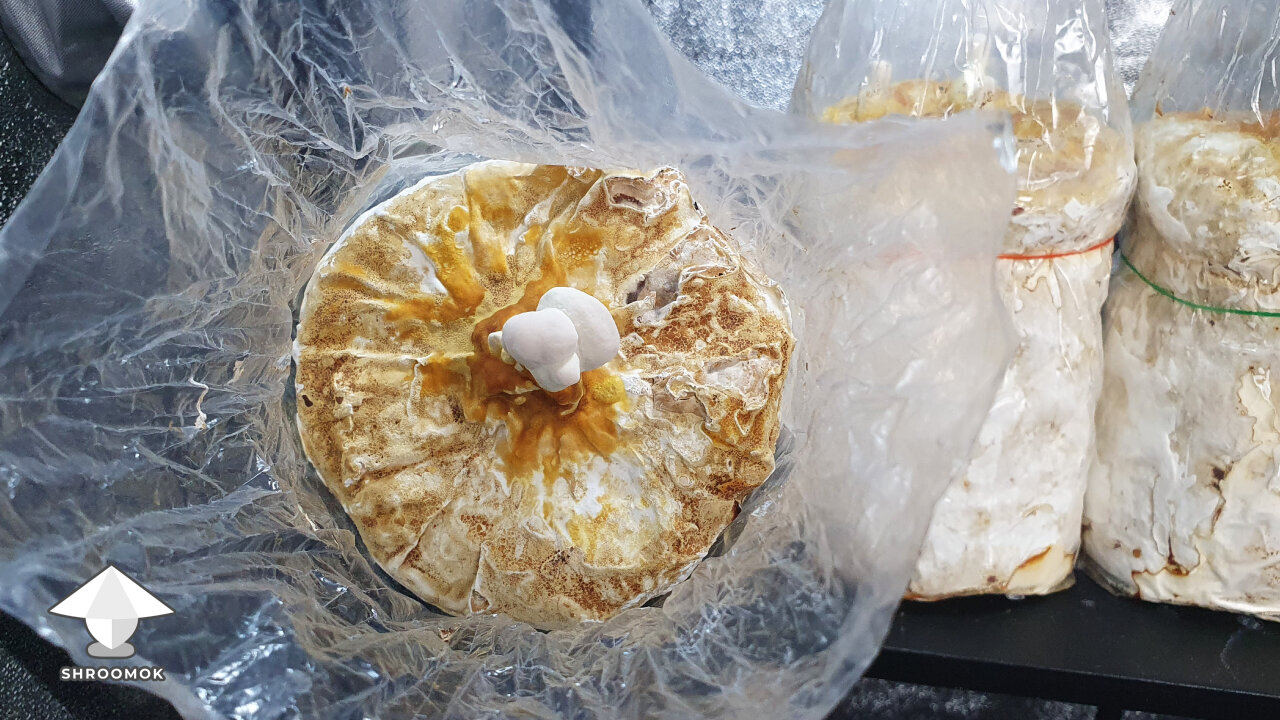
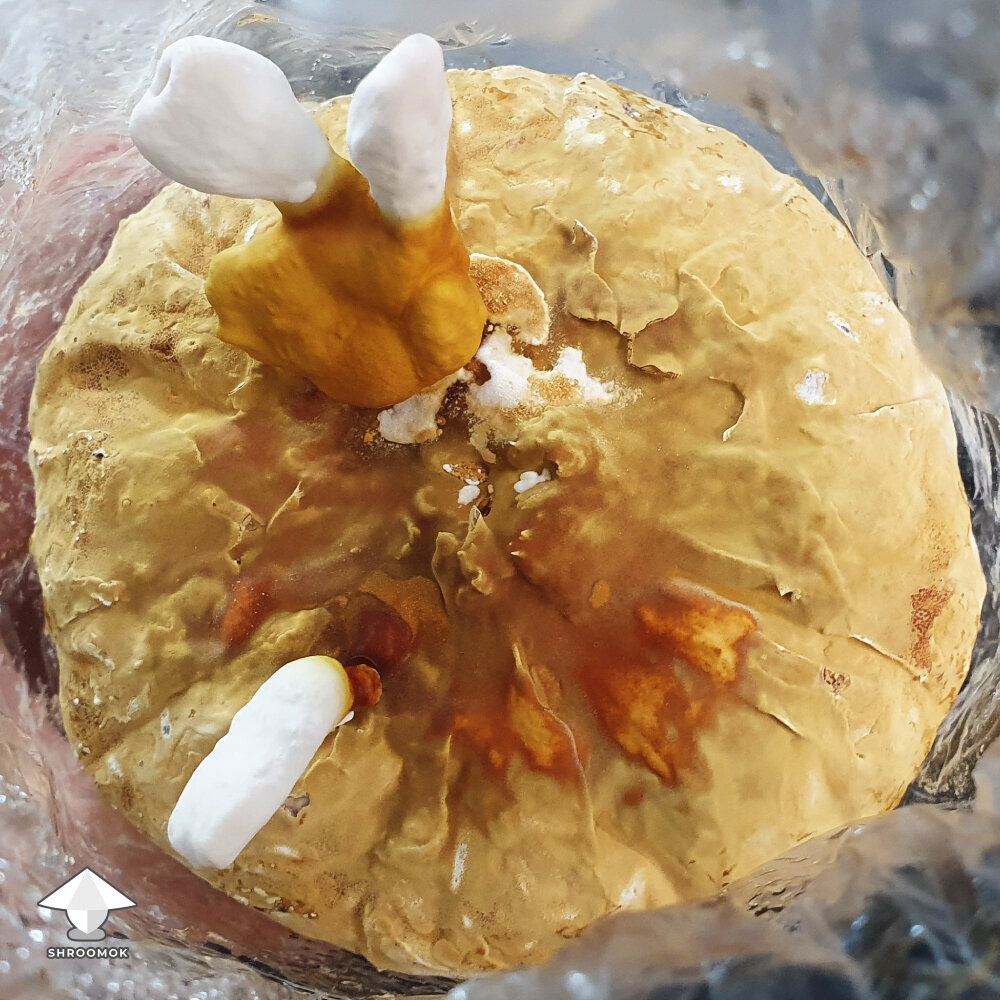
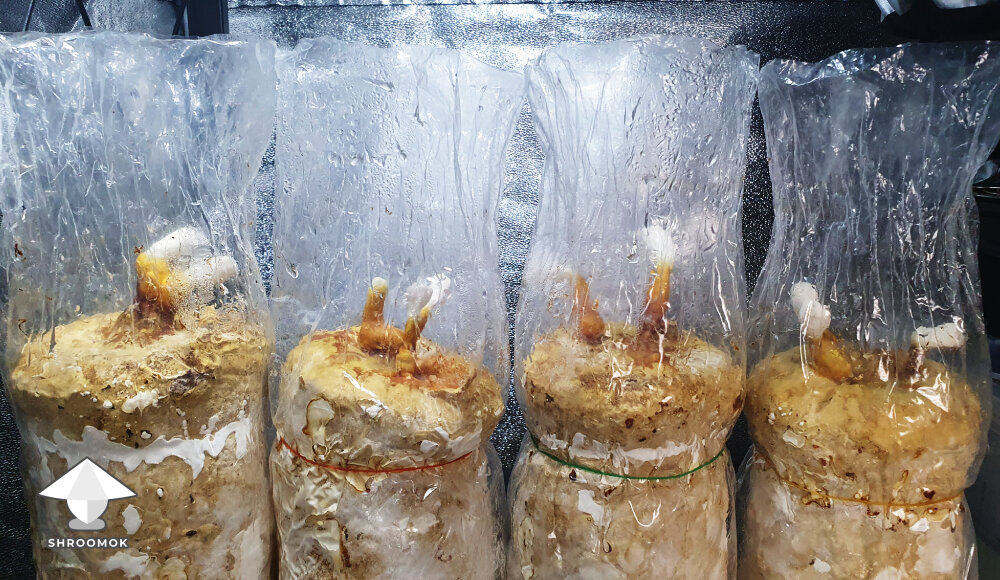
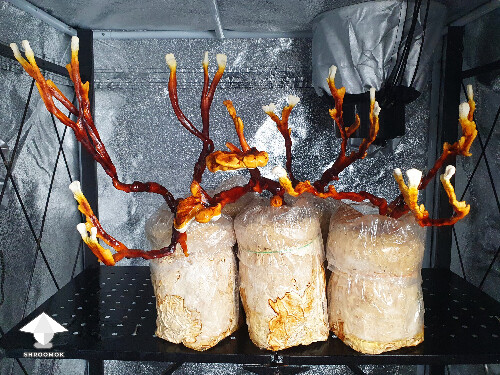
Day 60. When pins say go, you go
During the current reishi grow I faced with a dilemma. On one hand, the bags still had uncolonized areas, so I couldn’t remove the air filters and open them up for proper pinning earlier (before they started forming pins on filters). On the other hand, reishi had already started fruiting… yes! through the air filters!


The pins were literally biting into the filters. Trying to remove filters at this point would completely ruin my early mushrooms.
I couldn’t wait any longer and had to move them to the fruiting chamber right away. I figured I’d just let things slide. Let them grow through the filters and see what happens.
And just like that, the first day of the fruiting period officially started!
Attachments
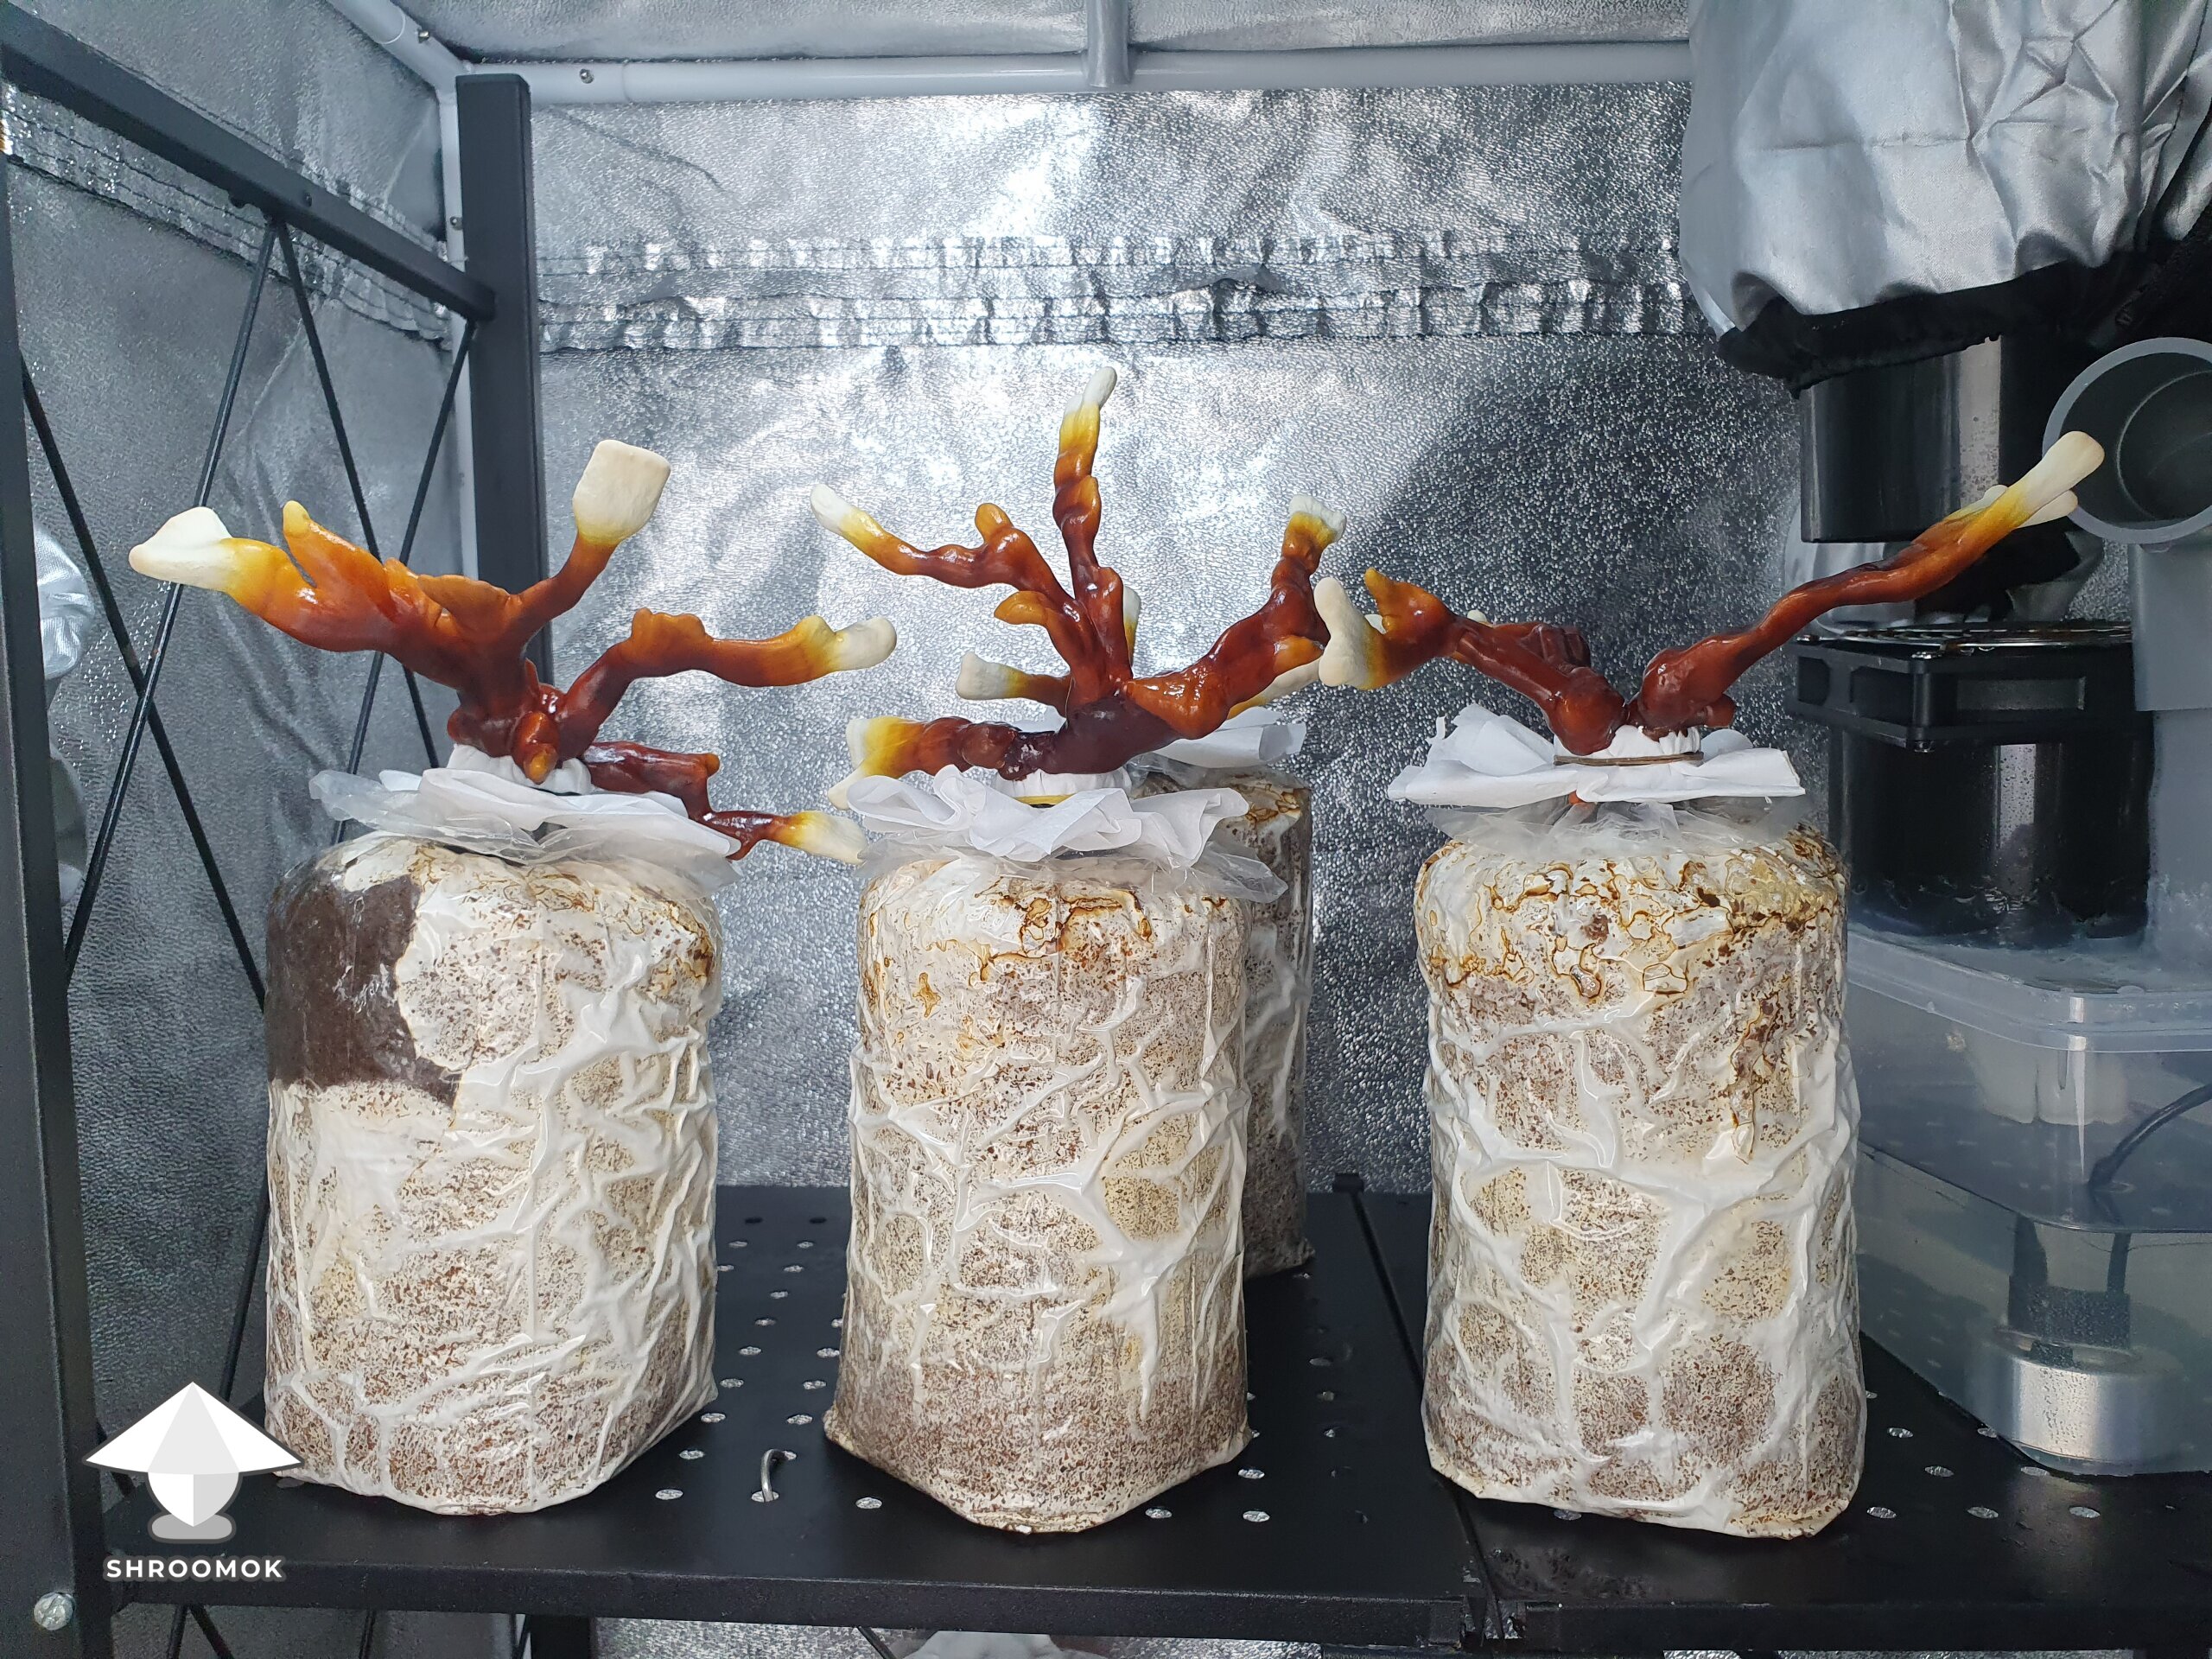
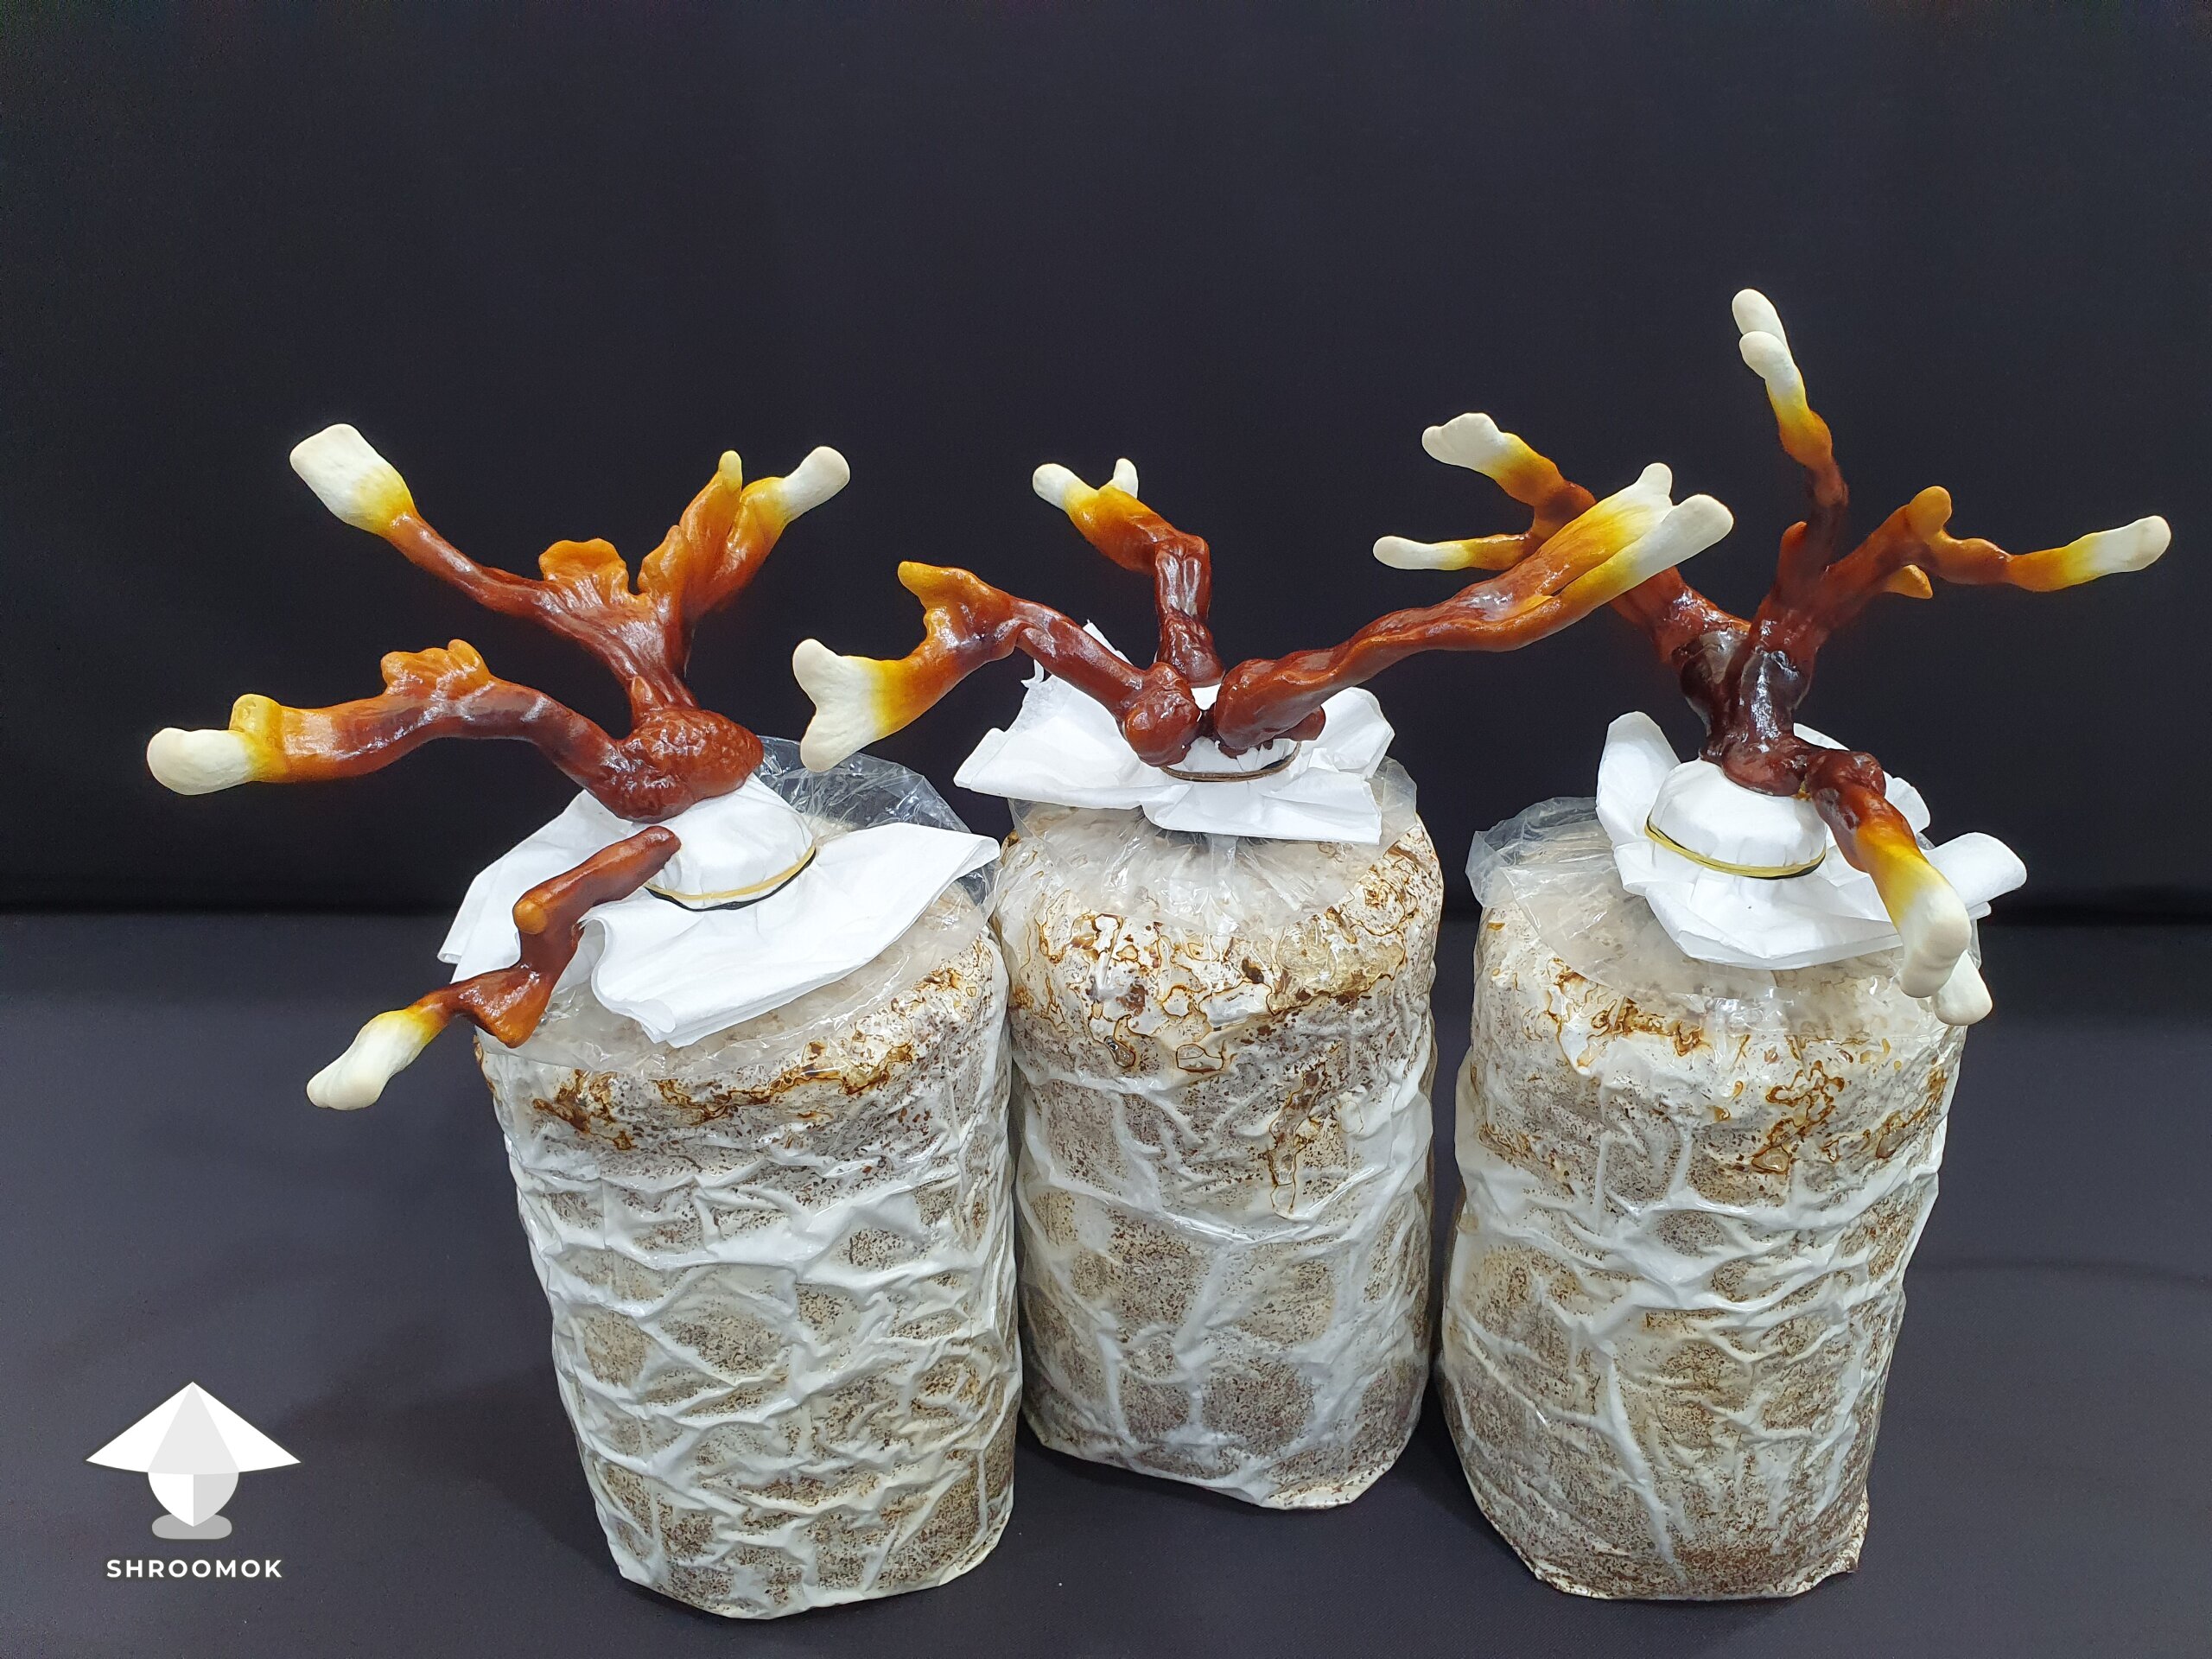
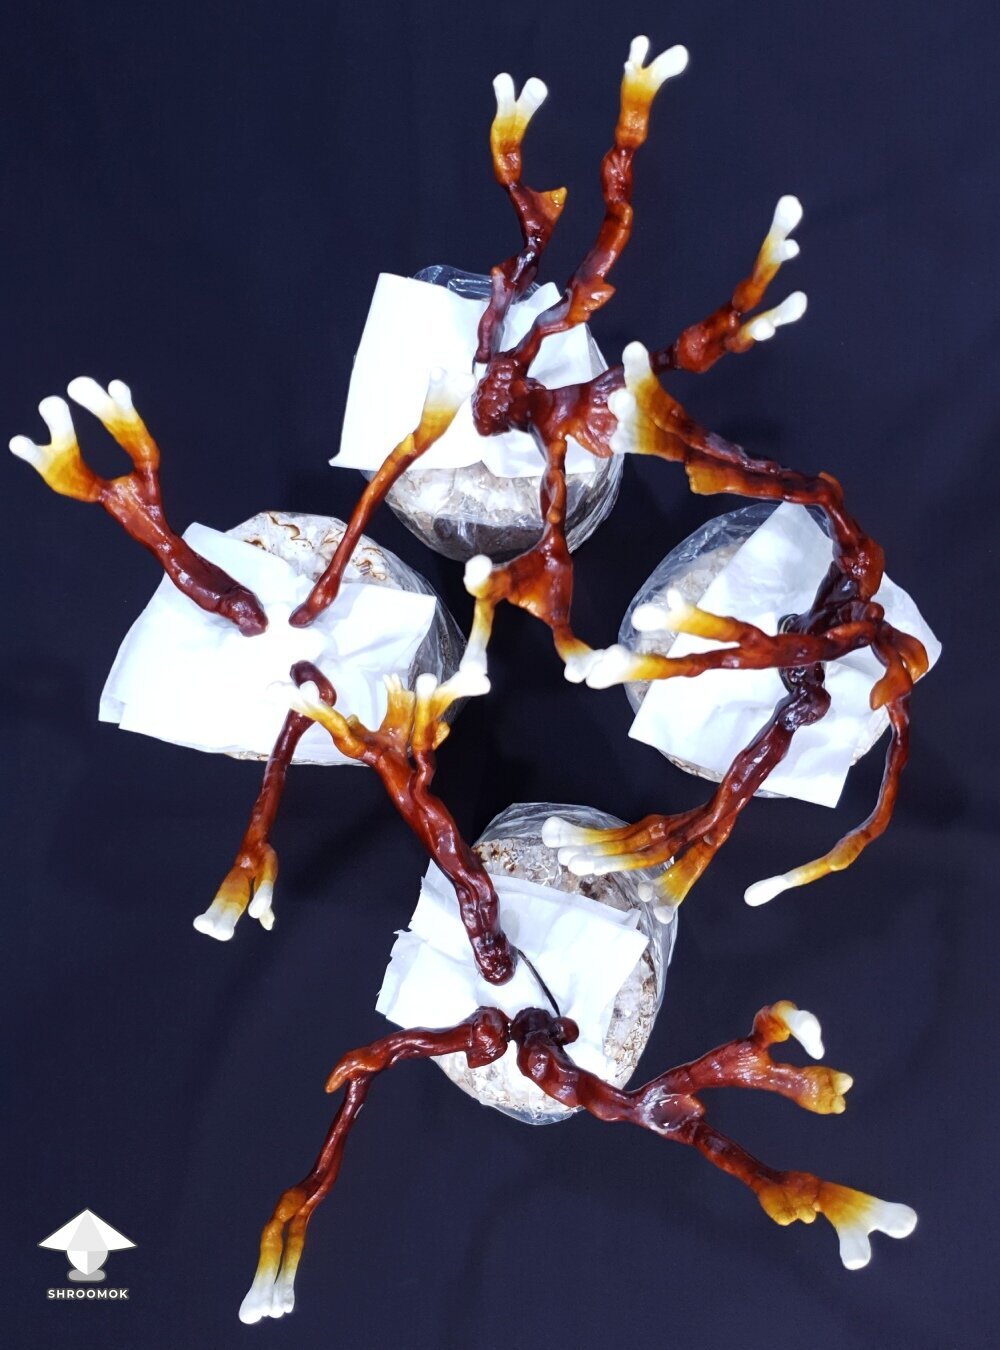
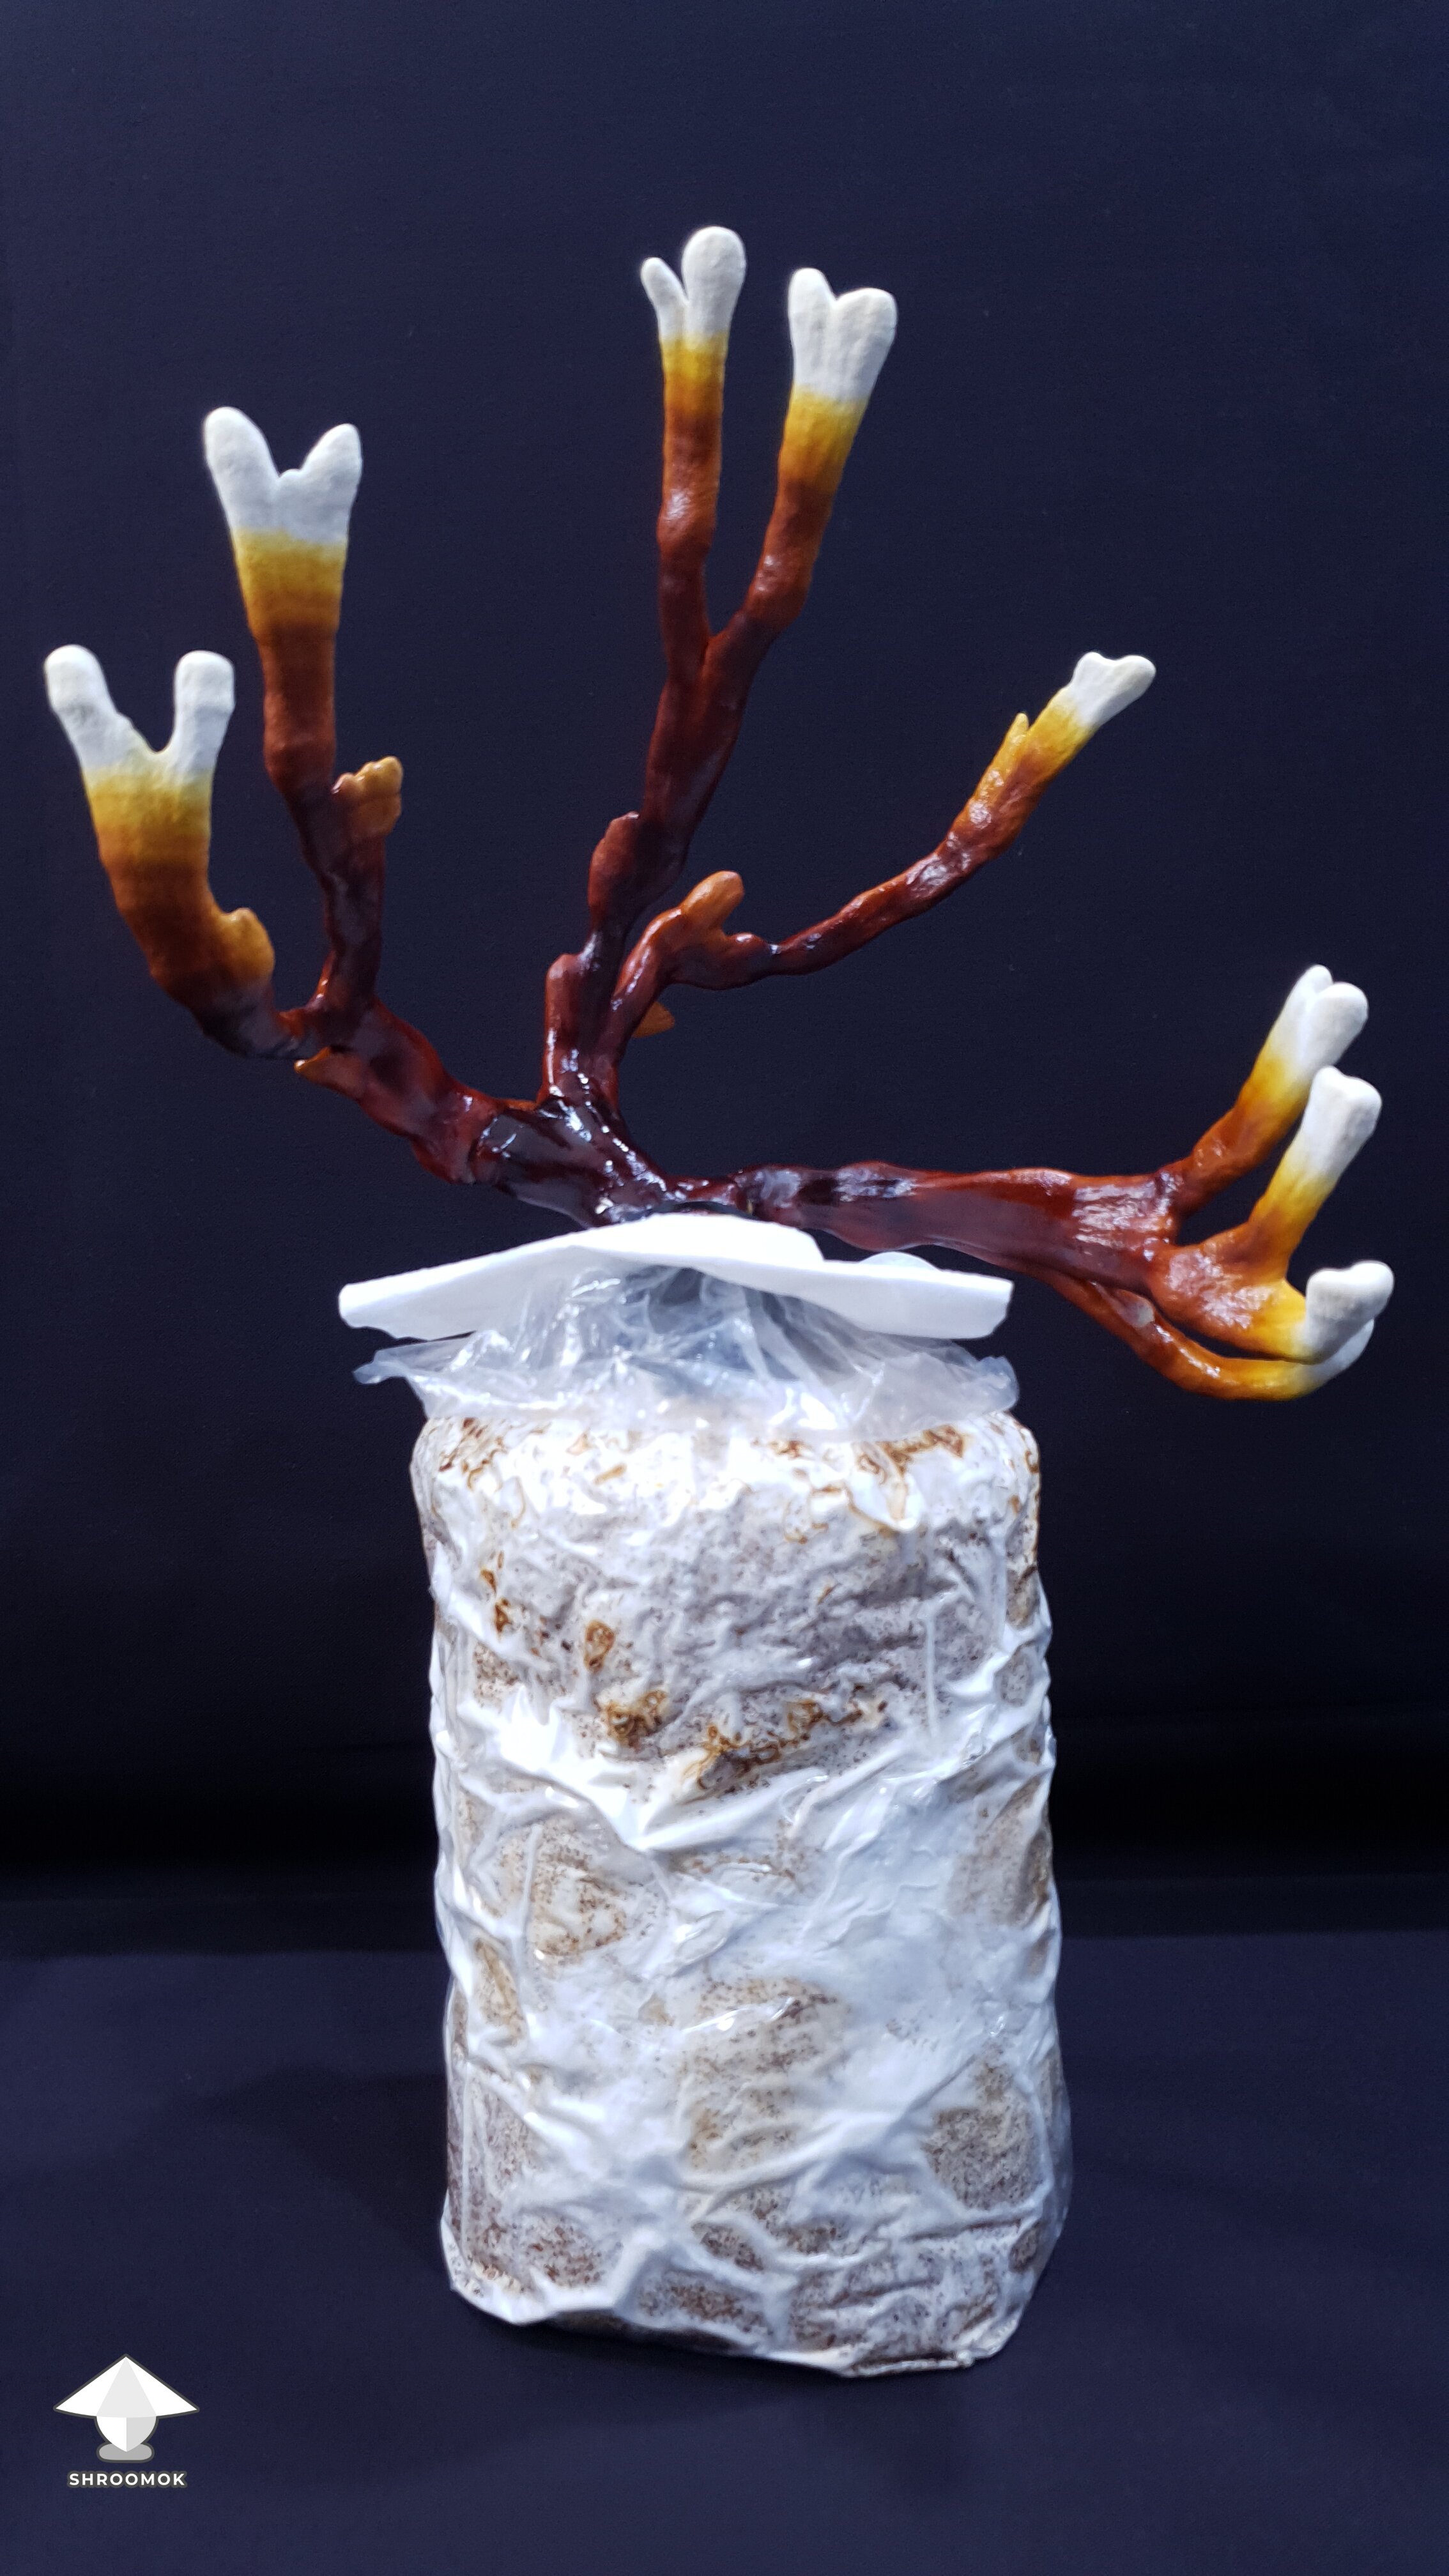
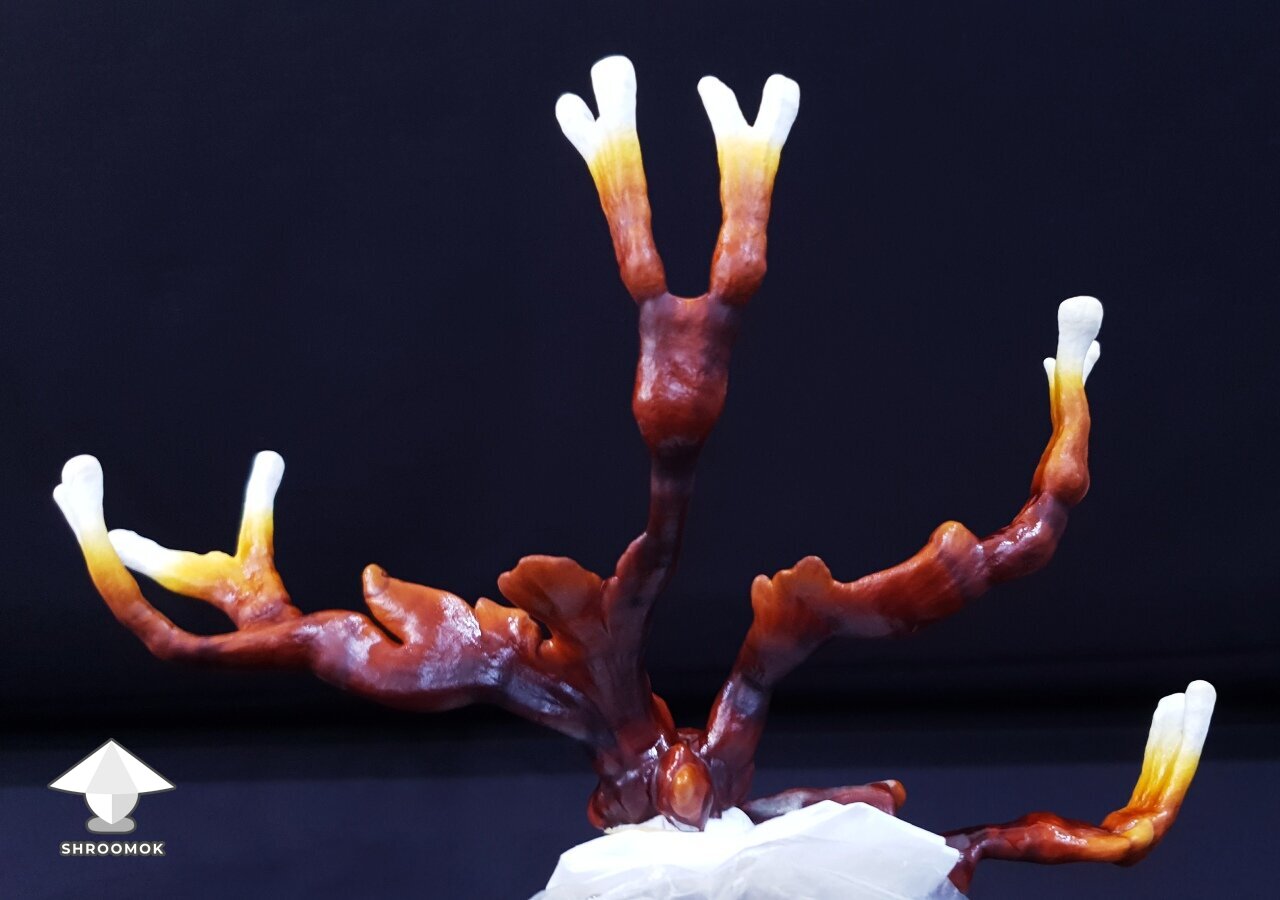
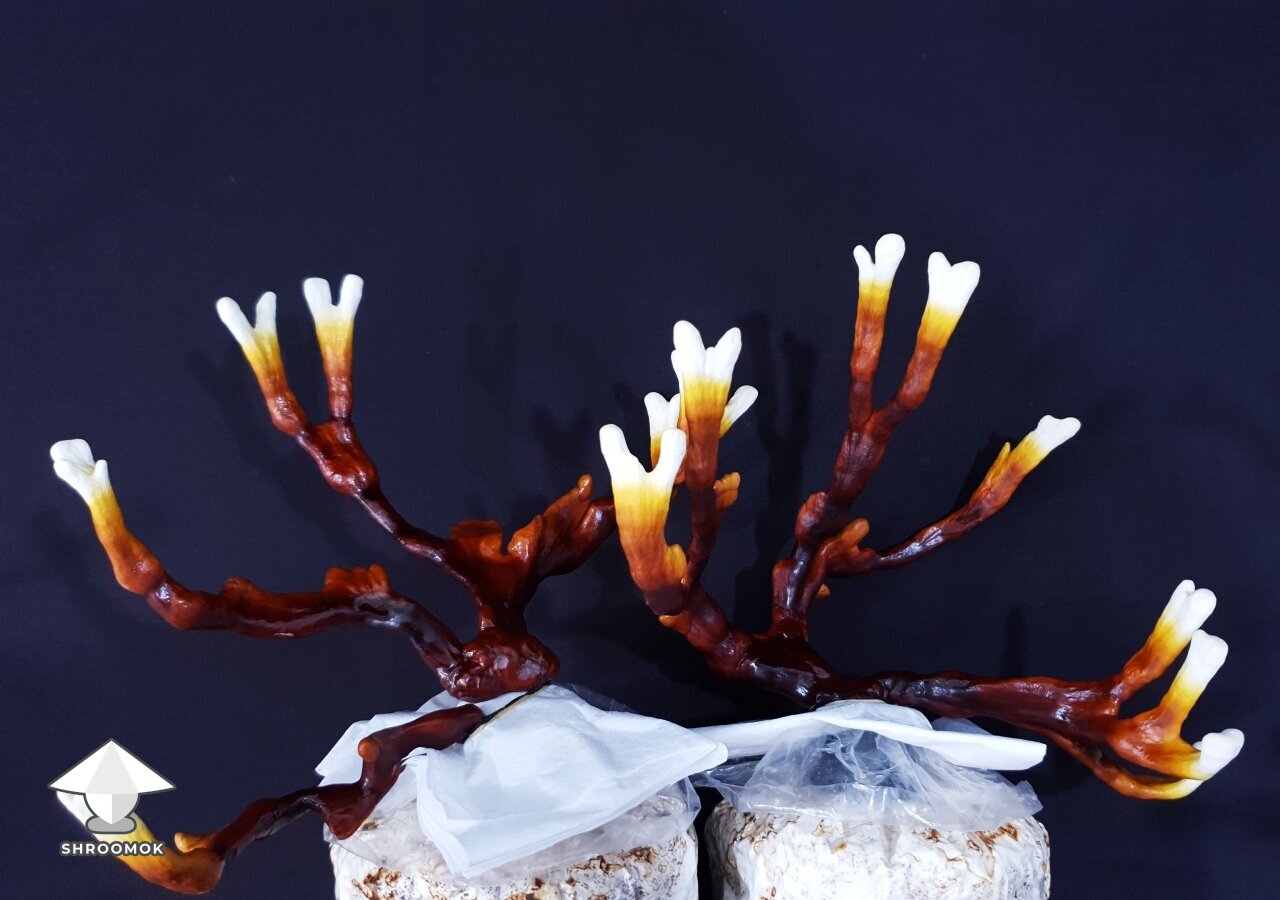
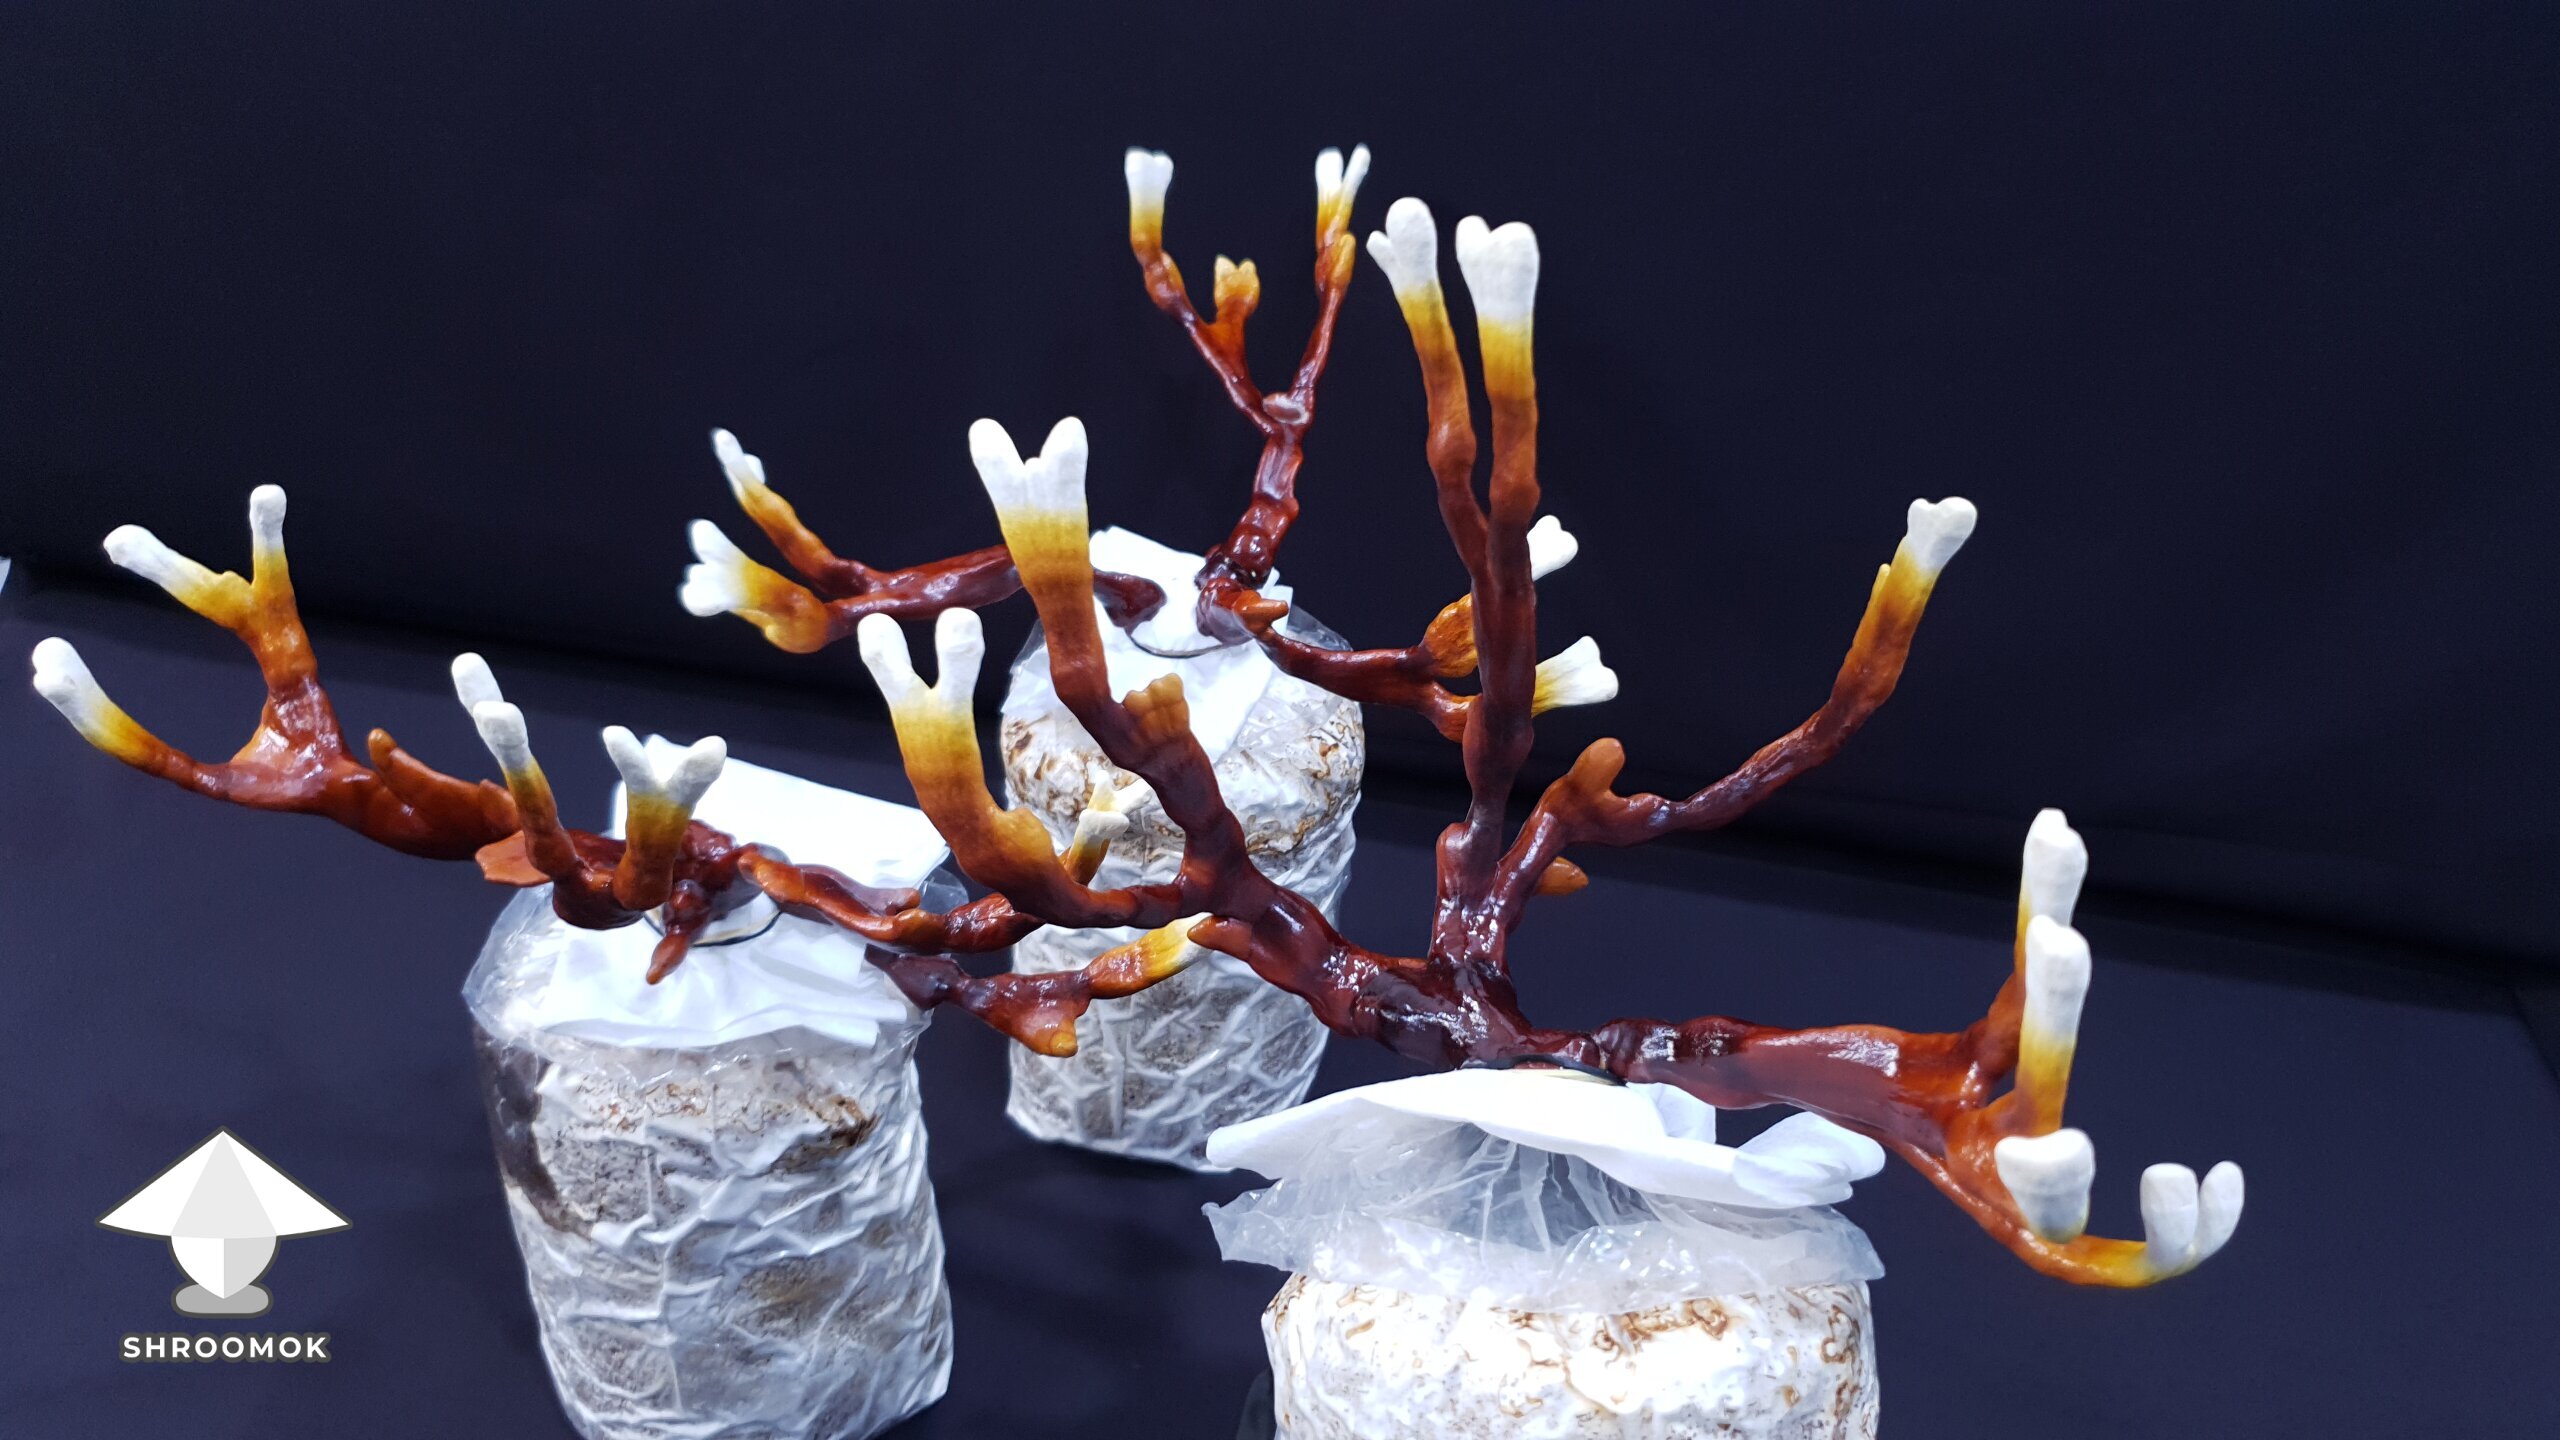
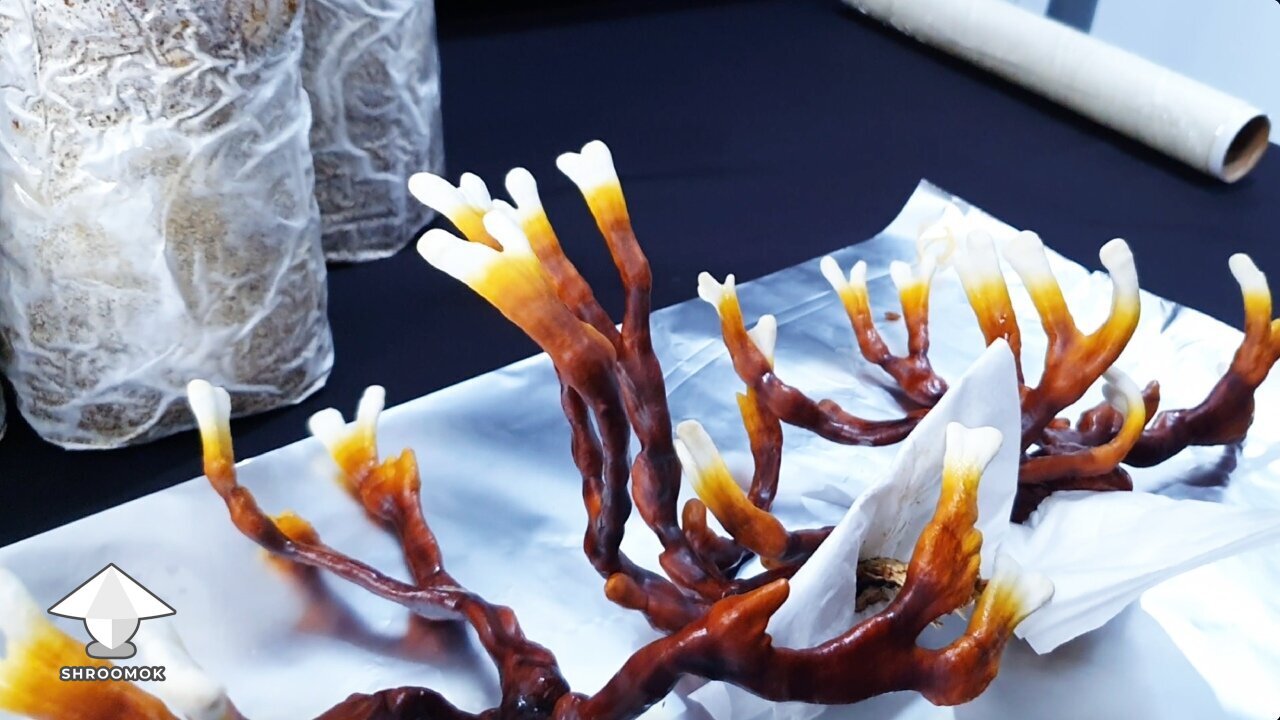
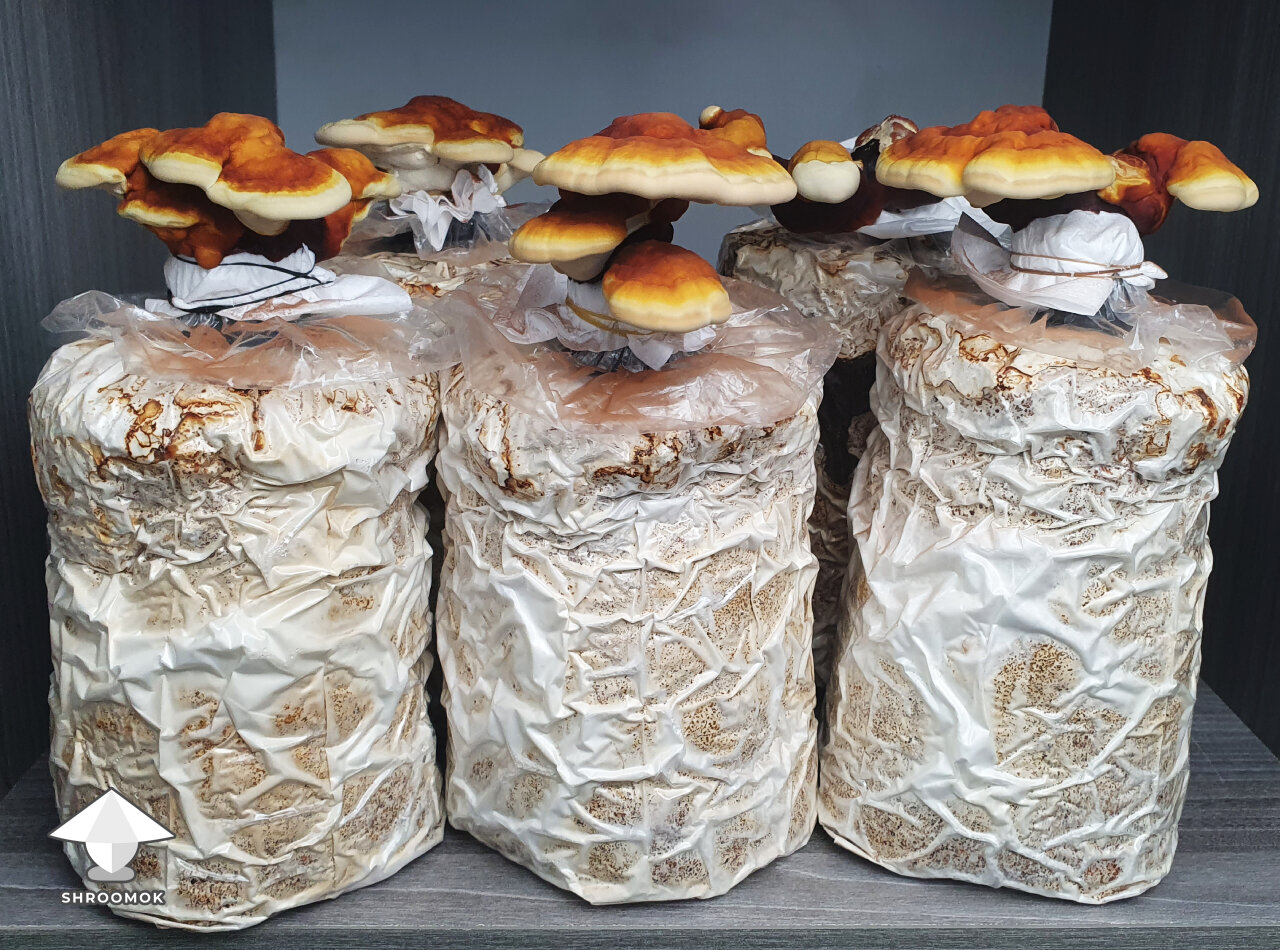
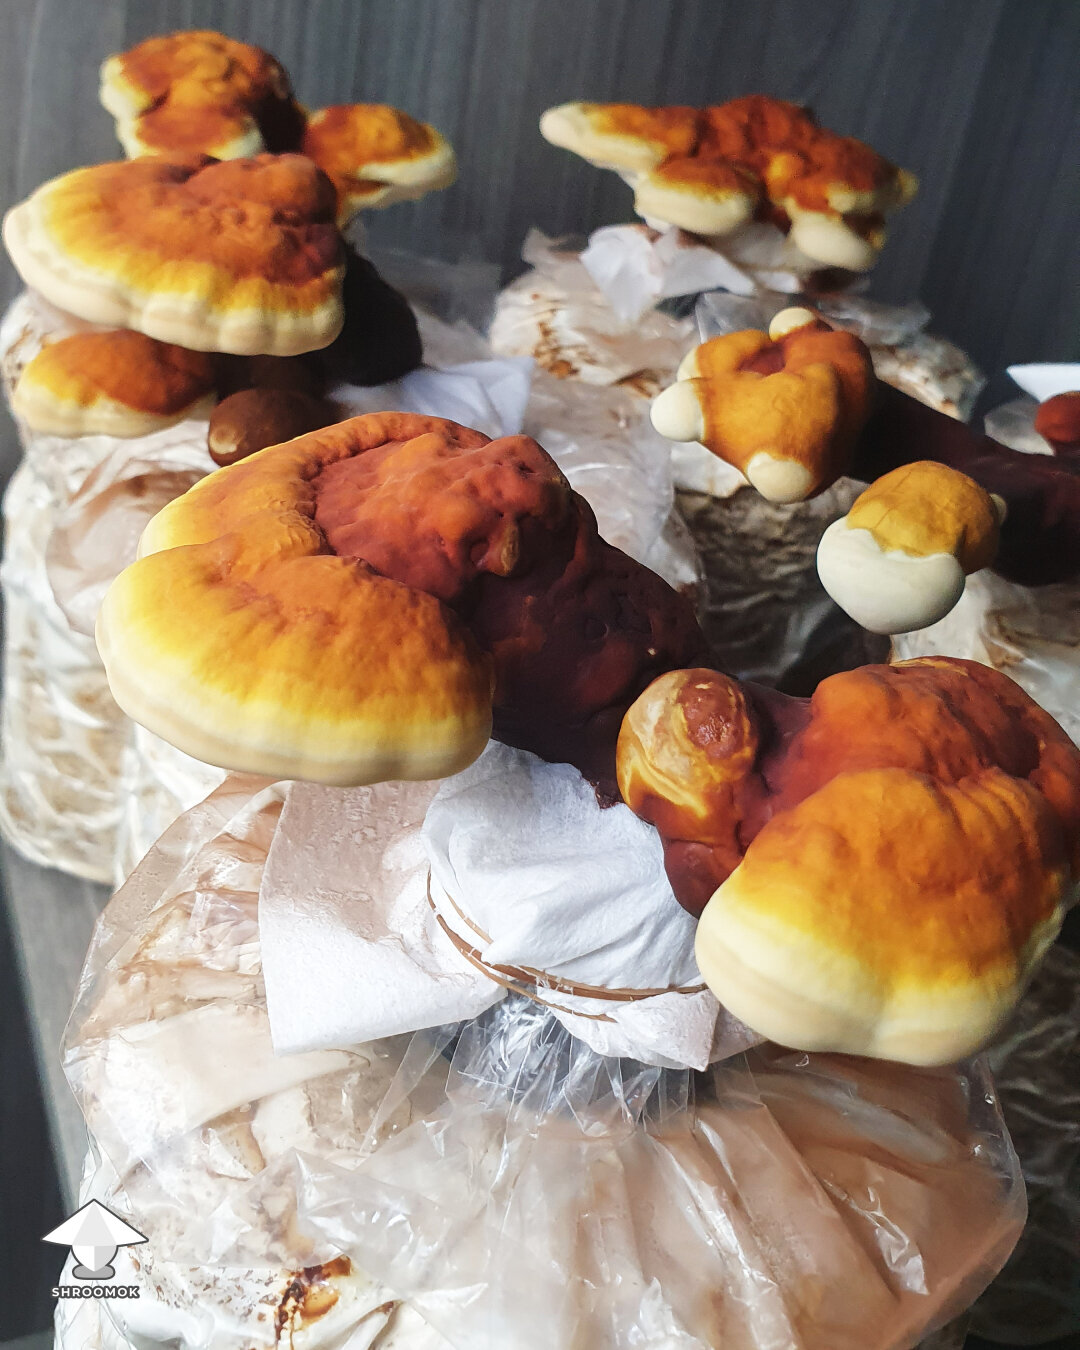
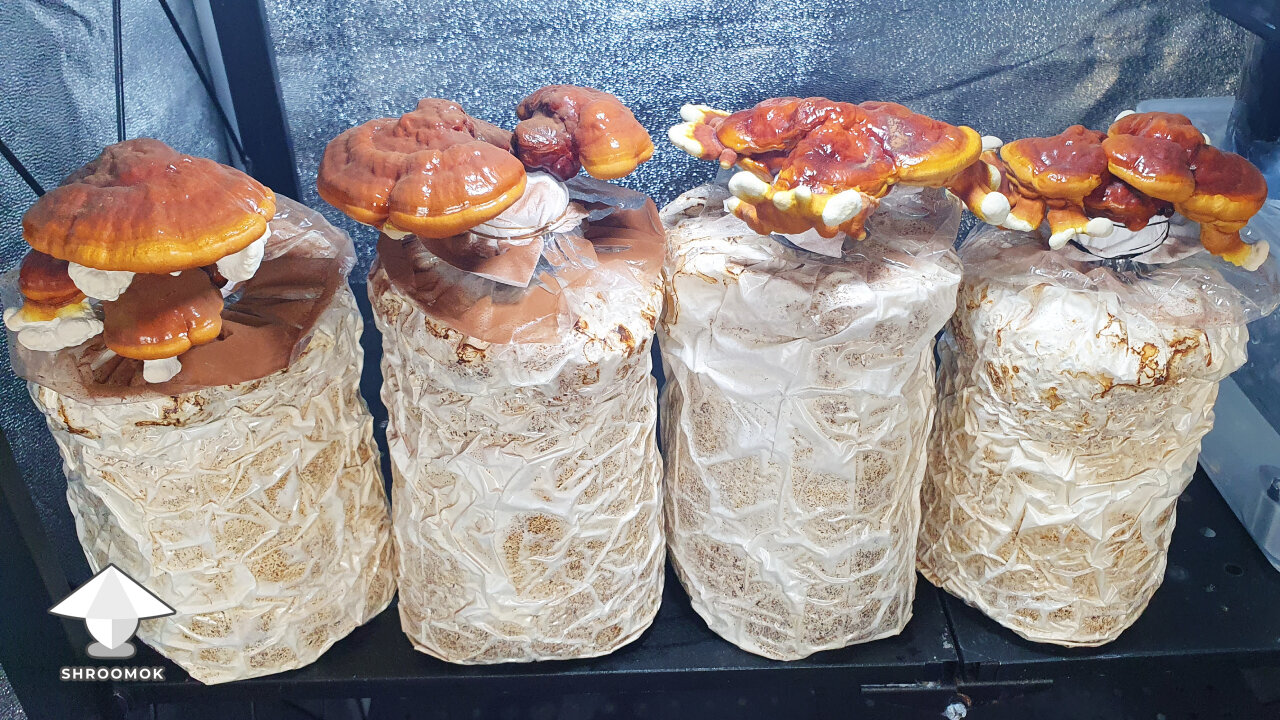
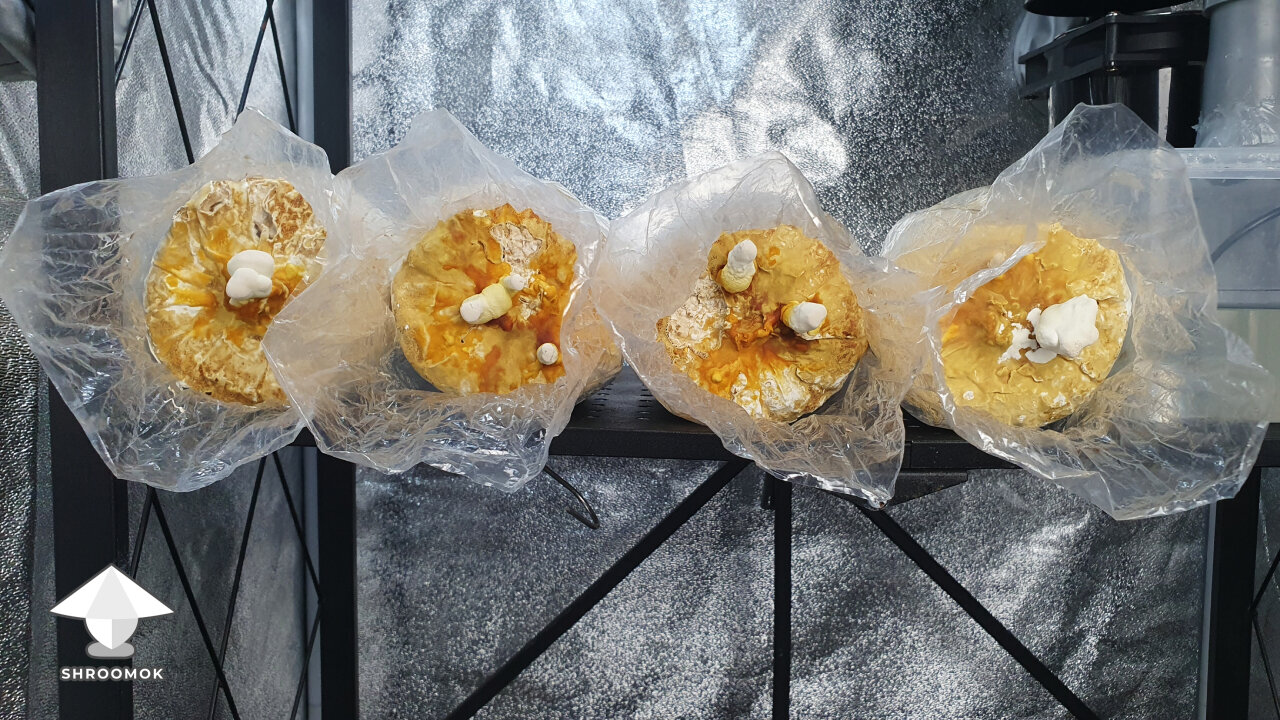
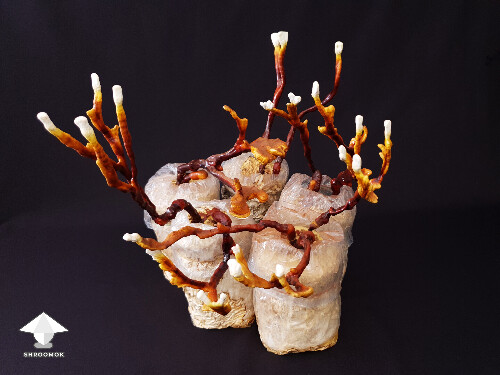
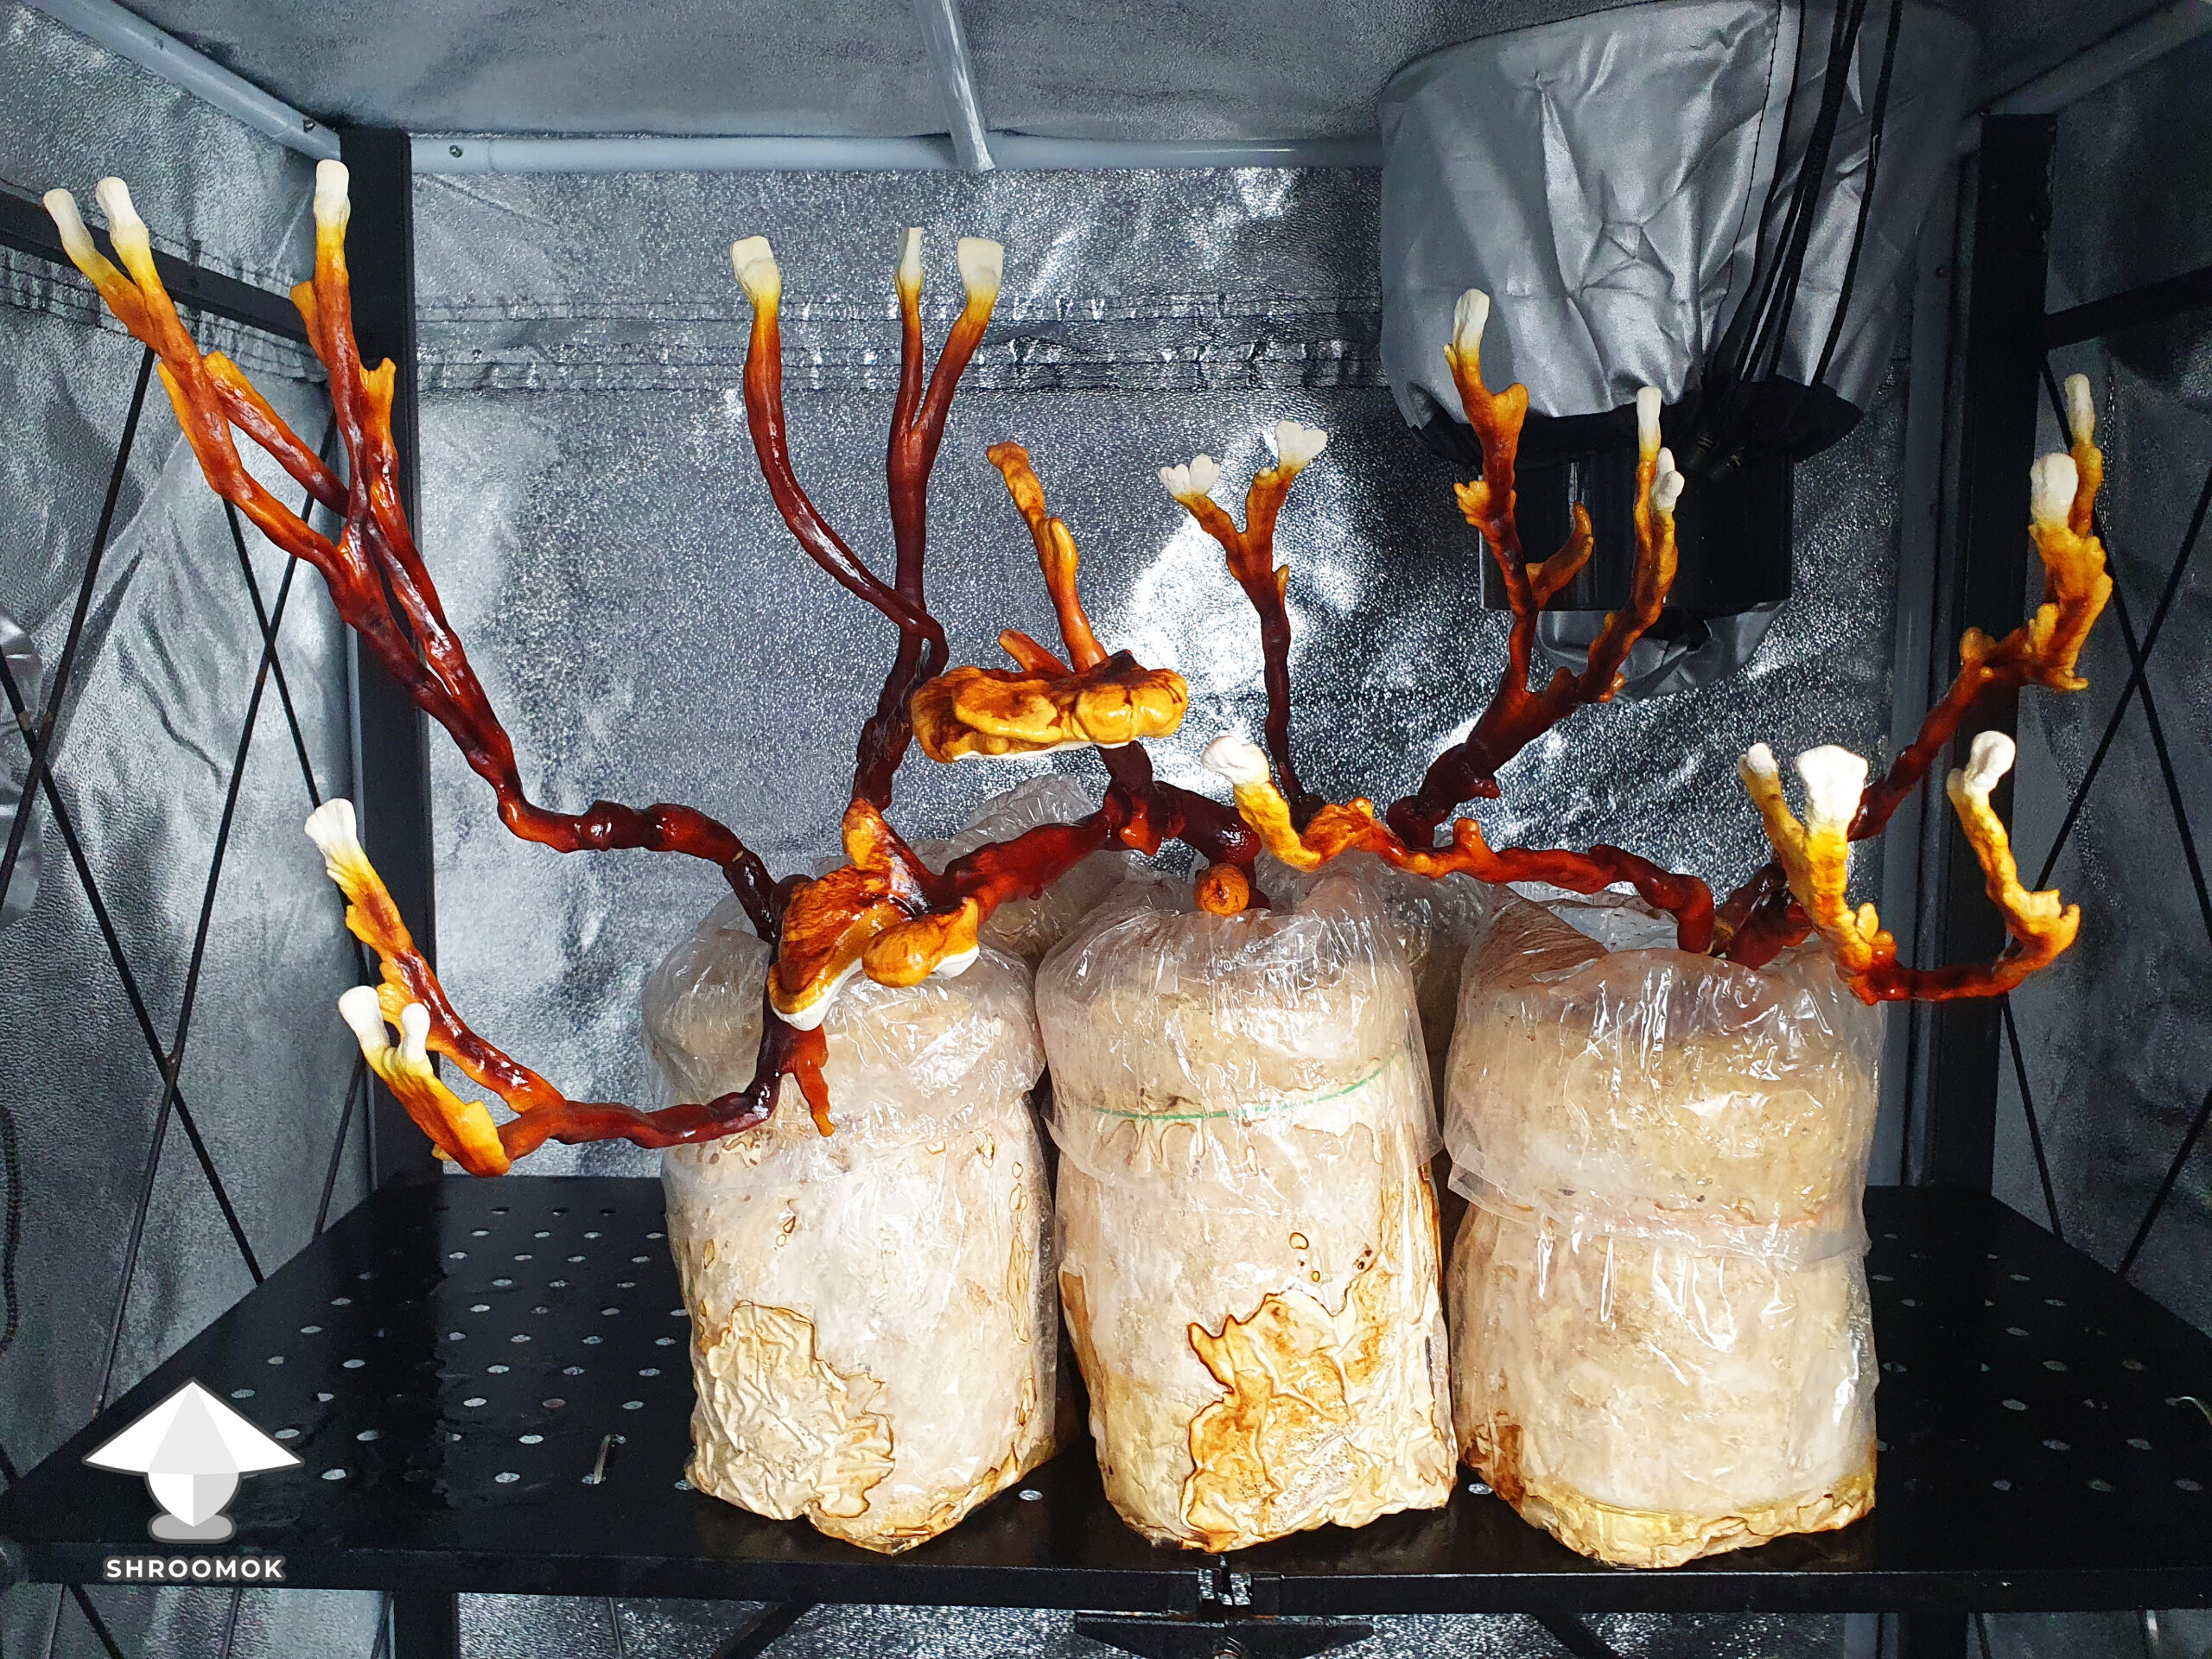
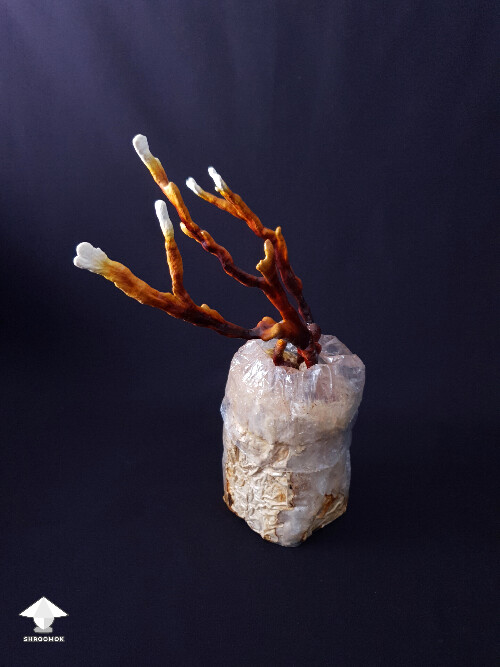
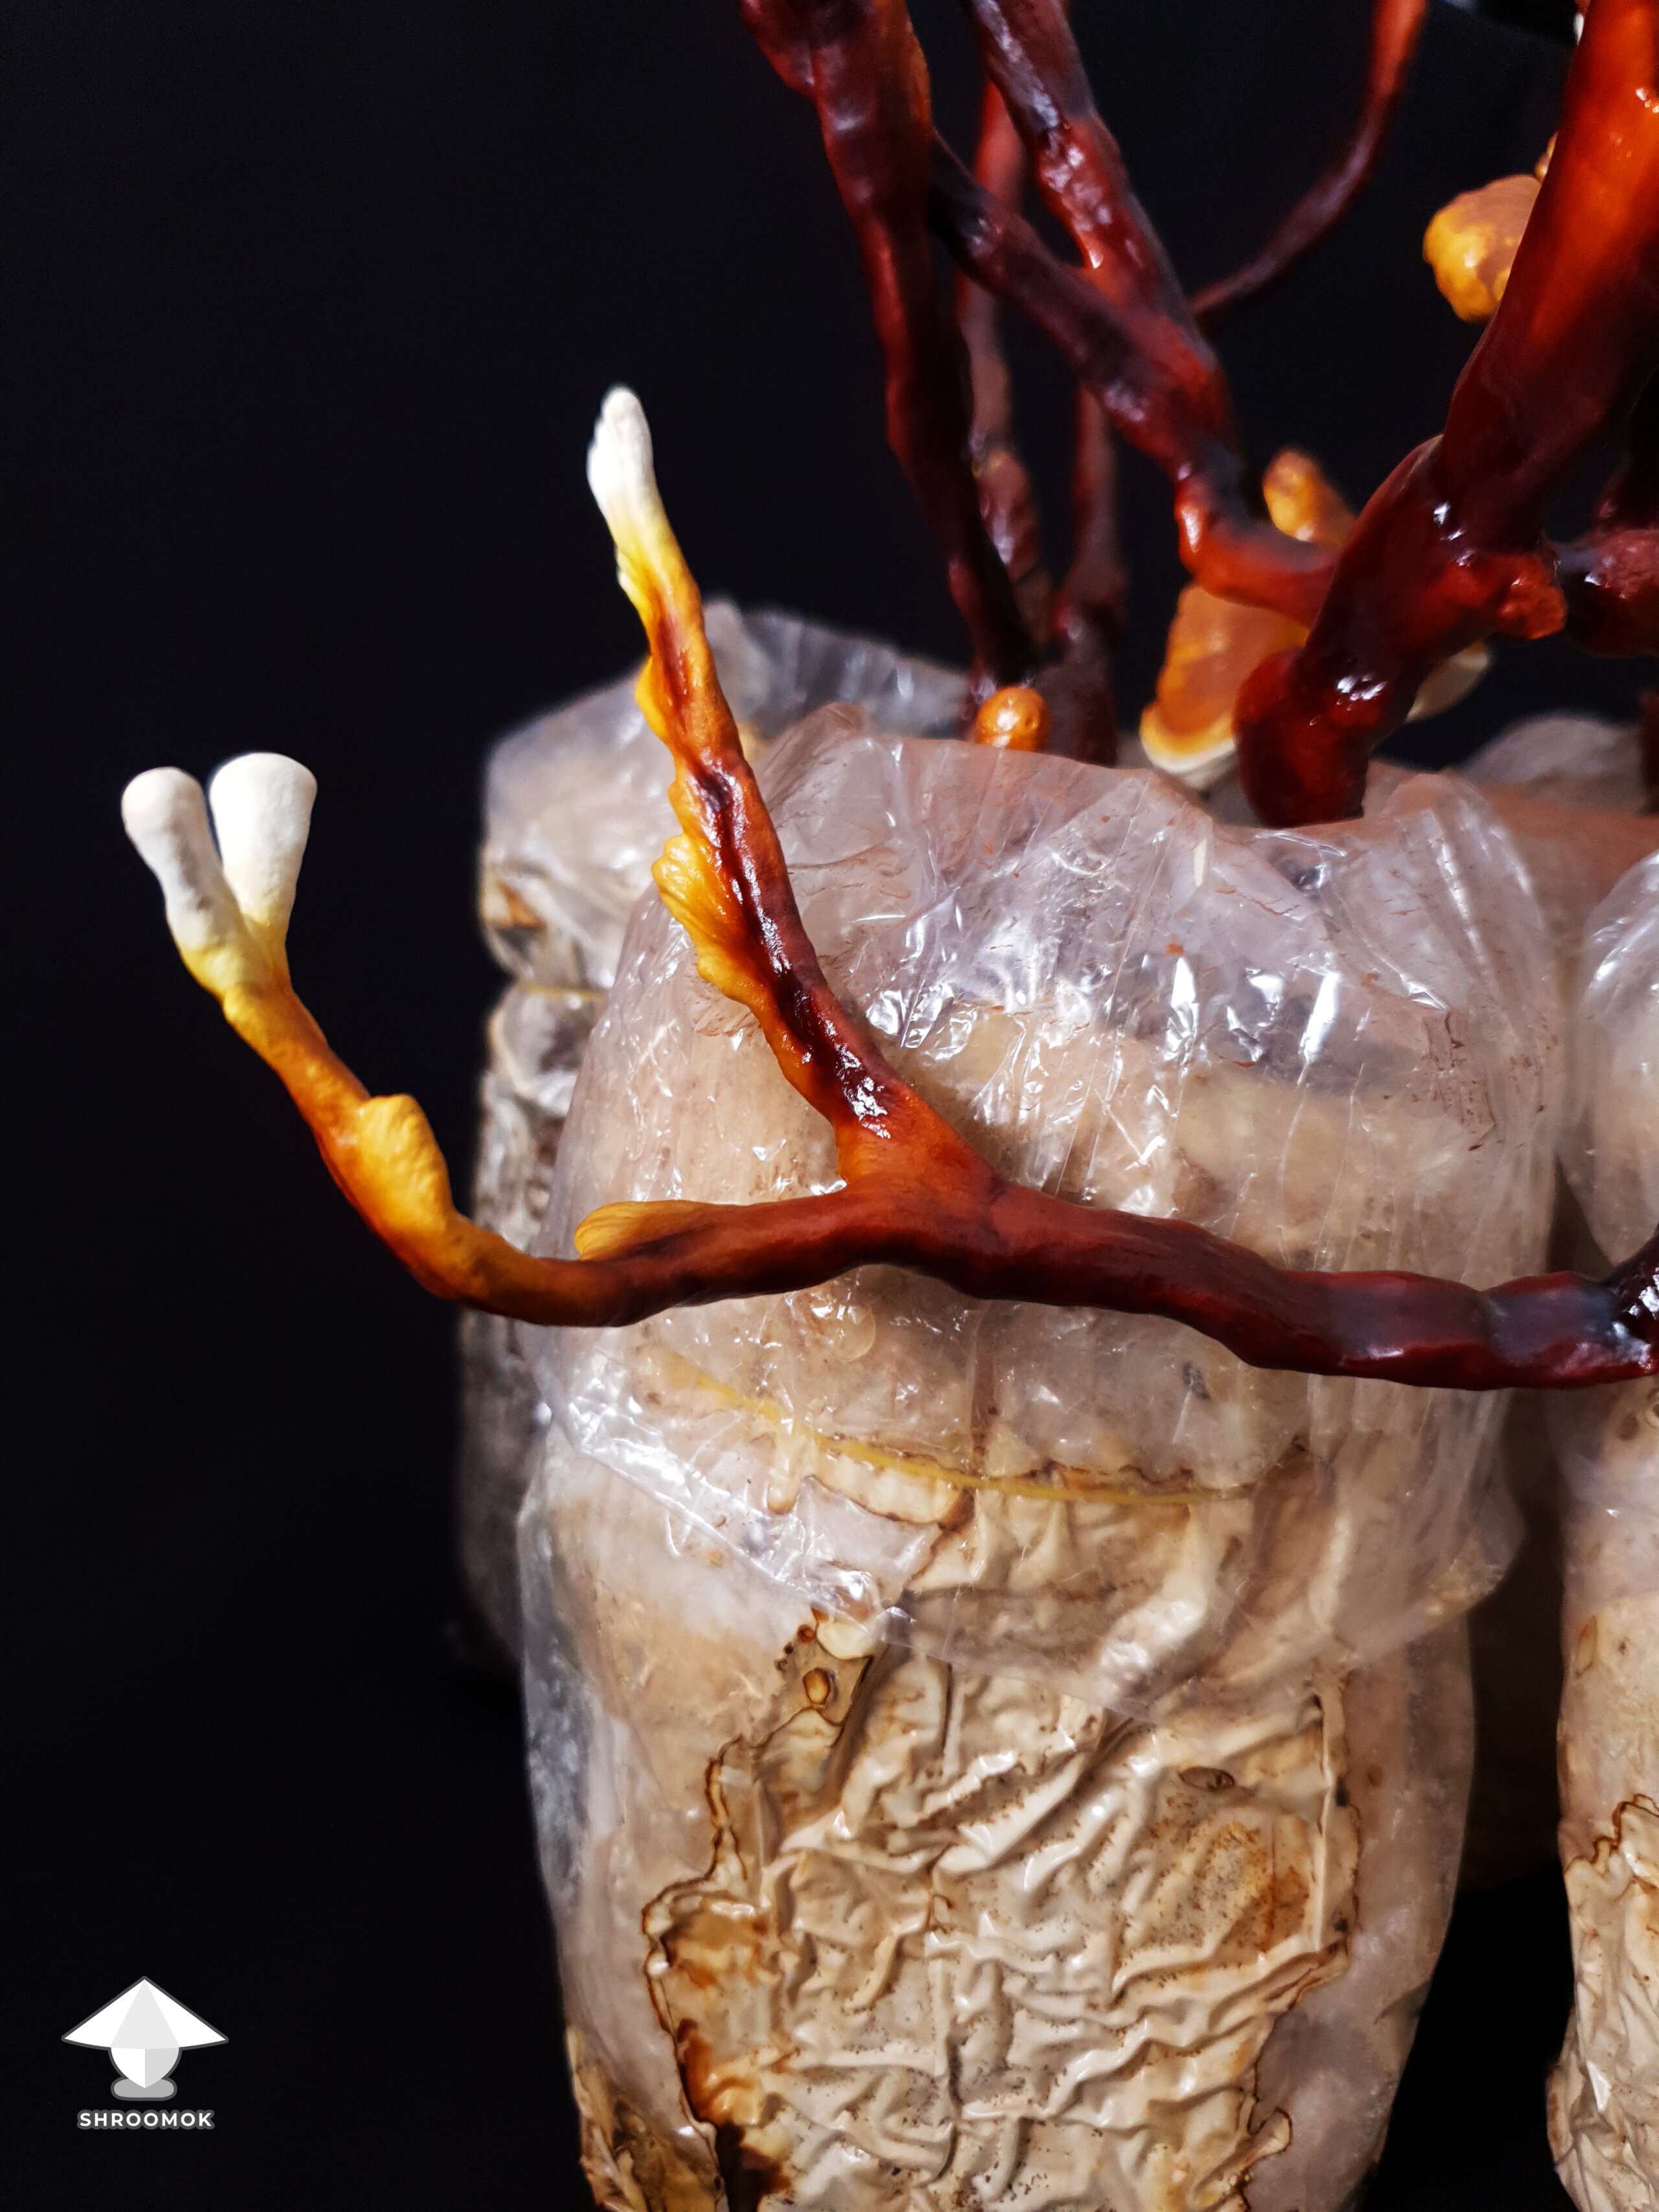
Day 80. Fruiting period update

Reishi are truly slow-growing mushrooms. When cultivation something like Cubensis, Shiitake, Oysters, you can often see changes daily. Sometimes even within a few hours. But with Reishi, it takes weeks to notice a significant difference between pins and proper fruits.


Here we are at:
Day 80 of the overall grow
Day 60 since spawning to bulk
Day 20 since since providing fruiting conditions (placing the bags in the grow tent)
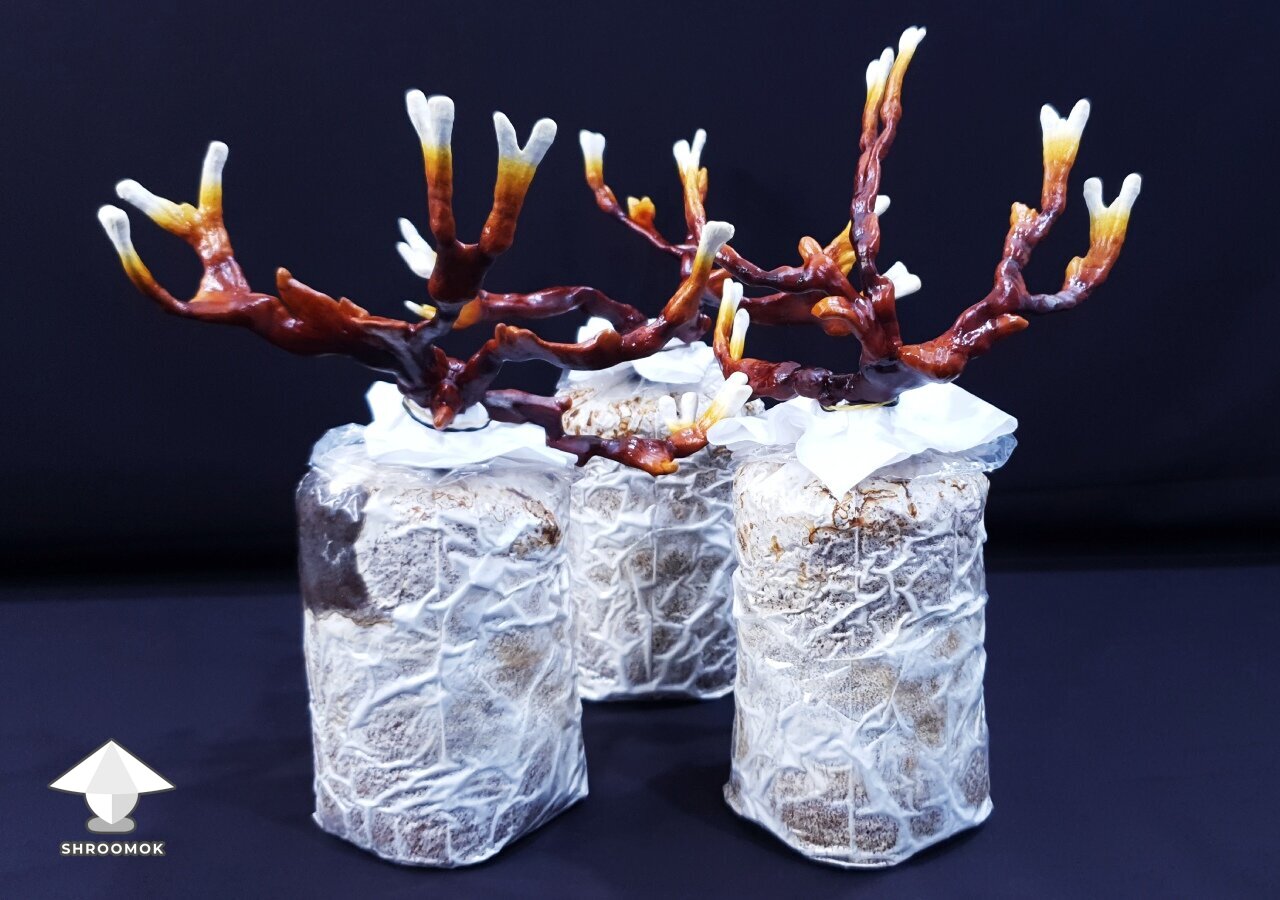
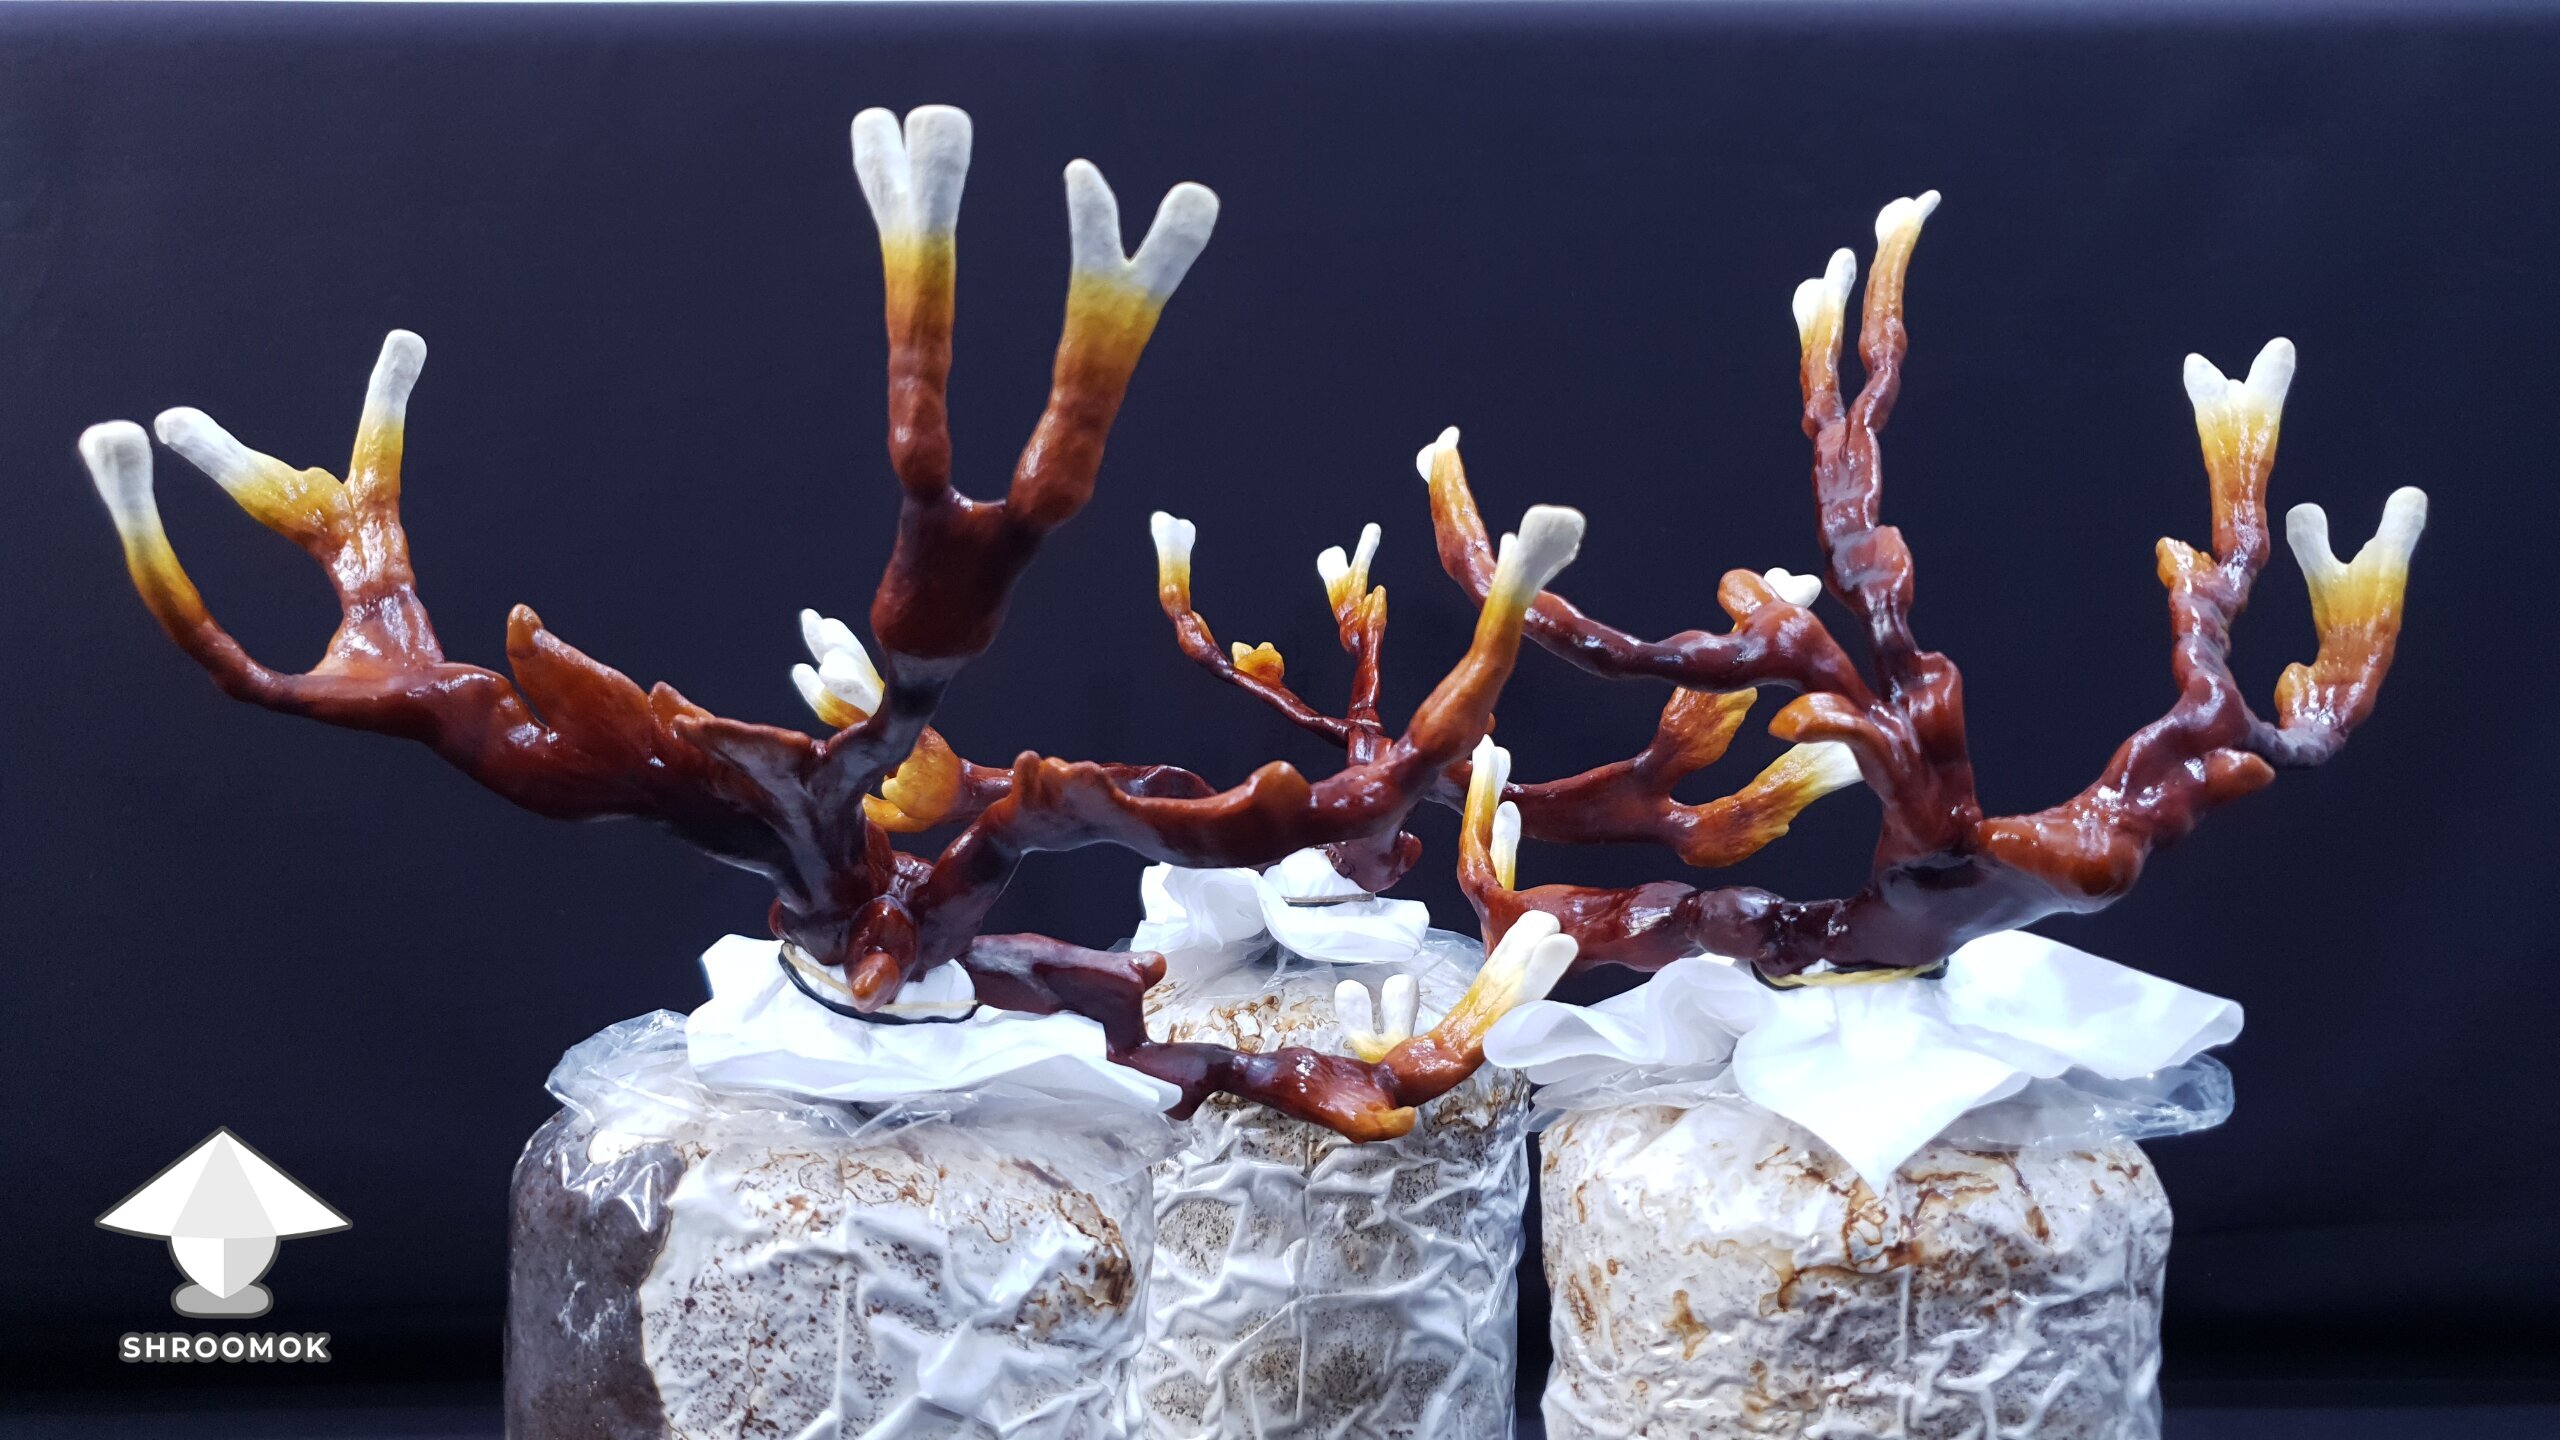
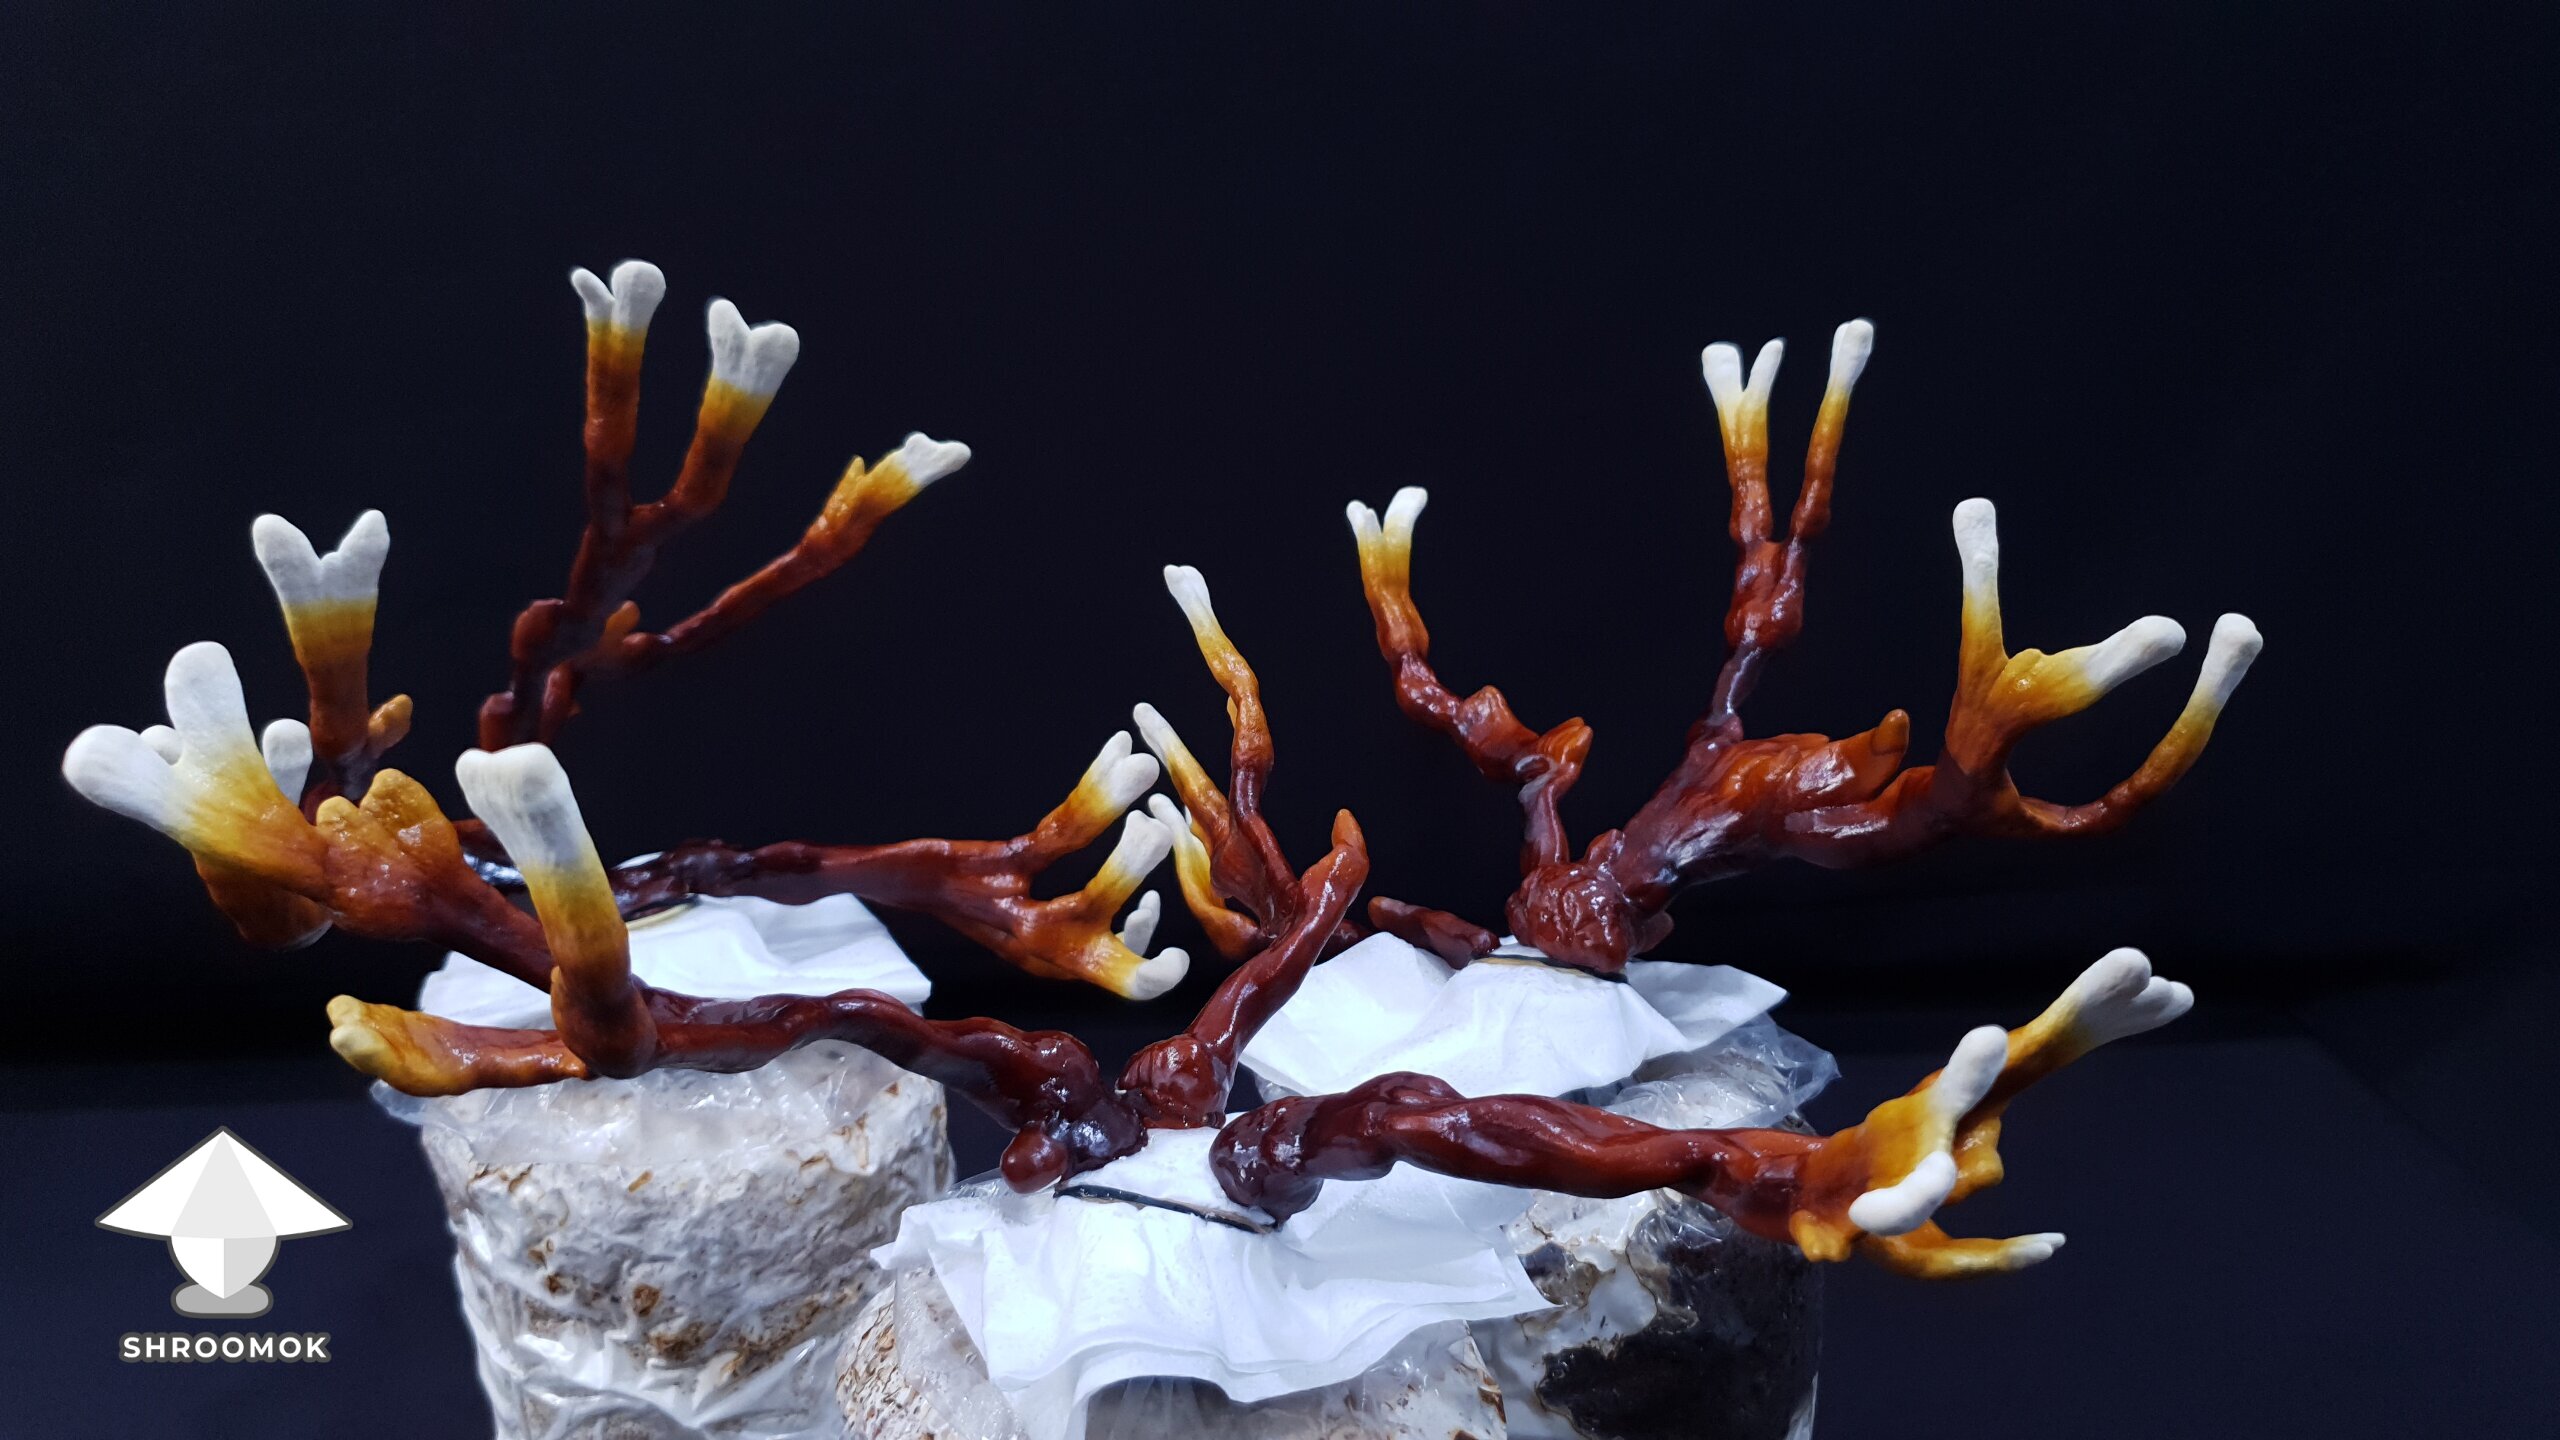
Almost three weeks for the transformation from shapeless pins into these beautiful, antler-like fruits with bright woody texture.


More photos in the attachments below ⬇️
Attachments
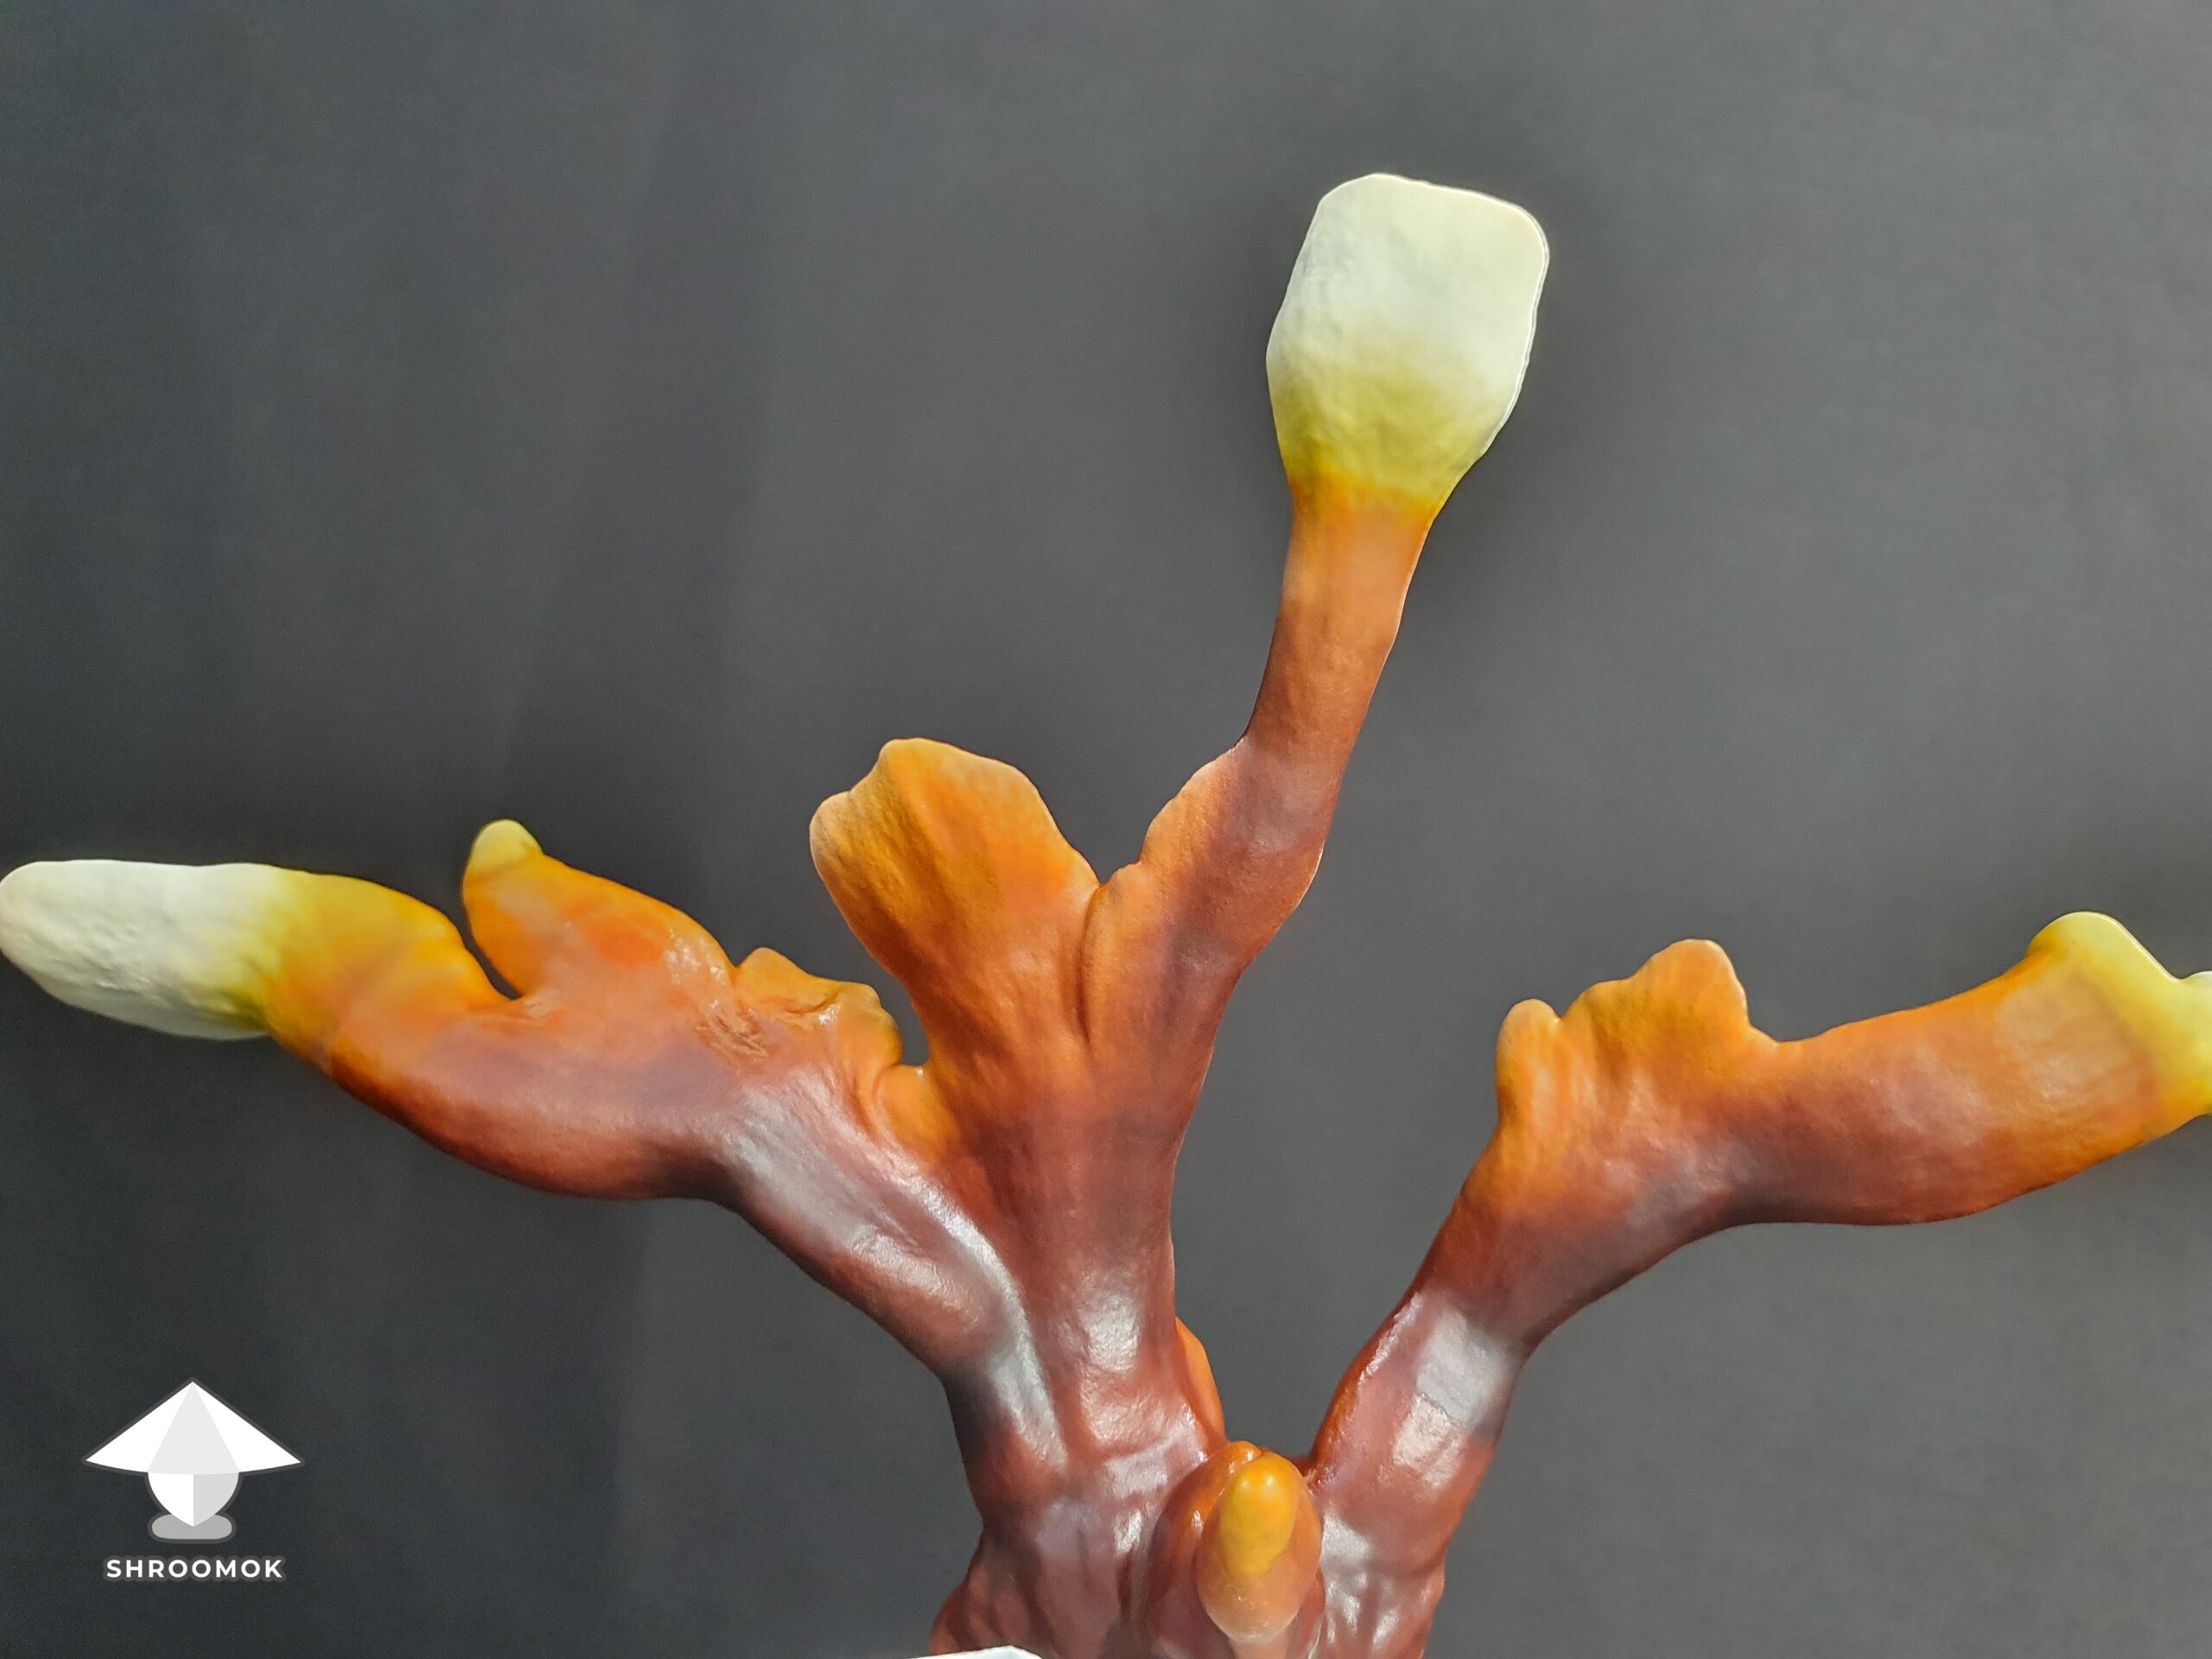
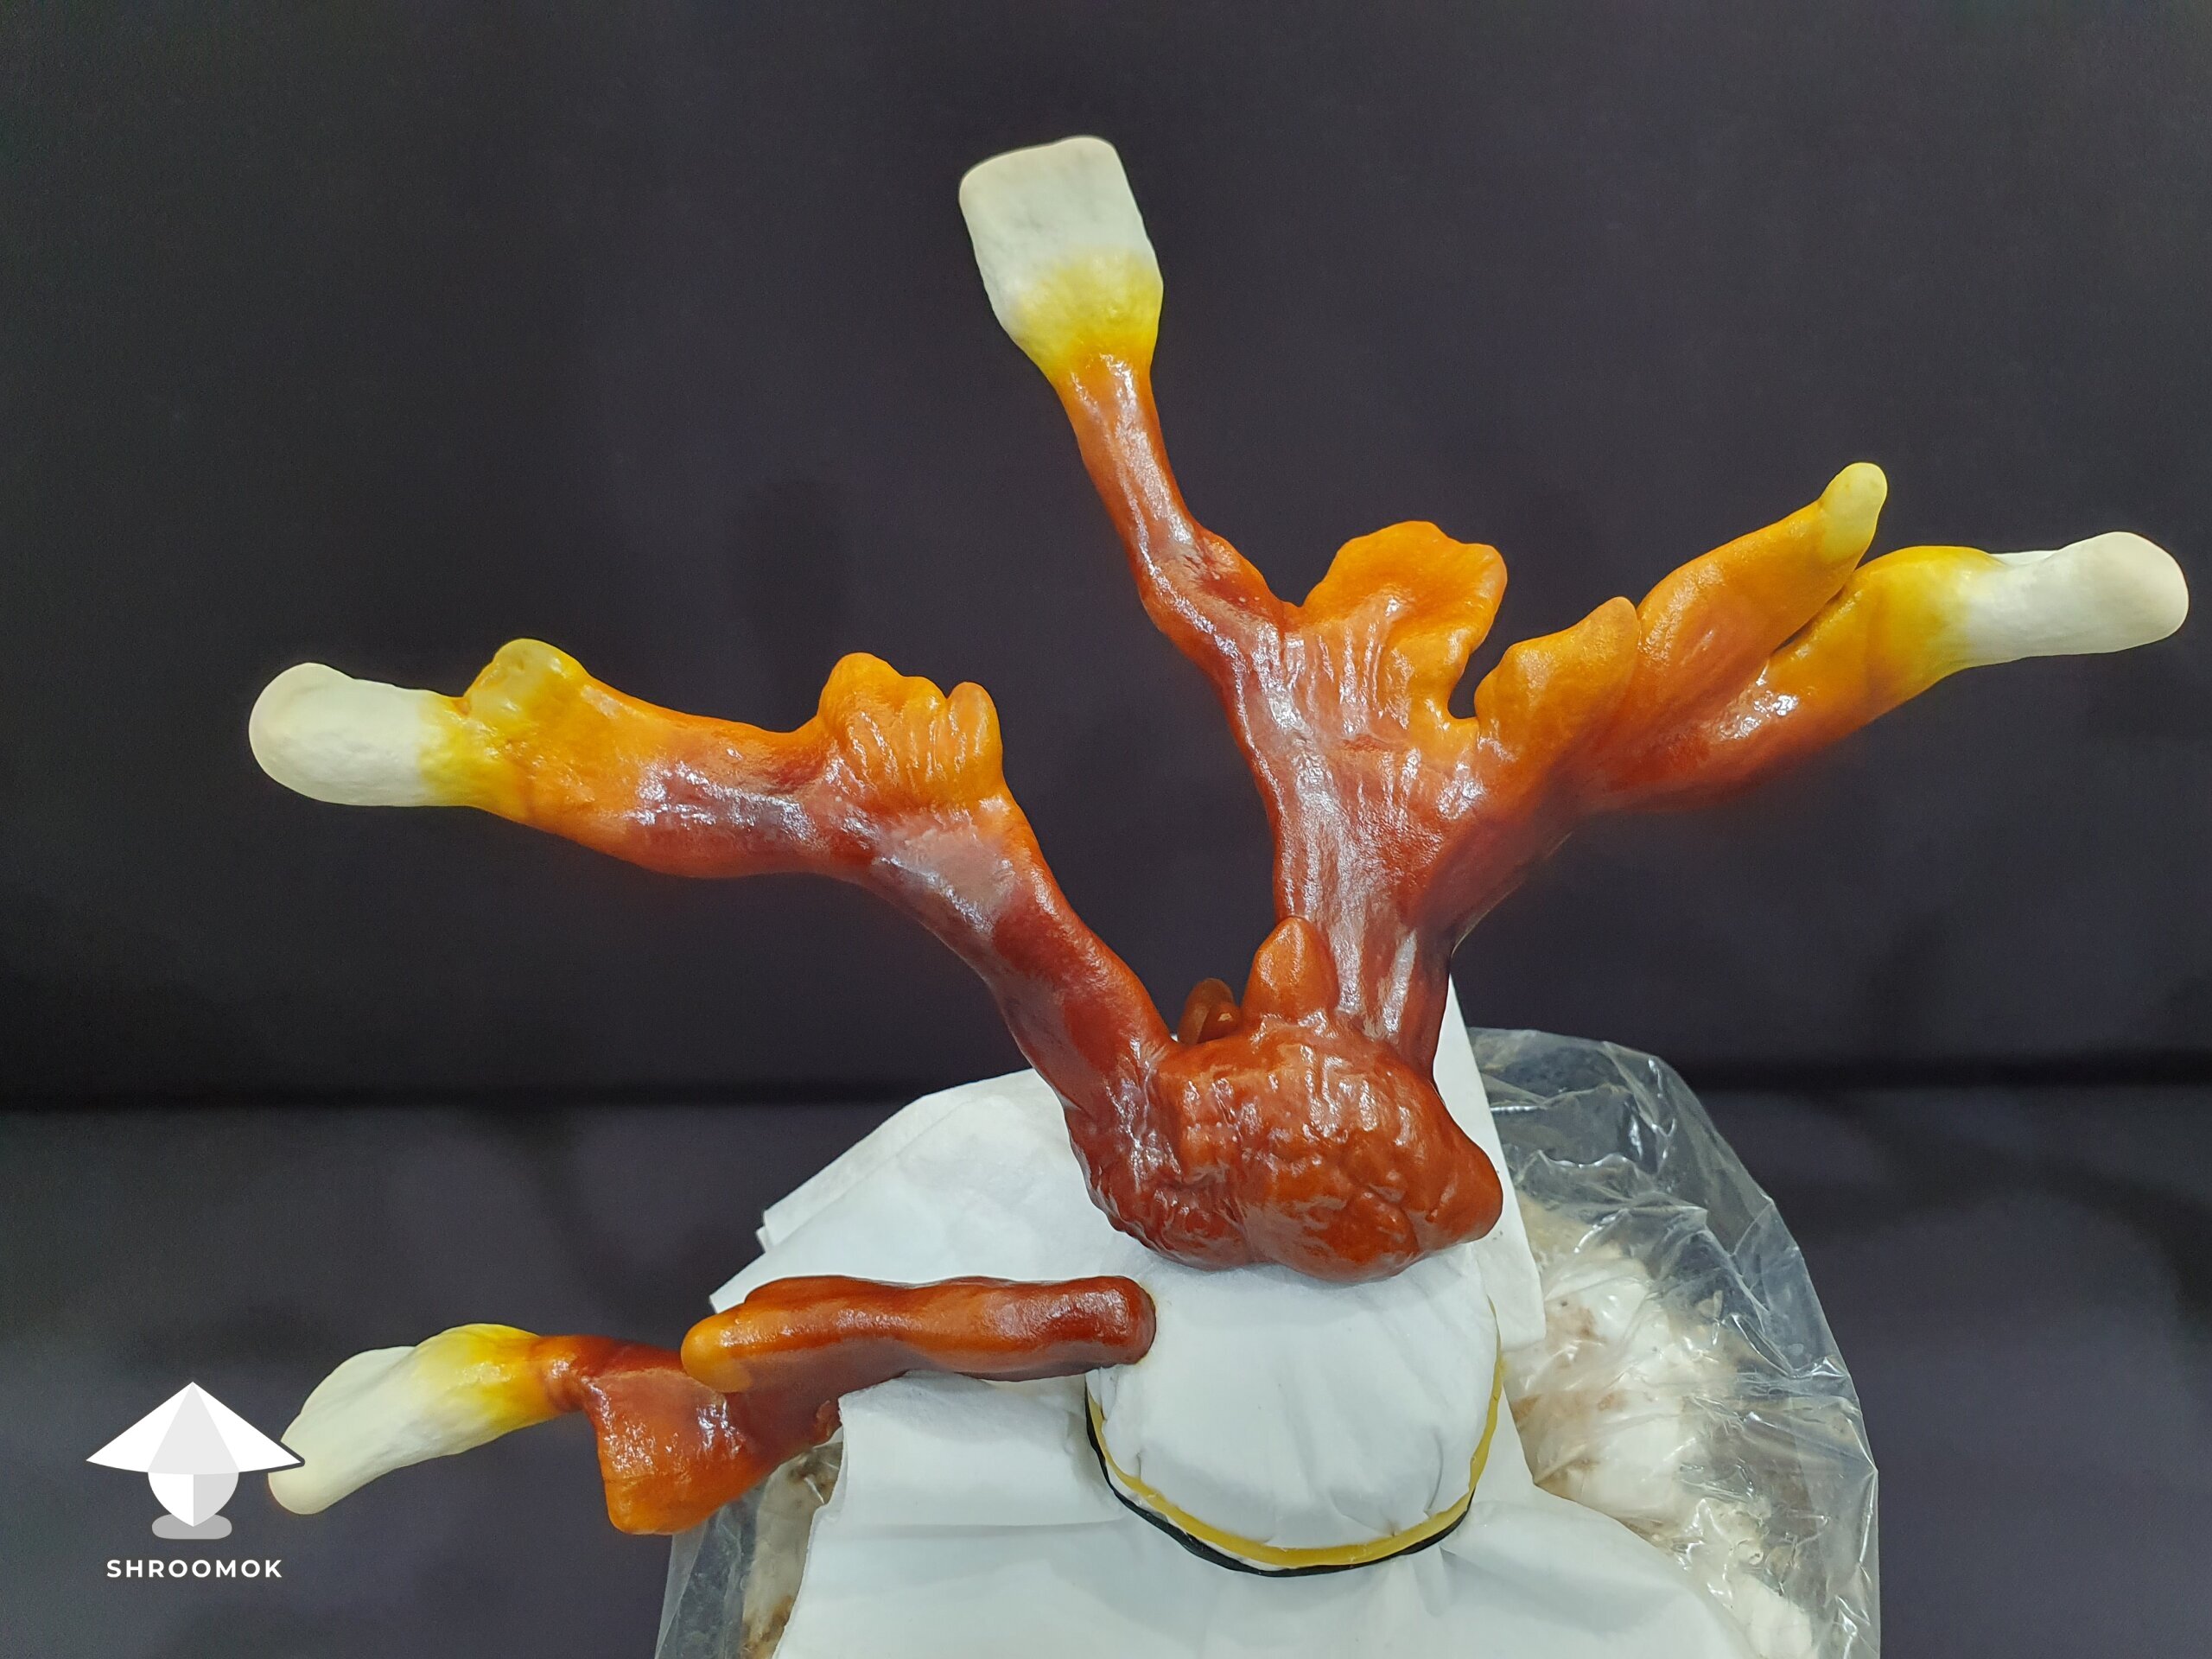
They're beautiful!
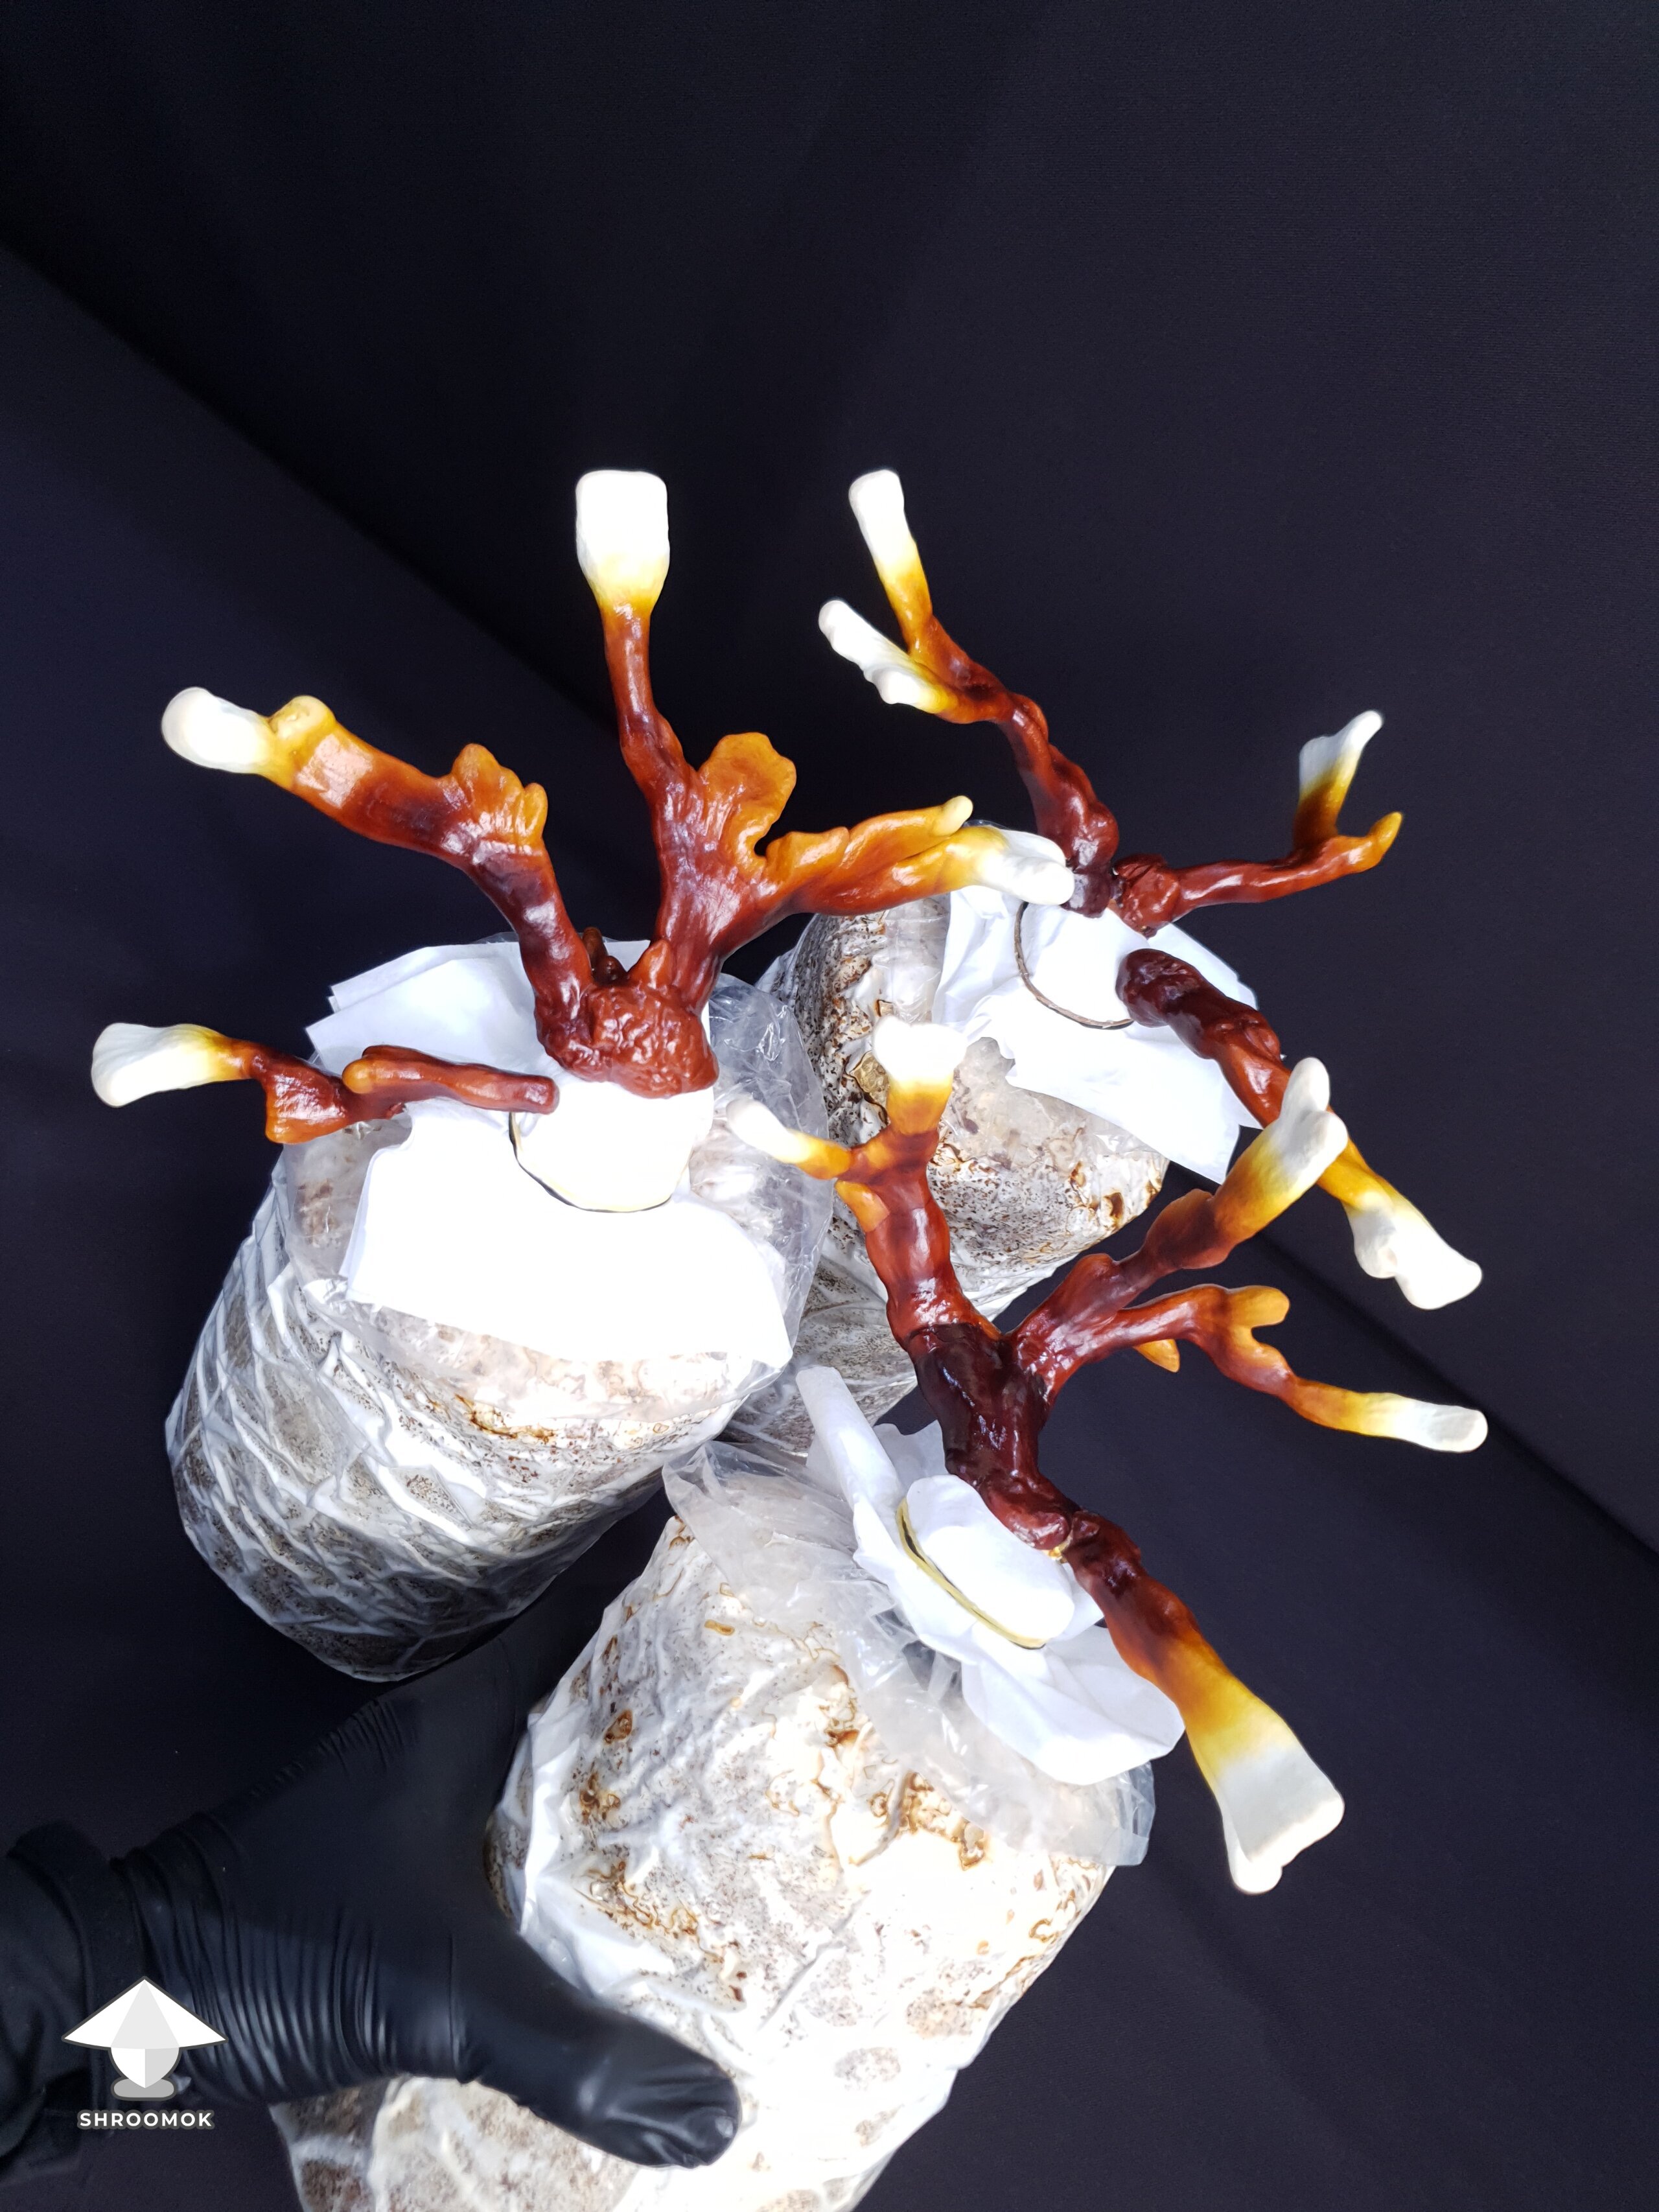
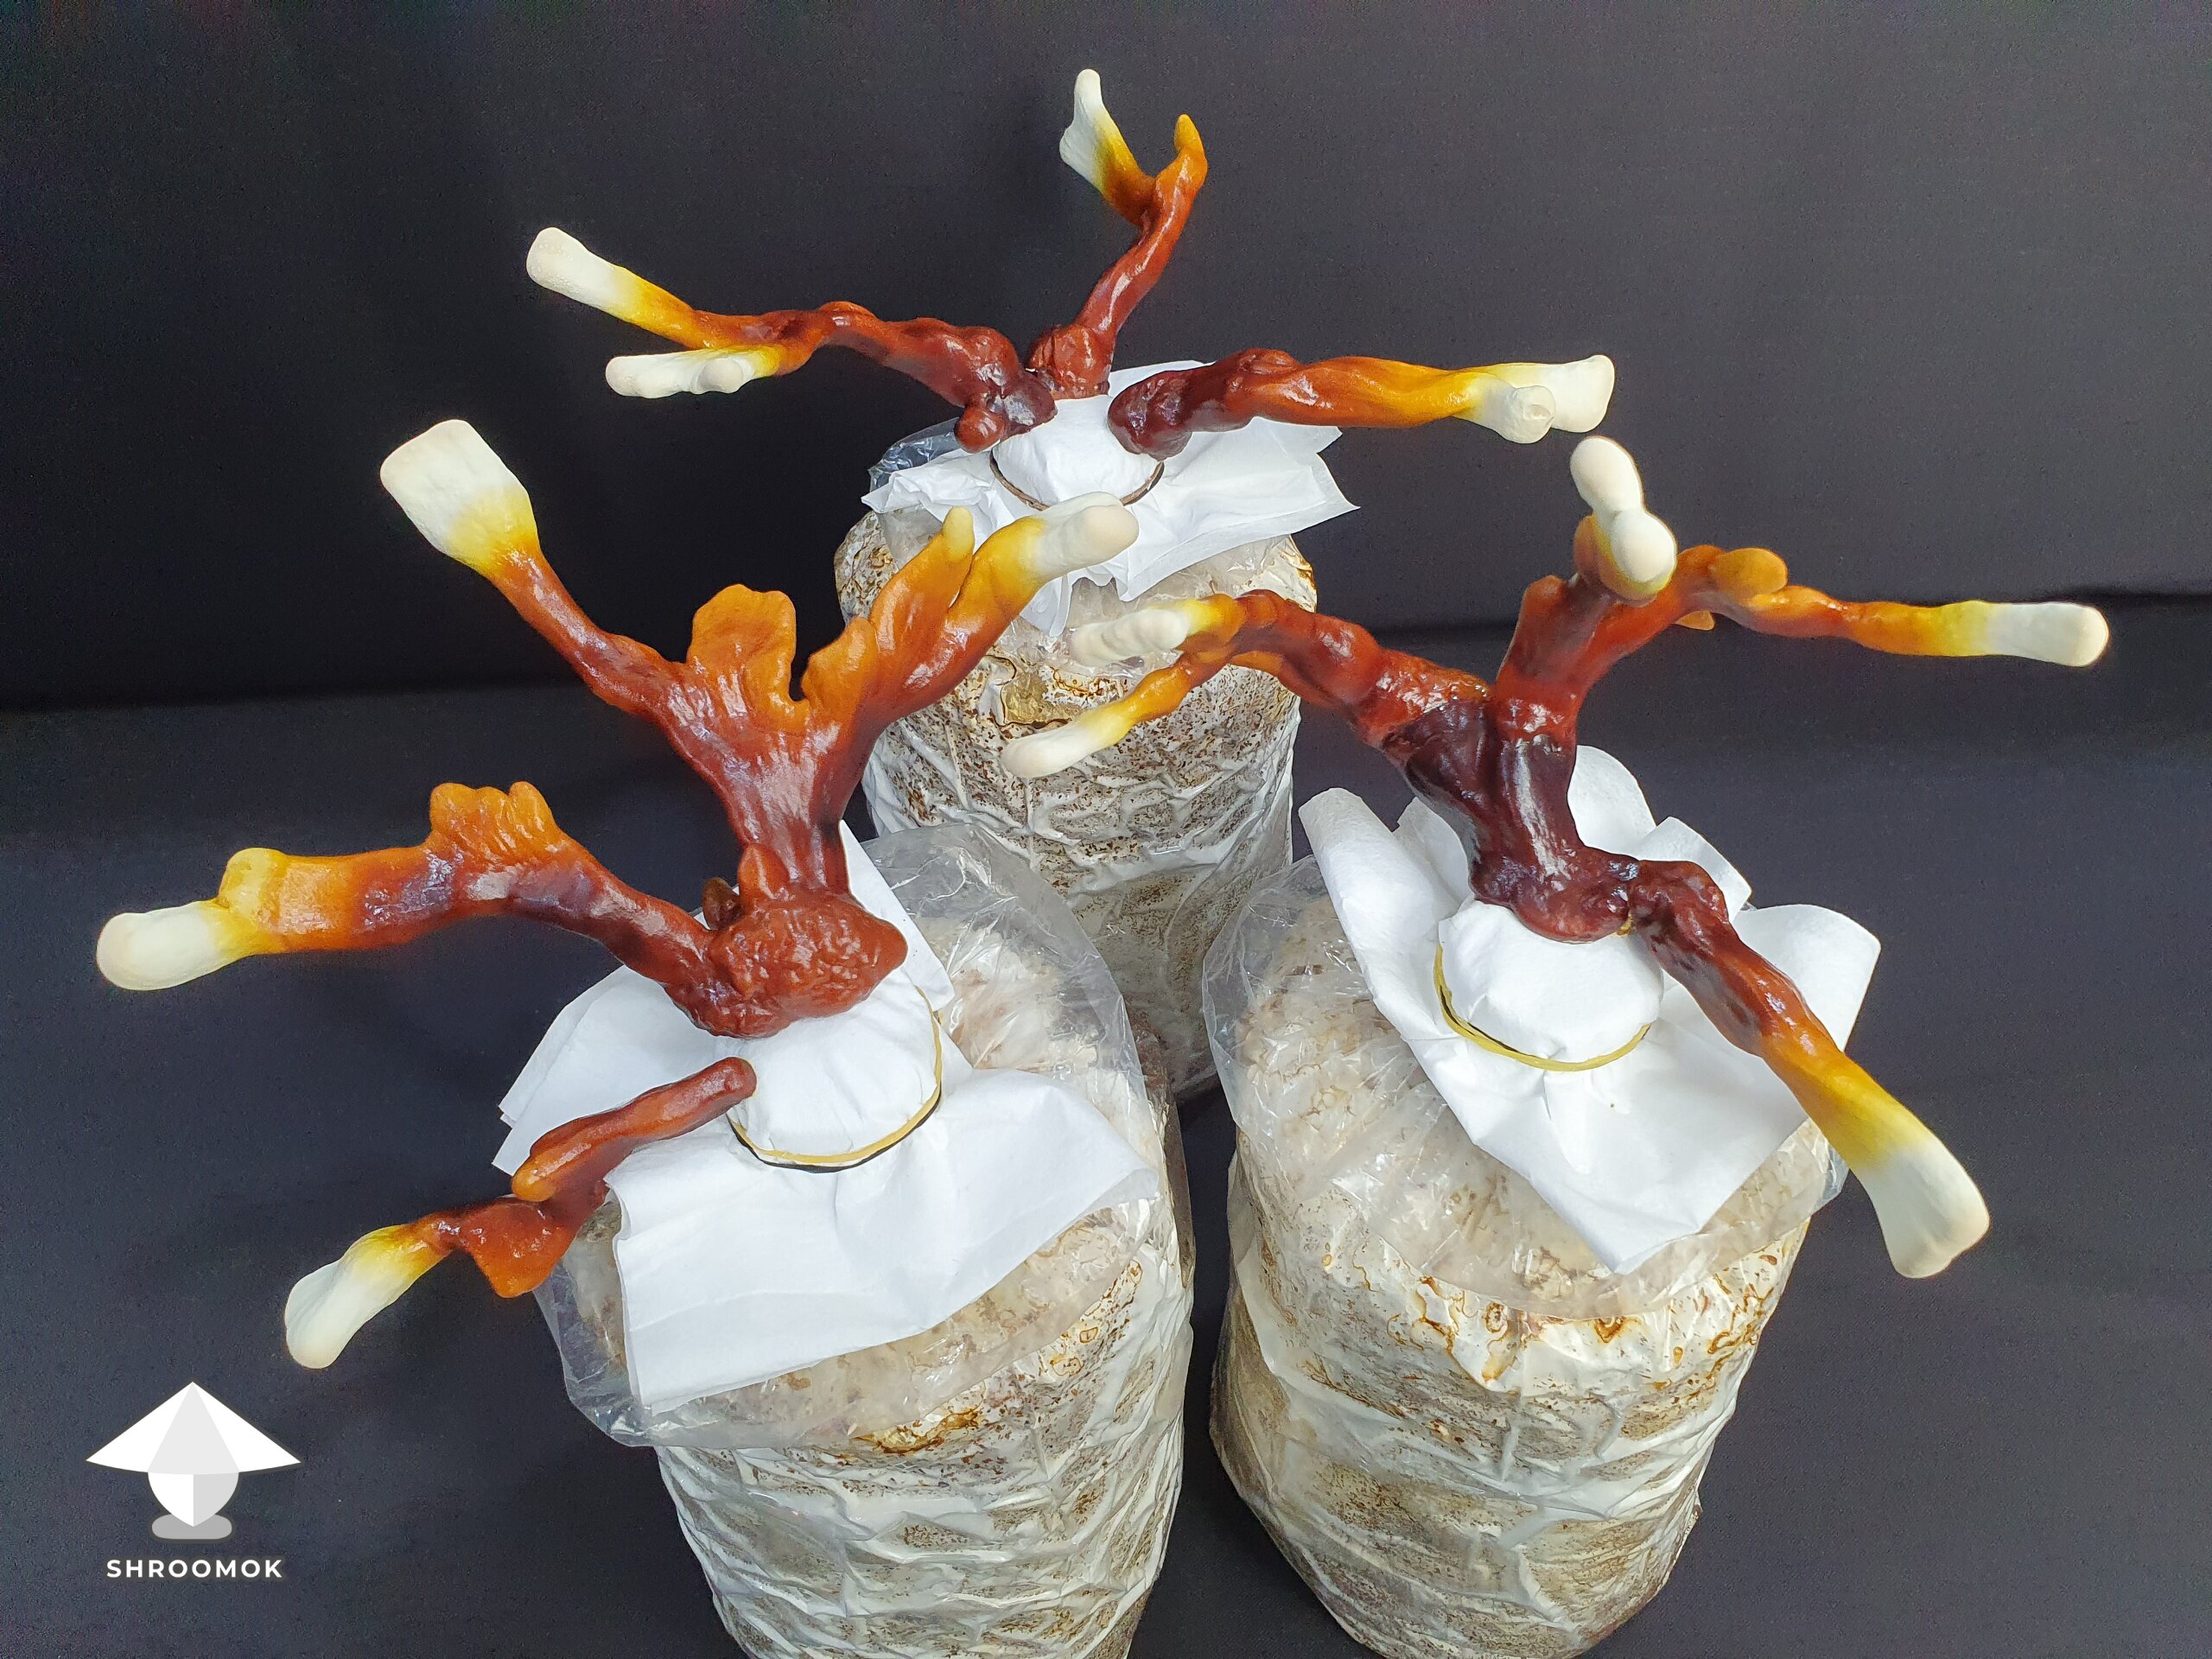
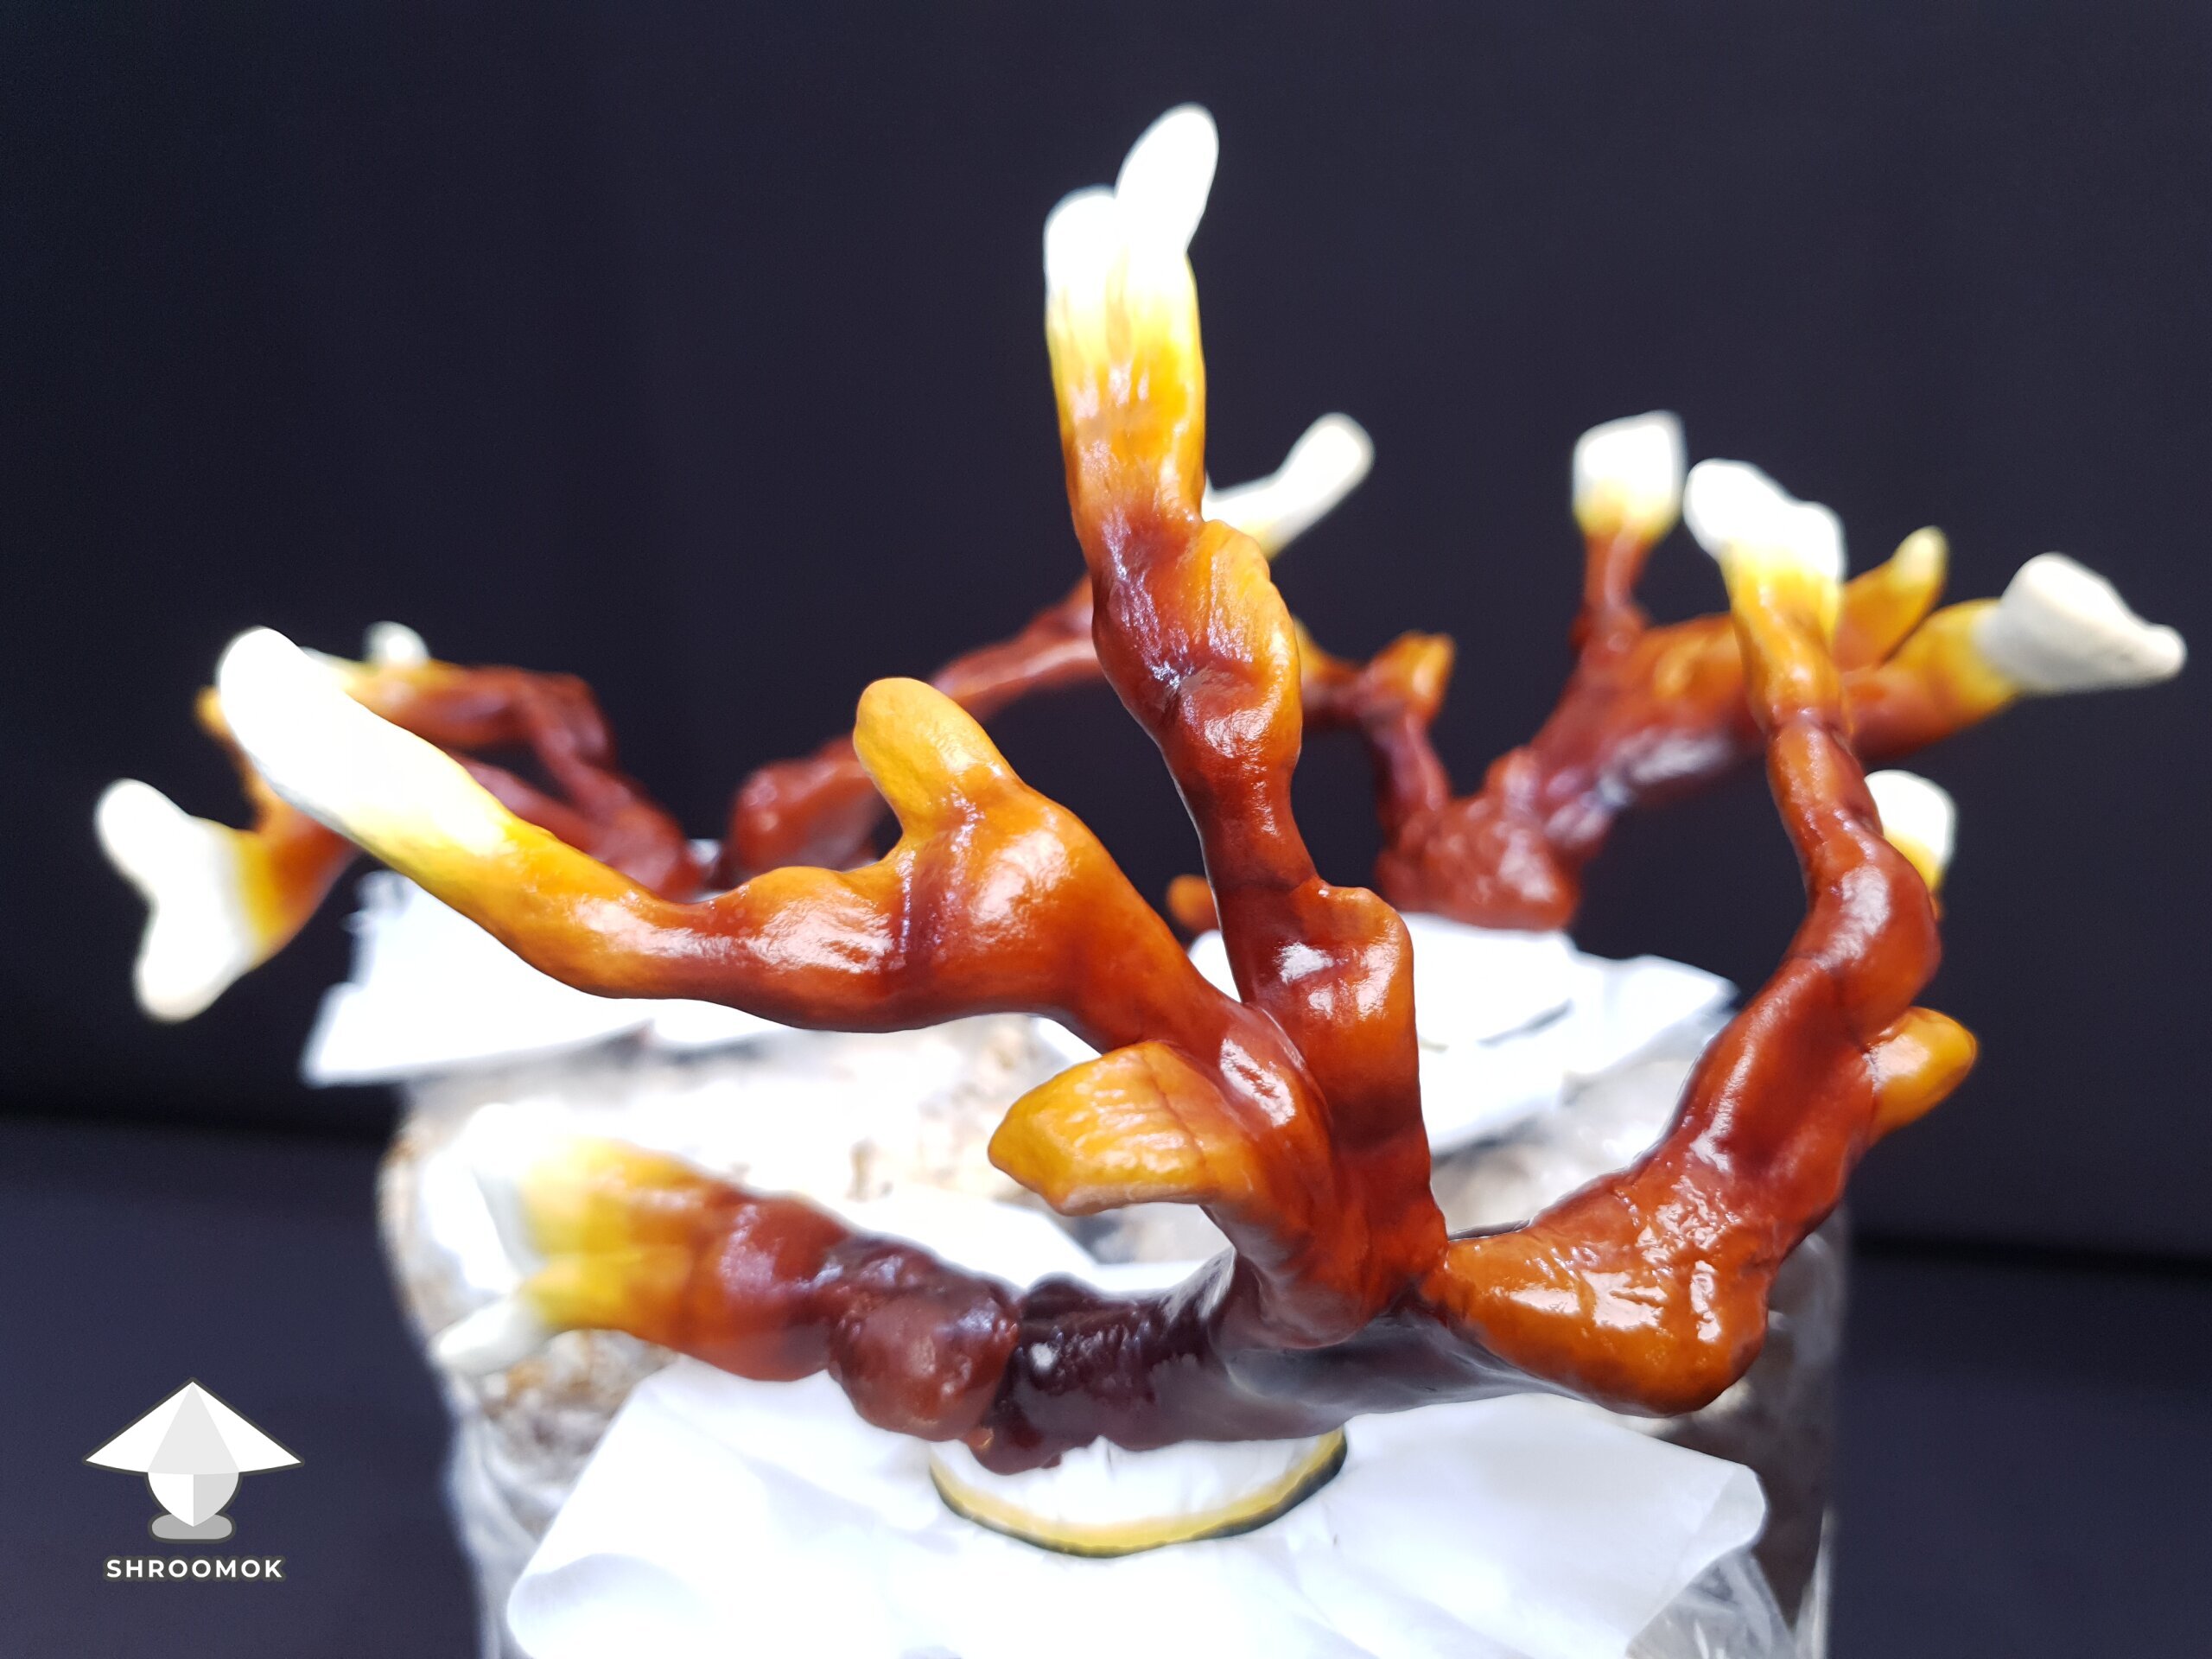
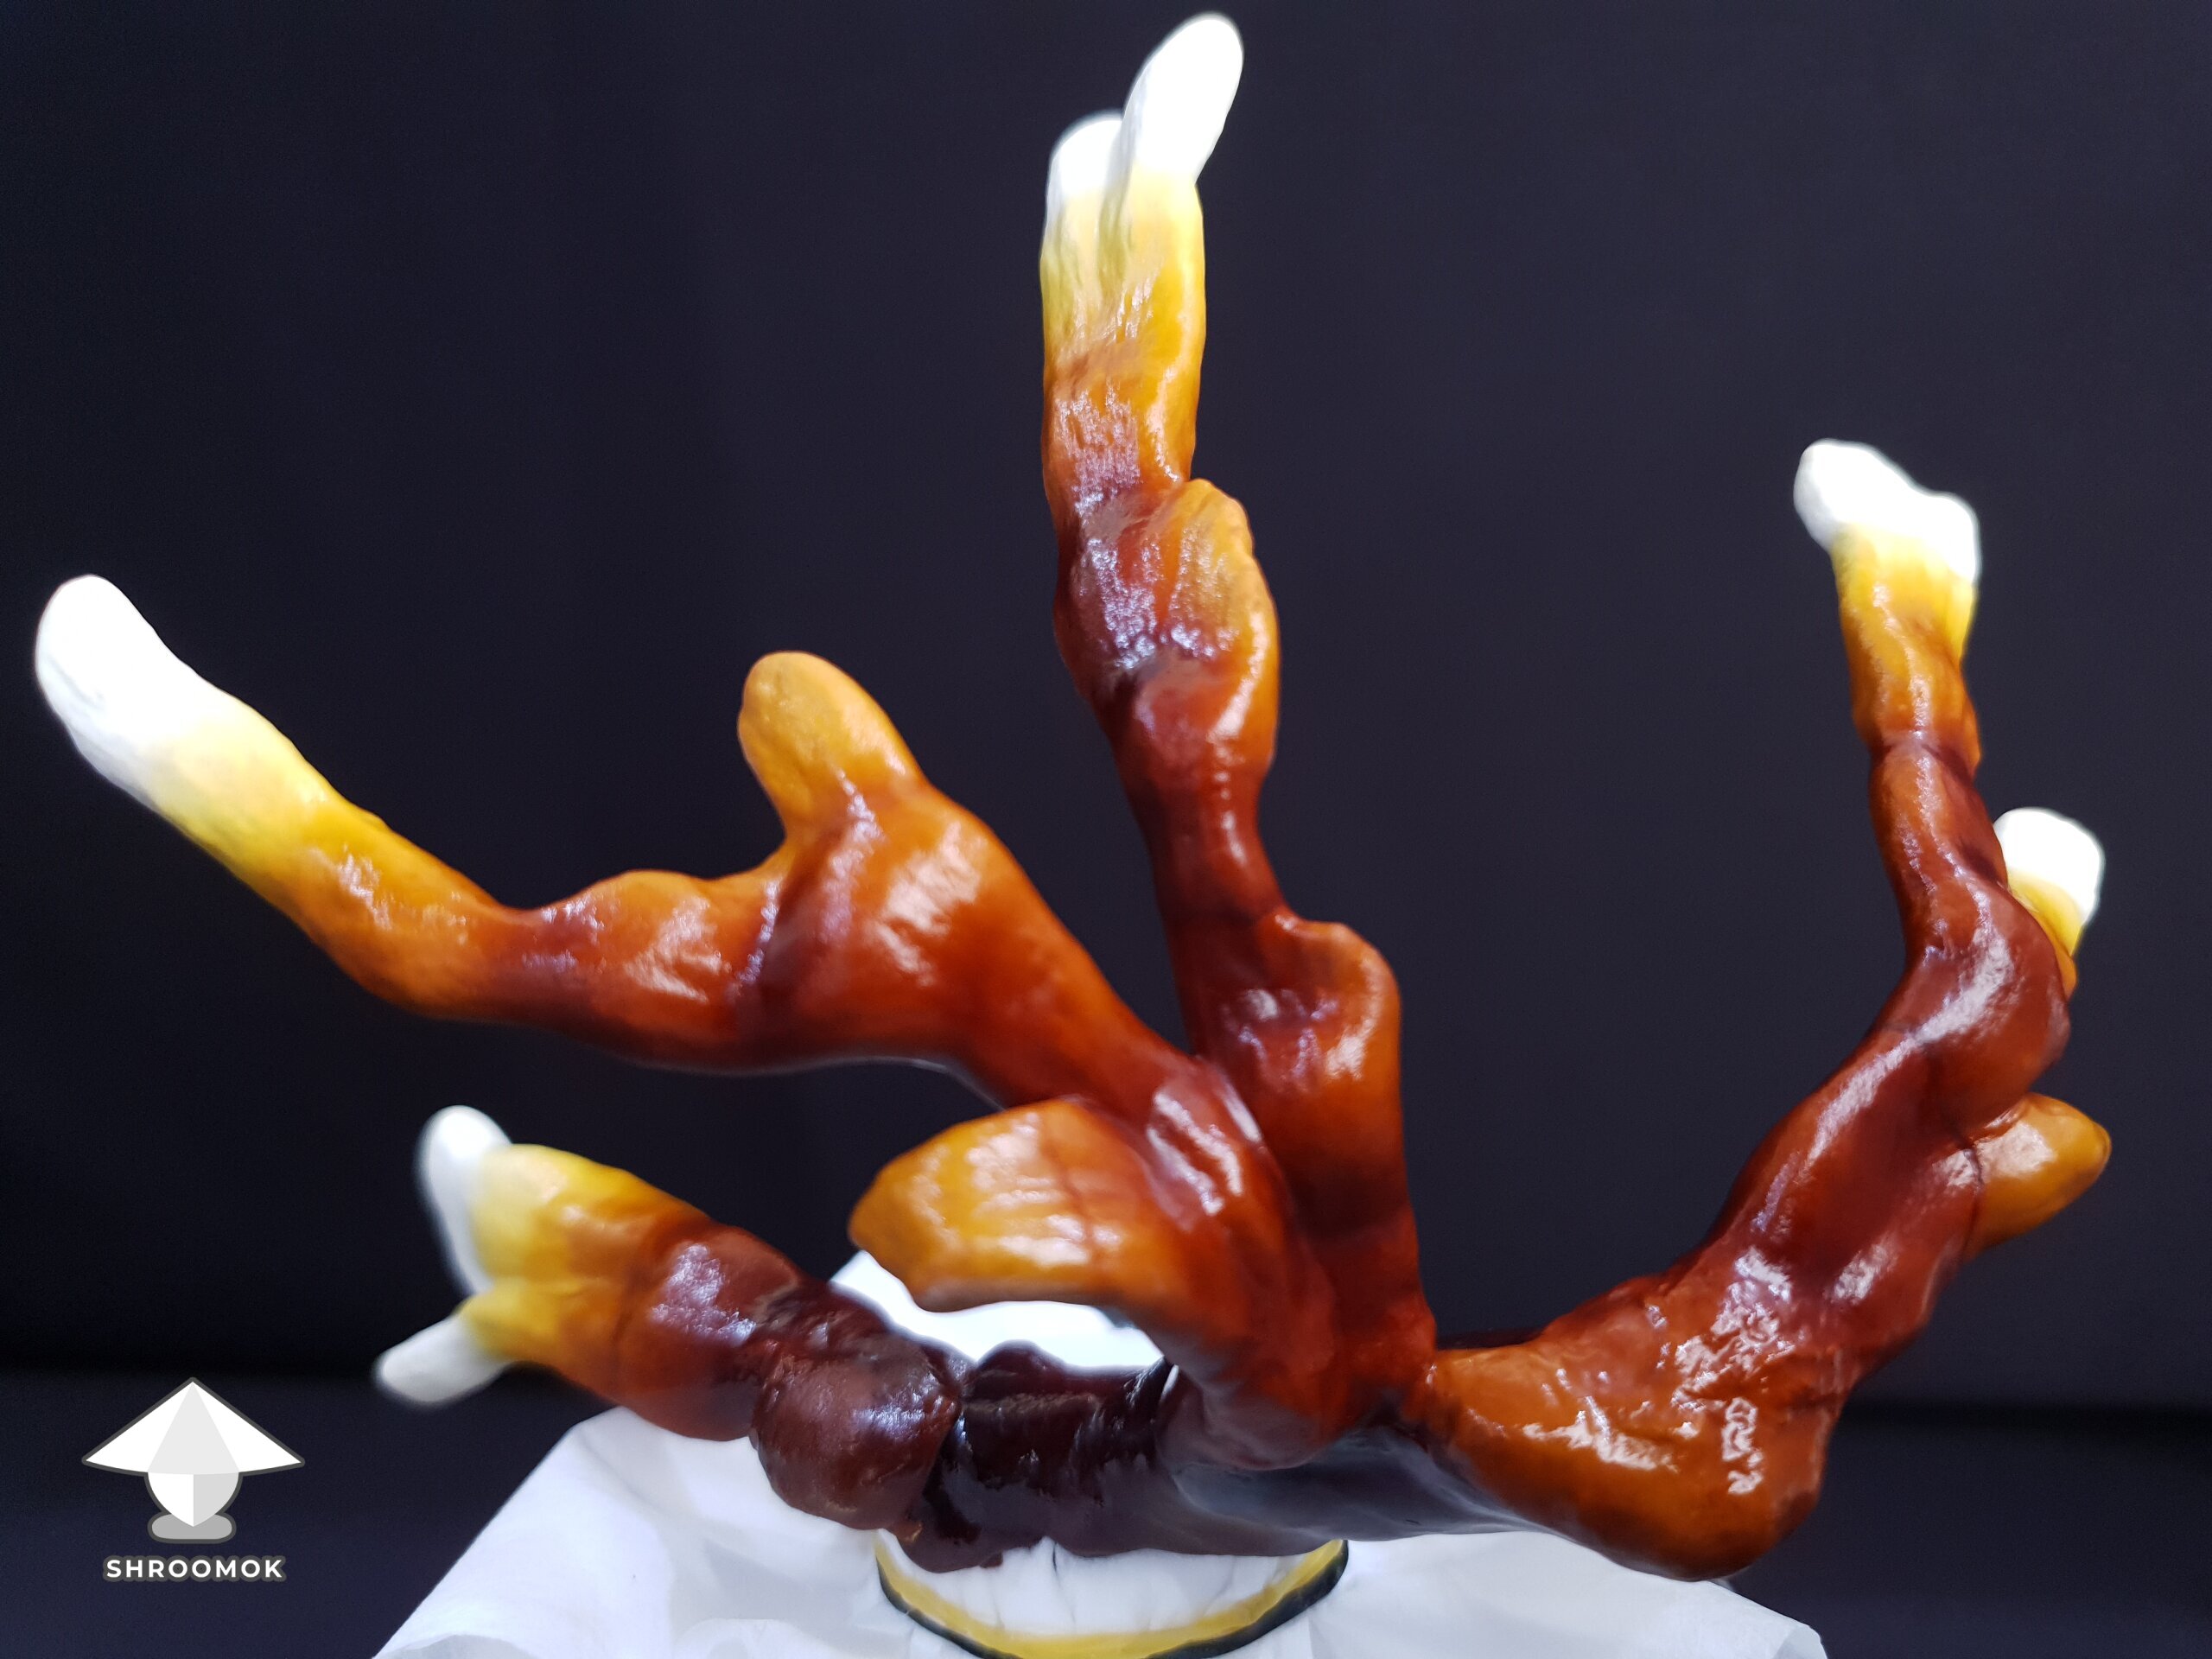
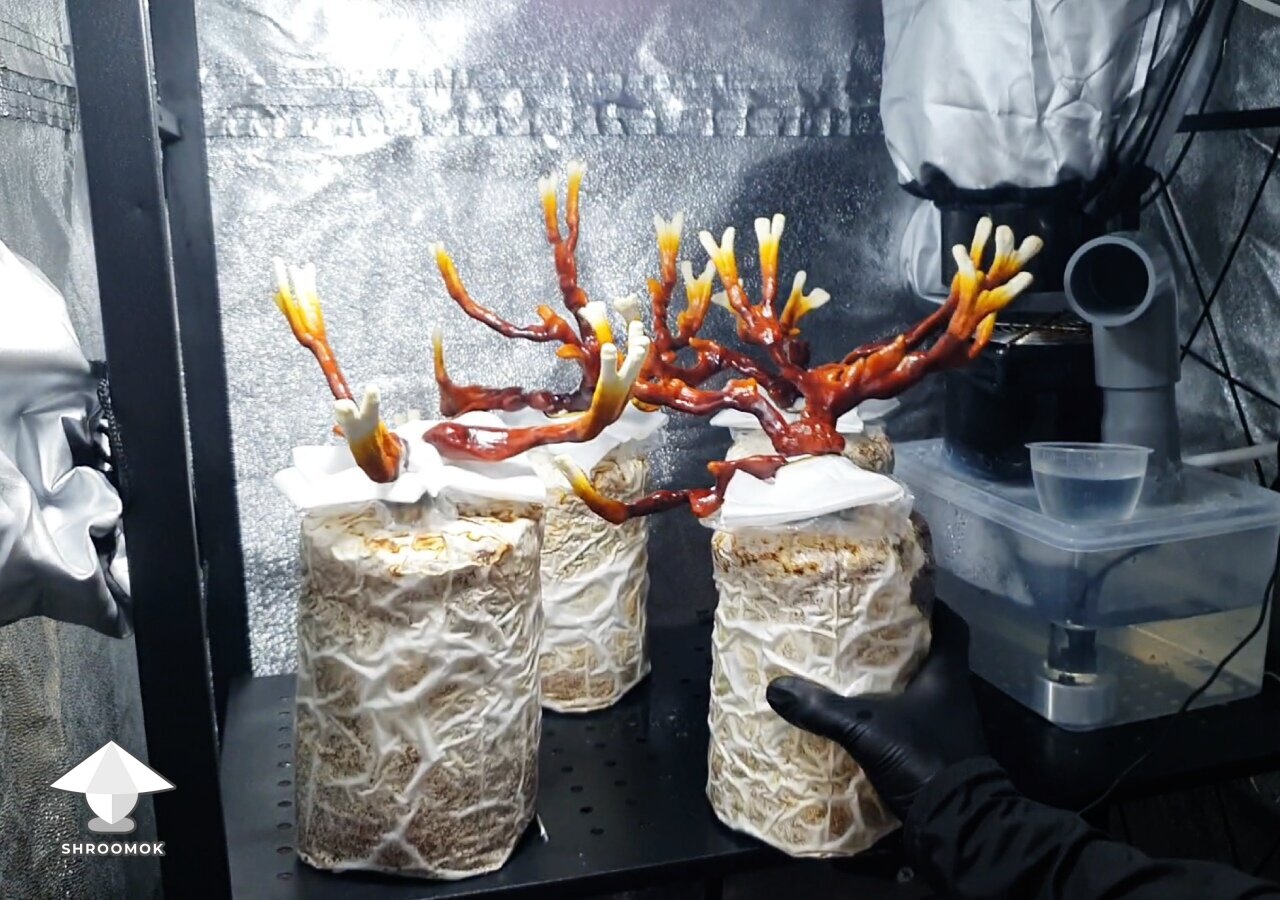
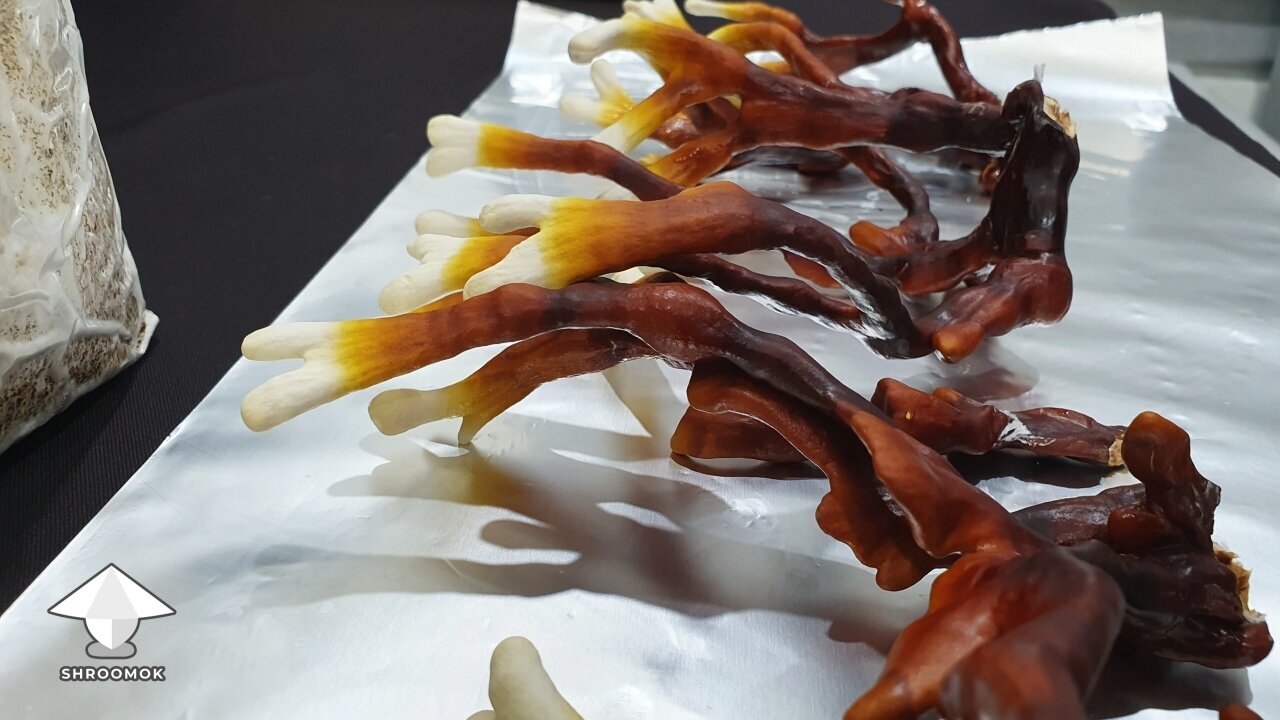
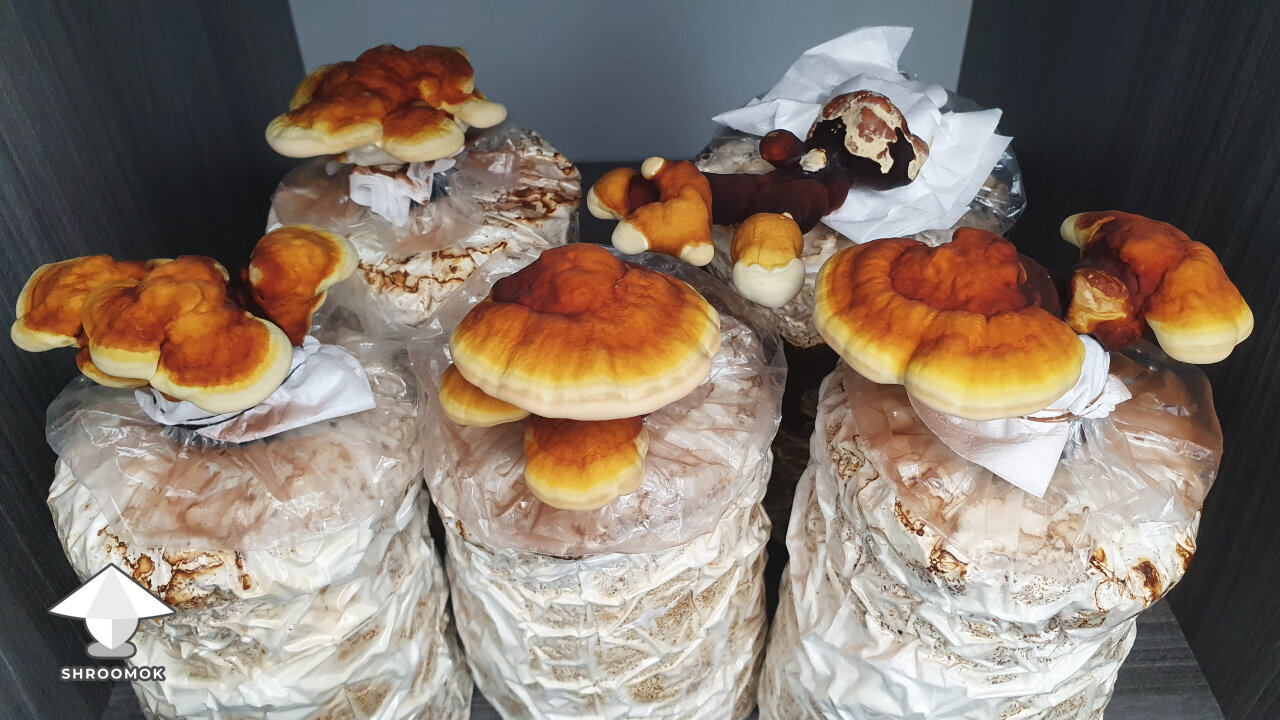
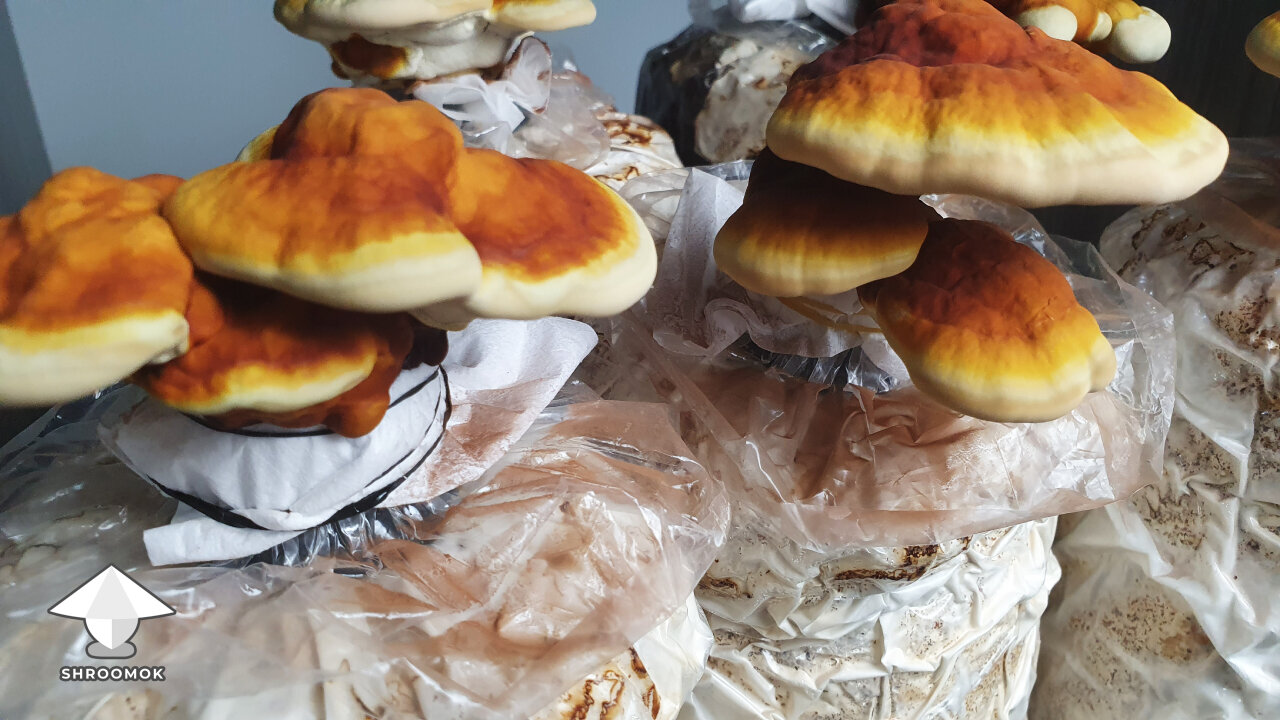
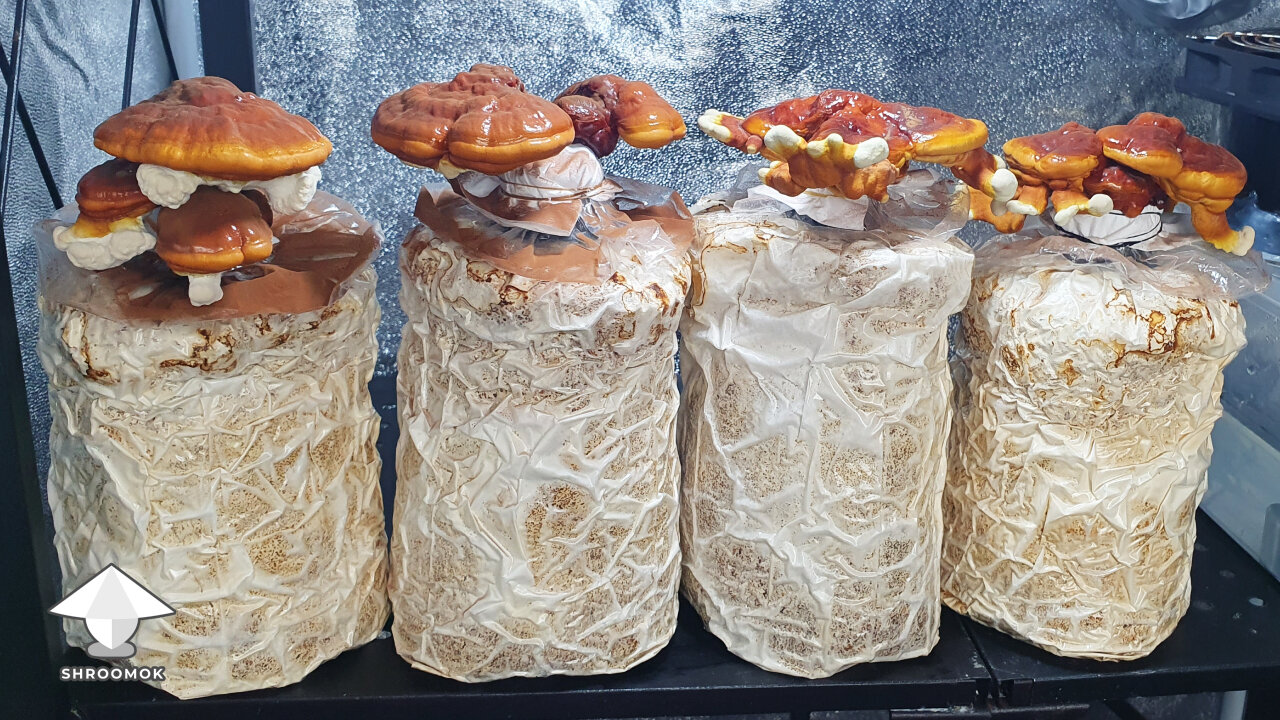
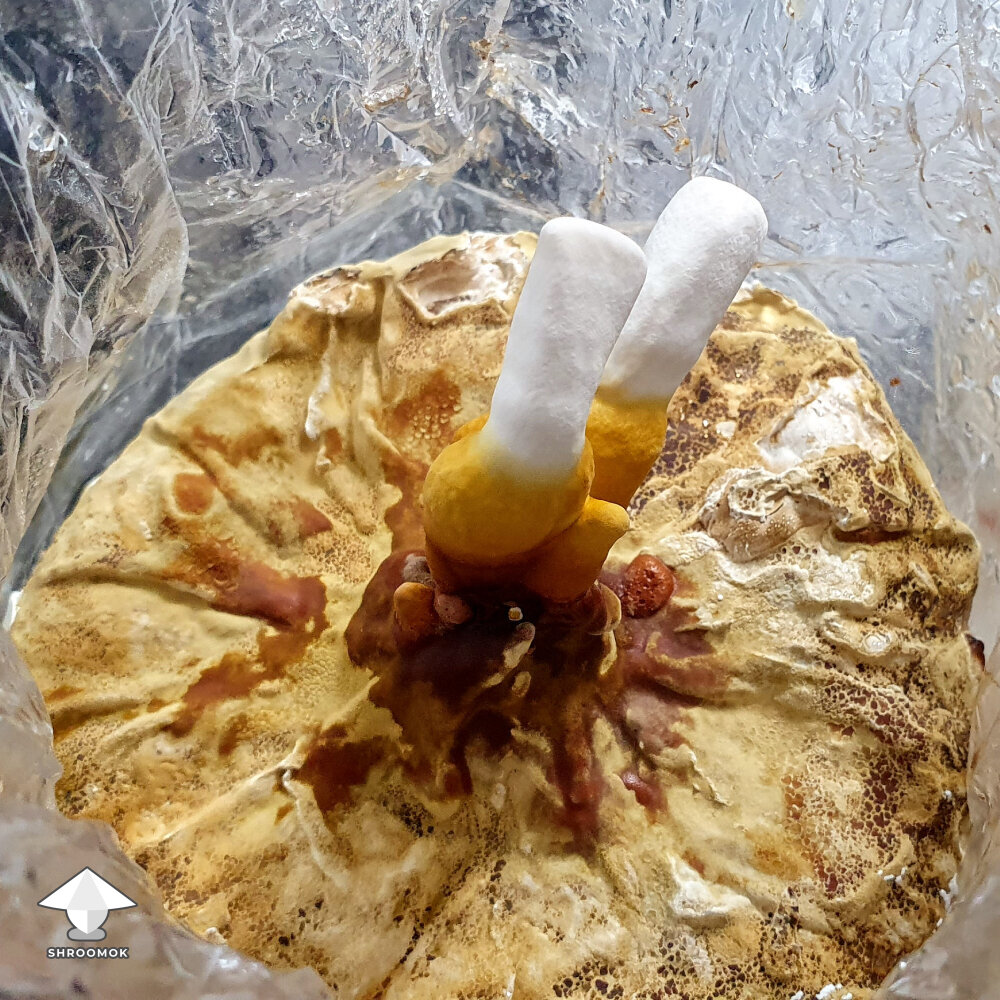
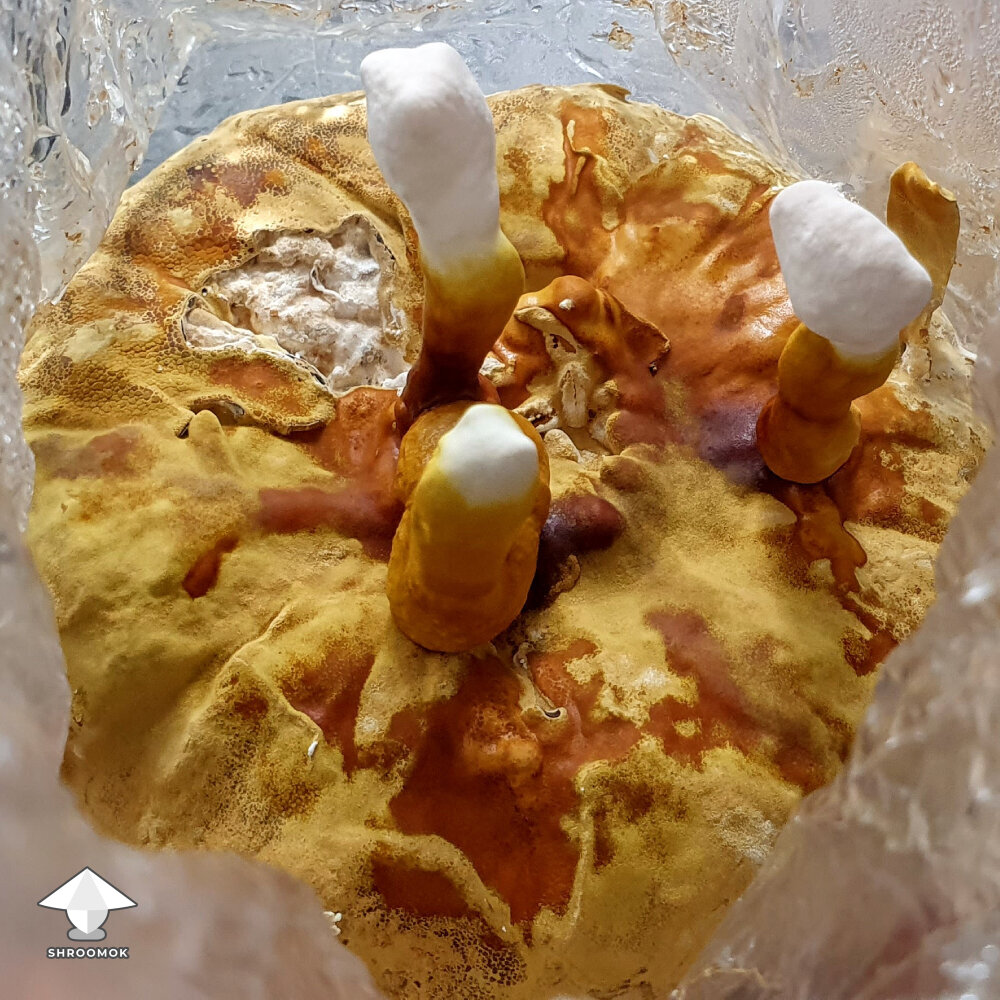
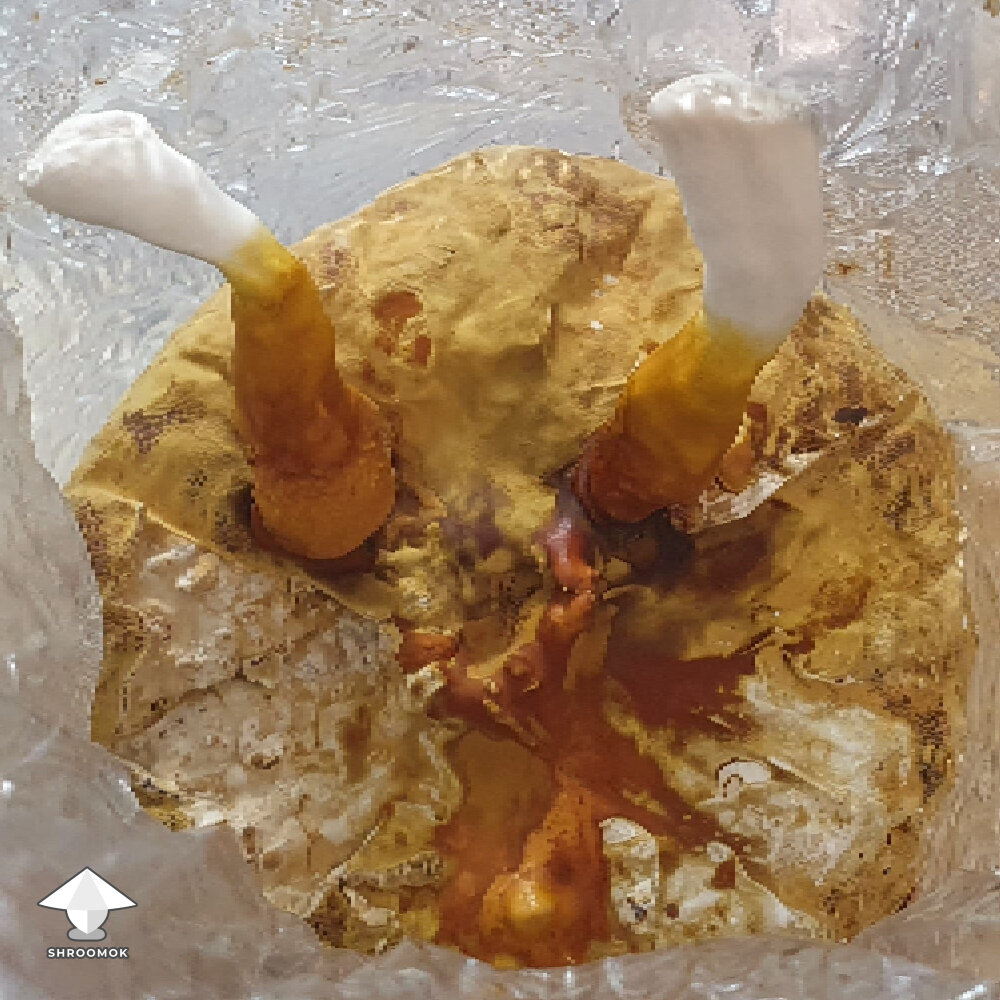
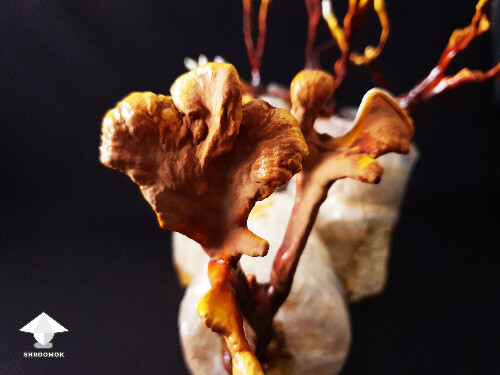
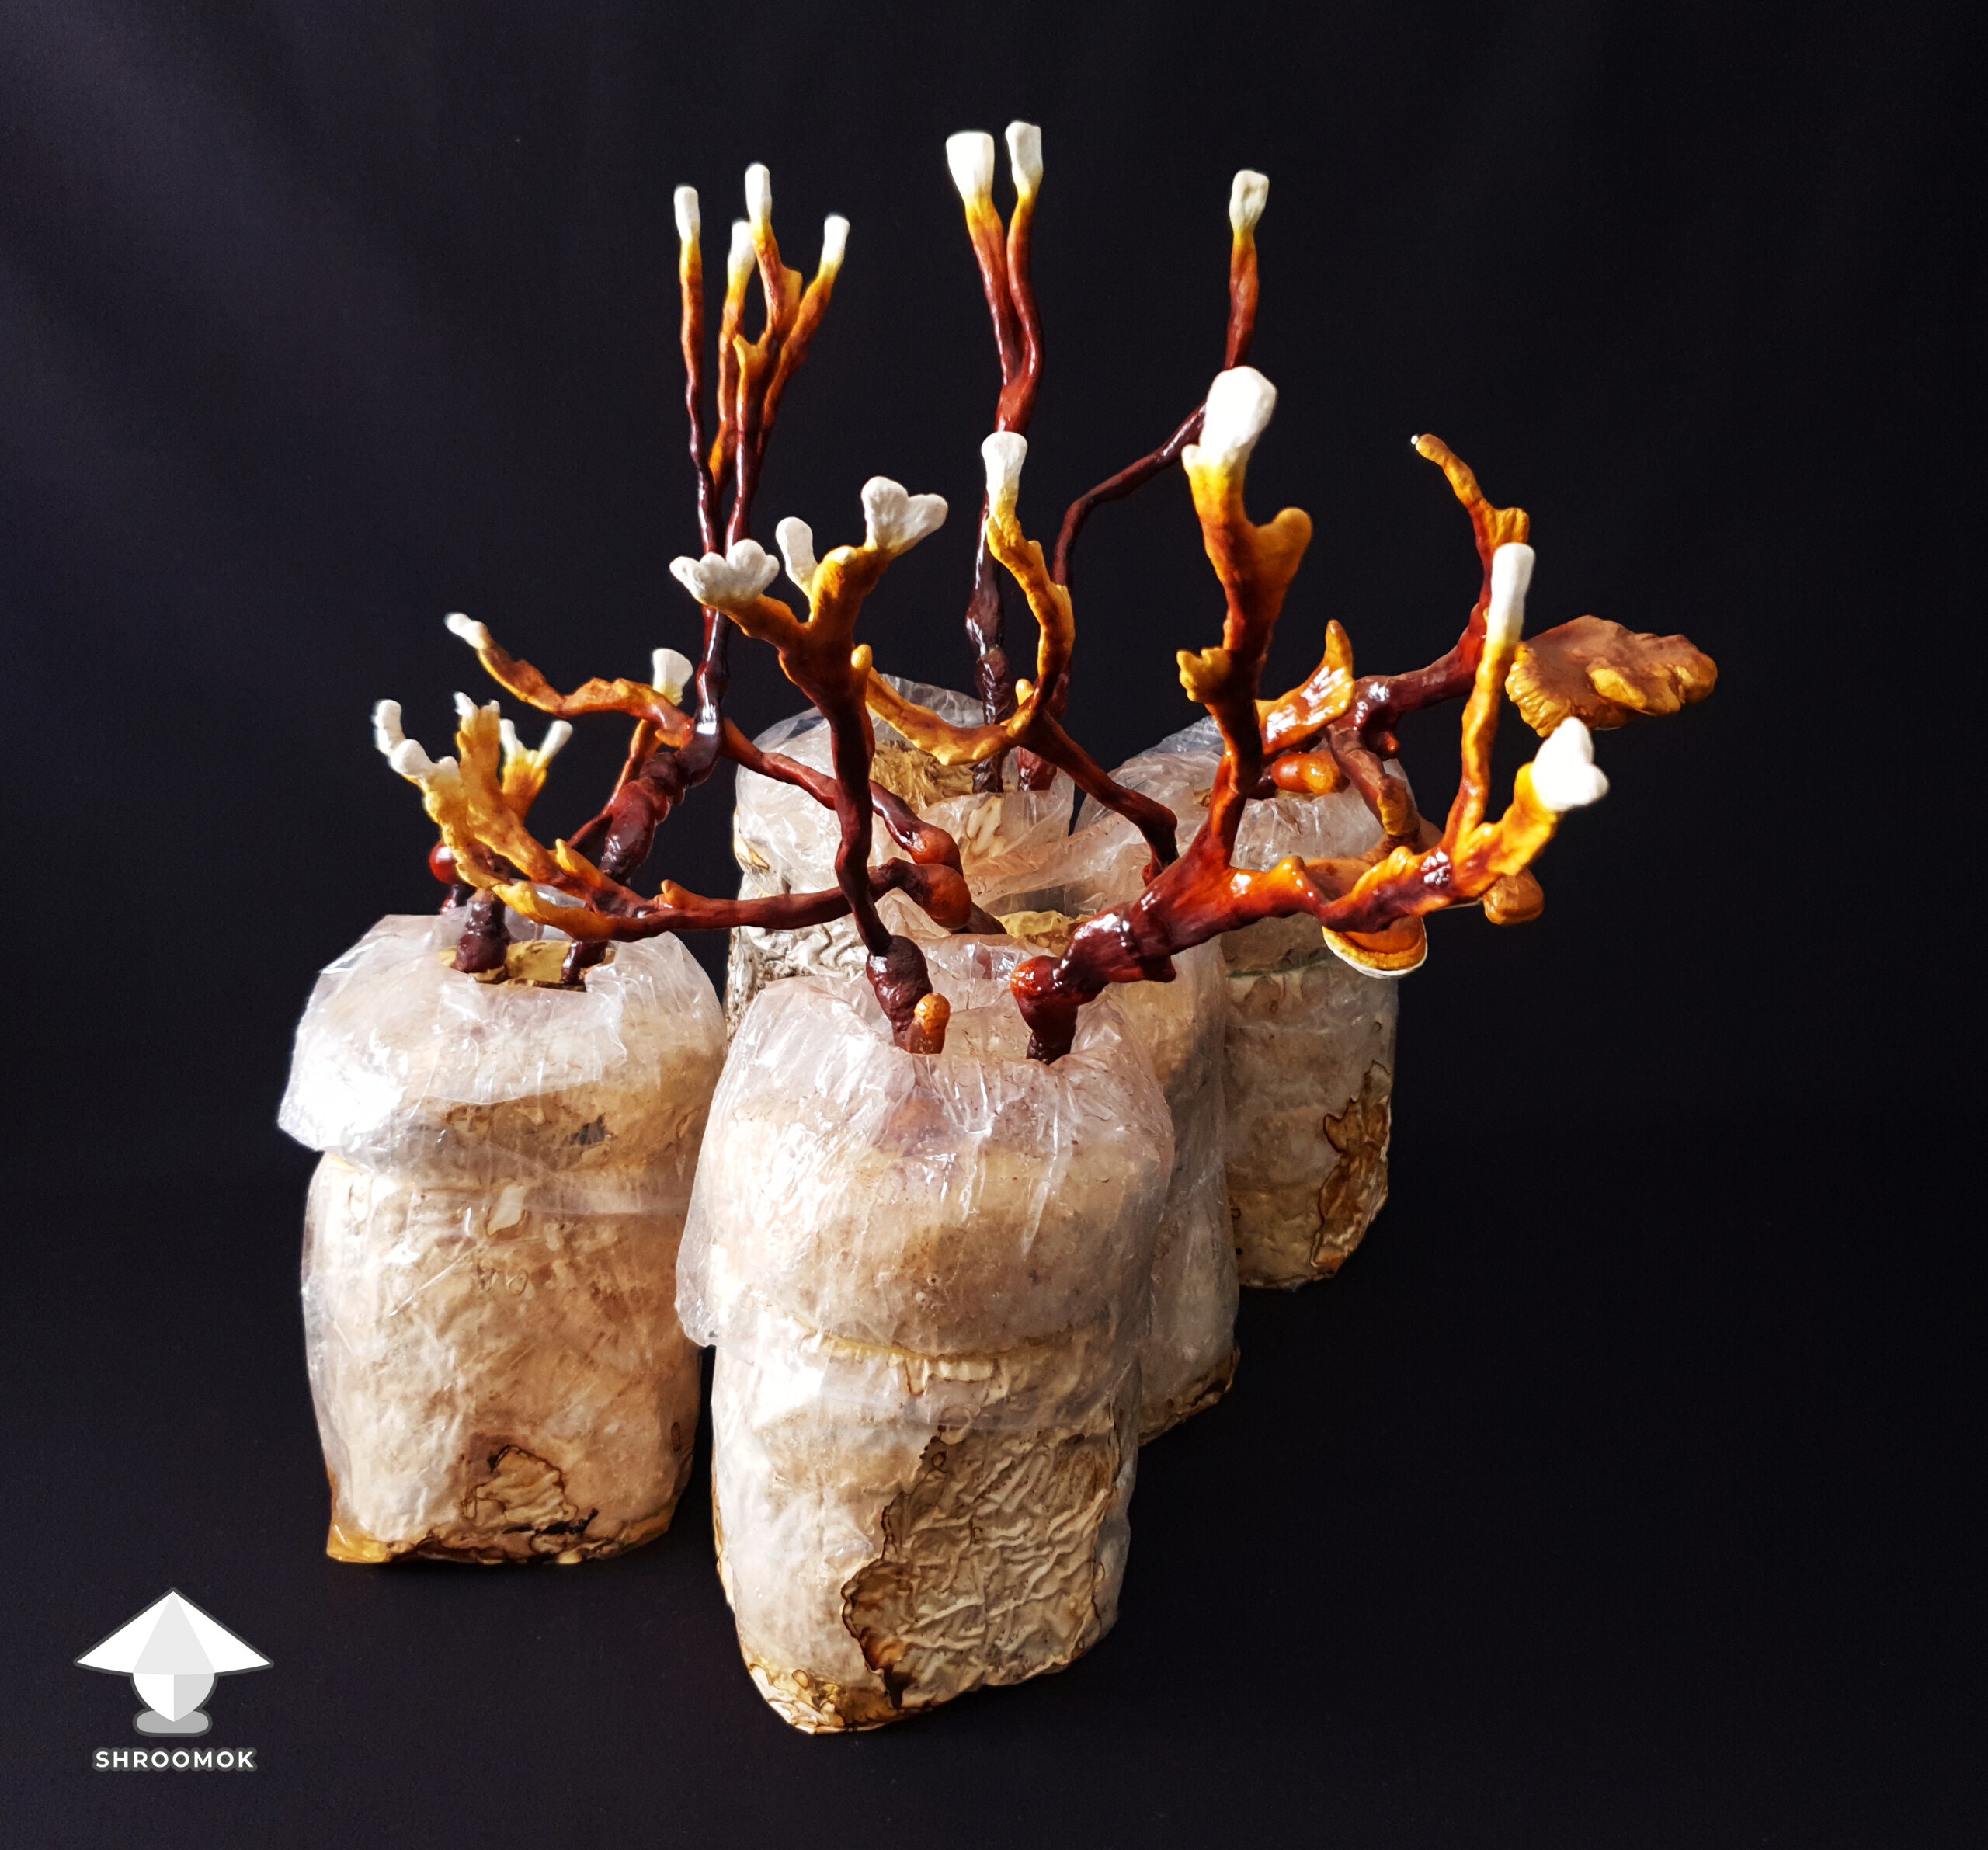
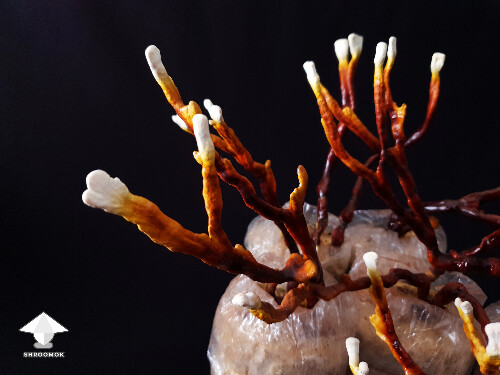
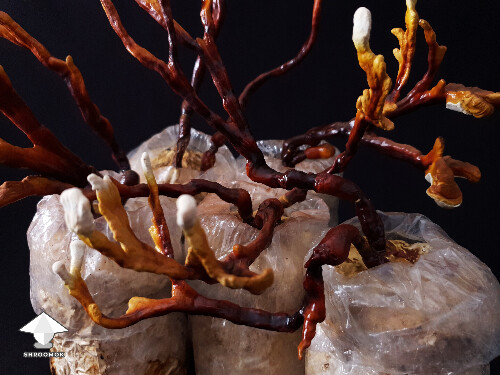
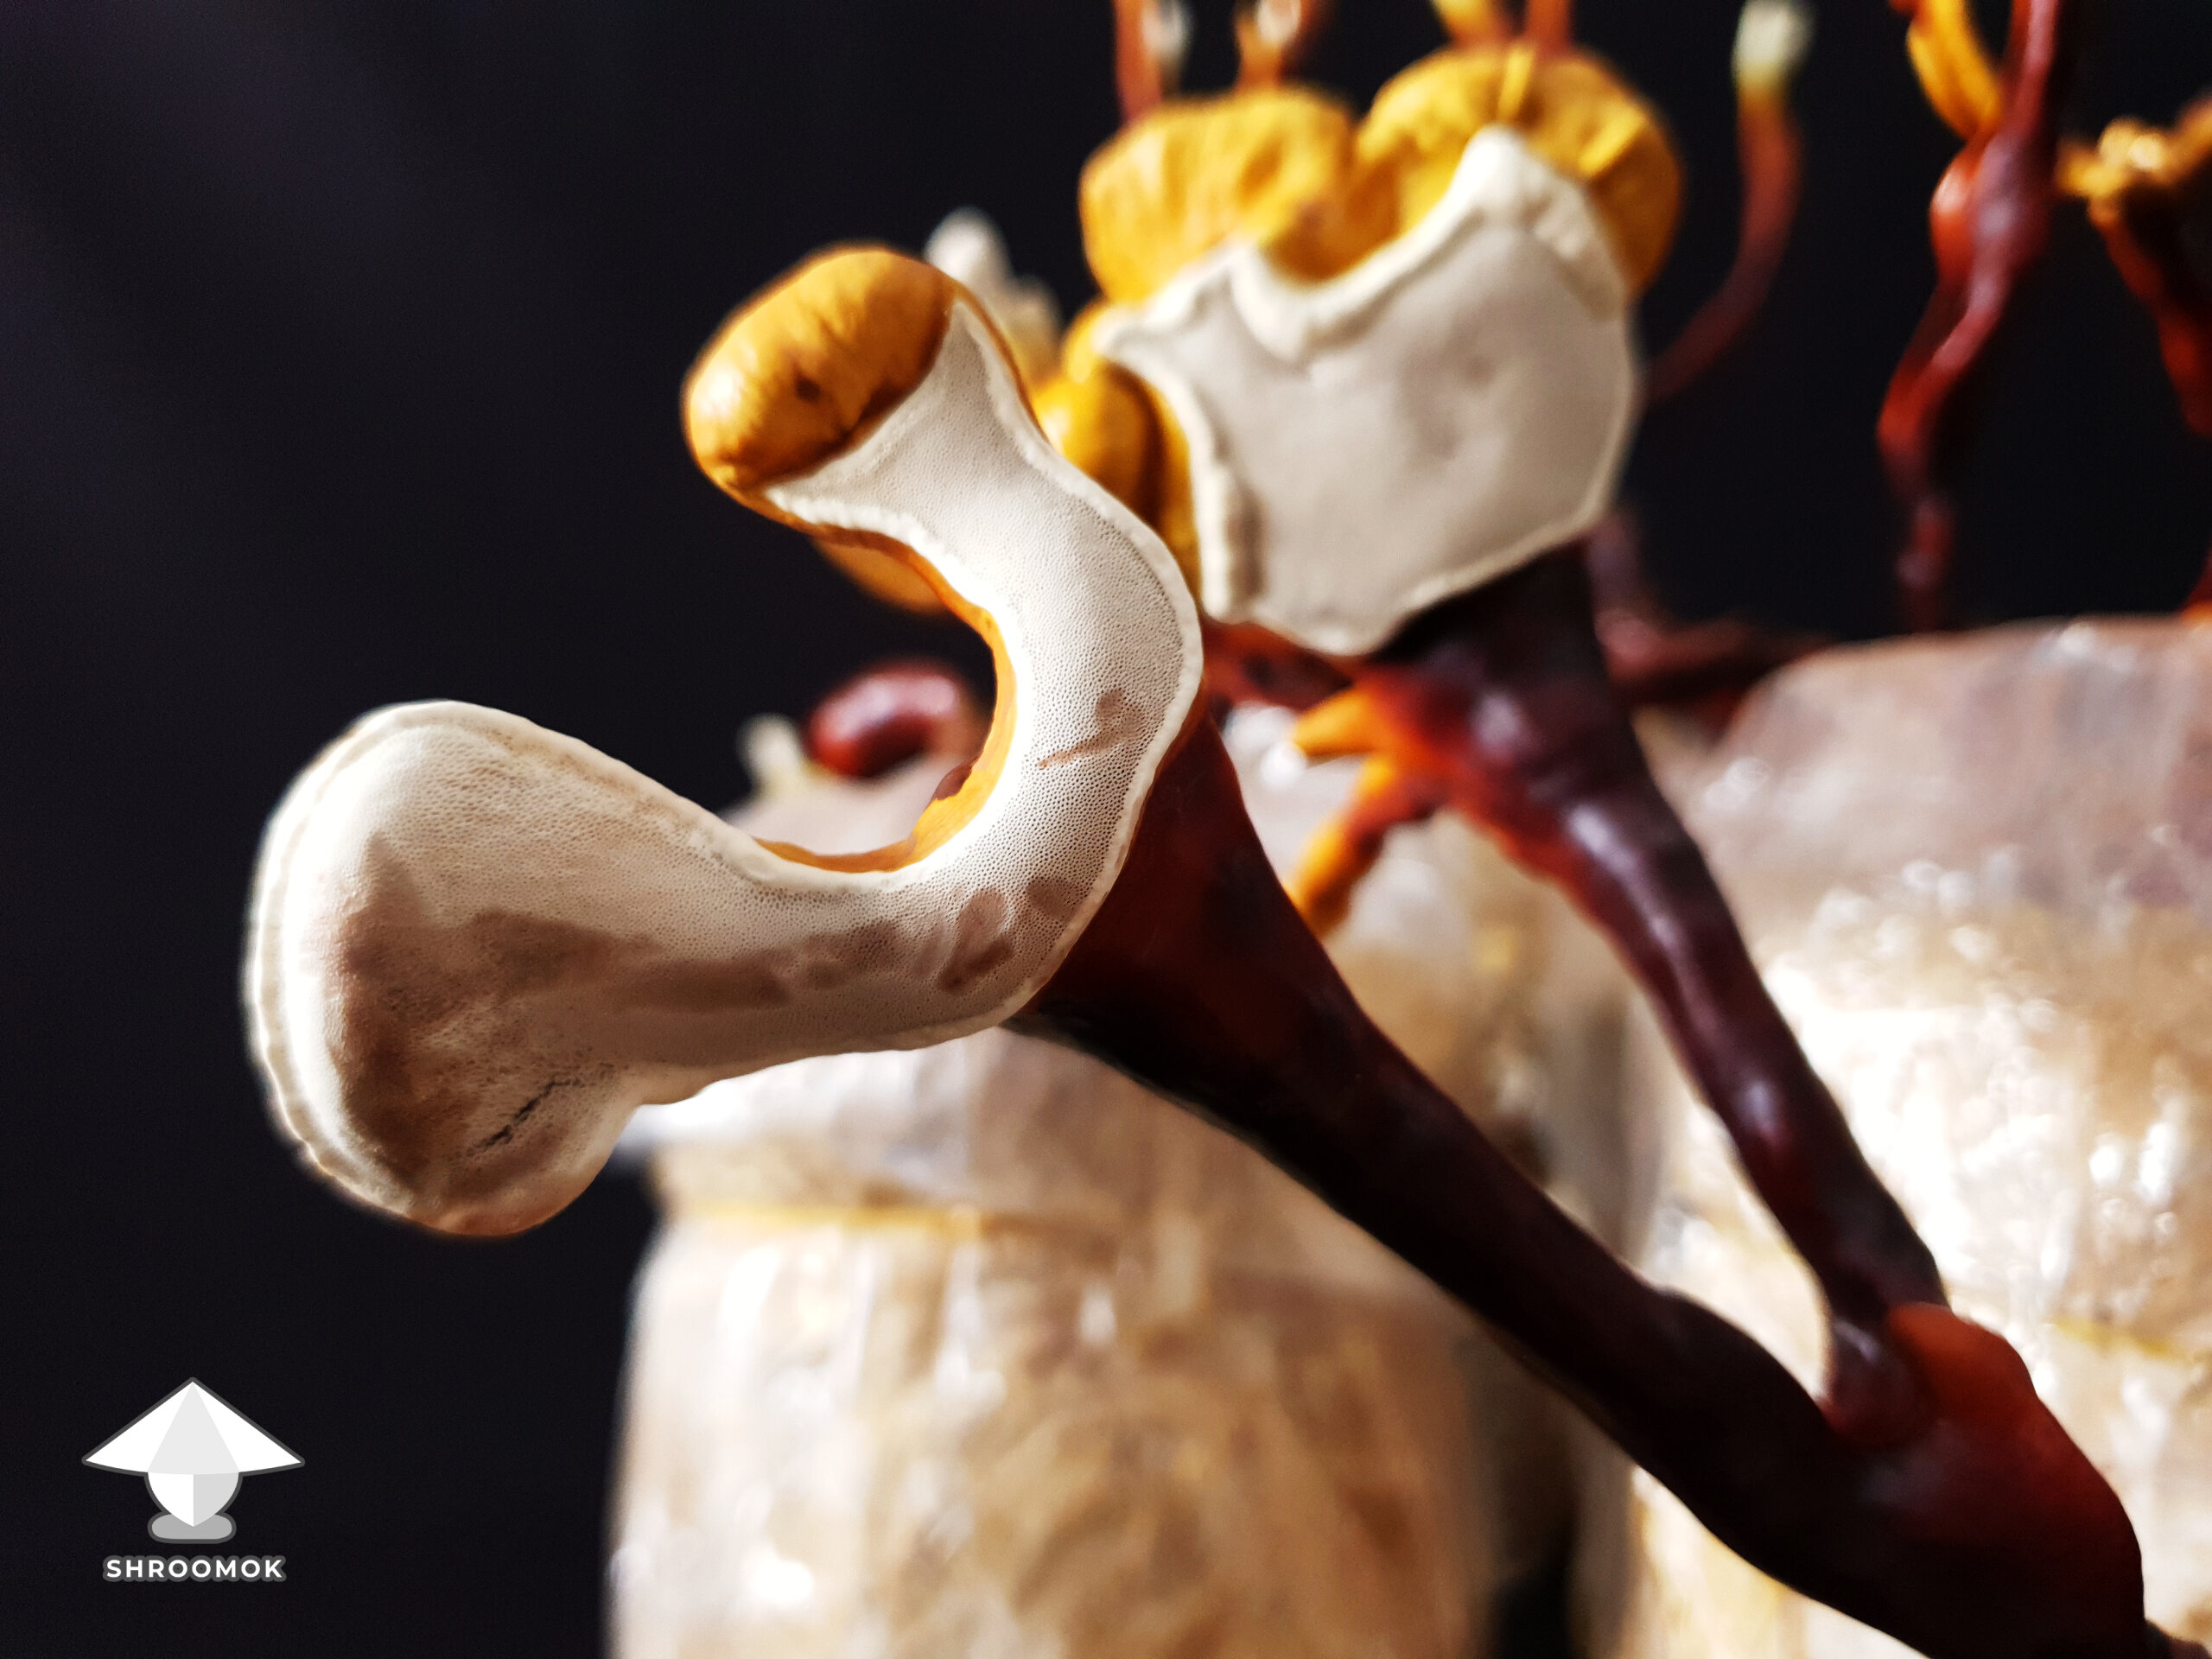
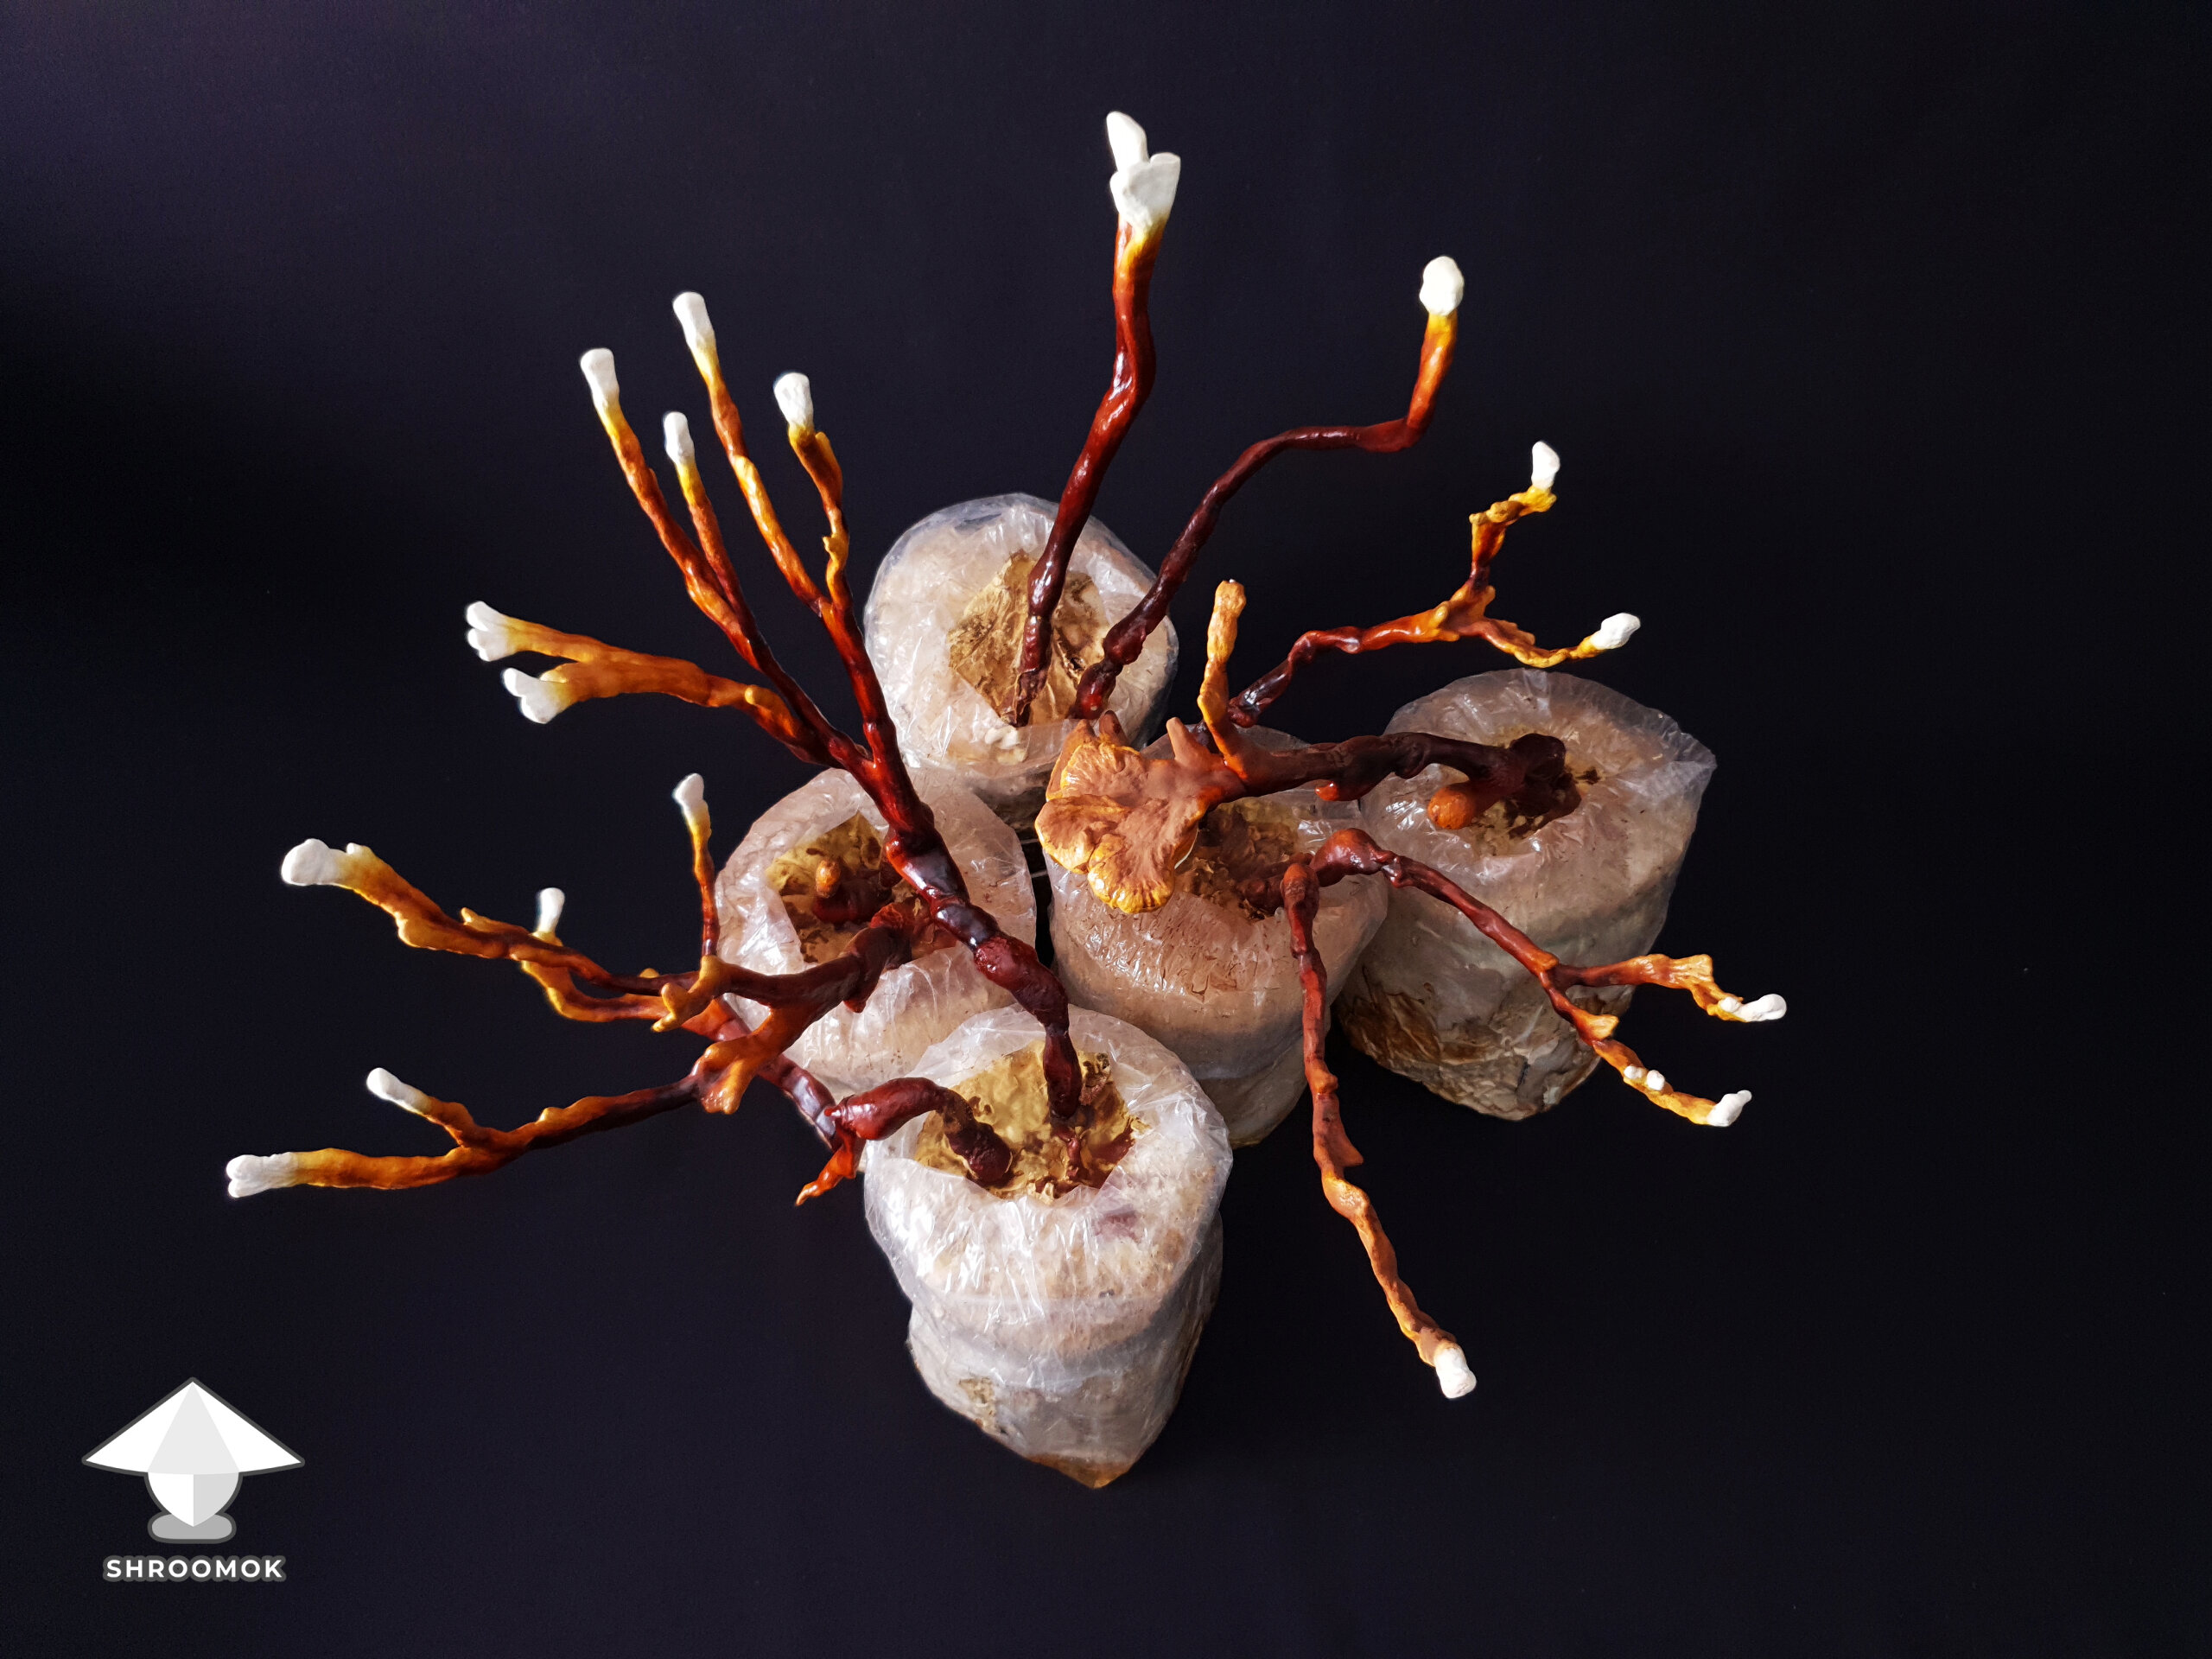
Day 90. Reishi fruiting progress
Note: 30 days of fruiting period

The active fruiting phase is the most exciting part of mushroom cultivation. It’s so satisfying to observe every tiny change in growth! 10 days have passed since the last update (see Day 80) and look at them now!


Ganoderma have formed more branches and become even more charming.

Reishi don’t look like (typical) mushrooms at all. From some angles, their fruits resemble tree branches or hands from horror movies.

Love this feature of Reishi. So hilarious!
More photos are in attachments below ⬇️
Attachments
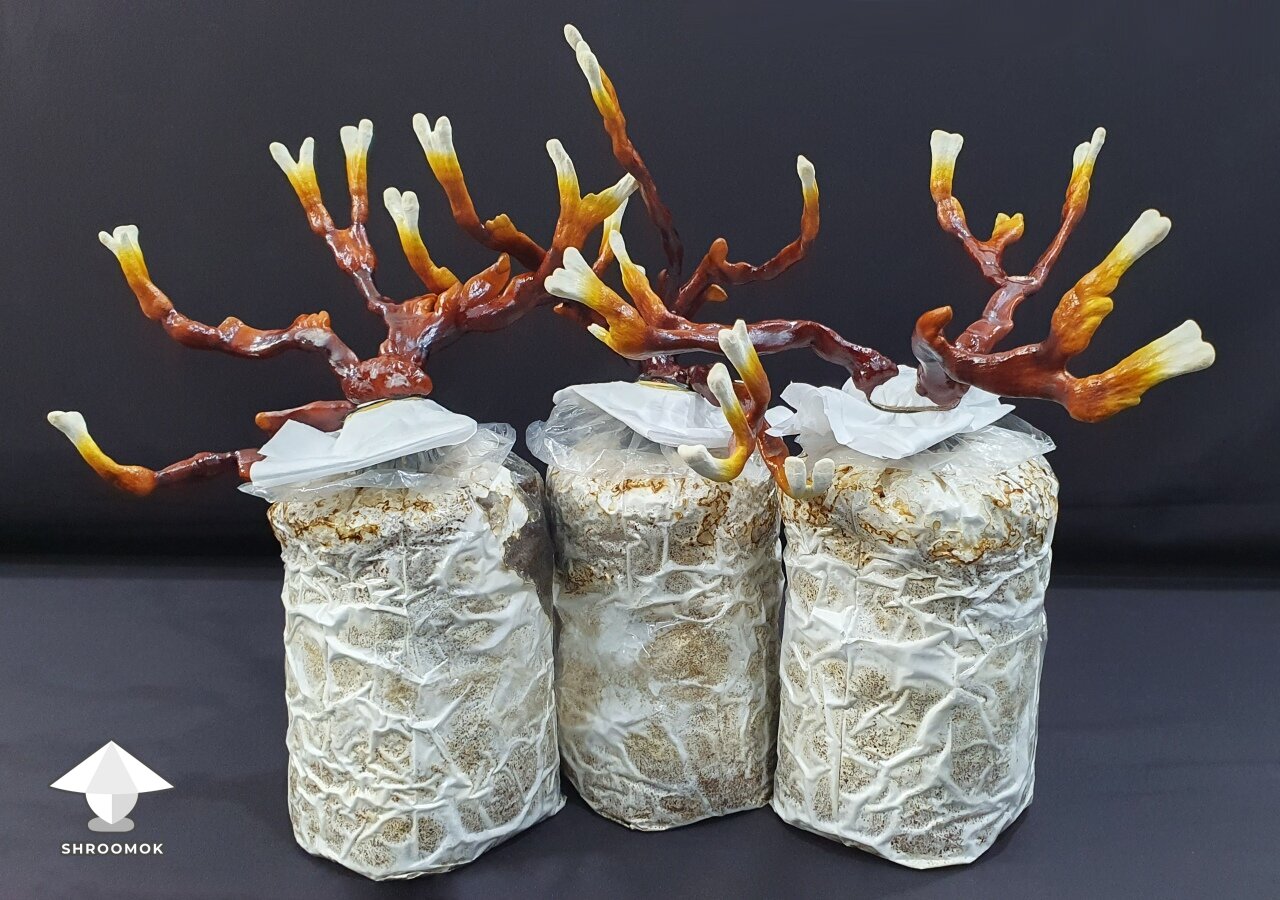
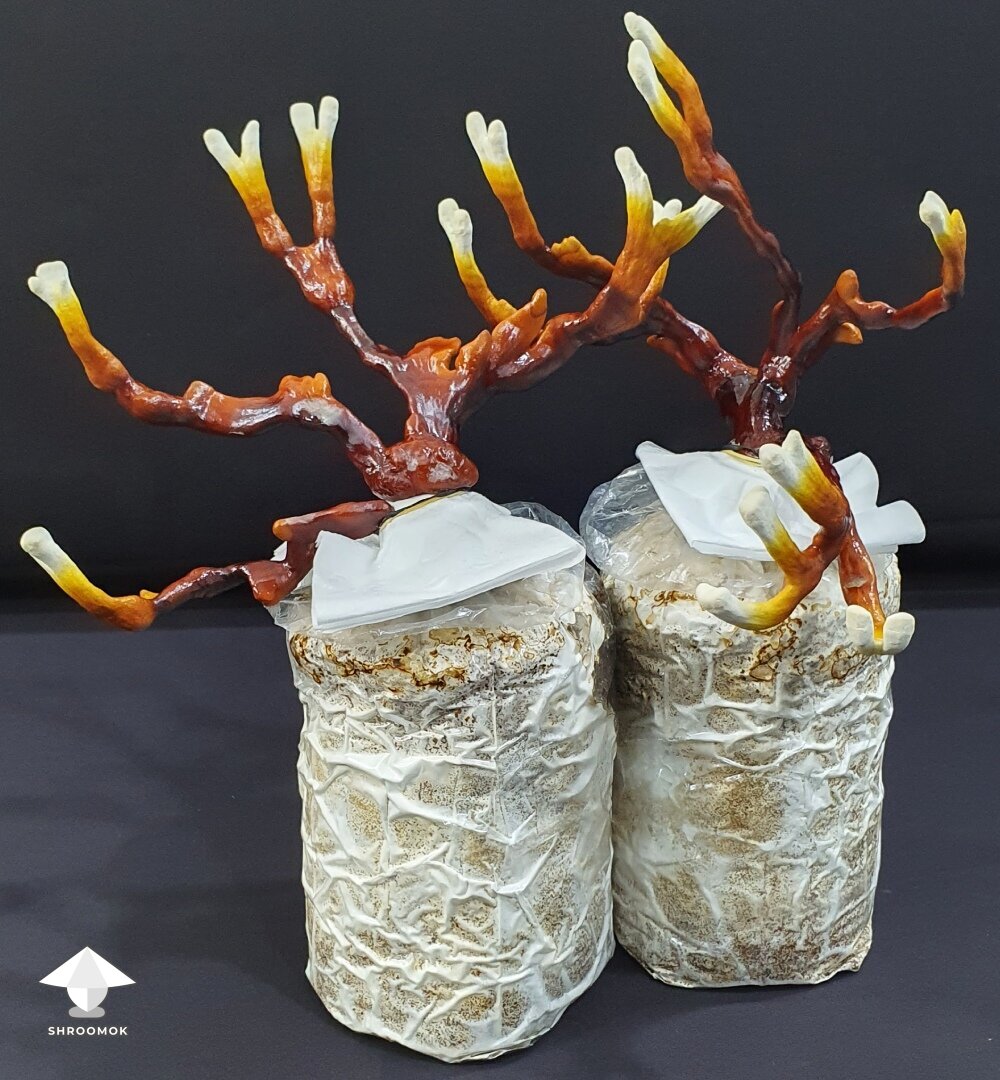
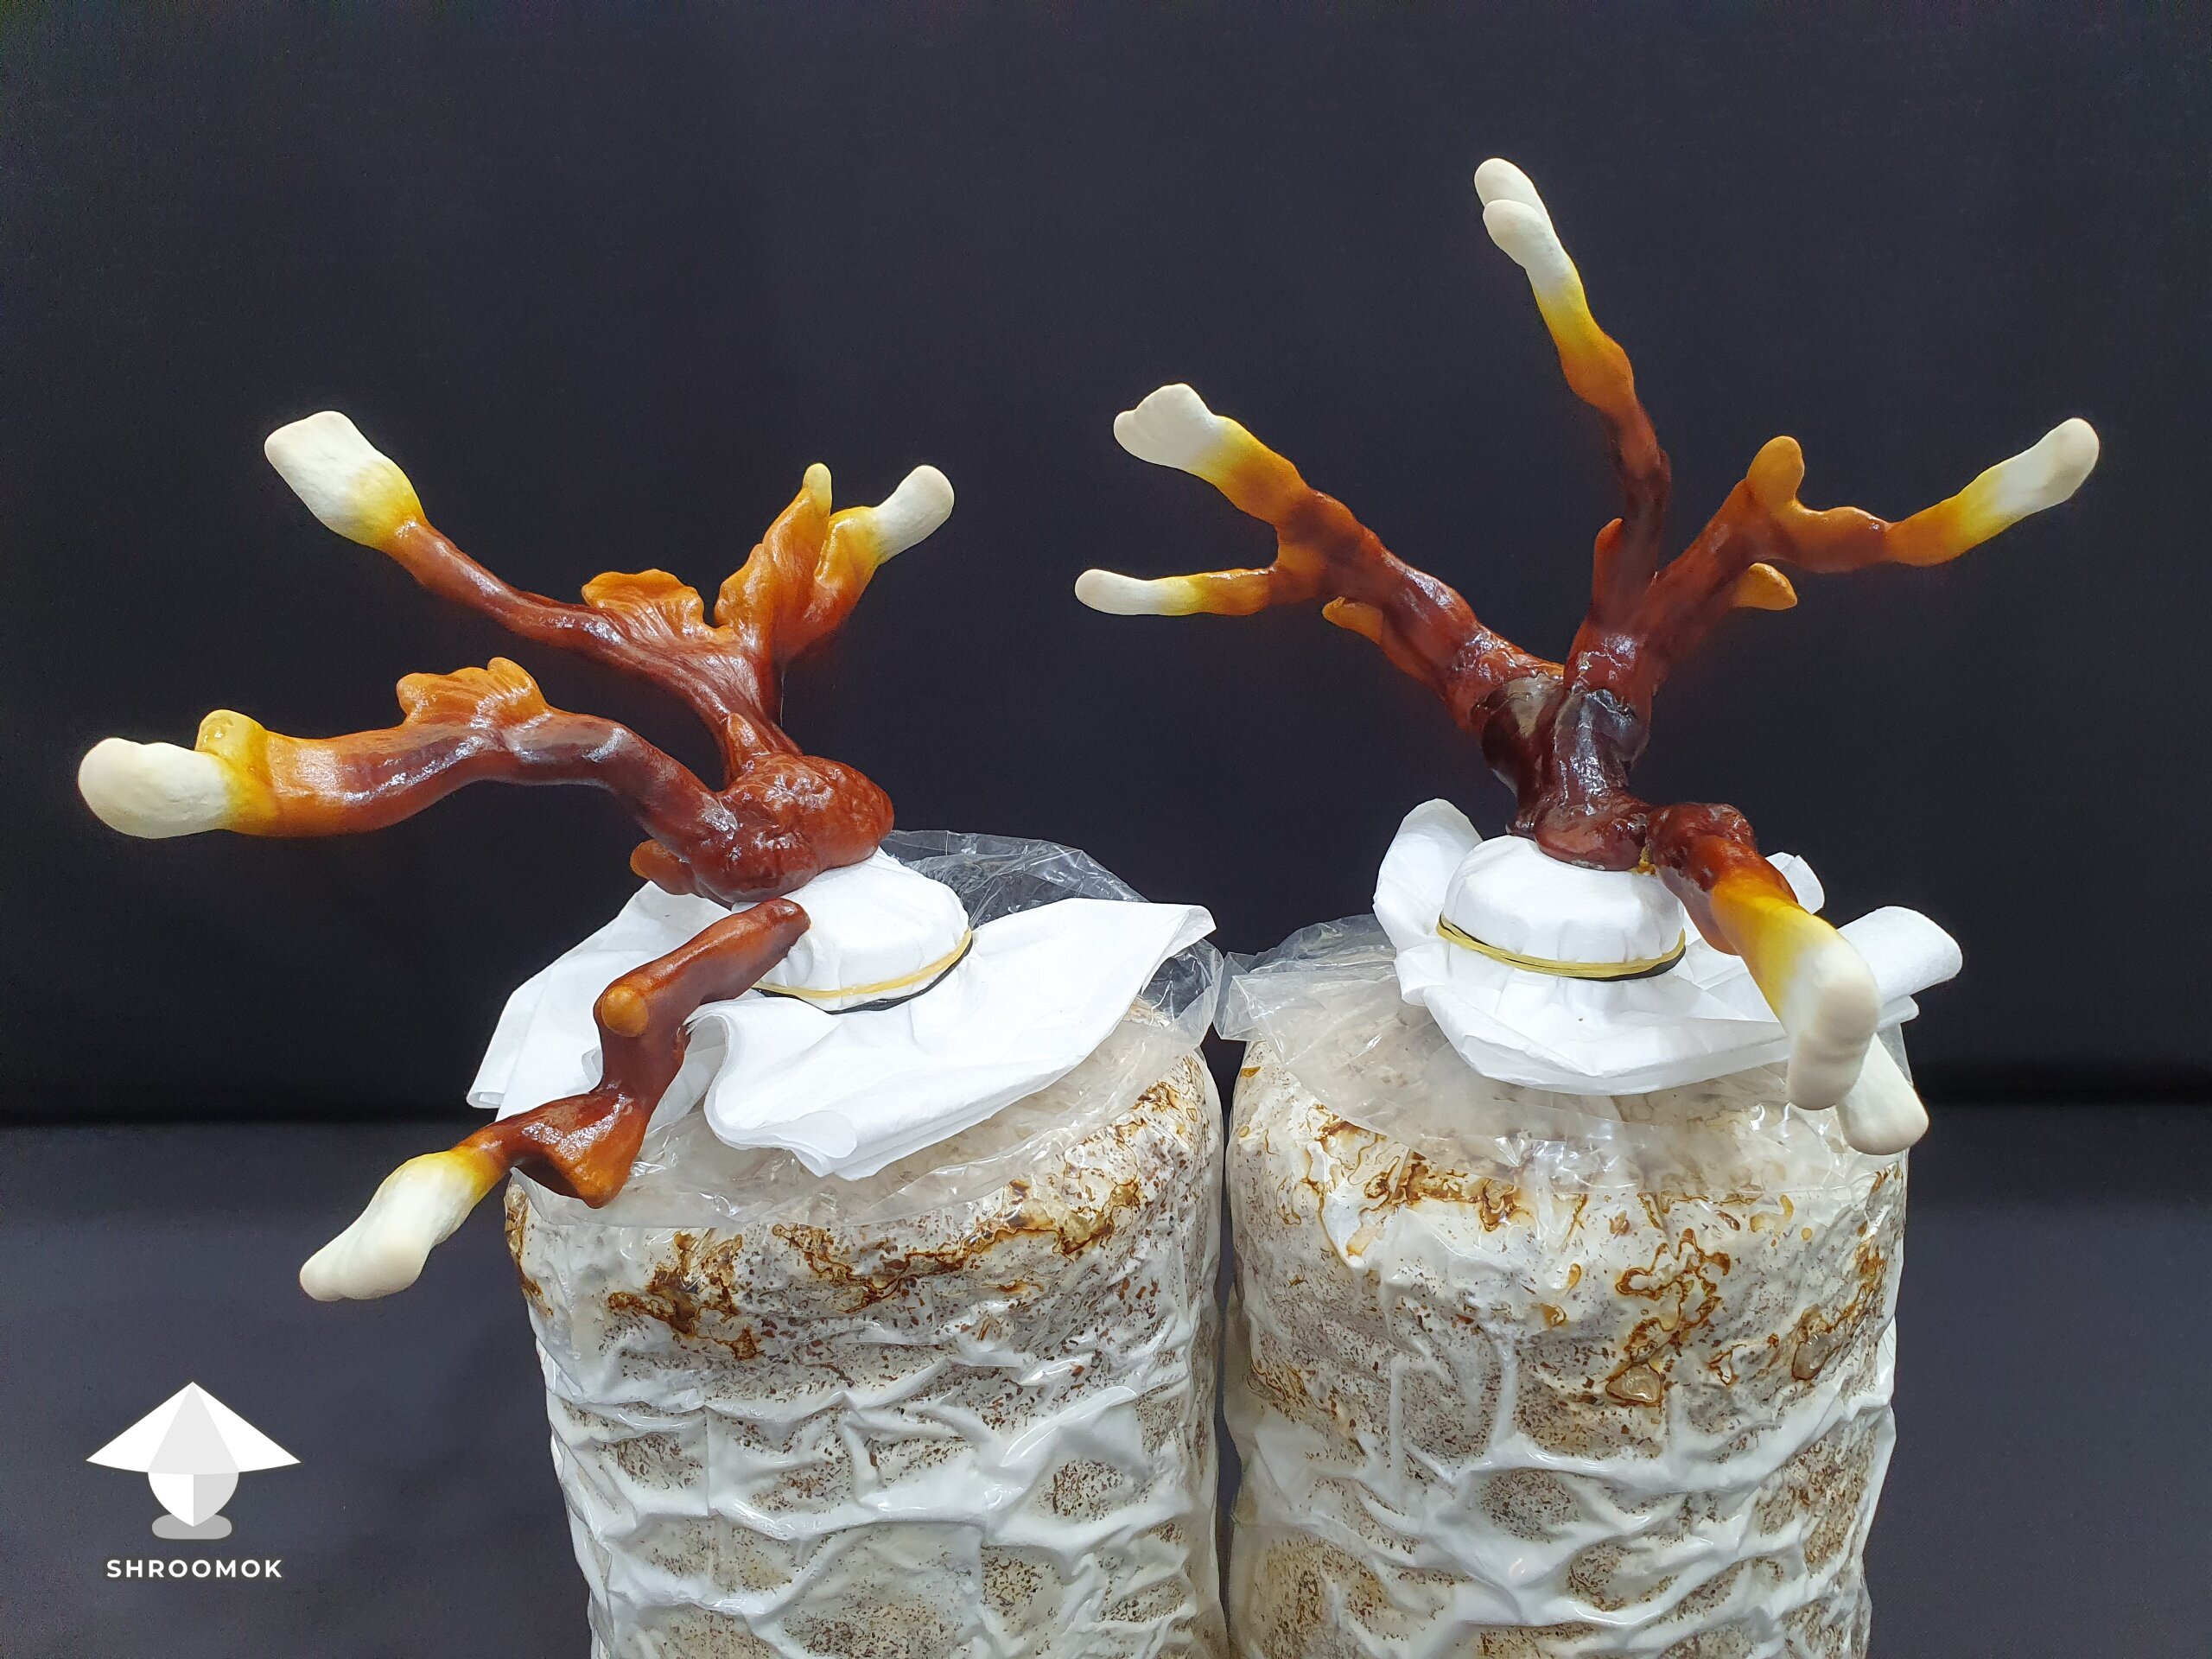
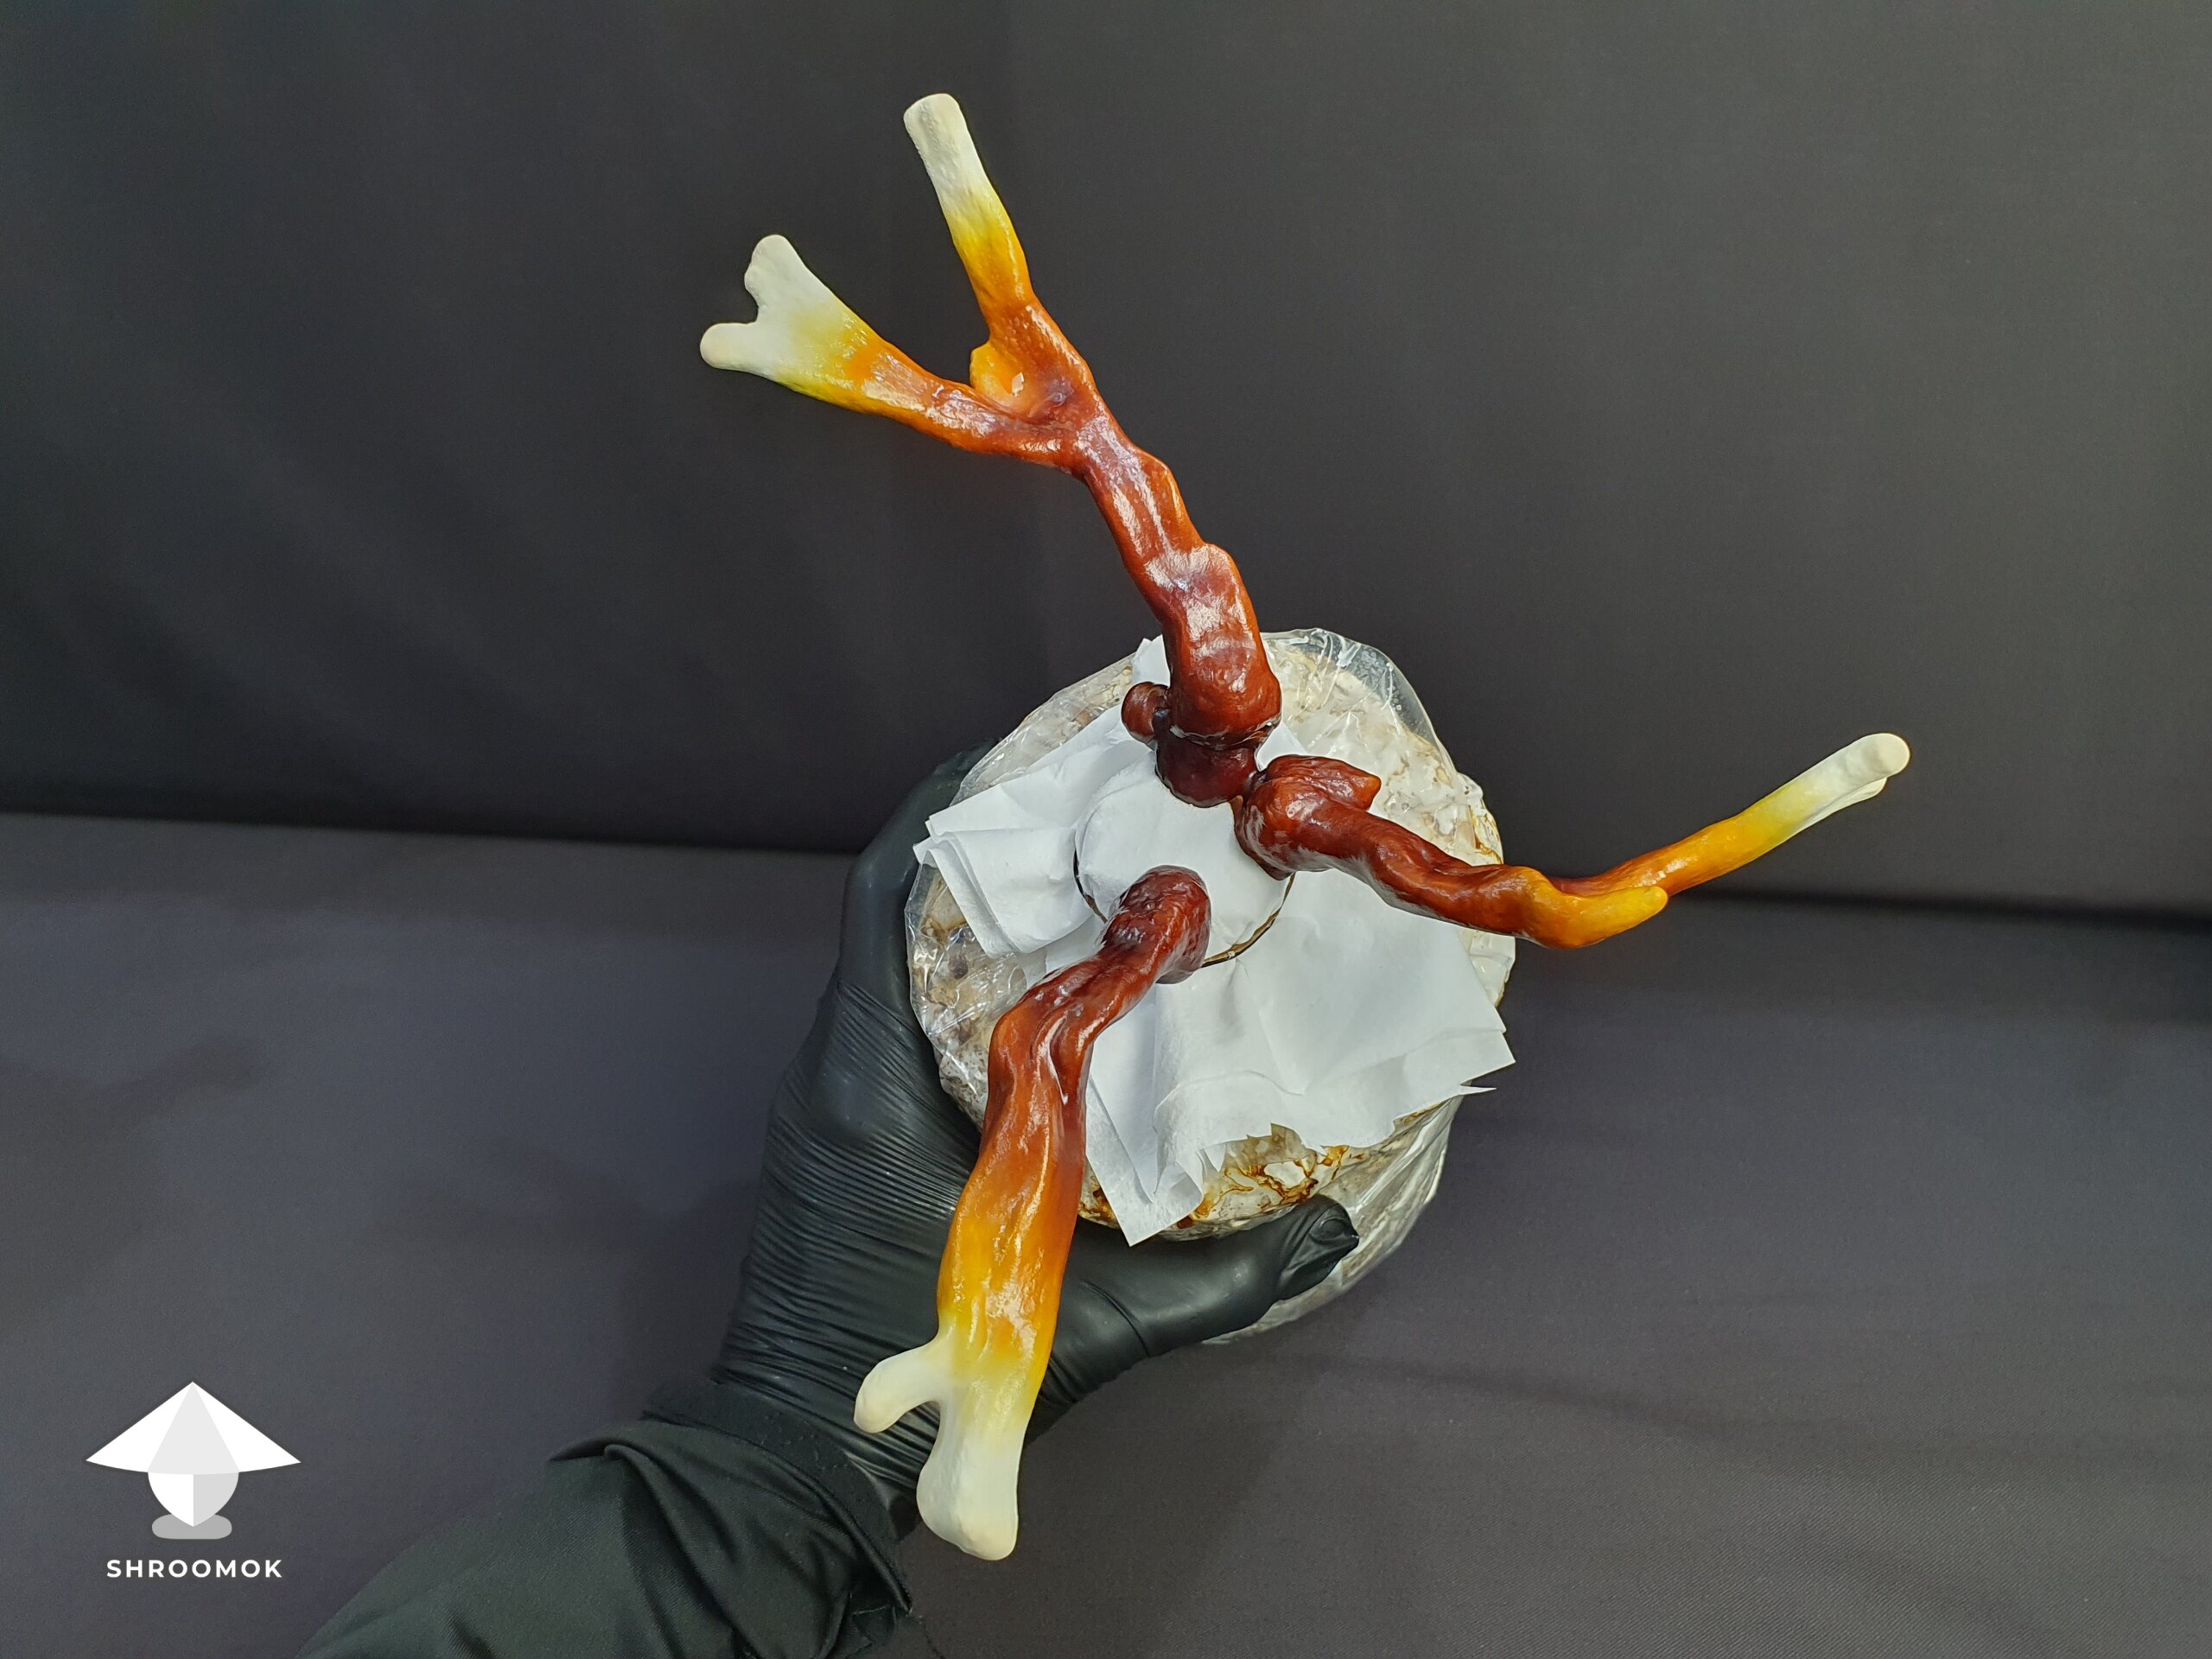
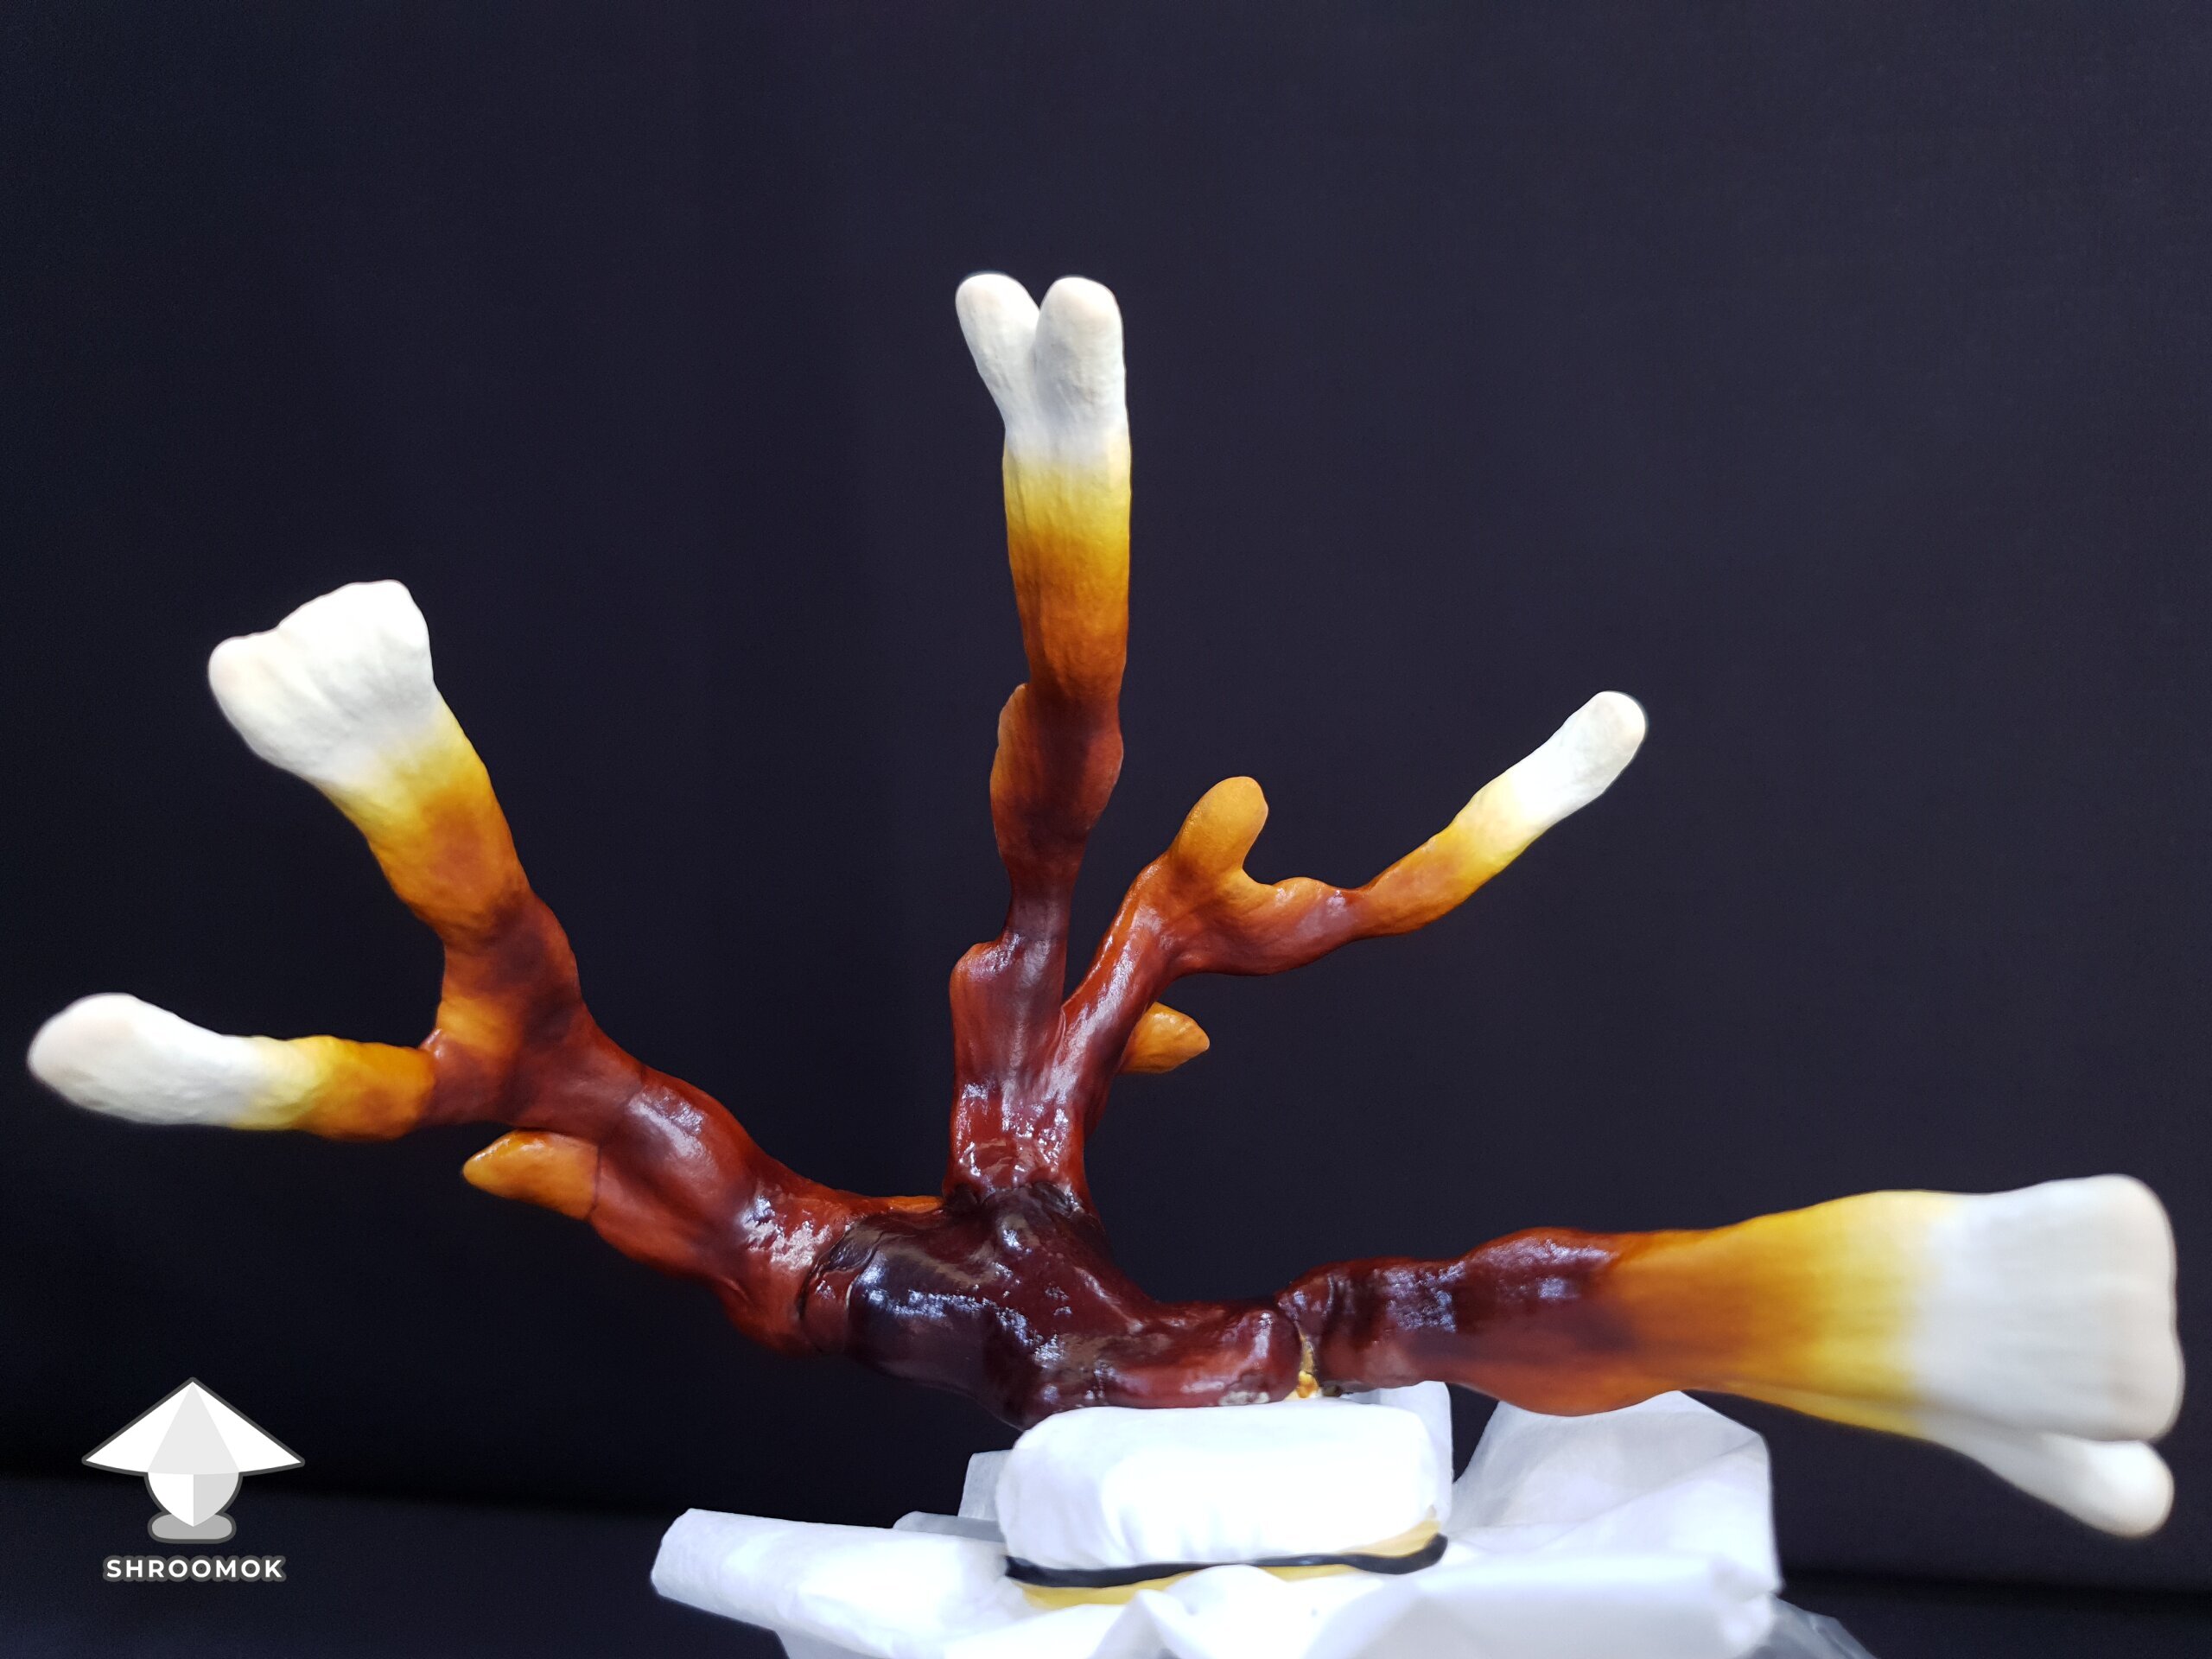
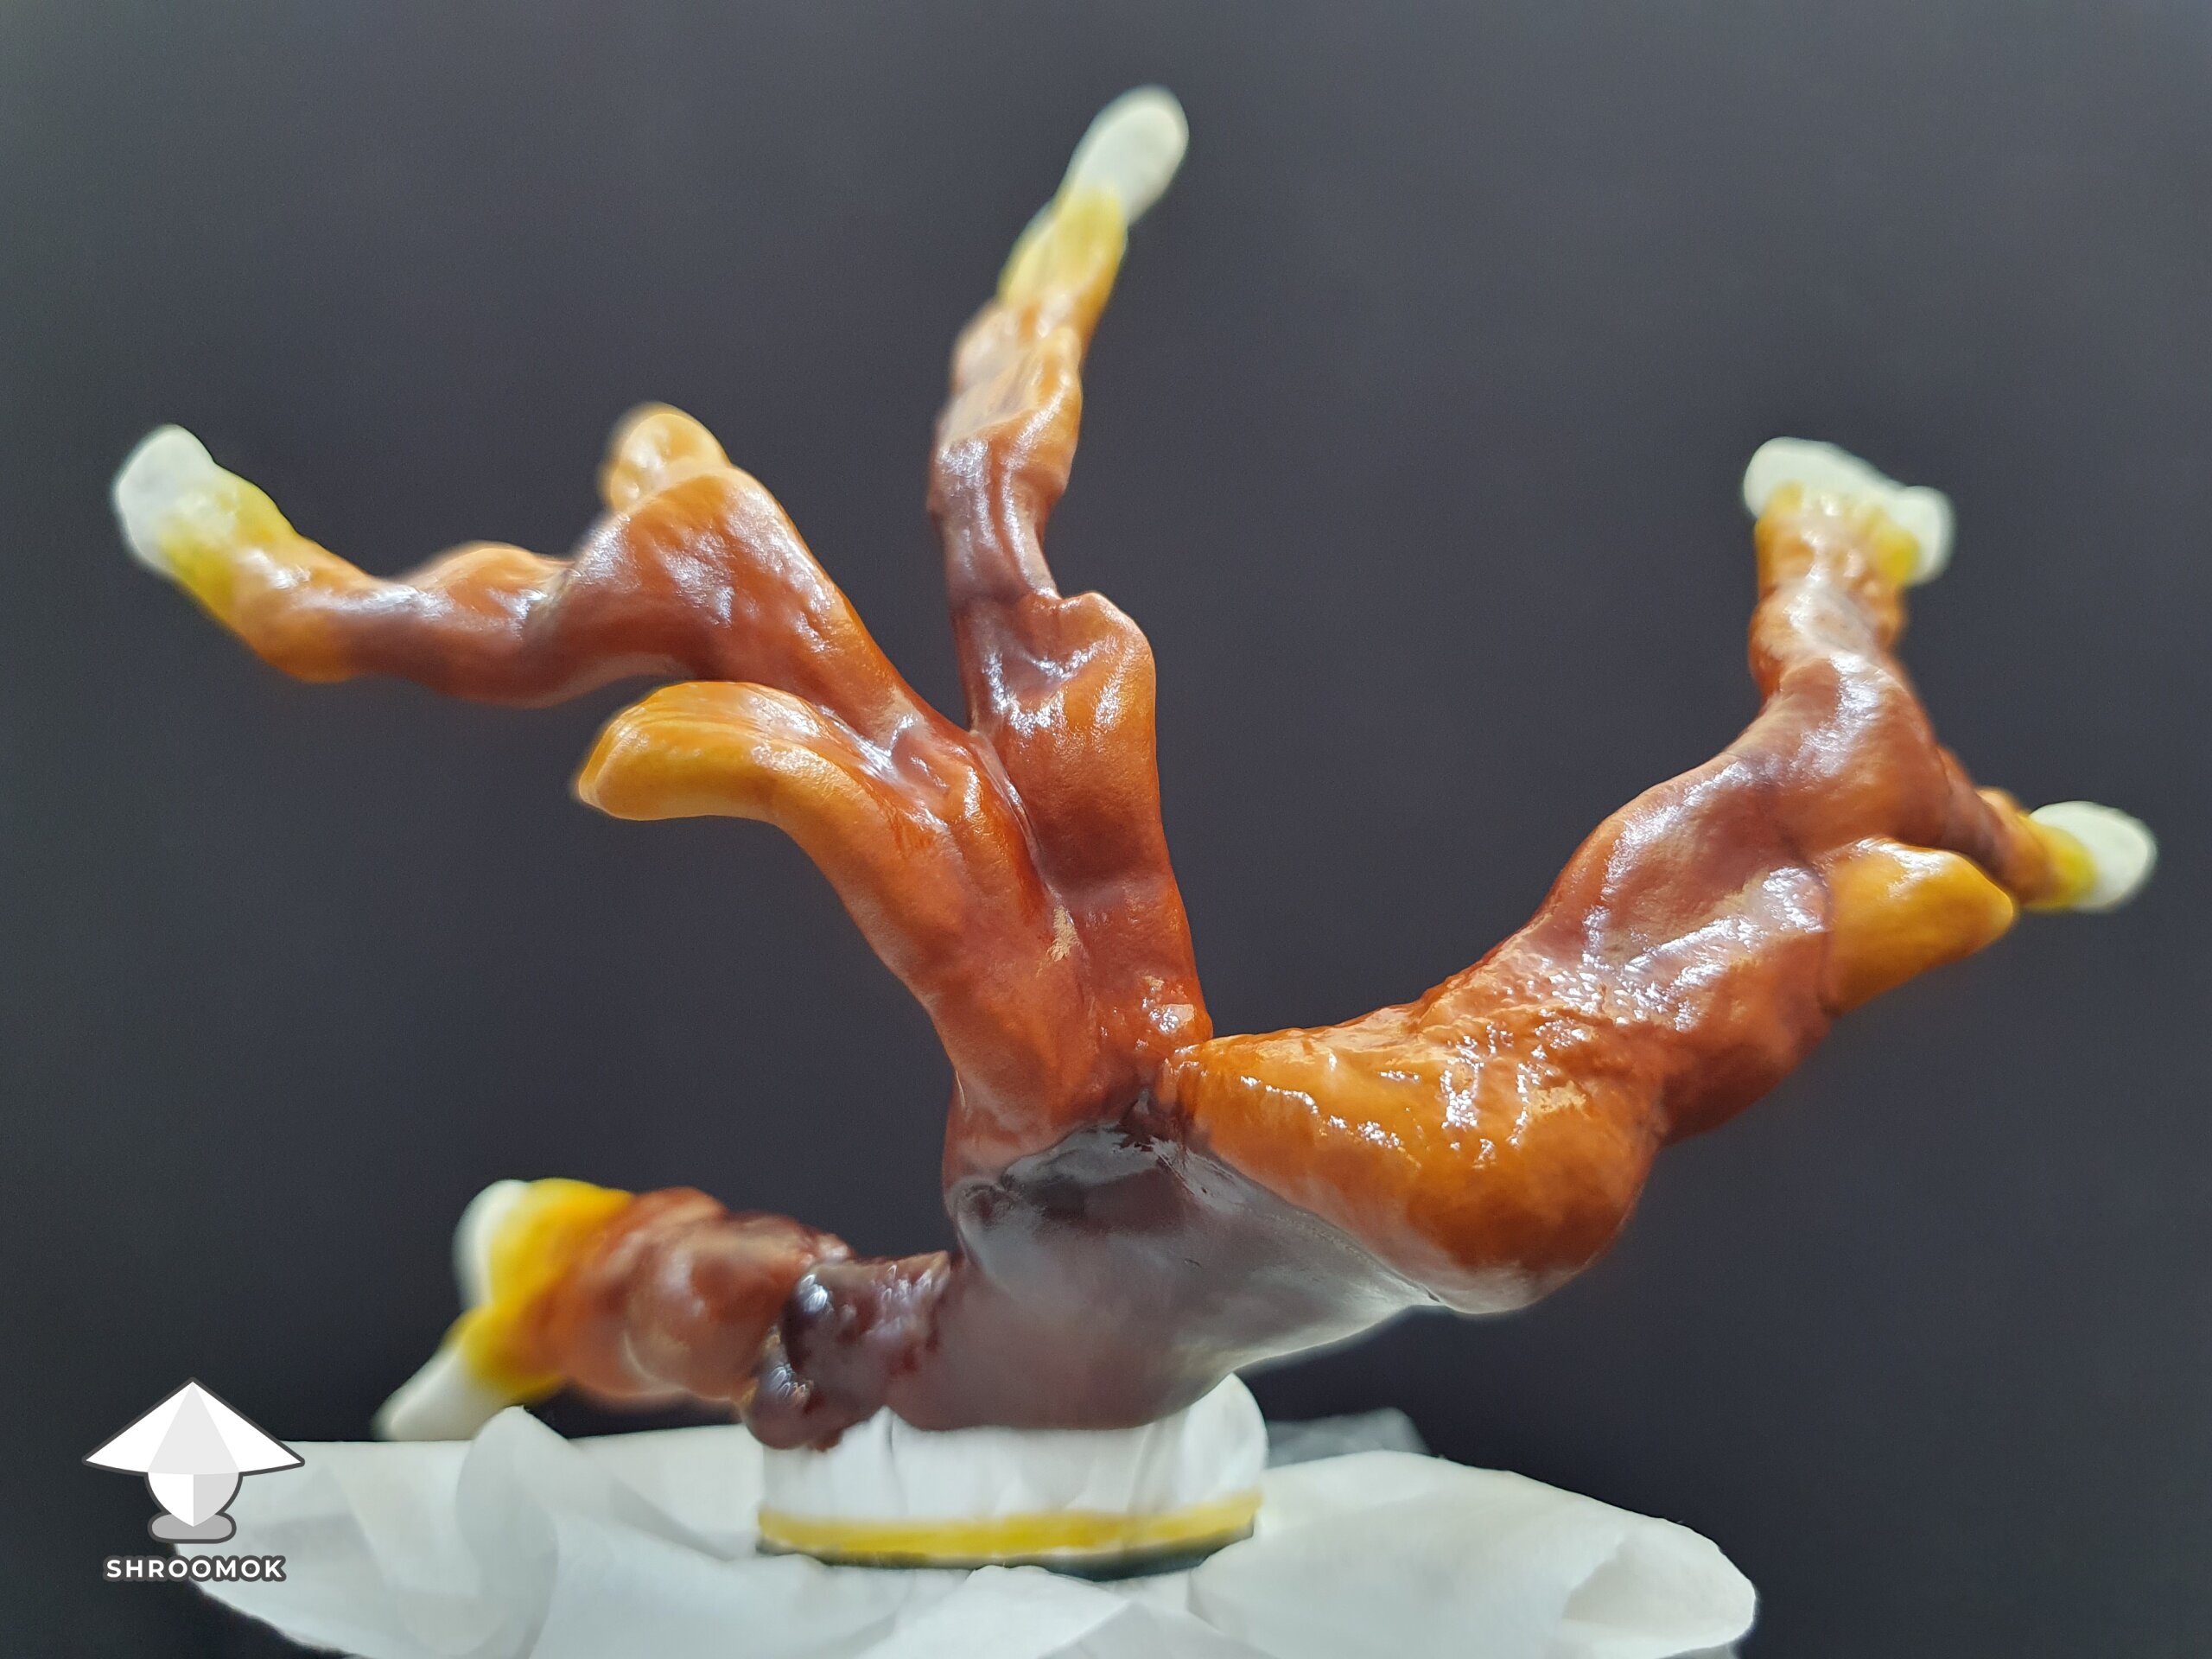
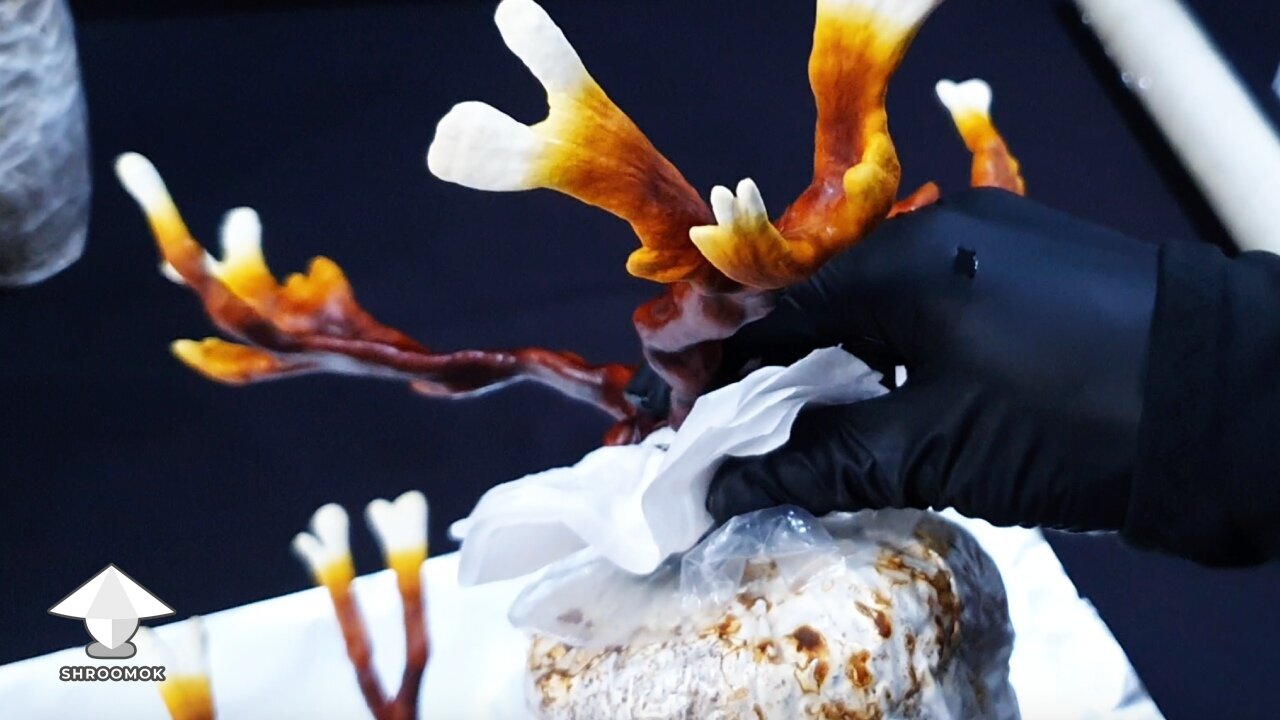
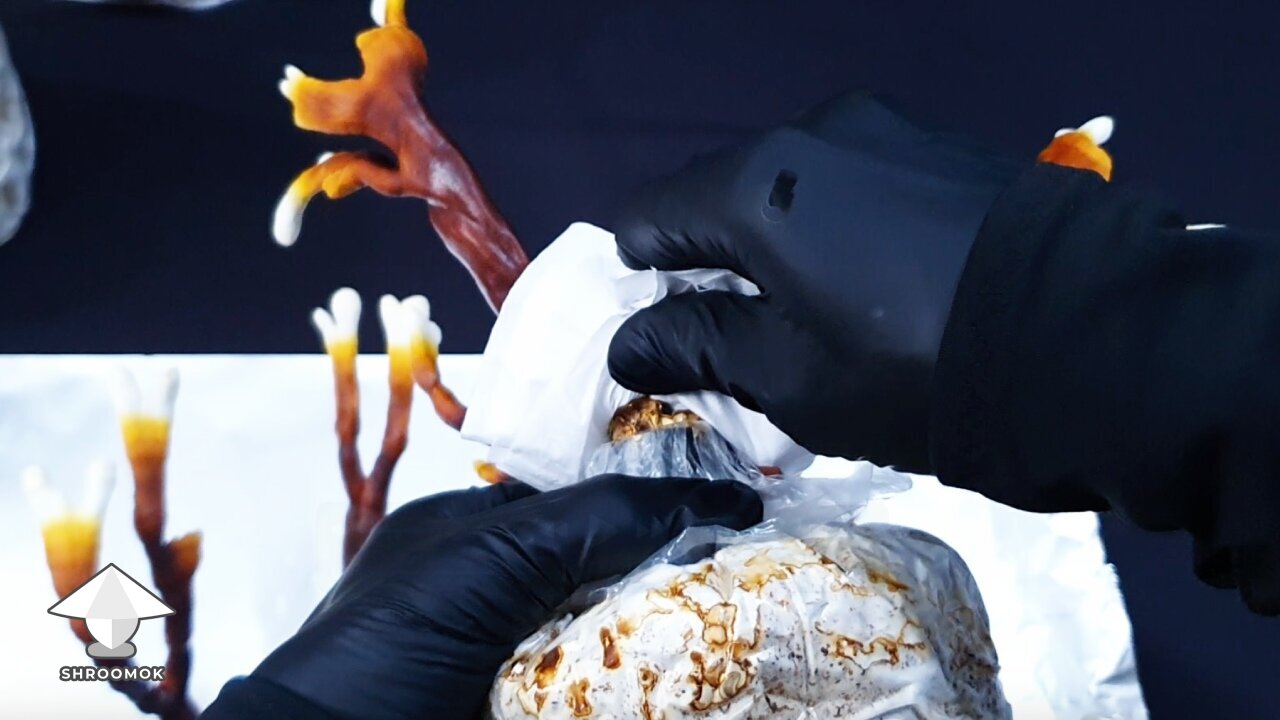
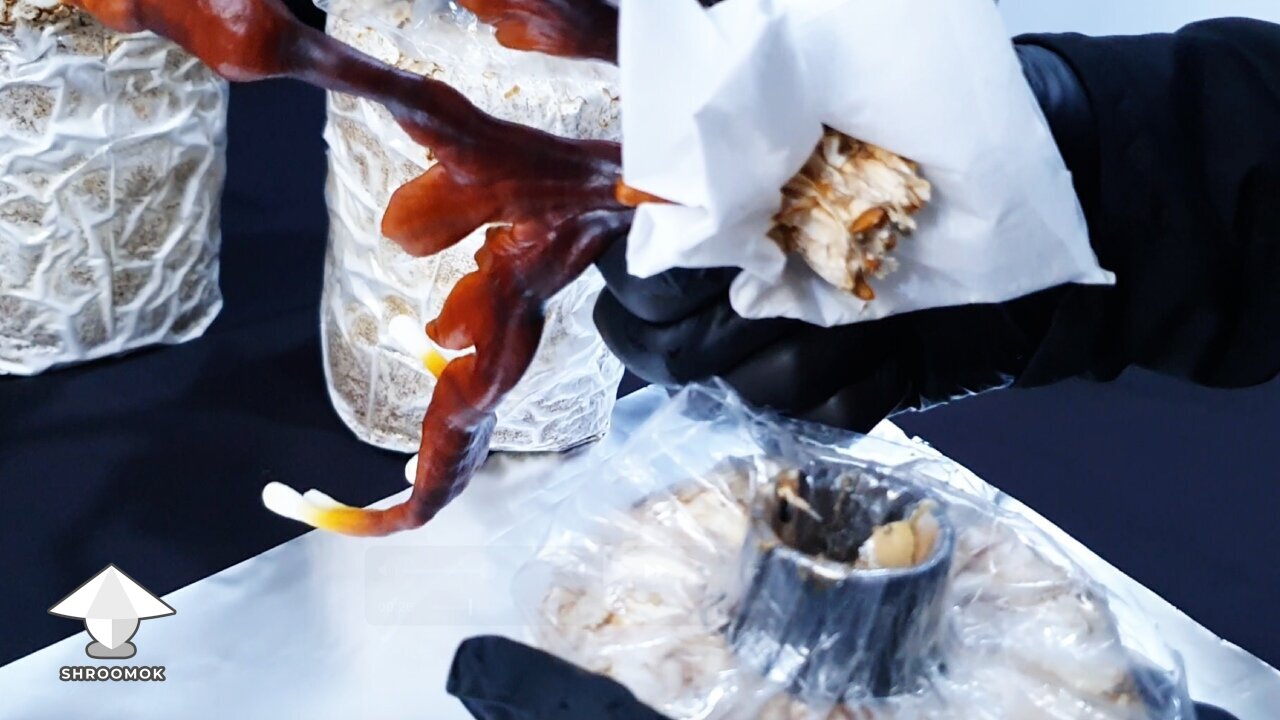
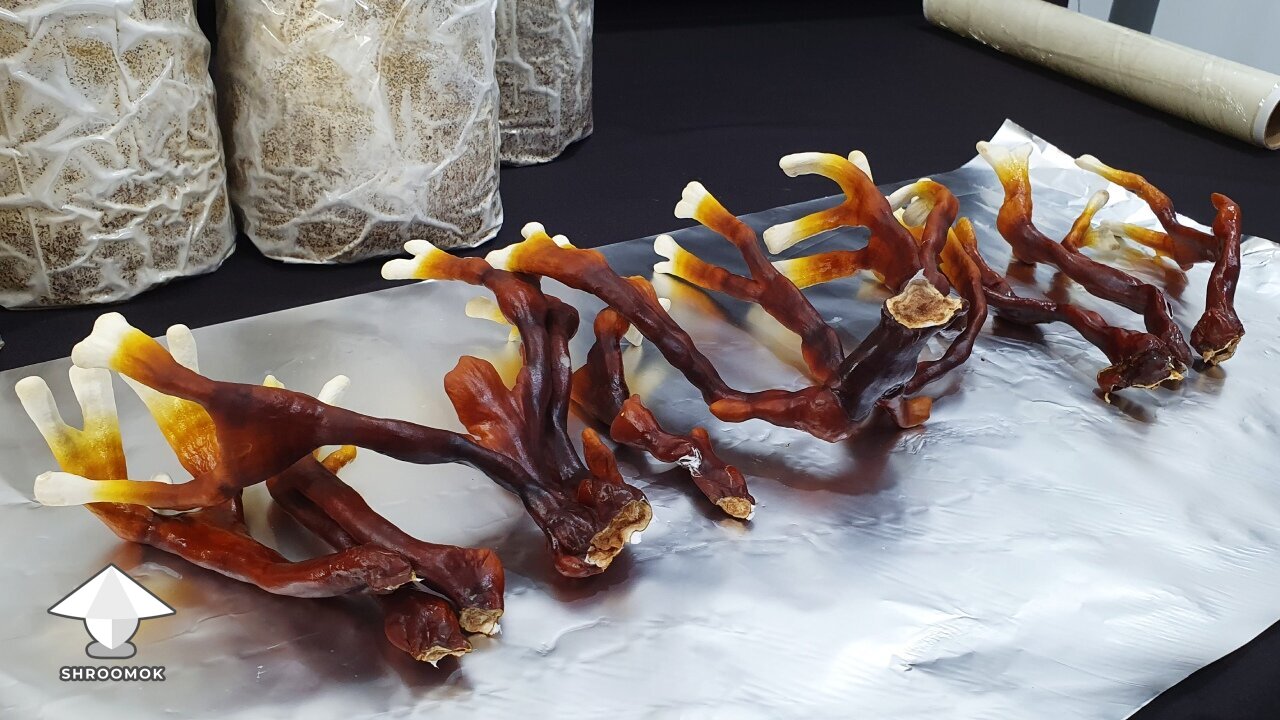
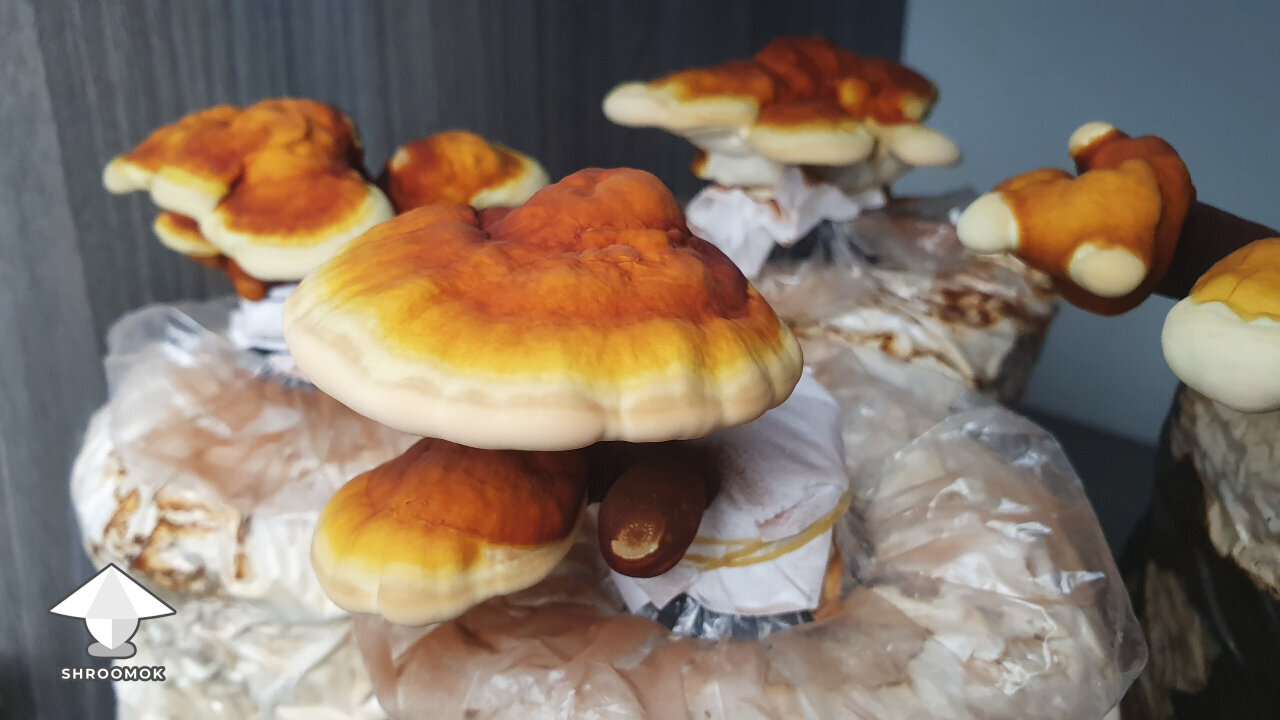
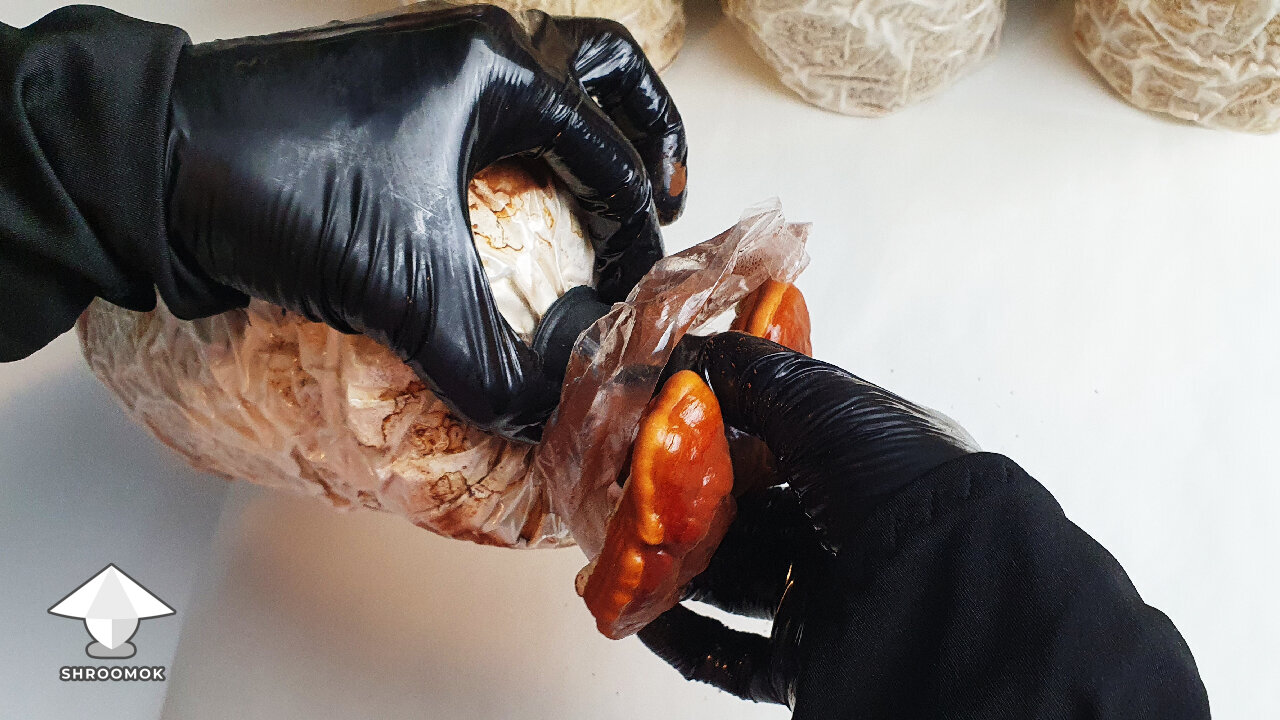
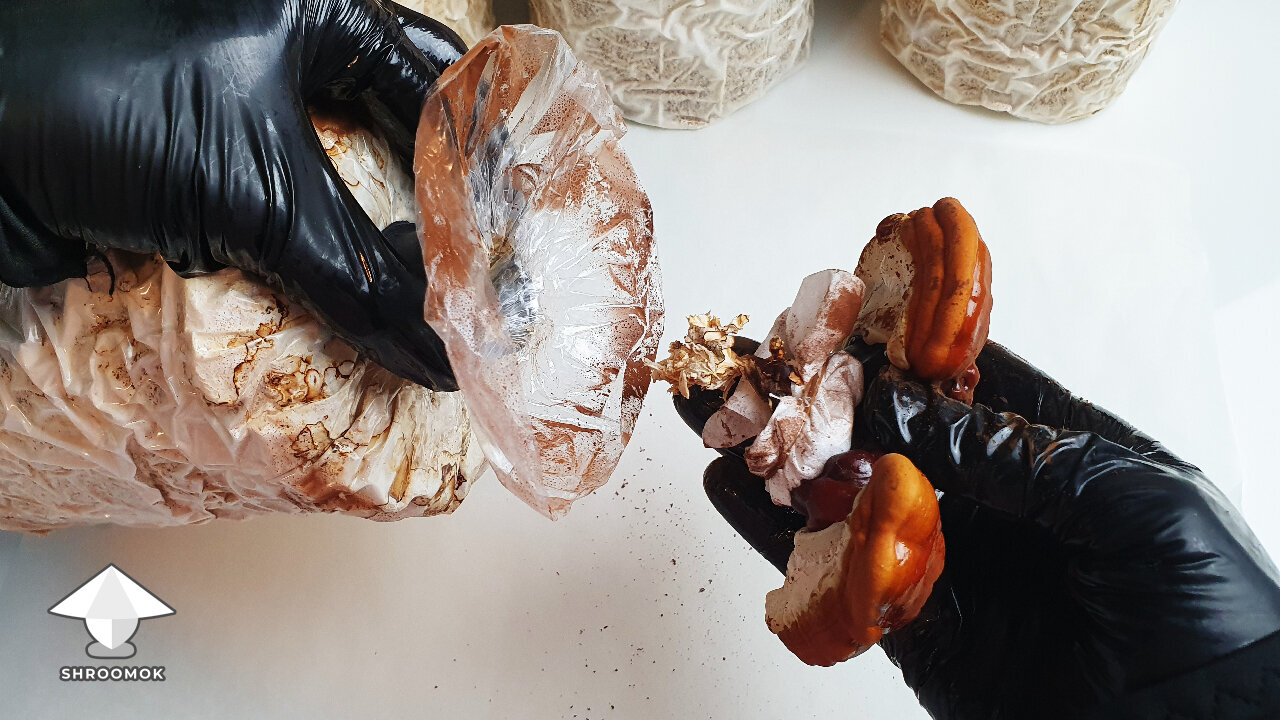
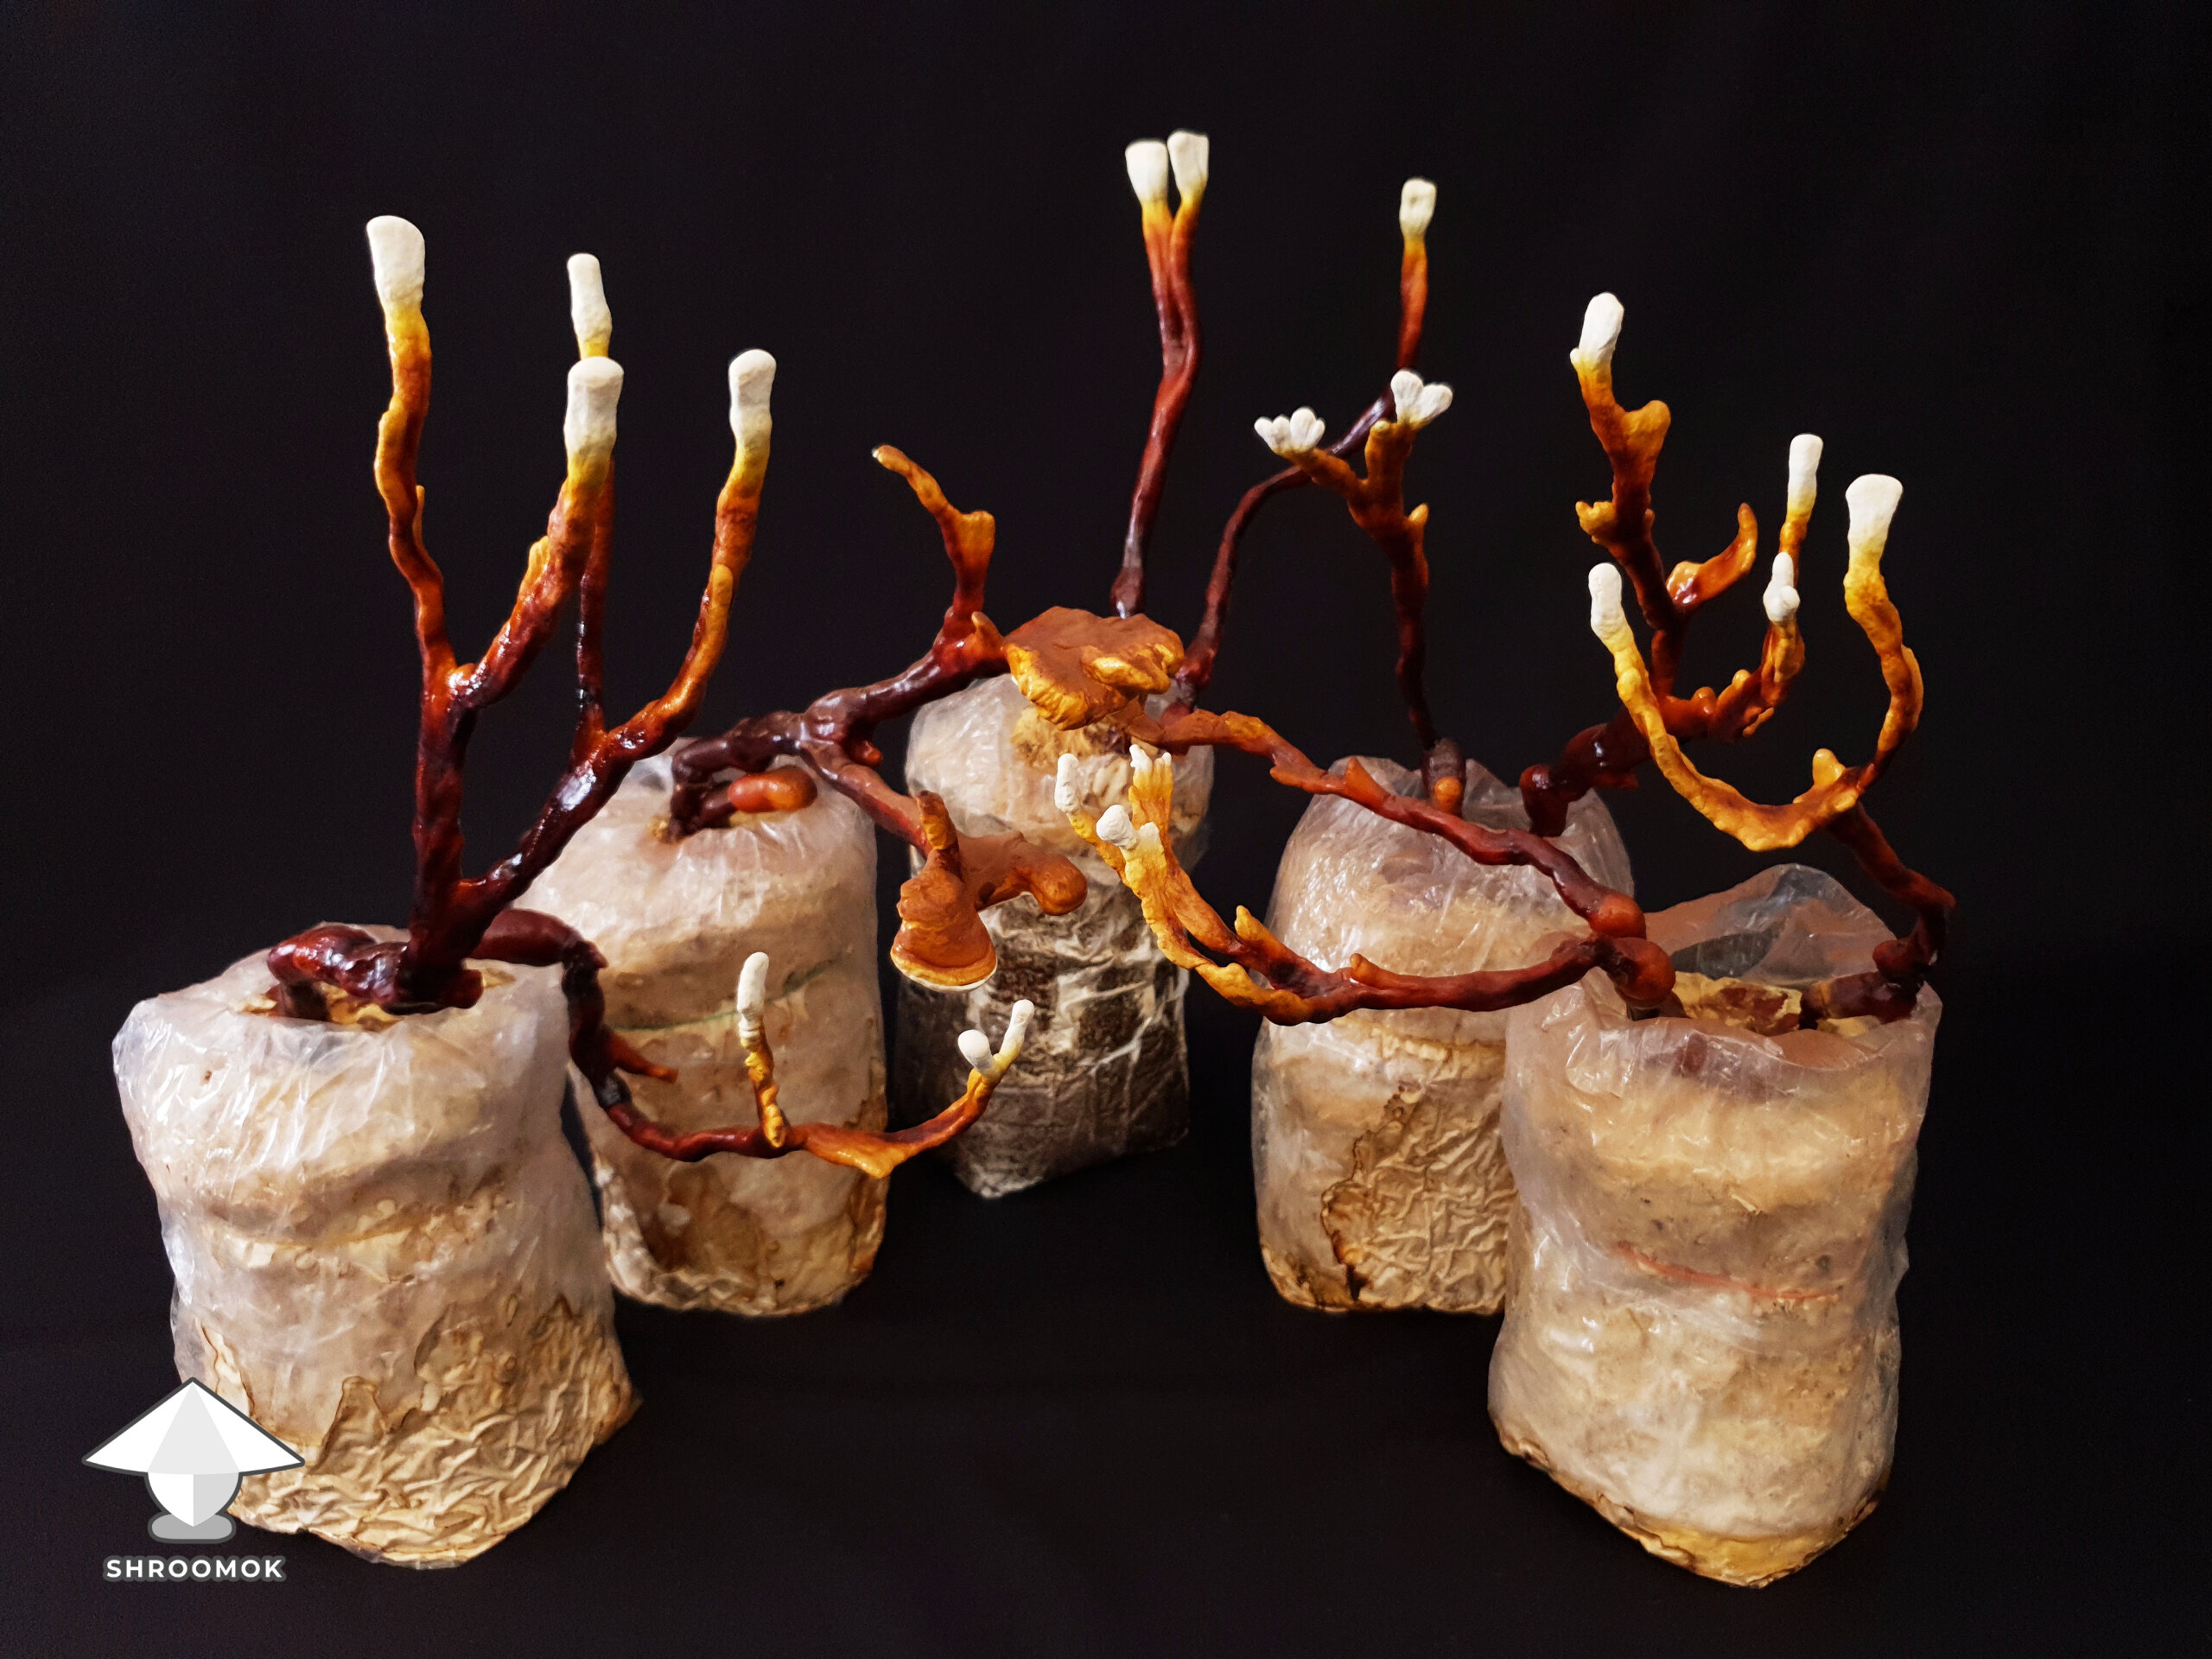
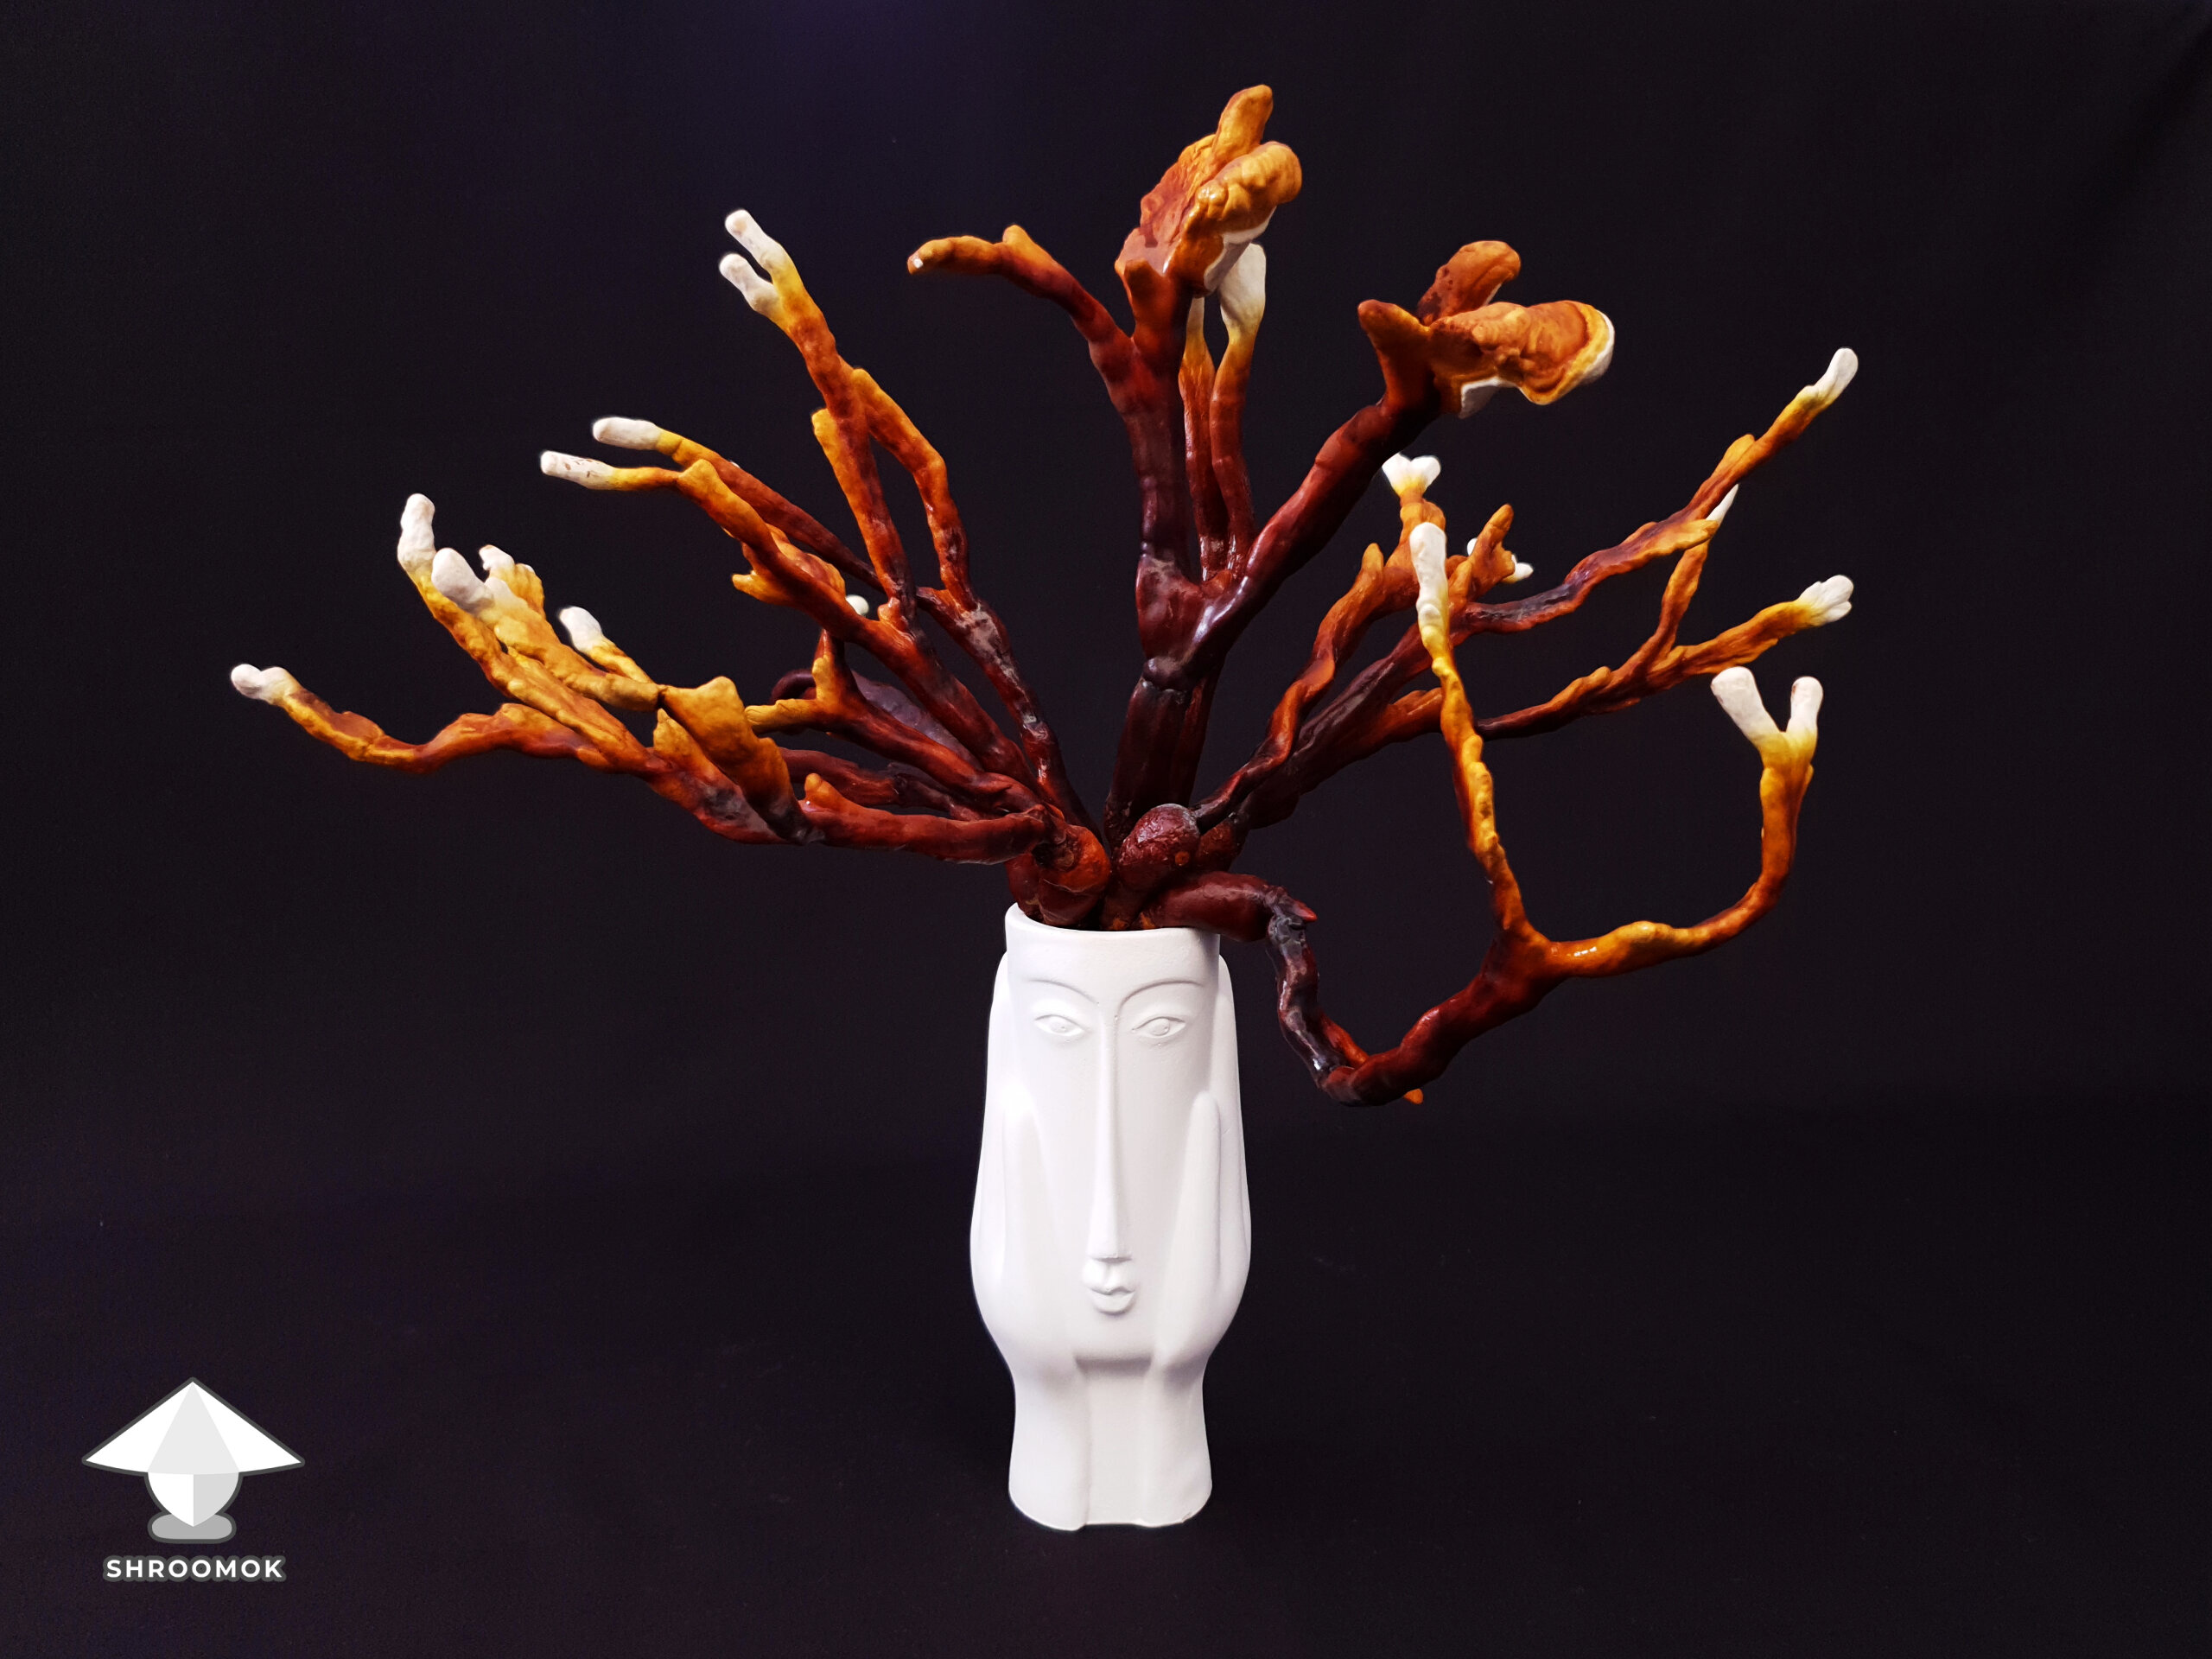
Day 90. Forced harvesting of the first flush
Note: same day update - 30 days of fruiting period
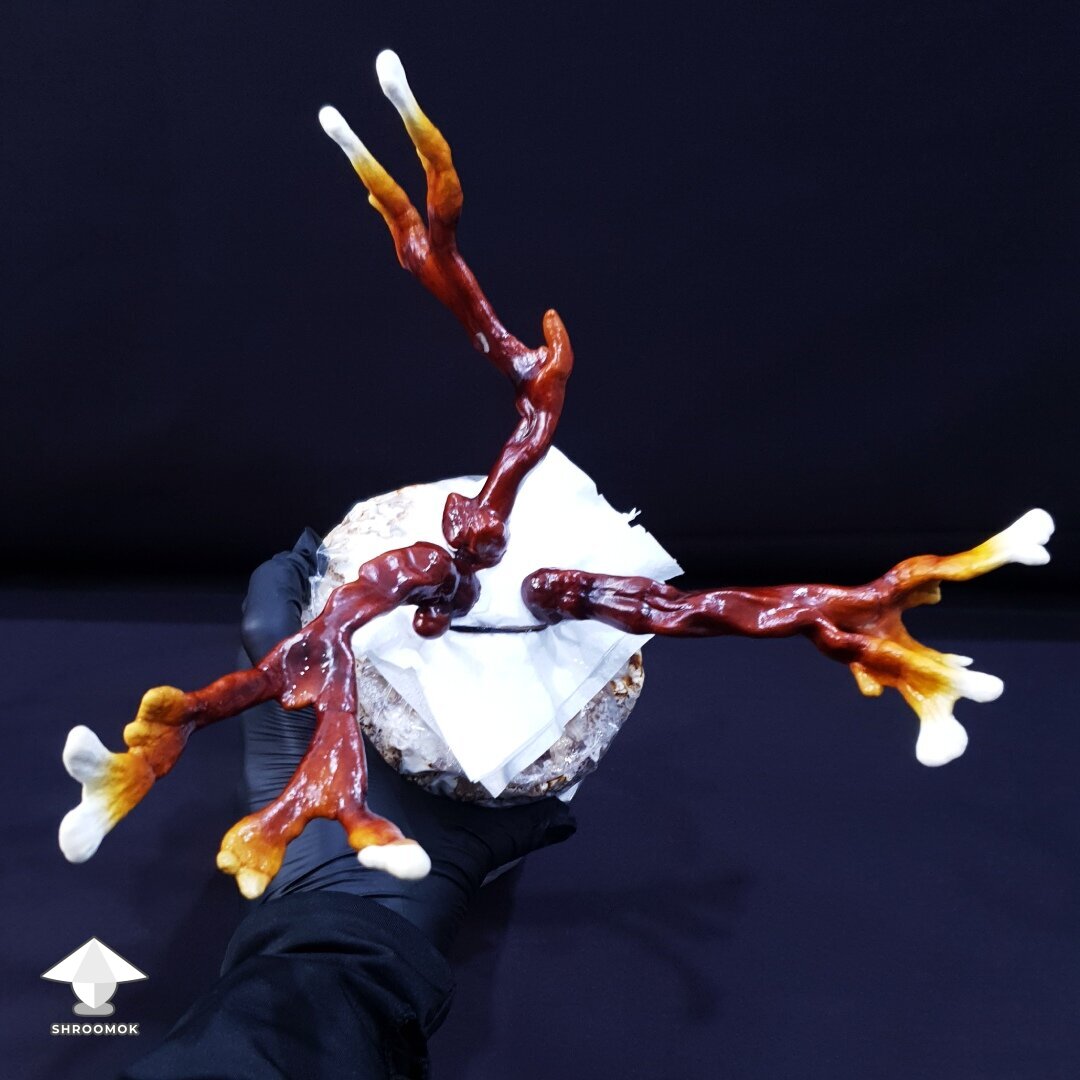
My reishi still had more growing to do. With time they could’ve developed more branches and size. I would’ve waited a few more days or maybe a couple of weeks. But unfortunately, I had to harvest earlier as I was leaving home. And I didn’t want to leave them unattended for too long.
Bag by bag, I carefully lifted the filter up and screw off all the Reishi antlers.


Sadly, this is the end of this grow… ALMOST! ;)


More photos in better quality are in attachments below ⬇️
Attachments
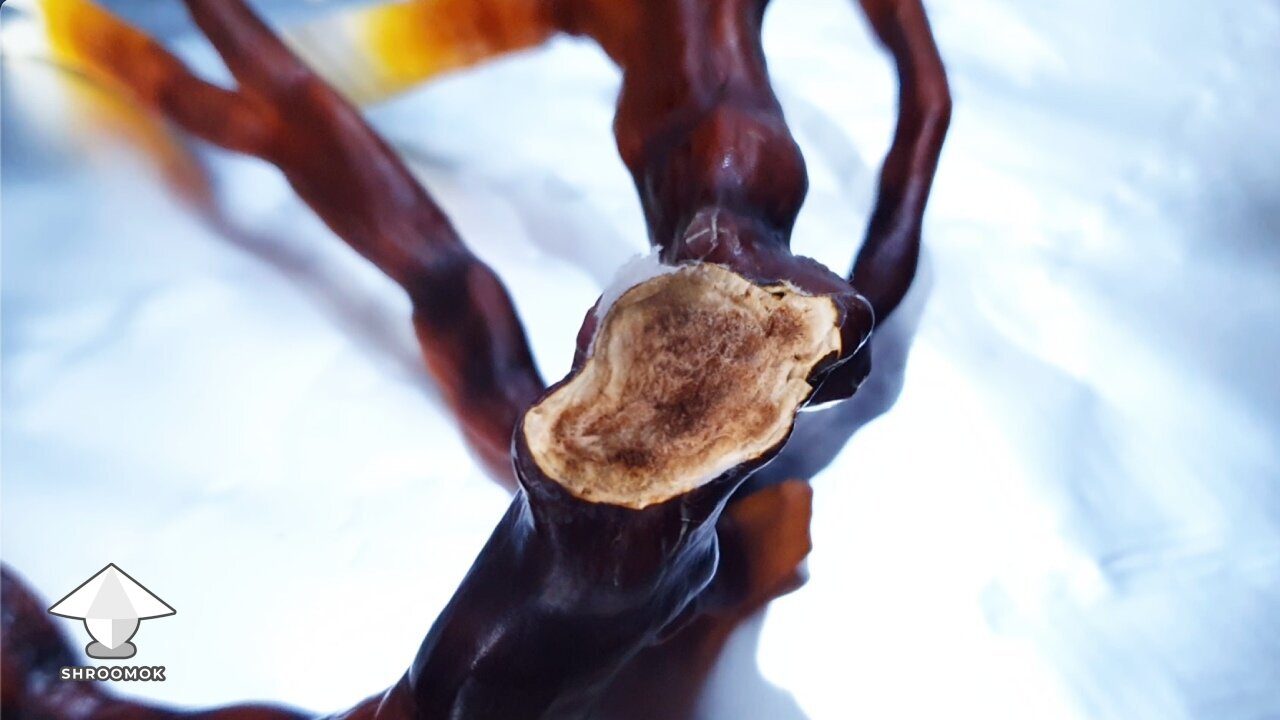
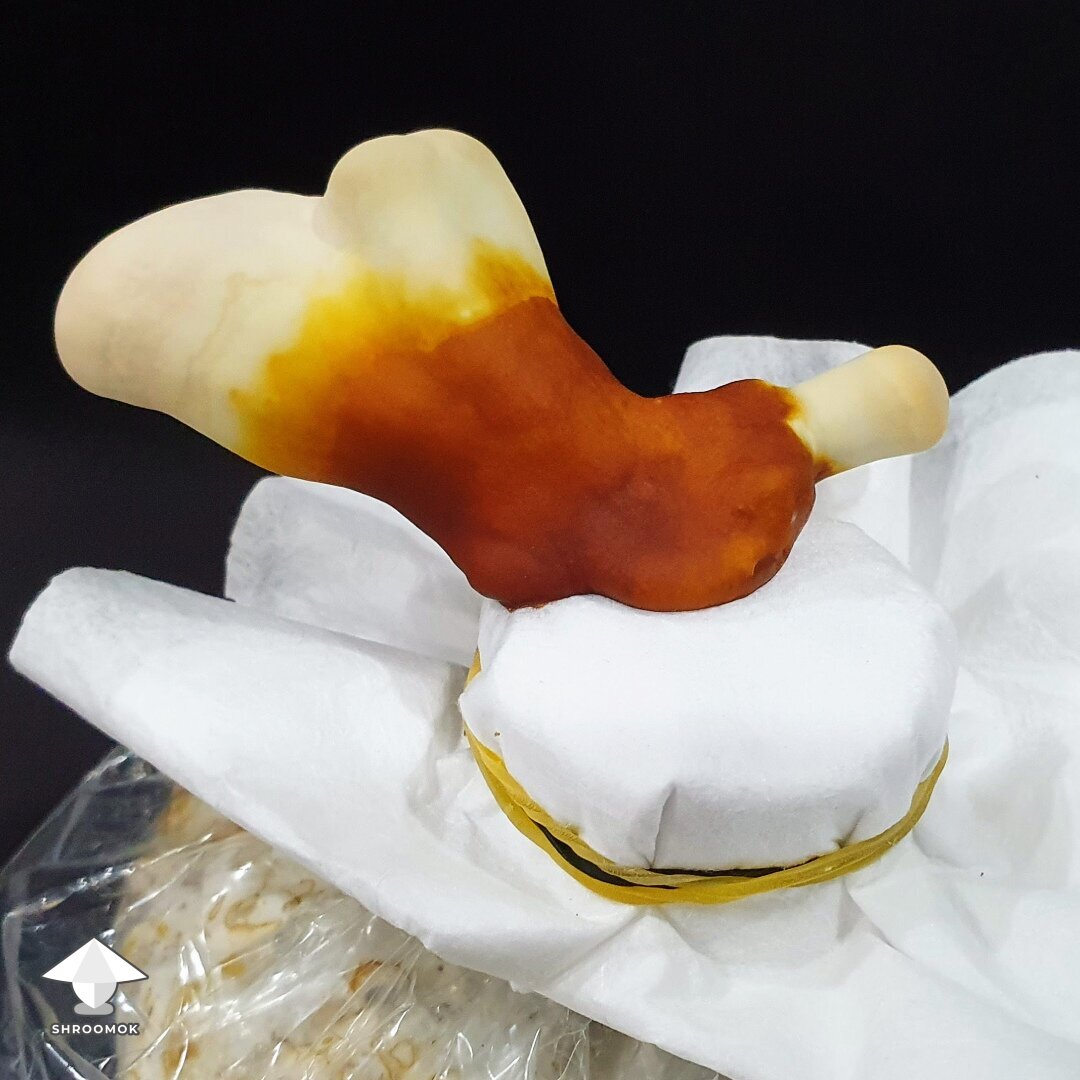
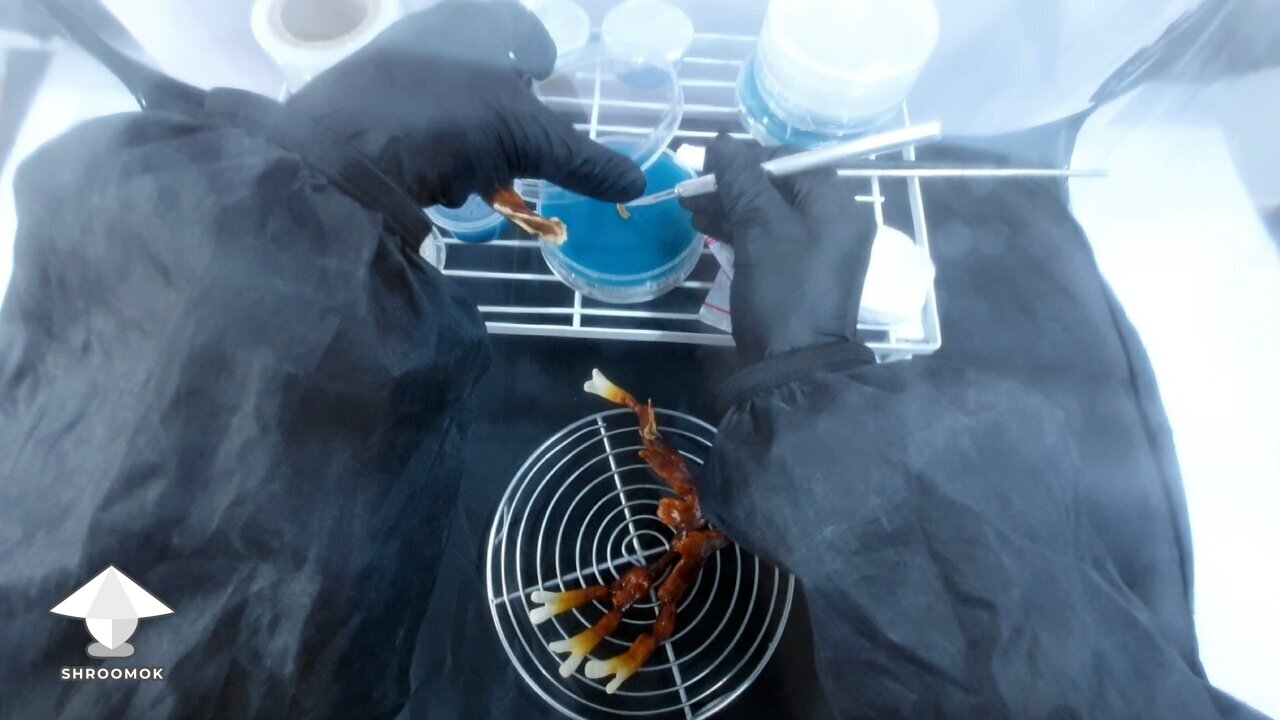
Day 90. Reishi Cloning on Agar
Same day actions - right after harvesting
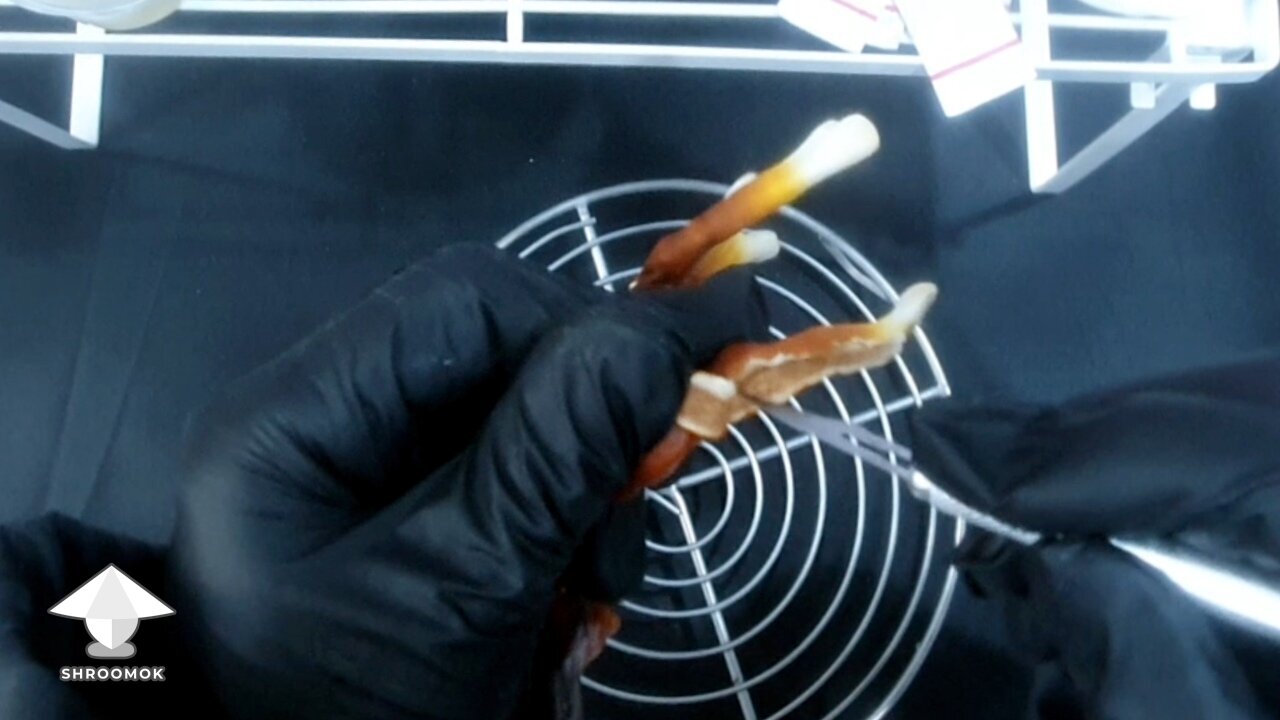
Just for fun, I decided to clone one of the fastest, strongest and the most beautiful Reishi fruits on agar.
Note: Cloning is not a necessary part of mushroom cultivation.
I prepared agar plates (potato dextrose yeast agar PDYA recipe) a few days before harvesting to be sure they are contam-free.
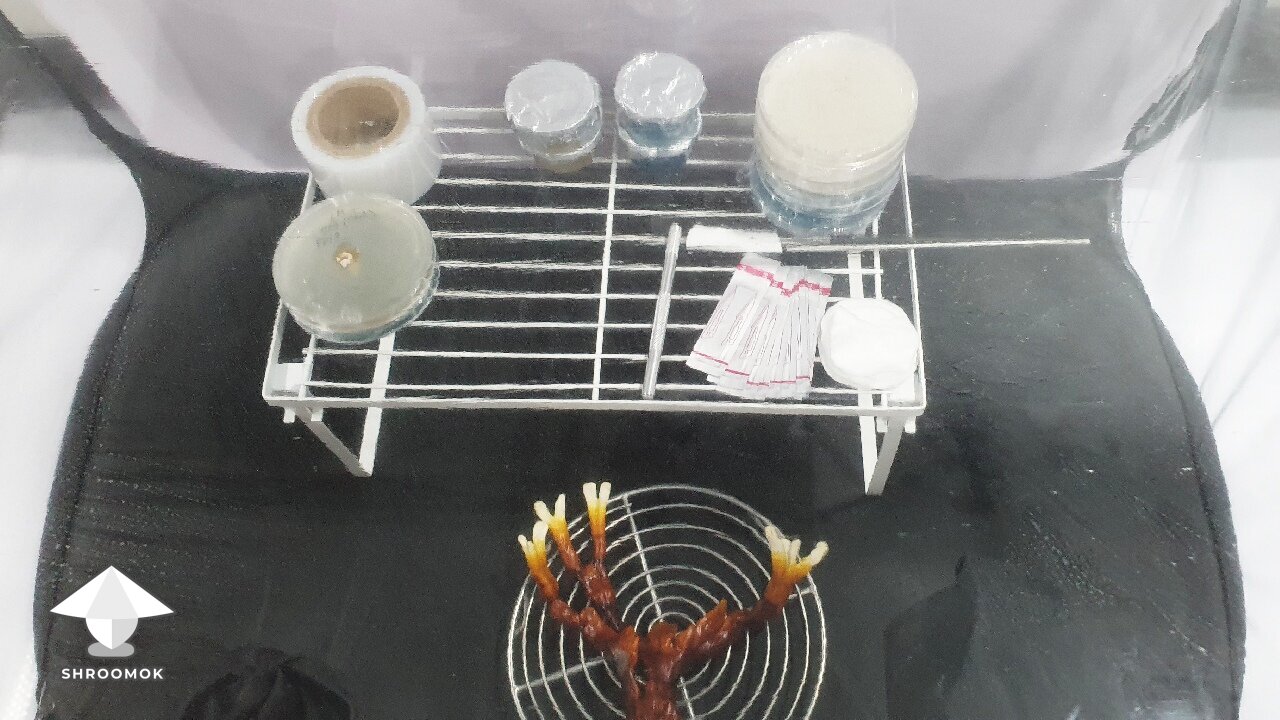
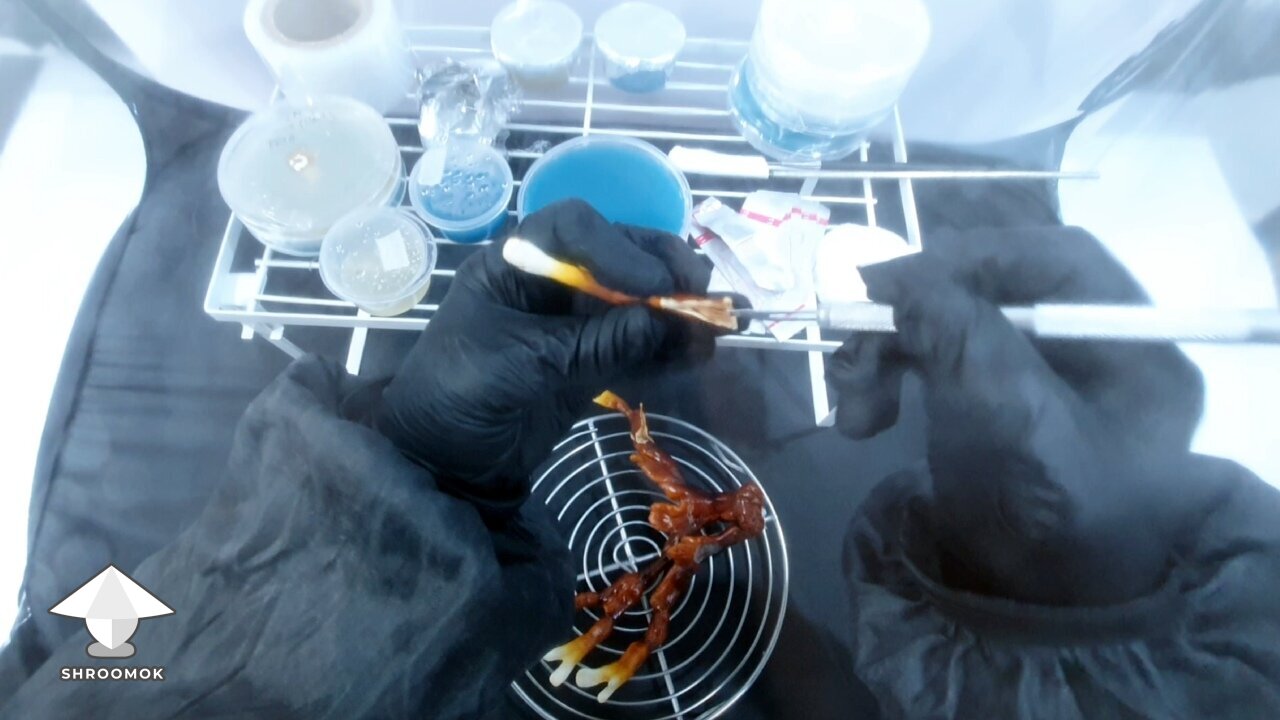
Then placed everything I need for cloning in Still Air Box (SAB): agar cups/petri dishes, scalpel with sterile blades, grafting tape (I use it instead of parafilm) and the mushroom itself.

To make cloning I tore mushroom apart and cut a piece of inner tissue using a disposable sterile scalpel blade.


Then place it onto agar surface.

And repeat these actions to make several plates.
The photos were taken through SAB, so they are a lil bit blurry:
Attachments
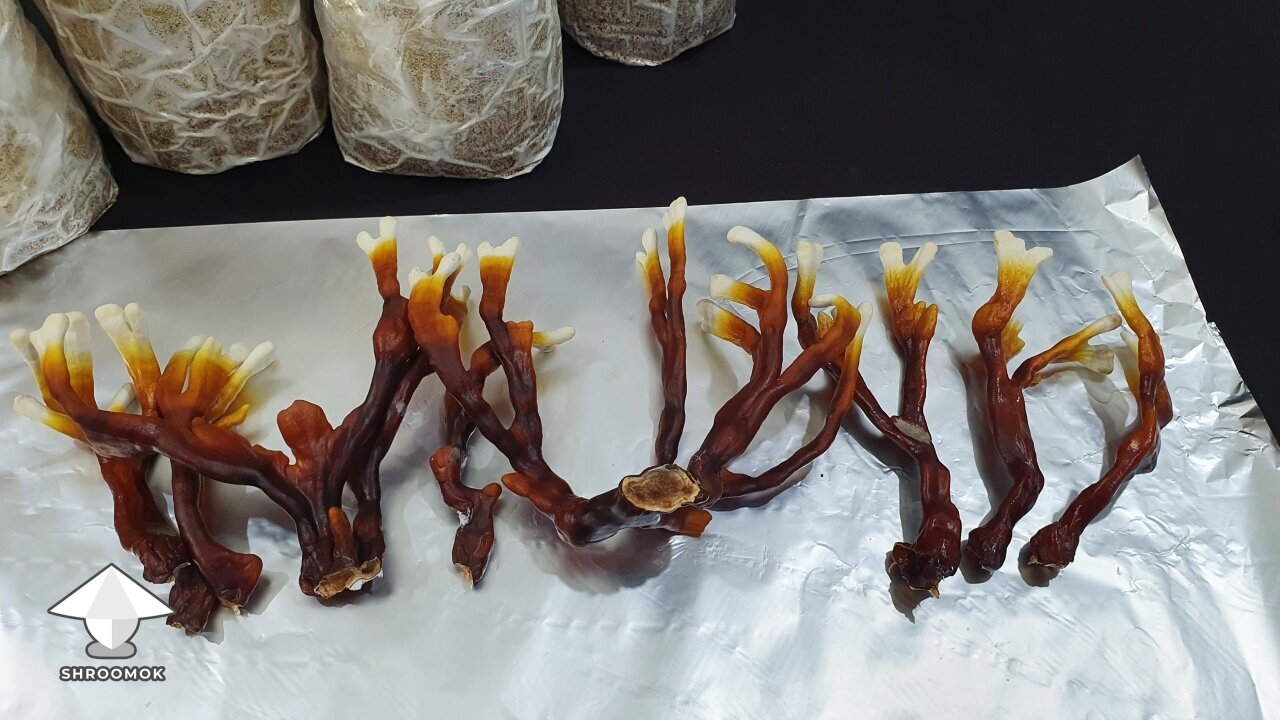
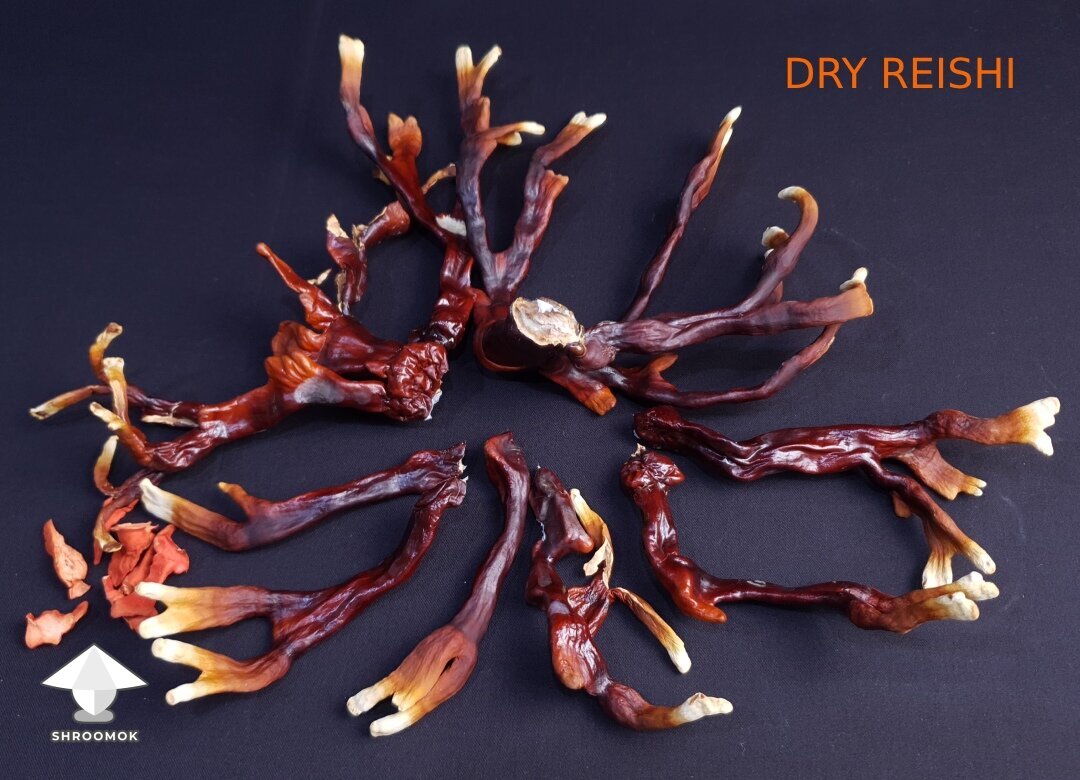
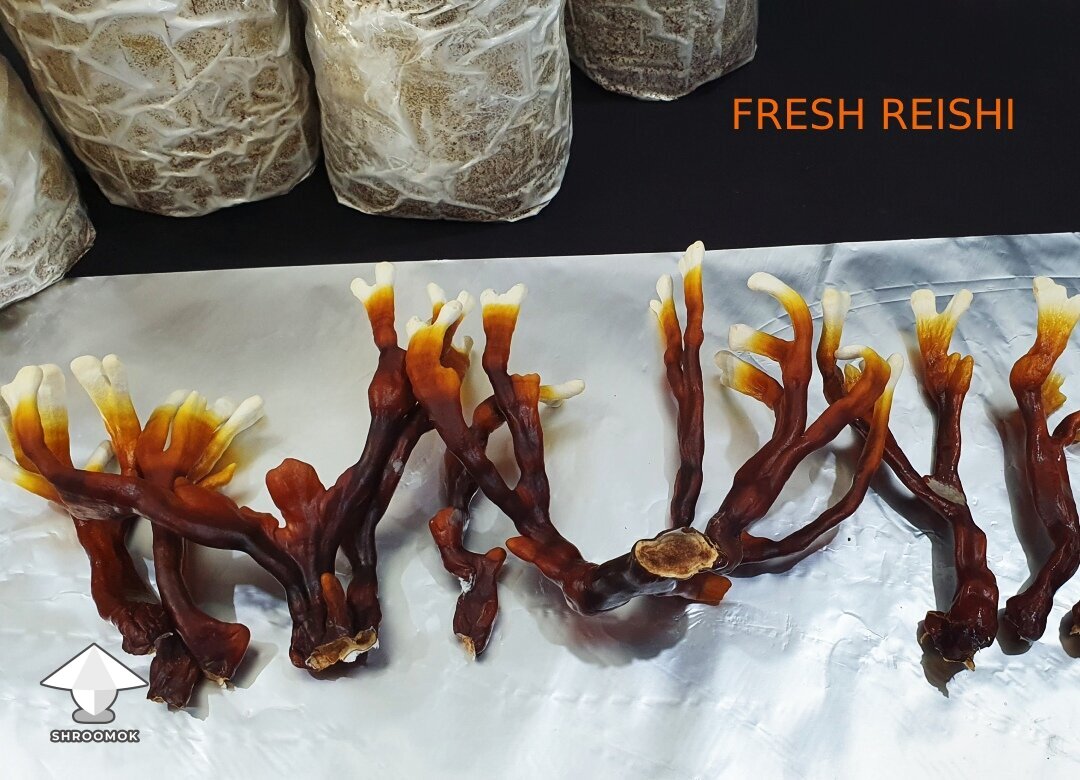
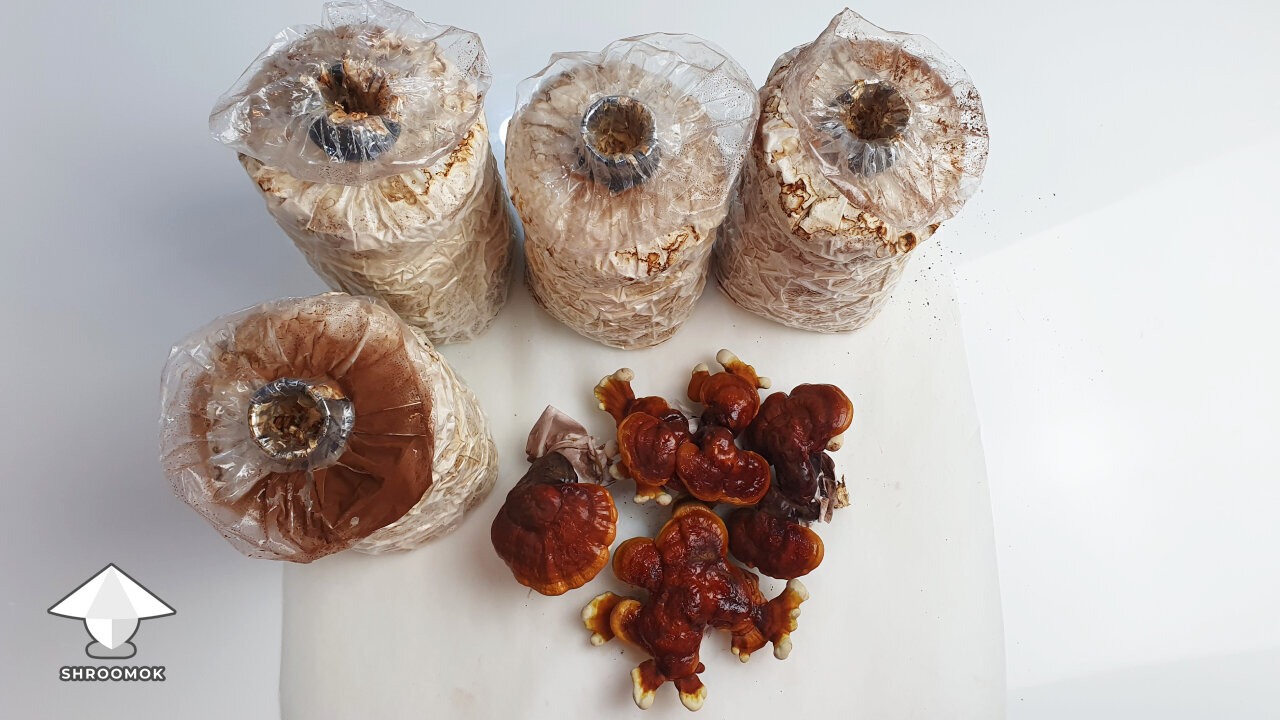
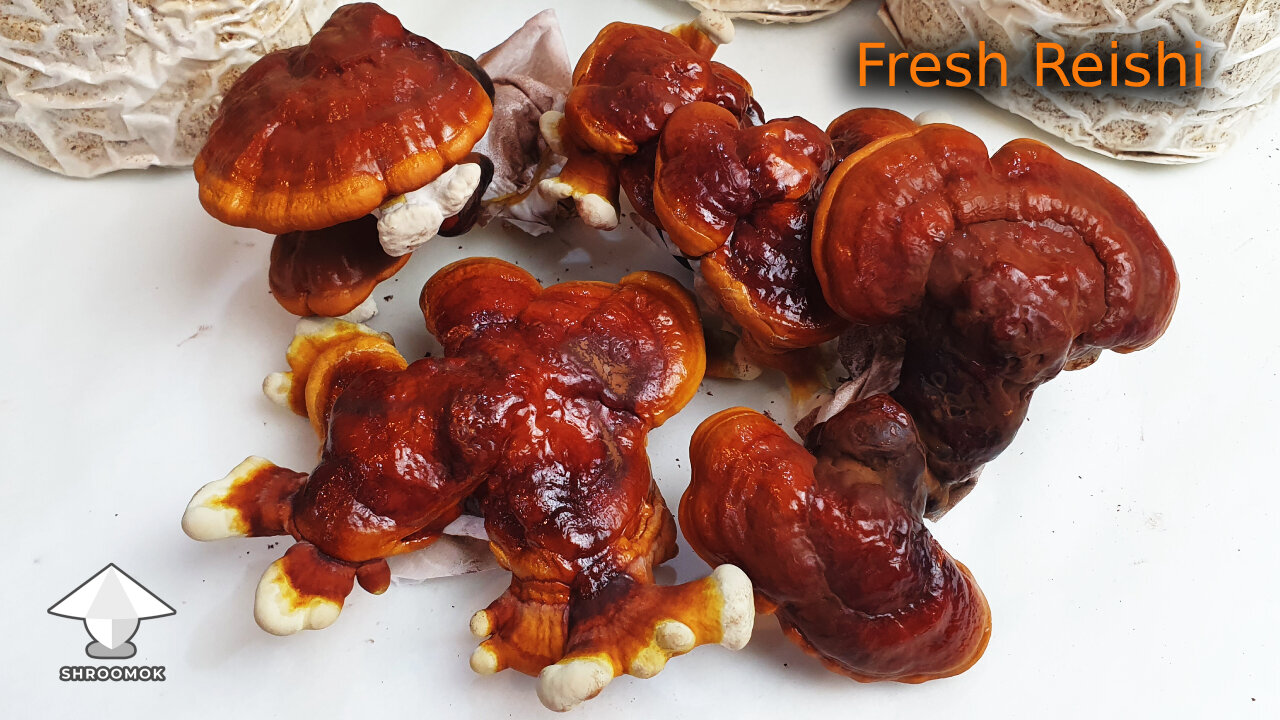
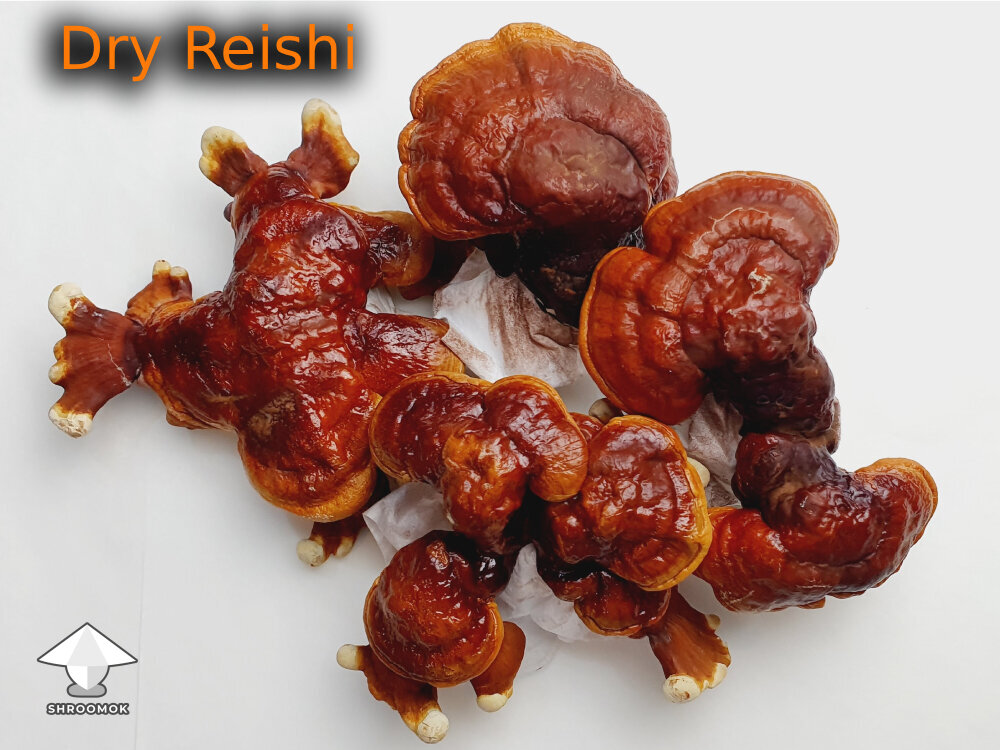
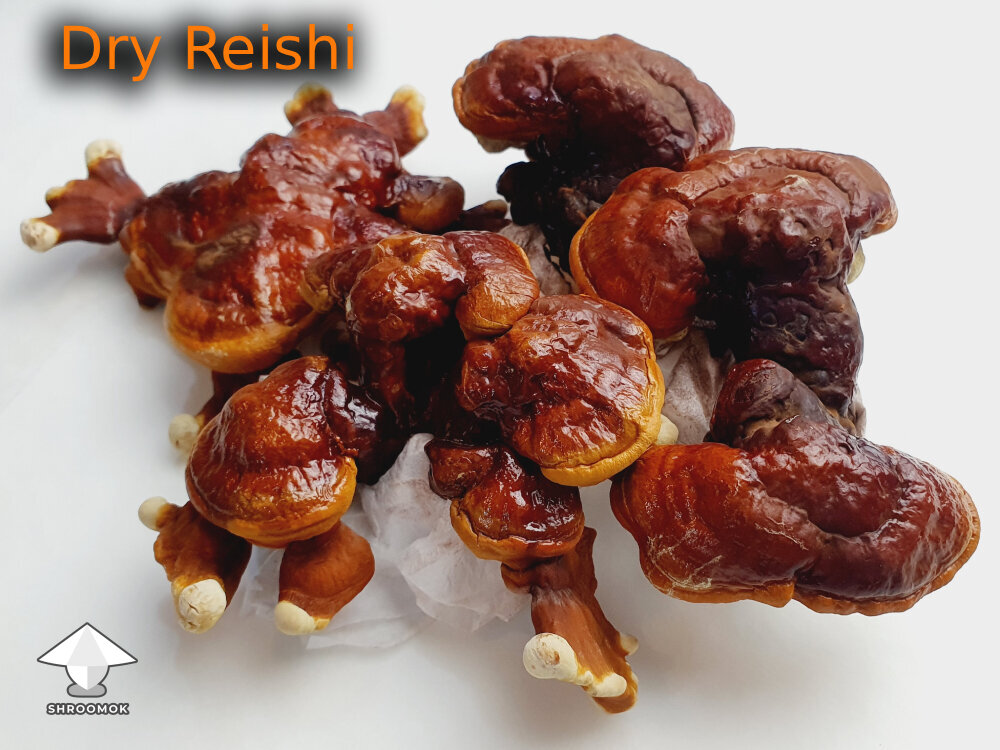
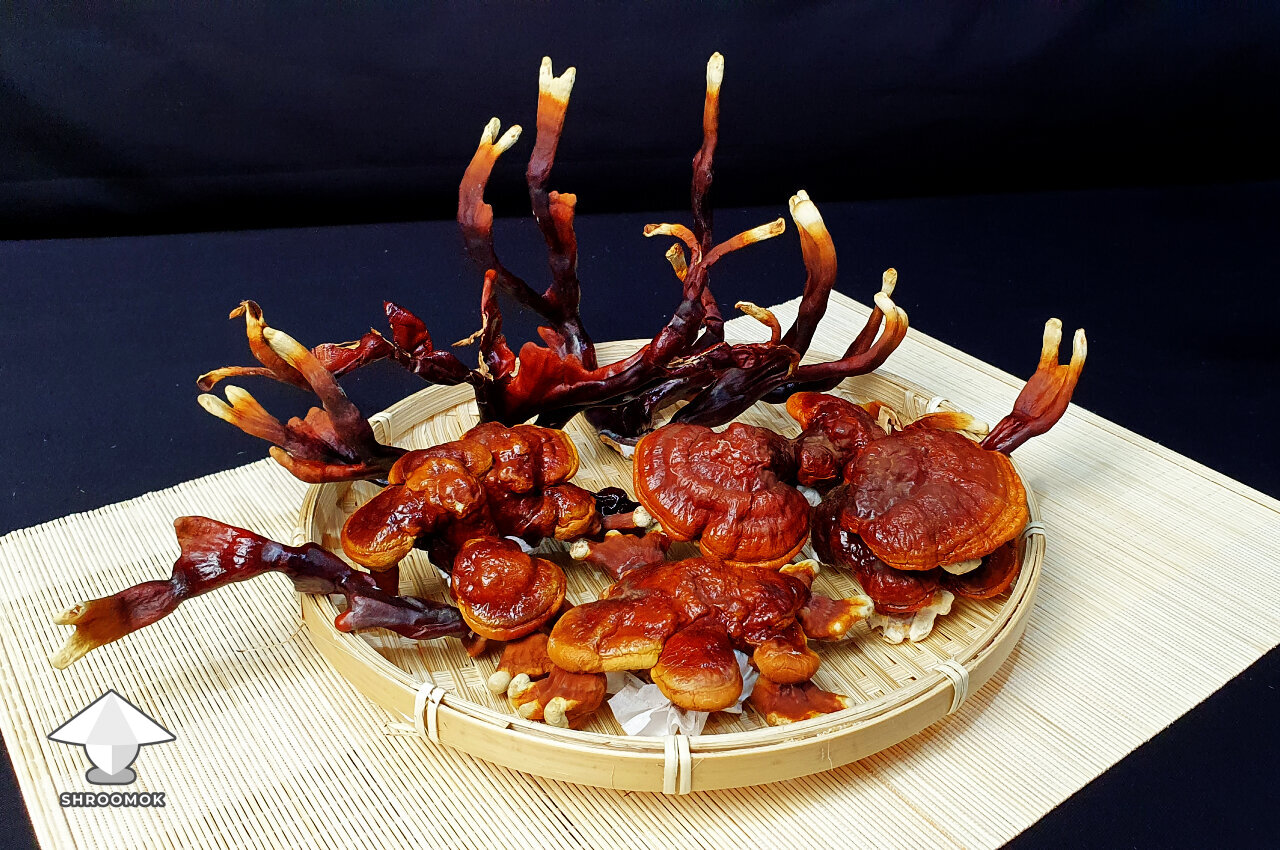
Day 90-91. First flush results and Drying Reishi mushrooms
The total weight of fresh Reishi mushrooms was 410 grams. Not too much for such bags, to be honest. But again, they were harvested much earlier.
I didn't use a dehydrator. Just left them to dry at room temperature. Within 24 hours, they became properly crusty and dry (my room humidity was lower than 50%). The final dry weight is 58 grams, meaning mushrooms contained about 14% solid mass and 86% water.
The cool thing is, the Reishi completely retained their color and shape. They still look alive! It’s really cool to see. This is how dry reishi fruits look like compared to fresh:


(Check out the photos in better quality in the attachments below!)
Attachments
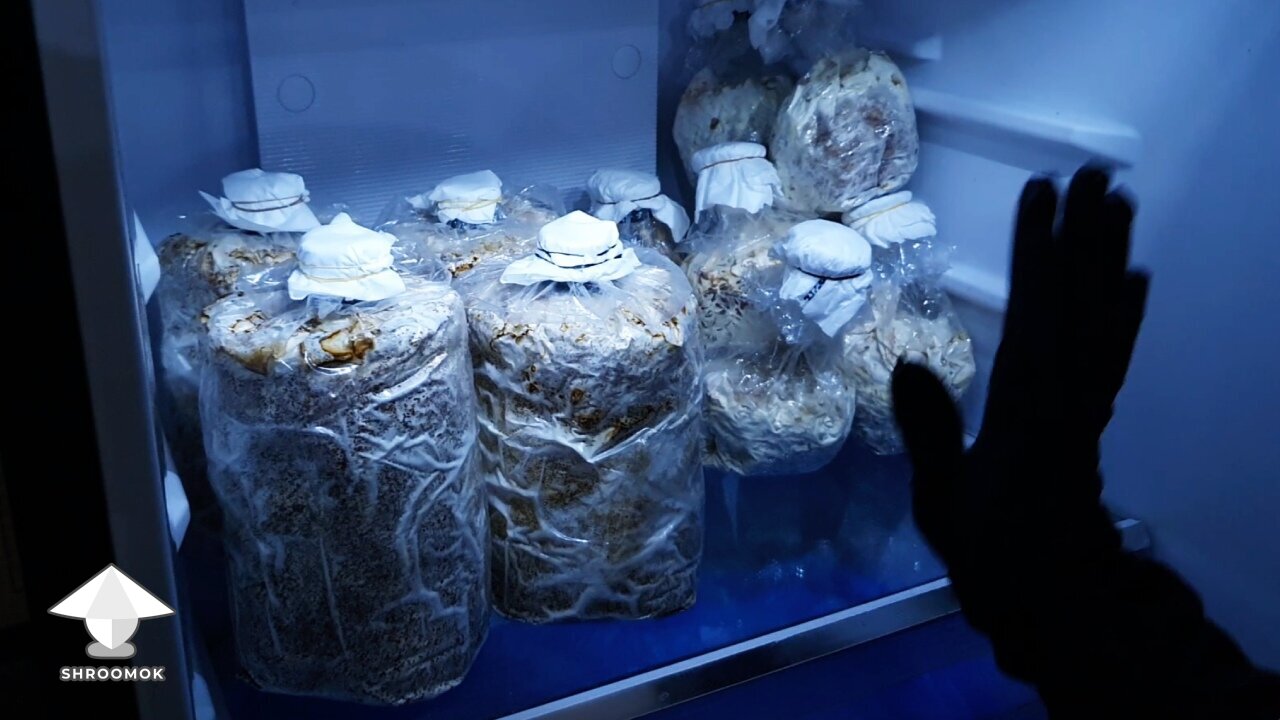
Day 90. Cold Storage for Reishi Fruiting Bags
What about the fruiting bags? What can I do next? Toss them? Or is there a way to save them and continue bearing reishi mushrooms?
After harvesting, I replaced all air filters on the bags and secured them with rubber bands.


I can't just toss my bags after the first flush and decided to give my reishi a cold vacation. I put all fruiting blocks in the fridge (temperature around 40°F or 5°C) to store them for the next few weeks.

This should slow down the mycelium, act as a cold shock, and (hopefully!) allow me to continue fruiting from the same bags later on.
Can they bounce back after a fridge nap? Will they fruit again?
We’ll see how this chill break experiment affects the Reishi ;)
Attachments
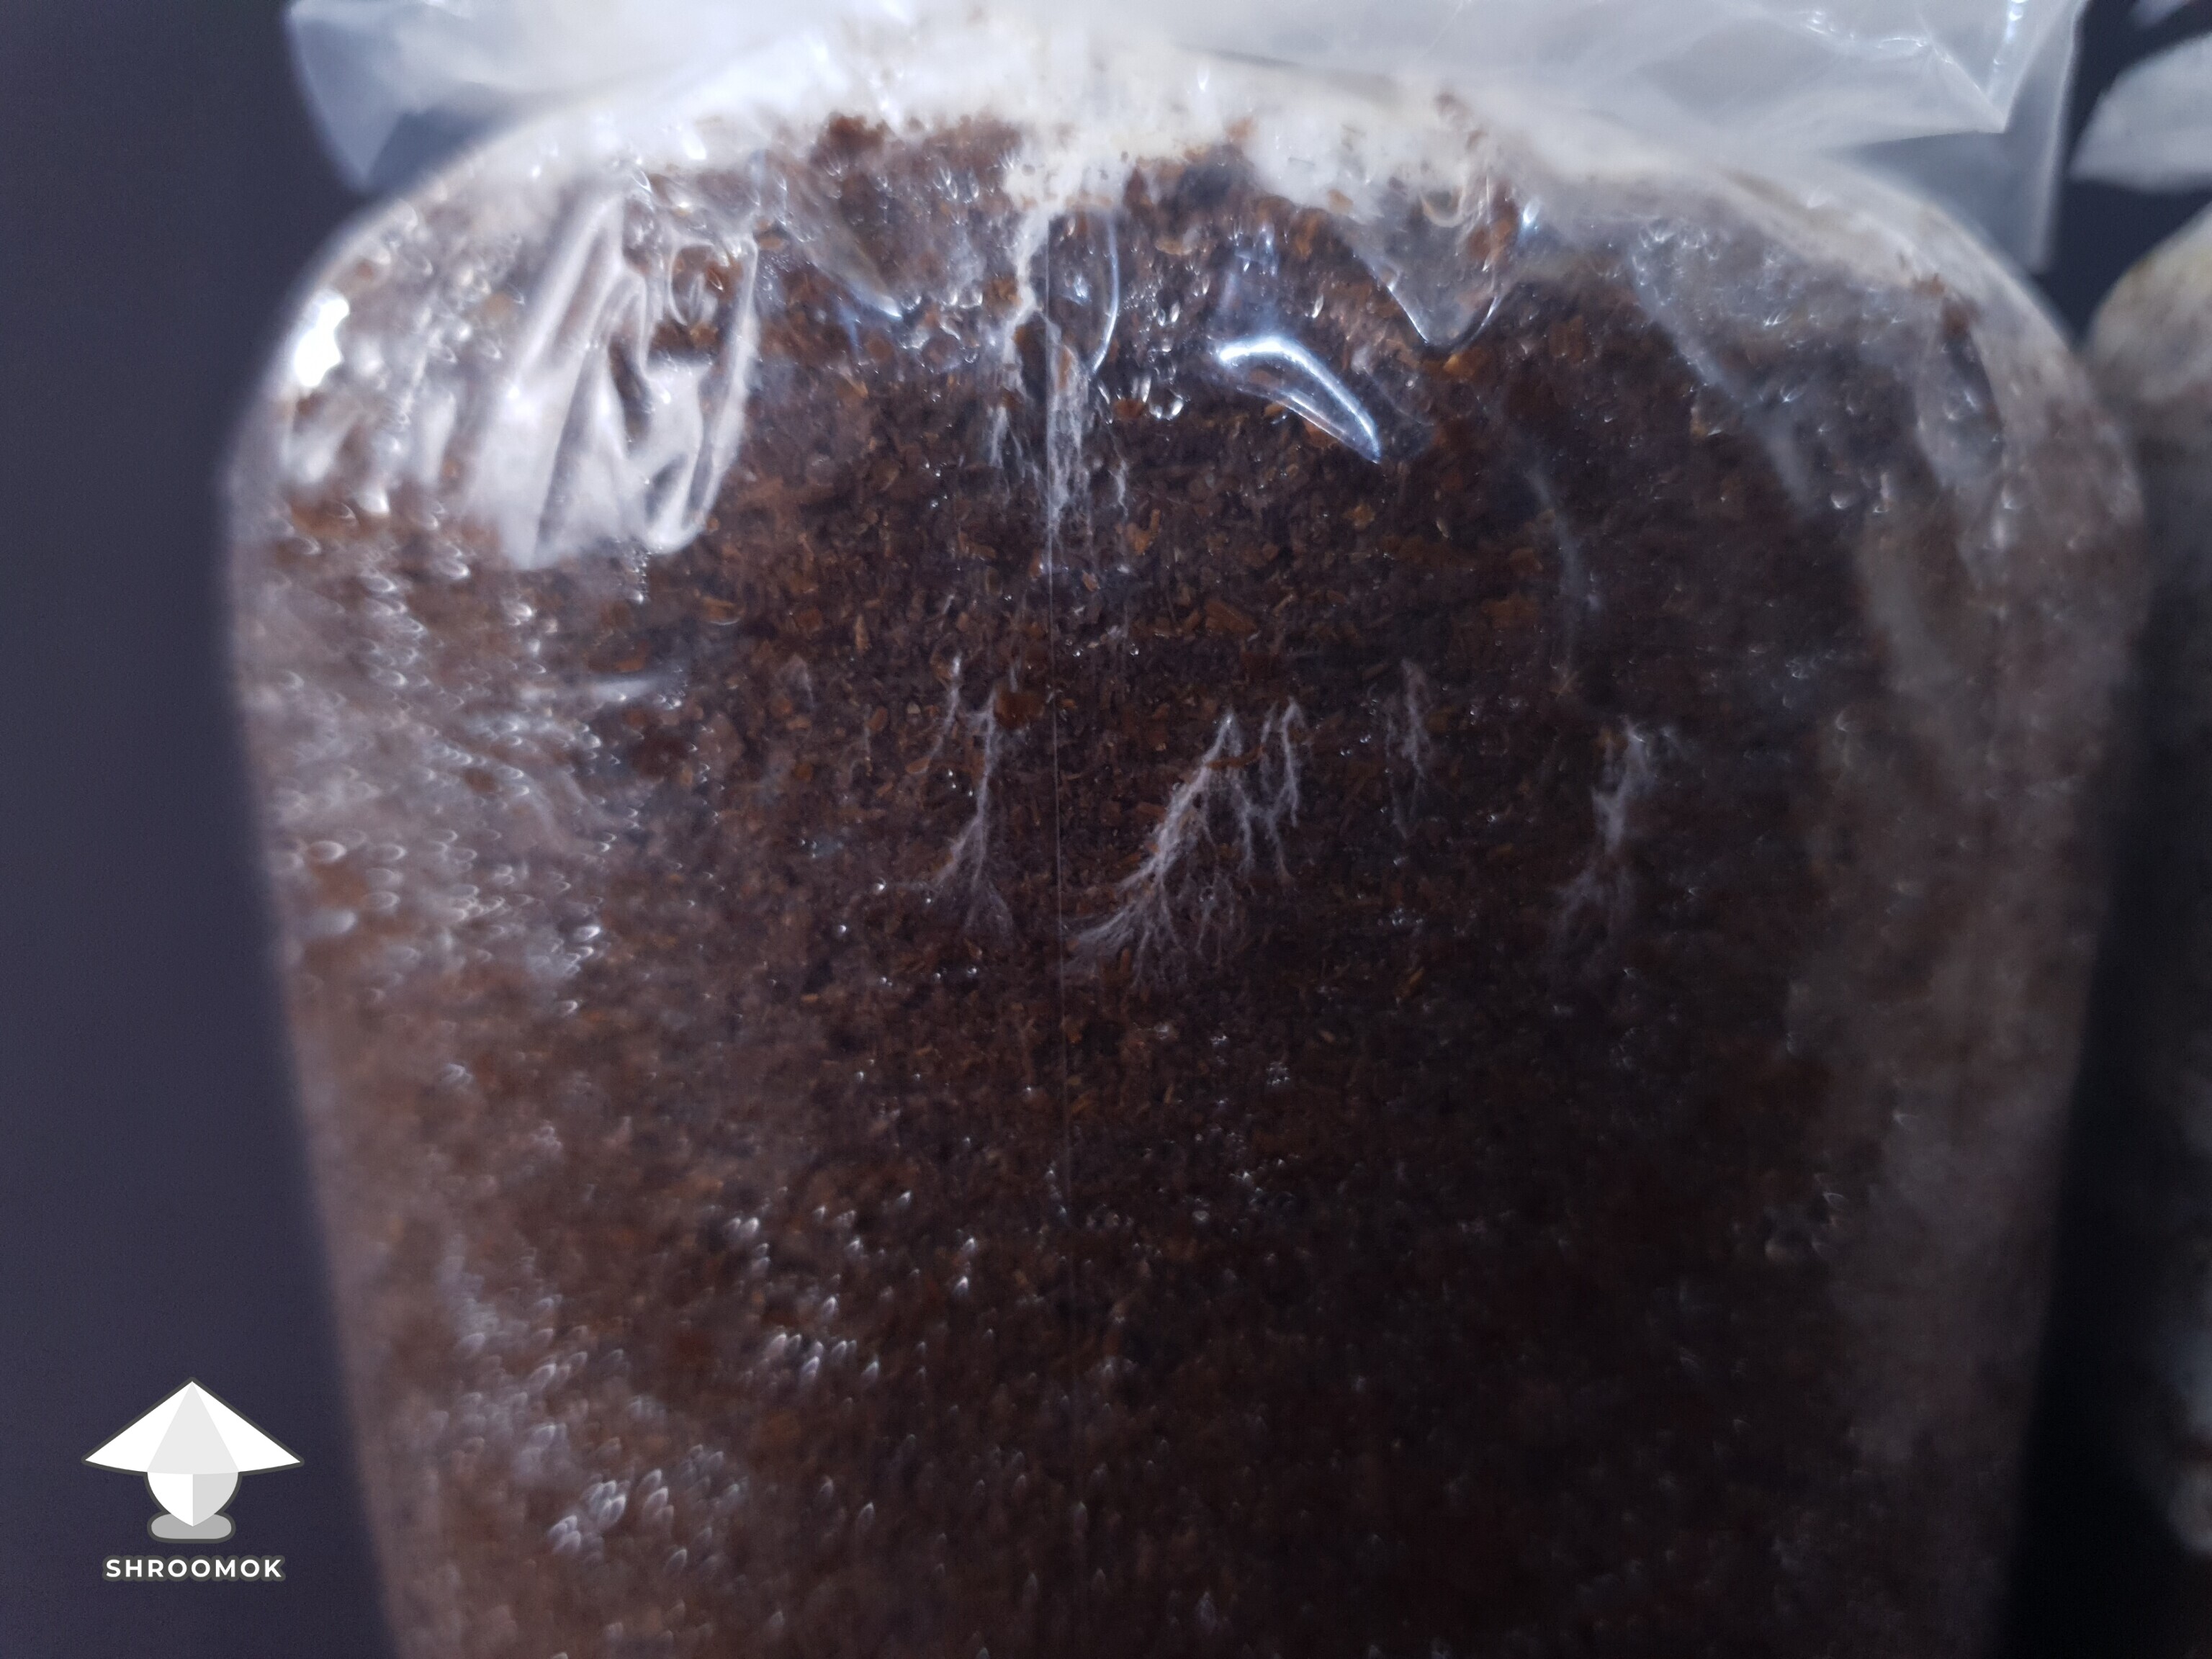
Day 120-122. Сold shock recovery
My Reishi fruiting bags spend 30 days in the refrigerator at 40°F (5°C). After the cold break, I took them out and placed on a shelf in a closet — a completely dark space with room temperatures ranging between 73–80°F (23–27°C).
By the next day (less than 12 hours later), I noticed fresh patches of mycelium starting to regrow.
Within just 2 days, new mycelium had already spread across the bags from all sides. The plastic, which had stuck to the substrate, was visibly pushed outward as the mycelium grew (see photo: old mycelium - brownish, new mycelium - fluffy snow-white).

(See the photo in better quality in the attachments below!)
Attachments
Day 130. Reishi Fruiting after Cold Storage
I literally left all the bags neglected for about a week. Reishi is slow-growing, after all.
When I opened the closet, I was surprised to see this!

All the bags were fruiting again! And once more, they were growing through the air filters.


Even more interesting! This happened without a grow tent and light, with desert-like humidity only 37% (with the required 80%).
And yet… in this dry, dark “desert,” they kept growing.

(See the photos in better quality in the attachments below!)
Attachments

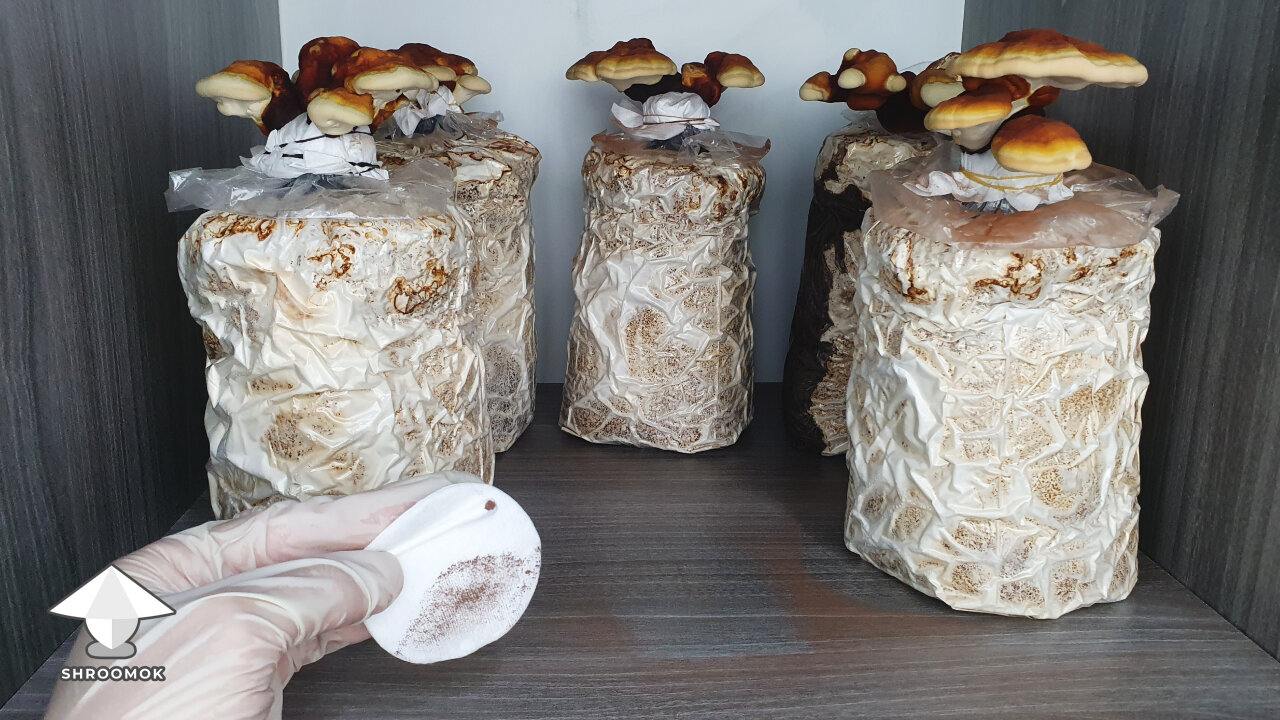
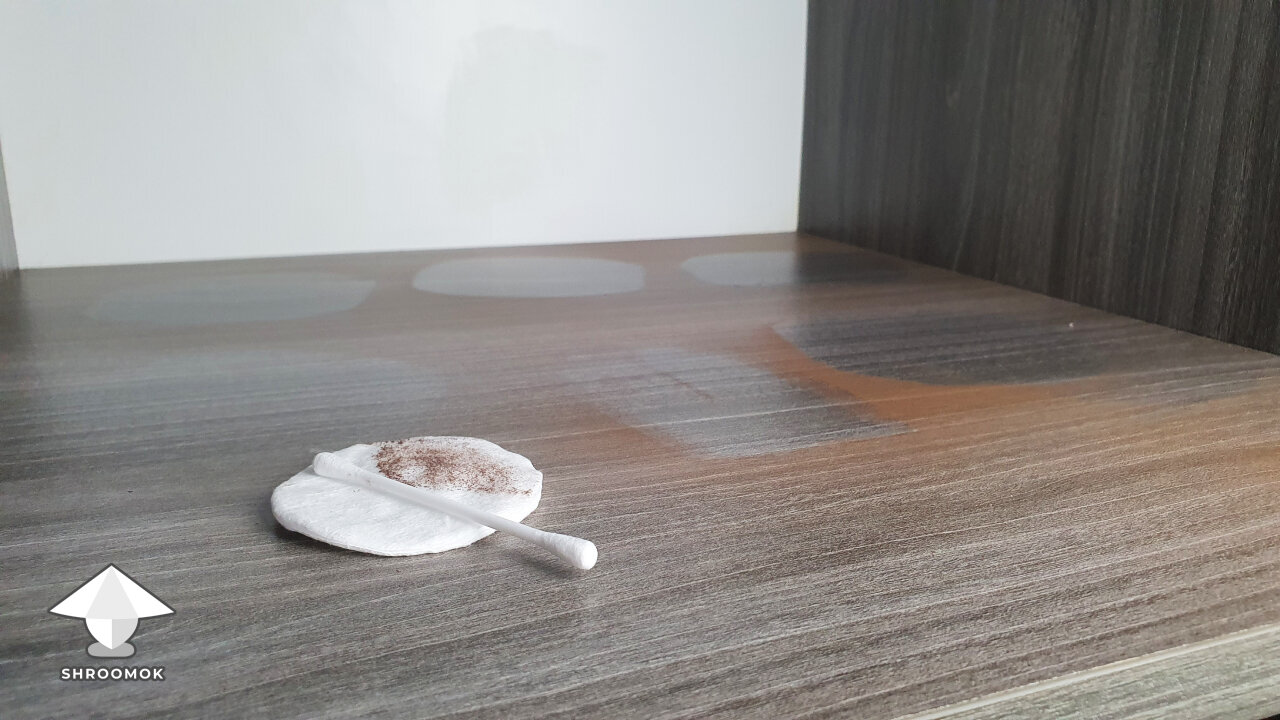
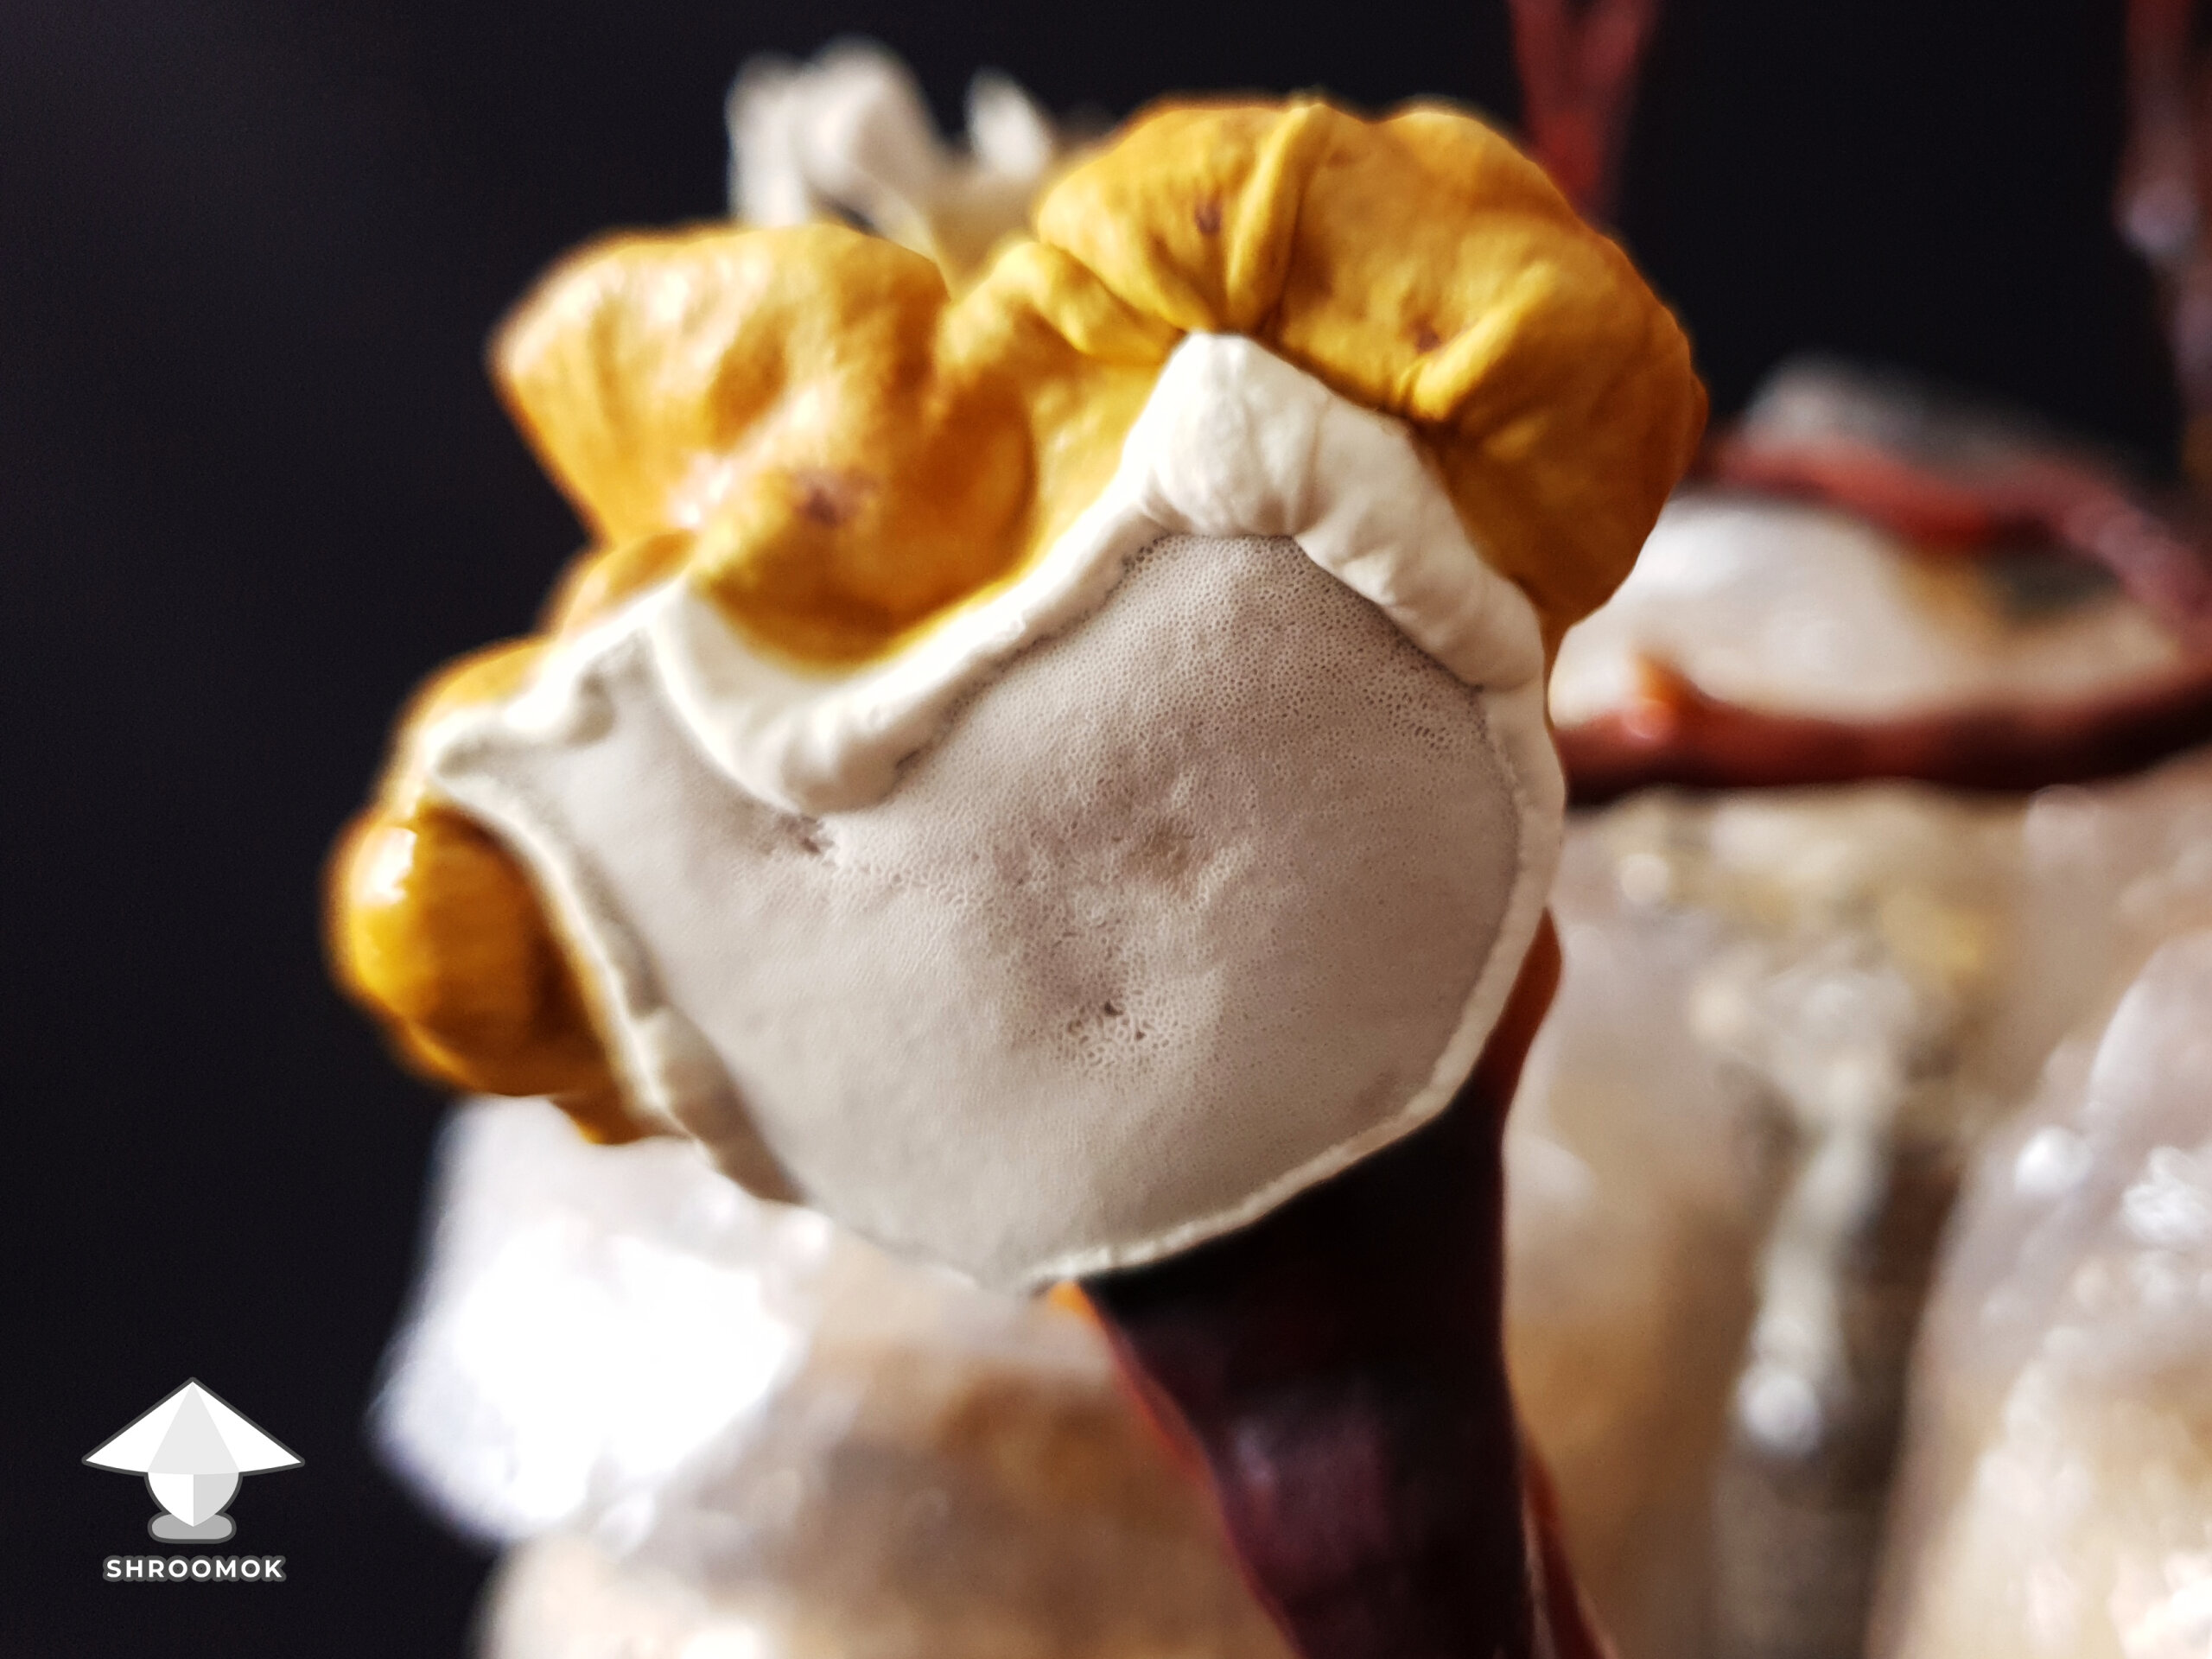
Day 130. Reishi sporulating — spores everywhere
Some of my Reishi mushrooms started releasing massive clouds of dark brown spores. They ended up everywhere! On the bags right under reishi caps:

around the bags on the shelf:


And of course in the air as I could feel them in my nose and my eyes!
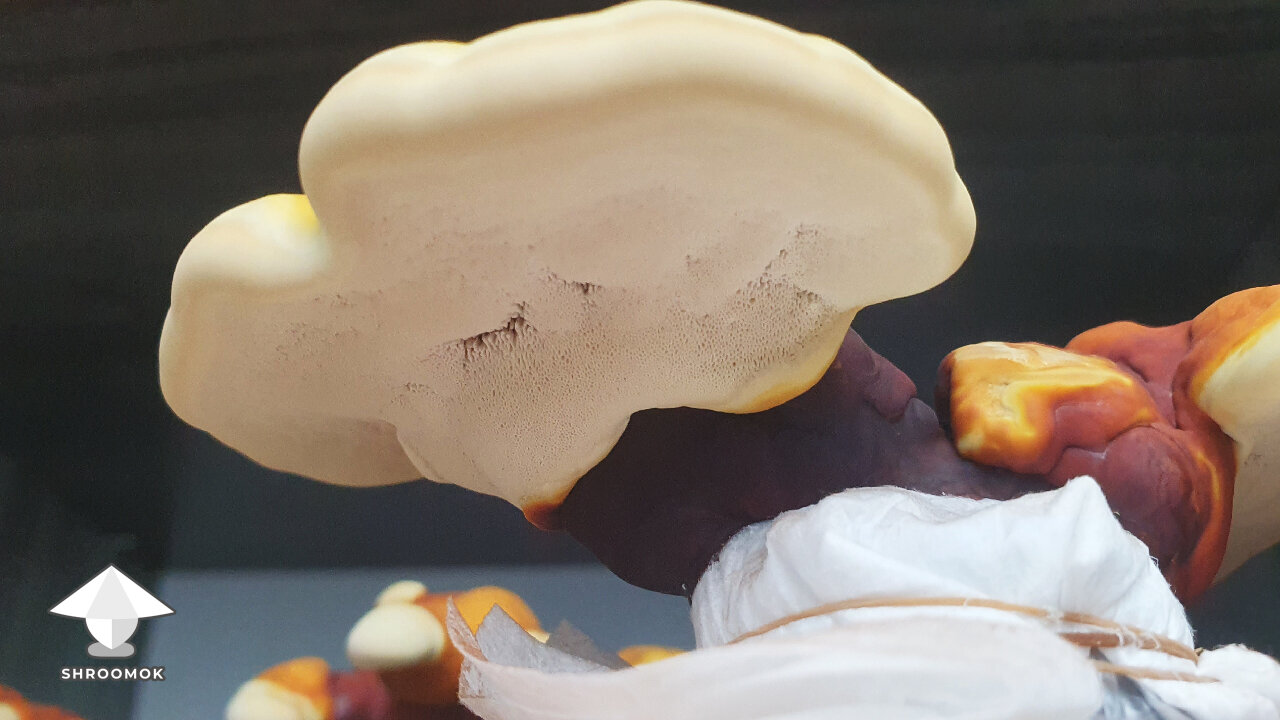
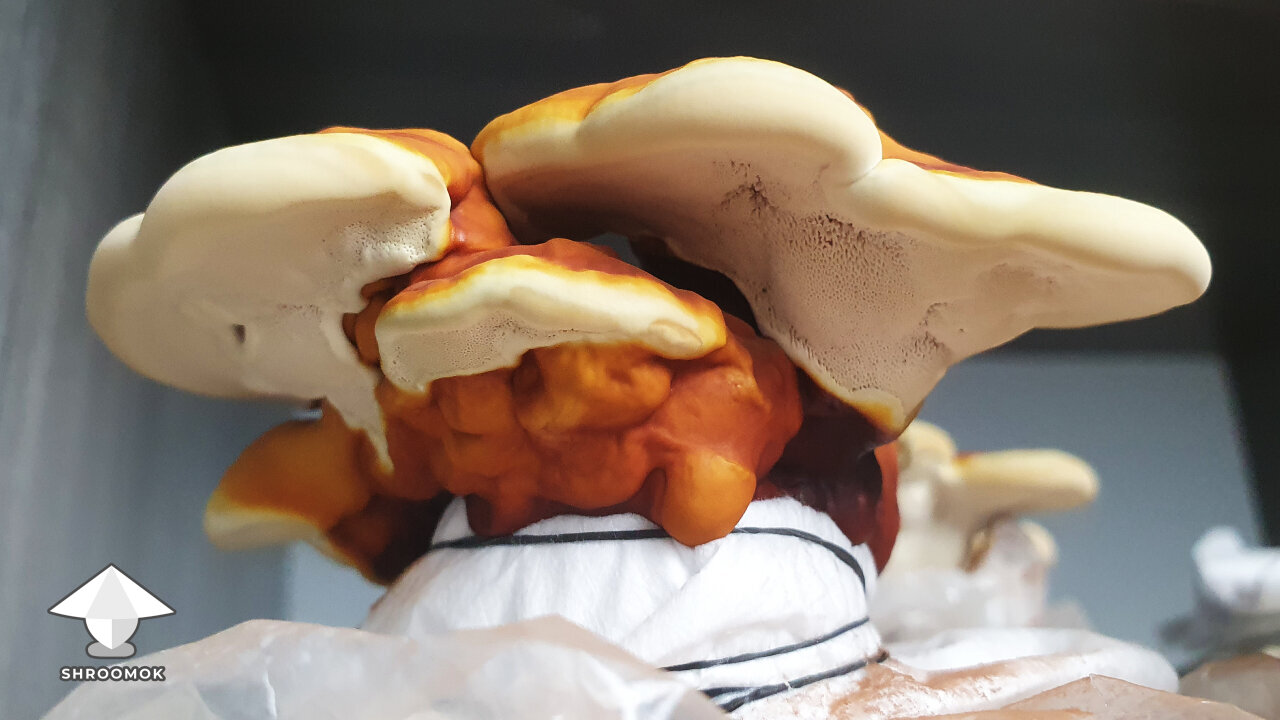
Reishi mushrooms don’t have gills. Instead, they’re polypores, which means they release spores through tiny pores located on the underside of their caps. These pores are barely visible, and young fruits usually appear white or creamy in color


Definitely, harsh conditions over the last 7 weeks (cold storage, temperature swings, low humidity) had a strong influence on their growth and appearance. These stress factors likely triggered early sporulation and affected the overall shape of mushrooms. Now they resemble Hemlock Reishi with their classic single, kidney-shaped brackets rather than the Antler Reishi form I had before on the first flush. But make no mistake, it’s still Antler Reishi!
(Check out the photos in better quality in the attachments below!)
Attachments
Day 135. Reishi second flush harvest
The next 5 days my reishi bags spent in a grow tent.


Mushrooms grew a little bit bigger and new branches formed - they have white-beige color


Some clusters look funny

However, I decided to harvest them all, since every bag had started sporulating extremely hard. You can see dark brown spores on bags.

To do this I just twisted off each mushroom cluster.


And that's it!

Second flush yield results
Final results of the 2nd flush:
Fresh weight: 163 g
Dry weight: 77 g. That means 2nd flush mushrooms contained about 47% solid mass and 53% water.
Although the 2nd flush produced less fresh mushrooms, the dry weight turned out to be higher.
For comparison, 1st flush results: Fresh weight - 410 g, Dry weight - 58 g (14% solid mass, 86% water)
Here are dried Reishi mushrooms from the 2nd flush. They look just like fresh ones! A few photos to compare fresh mushrooms right after harvesting and dried reishi:


(Check out photos in a better quality below in attachments)
Attachments

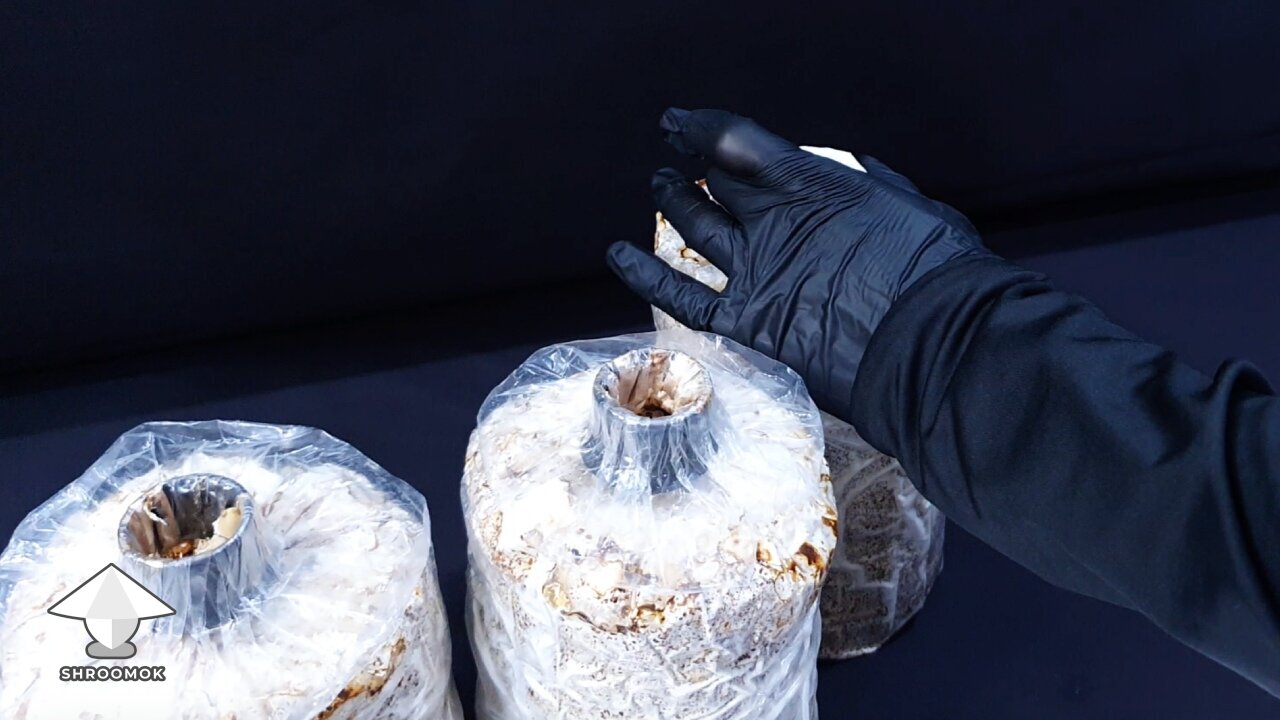
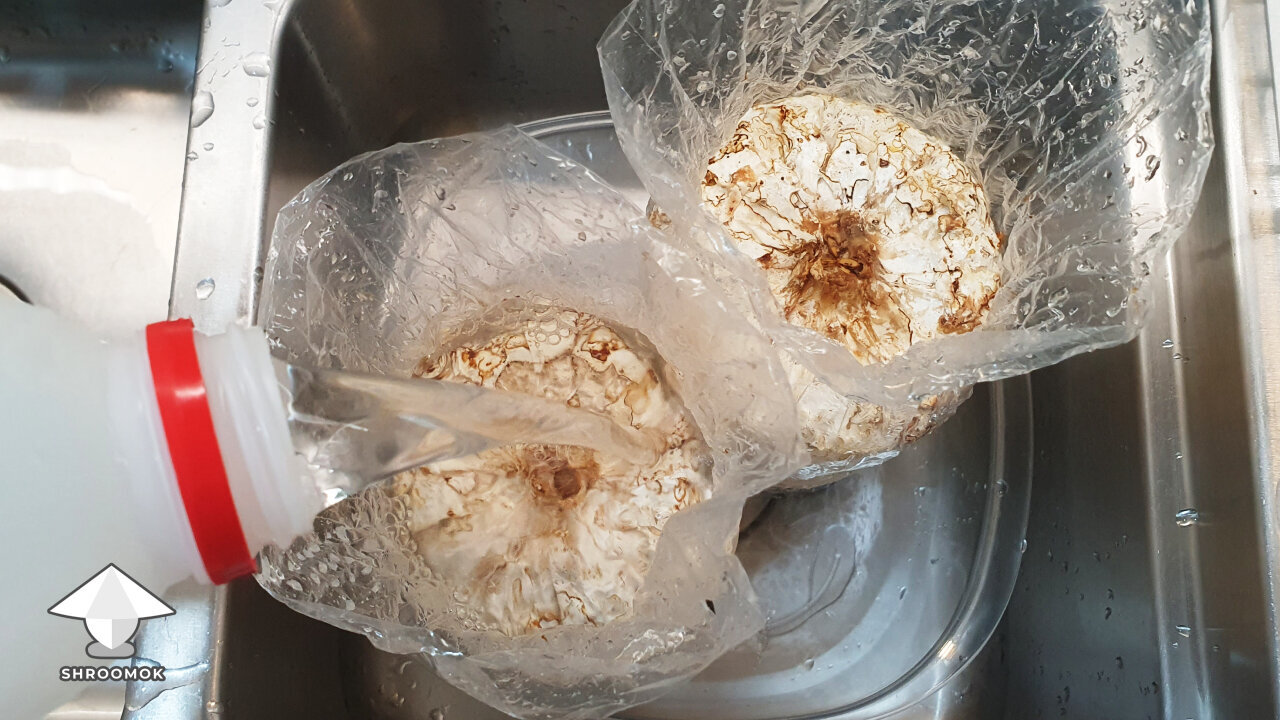
Day 135. Soaking Reishi fruiting bags in water
After several months of growing, the substrate had lost a lot of moisture, and the bags felt lightweight. Right after harvesting, I decided to treat my Reishi to a heavy healing rain. Just like we often do with magic mushroom cakes. By soaking each bag in water.
I poured in filtered freezing cold water (I literally chill it in the freezer) right into the bags, one by one. Let them soak for about 40 minutes.

After soaking, I poured out water and put all the blocks into the grow tent. Now all the bags are opened (without filters) and they have frequent ventilation and proper humidity (~80%) to support the next flush... hopefully :)
Note: Now I use humidifier and ventilation setup twice a day for 30 mins and it's enough.

Attachments
Day 138. Reishi bags recharged after rehydration
Looks like all the bags perked up again! Check out the difference.
Right after rehydration:
3 days after rehydration - fresh, snow-white mycelium has started growing back across the substrate:

Tip: I used rubber bands here to prevent side pins and accumulate all mycelium energy for pinning on the top.

It’s incredible how new life popping up in these old bags. Could this be the start of a third flush? We'll see!
Attachments
Day 145. Reishi pinning again and 3rd flush begins
10 days after rehydration. The mycelium in all bags has turned yellow-brownish-woody, which is fine for Reishi at this stage.

New pins have started to pop up in each bag!
In fact, I noticed the first signs of blob-like primordia about 5 days after soaking the bags.
The photos below show the progress on Day 10 after soaking.
Bag 1


Bag 2

Bag 3

Bag 4

Tip: I put the bags on their sides, because after using the humidifier water collect at the bottom of the bags.

We’ll see what changes over the next few days
Attachments

Day 149. Reishi third flush progress
4 days have passed since the last update — that’s 14 days after soaking bags in water. Some progress is visible!

Bag 1

Bag 2

Bag 3

Bag 4

All bags

Attachments
Day 150. Reishi Cold storage for the second time
I had to break this third flush of fruiting and leave all the bags for a few weeks. Yes, it's cold storage again!
I put reishi bags with already formed pins in the fridge and left them… for 6 weeks!

Attachments

This is what they looked like when I came back after a long journey.


I don’t expect these fruits to grow after this brutal cold storage run (I put them in a grow tent though). It actually doesn’t matter since new fresh bags are coming soon.
Attachments


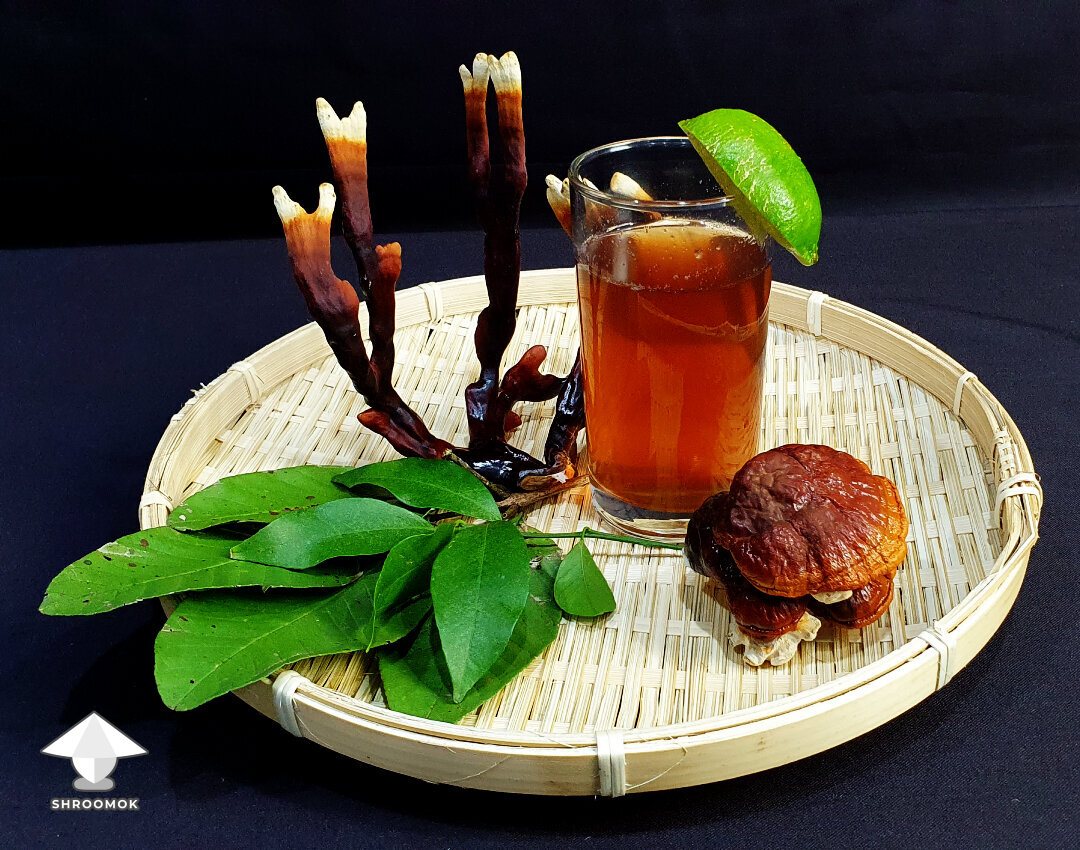
Bottom line and final thoughts
It’s time for a sip of reishi tea and let’s get to the conclusions.

Was it easy to grow Antler Reishi?
Yes, Reishi is one of the easiest in my experience. I’d suggest to grow them to anybody who wants to change perspective a bit and try a new type of mushrooms (other than active ones) And here is why!
Are there any differences in the cultivation process?
Basically, principles are the same as for almost any species. The colonization part is completely the same as for Cubensis – grain, jars/bags preparation, sterilization, inoculation, grain spawn colonization.
But Spawn to Bulk and fruiting period have some differences. This part is similar to Lion’s Mane, Shiitake, or Oysters. As a wood-loving species, Reishi requires a fruiting substrate based on hardwood sawdust and bran. And they need a stump-like block rather than a flat cake.
So, you can begin with the part you’ve already familiar with (I assume you have experience with Cubes). Then you need to learn about new substrate and making fruiting blocks. If you have ever cultivated edibles, then Reishi will be an easy run for you.
How fast do Reishi grow?
Reishi are rapid colonizers. It takes 2-3 weeks for grain colonization. But they are super slow at the fruiting stage. It takes a week to see small changes in mushrooms, while Oysters or Cubensis show the progress within a few hours. Overall you need approximately 9-13 weeks to get the first harvest:
2-3 weeks for grain colonization
2-3 weeks for bulk colonization
5-7 weeks for pinning and fruiting
Are Reishi prone to contamination?
Reishi are extremely strong and resistant to contaminants. Thanks to their aggressive mycelium. I had so many cases where reishi mycelium created a circle around a contaminated area, sealed it and literally ate it with time. This never happened to my Lion’s Mane though.
So, don’t hurry up to get rid of a bag with a small contaminated patch, especially inside the bag (not on the top).
Do Reishi need any special equipment for the fruiting period?
What a great benefit of growing reishi! They don't need any special equipment or GrowTent. They are highly tolerant to CO2 and low humidity. Reishi are able to fruit in a plastic box or even without it at all.
That’s it! Now you know enough to go on with.
Attachments
Afterwords
Honestly, I’m glad to have Ganoderma in my cultivation portfolio.

I’m happy that the whole process was logged by me – I tried to put as many details as possible, not just for my own memories but for everybody for whom this info could be useful. I hope you can grasp something from my journal and apply it to your hobby-home-growing.
Also, this diary was created via forum functionality which is new and still rusty but I work on it.
If you have any questions or want to share your thoughts, don’t hesitate to drop a comment below. Just say something - push some buttons and click "post" :)
Attachments
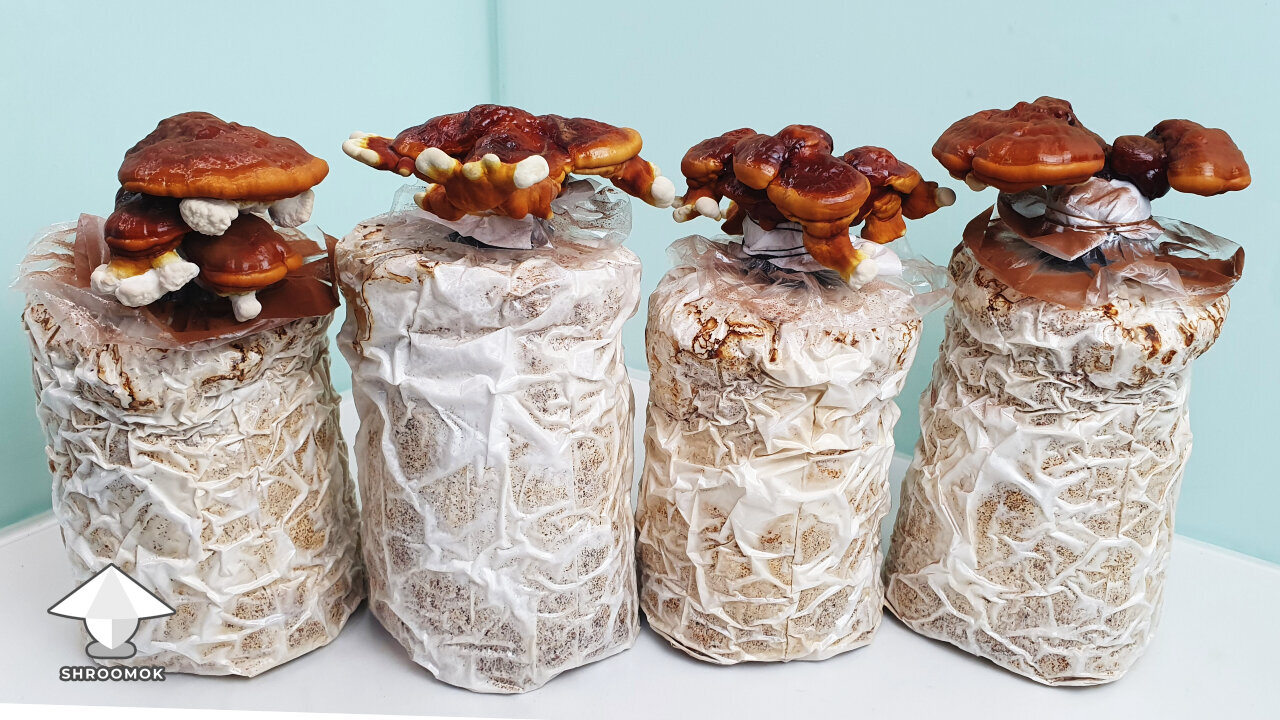
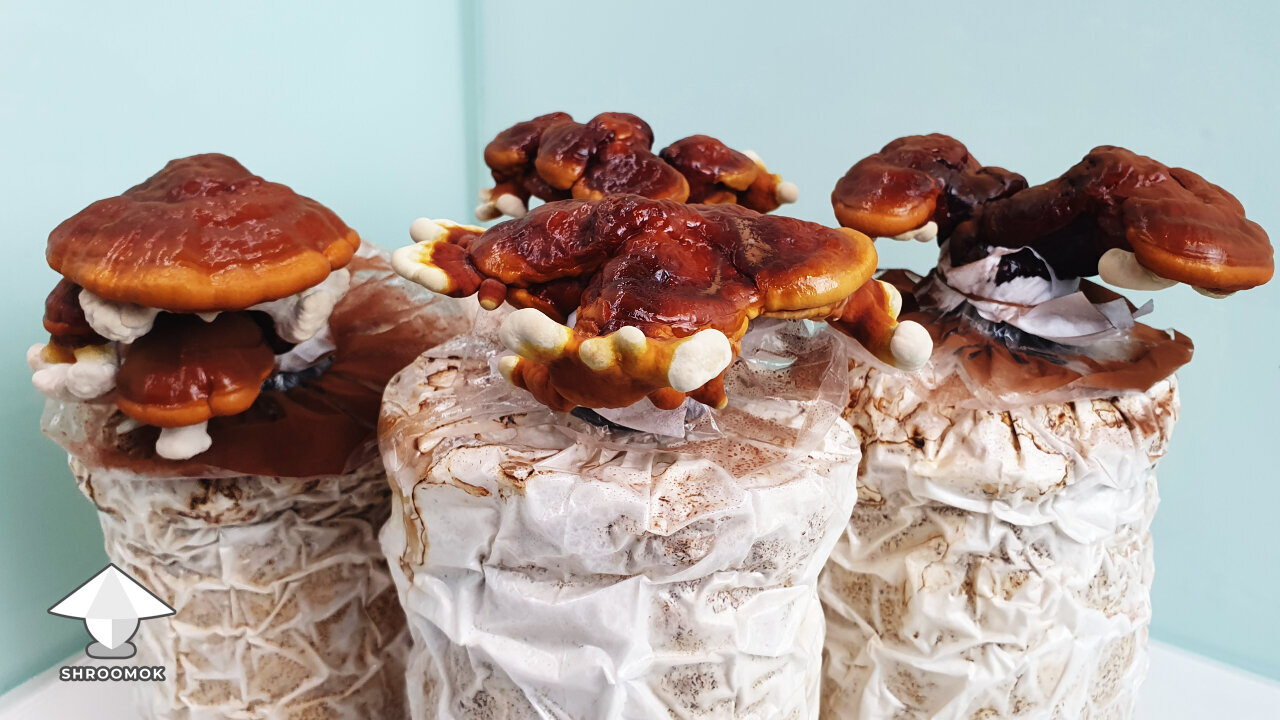
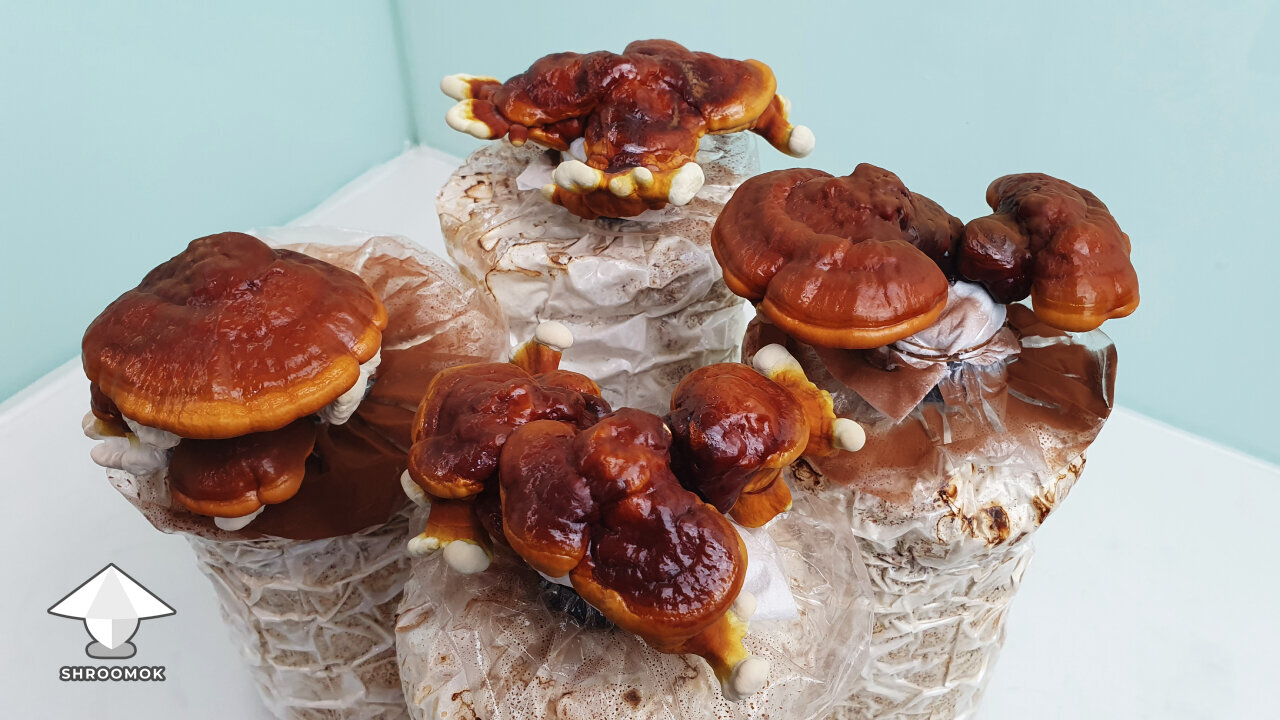
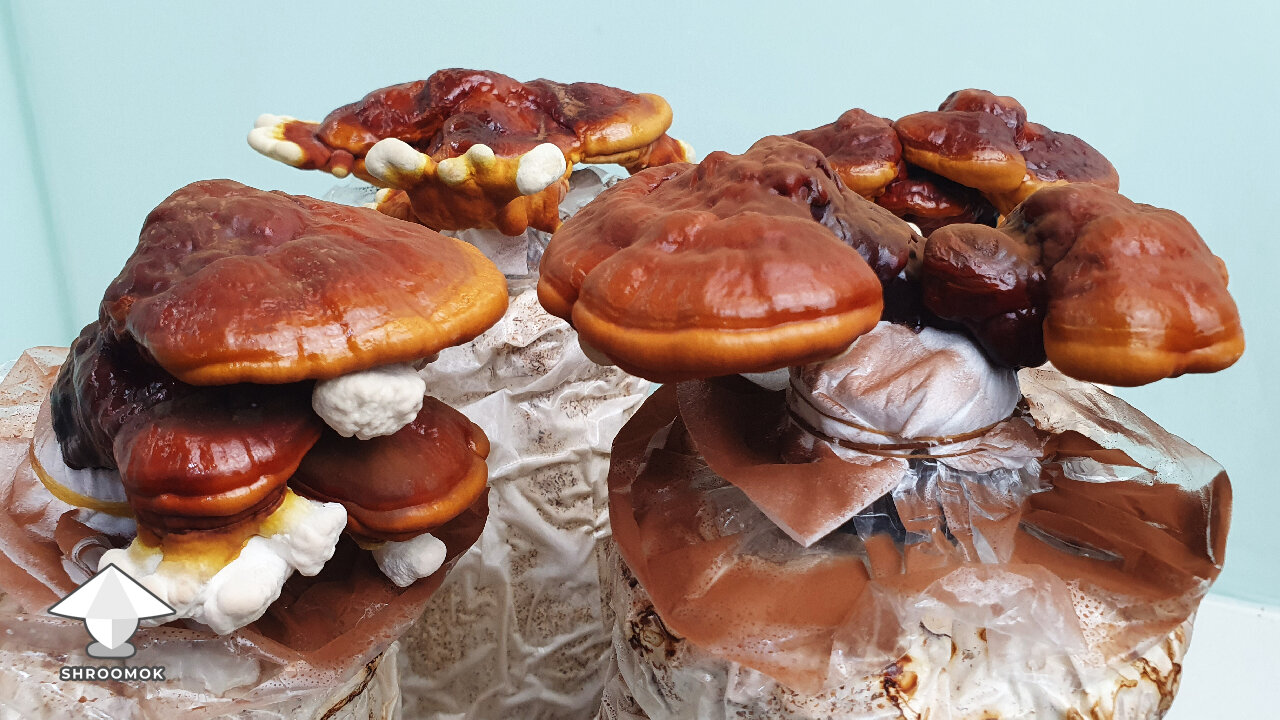
Finally, 6 weeks later I harvested another flush of reishi mushrooms from my almost (as I supposed to be) wasted blocks. After all the stresses and storage in fridge they produced pretty good fruits.


Attachments


Boom! Beauties...

And more photos!


Attachments


Incroyable témoignage ! Merci pour ce suivi super bien documenté, ça donne envie de se lancer dans la culture de ce champignon très original. Bonne continuation ! Pierre (from kingdom of France)
@Pierre, I'm so happy that at least one person has read and enjoyed this diary! Thank you very much for your comment, this means a lot to me!
Wish you good luck in your attempt to grow Reishi (Ganoderma) mushrooms. Hopefully you'll share your experience on this forum ;-)
All the best! Shroomok (from Fungi kingdom)